Transformers documentation
预处理
预处理
在您可以在数据集上训练模型之前,数据需要被预处理为期望的模型输入格式。无论您的数据是文本、图像还是音频,它们都需要被转换并组合成批量的张量。🤗 Transformers 提供了一组预处理类来帮助准备数据以供模型使用。在本教程中,您将了解以下内容:
- 对于文本,使用分词器(
Tokenizer)将文本转换为一系列标记(tokens),并创建tokens的数字表示,将它们组合成张量。 - 对于语音和音频,使用特征提取器(
Feature extractor)从音频波形中提取顺序特征并将其转换为张量。 - 图像输入使用图像处理器(
ImageProcessor)将图像转换为张量。 - 多模态输入,使用处理器(
Processor)结合了Tokenizer和ImageProcessor或Processor。
AutoProcessor始终有效的自动选择适用于您使用的模型的正确class,无论您使用的是Tokenizer、ImageProcessor、Feature extractor还是Processor。
在开始之前,请安装🤗 Datasets,以便您可以加载一些数据集来进行实验:
pip install datasets
自然语言处理
处理文本数据的主要工具是Tokenizer。Tokenizer根据一组规则将文本拆分为tokens。然后将这些tokens转换为数字,然后转换为张量,成为模型的输入。模型所需的任何附加输入都由Tokenizer添加。
如果您计划使用预训练模型,重要的是使用与之关联的预训练
Tokenizer。这确保文本的拆分方式与预训练语料库相同,并在预训练期间使用相同的标记-索引的对应关系(通常称为词汇表-vocab)。
开始使用AutoTokenizer.from_pretrained()方法加载一个预训练tokenizer。这将下载模型预训练的vocab:
>>> from transformers import AutoTokenizer

>>> tokenizer = AutoTokenizer.from_pretrained("google-bert/bert-base-cased")然后将您的文本传递给tokenizer:
>>> encoded_input = tokenizer("Do not meddle in the affairs of wizards, for they are subtle and quick to anger.")
>>> print(encoded_input)
{'input_ids': [101, 2079, 2025, 19960, 10362, 1999, 1996, 3821, 1997, 16657, 1010, 2005, 2027, 2024, 11259, 1998, 4248, 2000, 4963, 1012, 102],
 'token_type_ids': [0, 0, 0, 0, 0, 0, 0, 0, 0, 0, 0, 0, 0, 0, 0, 0, 0, 0, 0, 0, 0],
'attention_mask': [1, 1, 1, 1, 1, 1, 1, 1, 1, 1, 1, 1, 1, 1, 1, 1, 1, 1, 1, 1, 1]}tokenizer返回一个包含三个重要对象的字典:
- input_ids 是与句子中每个
token对应的索引。 - attention_mask 指示是否应该关注一个
token。 - token_type_ids 在存在多个序列时标识一个
token属于哪个序列。
通过解码 input_ids 来返回您的输入:
>>> tokenizer.decode(encoded_input["input_ids"])
'[CLS] Do not meddle in the affairs of wizards, for they are subtle and quick to anger. [SEP]'如您所见,tokenizer向句子中添加了两个特殊token - CLS 和 SEP(分类器和分隔符)。并非所有模型都需要特殊token,但如果需要,tokenizer会自动为您添加。
如果有多个句子需要预处理,将它们作为列表传递给tokenizer:
>>> batch_sentences = [
...     "But what about second breakfast?",
...     "Don't think he knows about second breakfast, Pip.",
...     "What about elevensies?",
... ]
>>> encoded_inputs = tokenizer(batch_sentences)
>>> print(encoded_inputs)
{'input_ids': [[101, 1252, 1184, 1164, 1248, 6462, 136, 102],
               [101, 1790, 112, 189, 1341, 1119, 3520, 1164, 1248, 6462, 117, 21902, 1643, 119, 102],
               [101, 1327, 1164, 5450, 23434, 136, 102]],
 'token_type_ids': [[0, 0, 0, 0, 0, 0, 0, 0],
                    [0, 0, 0, 0, 0, 0, 0, 0, 0, 0, 0, 0, 0, 0, 0],
                    [0, 0, 0, 0, 0, 0, 0]],
 'attention_mask': [[1, 1, 1, 1, 1, 1, 1, 1],
                    [1, 1, 1, 1, 1, 1, 1, 1, 1, 1, 1, 1, 1, 1, 1],
                    [1, 1, 1, 1, 1, 1, 1]]}
填充
句子的长度并不总是相同,这可能会成为一个问题,因为模型输入的张量需要具有统一的形状。填充是一种策略,通过在较短的句子中添加一个特殊的padding token,以确保张量是矩形的。
将 padding 参数设置为 True,以使批次中较短的序列填充到与最长序列相匹配的长度:
>>> batch_sentences = [
...     "But what about second breakfast?",
...     "Don't think he knows about second breakfast, Pip.",
...     "What about elevensies?",
... ]
>>> encoded_input = tokenizer(batch_sentences, padding=True)
>>> print(encoded_input)
{'input_ids': [[101, 1252, 1184, 1164, 1248, 6462, 136, 102, 0, 0, 0, 0, 0, 0, 0],
               [101, 1790, 112, 189, 1341, 1119, 3520, 1164, 1248, 6462, 117, 21902, 1643, 119, 102],
               [101, 1327, 1164, 5450, 23434, 136, 102, 0, 0, 0, 0, 0, 0, 0, 0]],
 'token_type_ids': [[0, 0, 0, 0, 0, 0, 0, 0, 0, 0, 0, 0, 0, 0, 0],
                    [0, 0, 0, 0, 0, 0, 0, 0, 0, 0, 0, 0, 0, 0, 0],
                    [0, 0, 0, 0, 0, 0, 0, 0, 0, 0, 0, 0, 0, 0, 0]],
 'attention_mask': [[1, 1, 1, 1, 1, 1, 1, 1, 0, 0, 0, 0, 0, 0, 0],
                    [1, 1, 1, 1, 1, 1, 1, 1, 1, 1, 1, 1, 1, 1, 1],
[1, 1, 1, 1, 1, 1, 1, 0, 0, 0, 0, 0, 0, 0, 0]]}第一句和第三句因为较短,通过0进行填充,。
截断
另一方面,有时候一个序列可能对模型来说太长了。在这种情况下,您需要将序列截断为更短的长度。
将 truncation 参数设置为 True,以将序列截断为模型接受的最大长度:
>>> batch_sentences = [
...     "But what about second breakfast?",
...     "Don't think he knows about second breakfast, Pip.",
...     "What about elevensies?",
... ]
>>> encoded_input = tokenizer(batch_sentences, padding=True, truncation=True)
>>> print(encoded_input)
{'input_ids': [[101, 1252, 1184, 1164, 1248, 6462, 136, 102, 0, 0, 0, 0, 0, 0, 0],
               [101, 1790, 112, 189, 1341, 1119, 3520, 1164, 1248, 6462, 117, 21902, 1643, 119, 102],
               [101, 1327, 1164, 5450, 23434, 136, 102, 0, 0, 0, 0, 0, 0, 0, 0]],
 'token_type_ids': [[0, 0, 0, 0, 0, 0, 0, 0, 0, 0, 0, 0, 0, 0, 0],
                    [0, 0, 0, 0, 0, 0, 0, 0, 0, 0, 0, 0, 0, 0, 0],
                    [0, 0, 0, 0, 0, 0, 0, 0, 0, 0, 0, 0, 0, 0, 0]],
 'attention_mask': [[1, 1, 1, 1, 1, 1, 1, 1, 0, 0, 0, 0, 0, 0, 0],
                    [1, 1, 1, 1, 1, 1, 1, 1, 1, 1, 1, 1, 1, 1, 1],
[1, 1, 1, 1, 1, 1, 1, 0, 0, 0, 0, 0, 0, 0, 0]]}查看填充和截断概念指南,了解更多有关填充和截断参数的信息。
构建张量
最后,tokenizer可以返回实际输入到模型的张量。
将 return_tensors 参数设置为 pt(对于PyTorch)或 tf(对于TensorFlow):
>>> batch_sentences = [
...     "But what about second breakfast?",
...     "Don't think he knows about second breakfast, Pip.",
...     "What about elevensies?",
... ]
>>> encoded_input = tokenizer(batch_sentences, padding=True, truncation=True, return_tensors="pt")
>>> print(encoded_input)
{'input_ids': tensor([[101, 1252, 1184, 1164, 1248, 6462, 136, 102, 0, 0, 0, 0, 0, 0, 0],
                      [101, 1790, 112, 189, 1341, 1119, 3520, 1164, 1248, 6462, 117, 21902, 1643, 119, 102],
                      [101, 1327, 1164, 5450, 23434, 136, 102, 0, 0, 0, 0, 0, 0, 0, 0]]),
 'token_type_ids': tensor([[0, 0, 0, 0, 0, 0, 0, 0, 0, 0, 0, 0, 0, 0, 0],
                           [0, 0, 0, 0, 0, 0, 0, 0, 0, 0, 0, 0, 0, 0, 0],
                           [0, 0, 0, 0, 0, 0, 0, 0, 0, 0, 0, 0, 0, 0, 0]]),
 'attention_mask': tensor([[1, 1, 1, 1, 1, 1, 1, 1, 0, 0, 0, 0, 0, 0, 0],
                           [1, 1, 1, 1, 1, 1, 1, 1, 1, 1, 1, 1, 1, 1, 1],
                           [1, 1, 1, 1, 1, 1, 1, 0, 0, 0, 0, 0, 0, 0, 0]])}
音频
对于音频任务,您需要feature extractor来准备您的数据集以供模型使用。feature extractor旨在从原始音频数据中提取特征,并将它们转换为张量。
加载MInDS-14数据集(有关如何加载数据集的更多详细信息,请参阅🤗 Datasets教程)以了解如何在音频数据集中使用feature extractor:
>>> from datasets import load_dataset, Audio

>>> dataset = load_dataset("PolyAI/minds14", name="en-US", split="train")
访问 audio 列的第一个元素以查看输入。调用 audio 列会自动加载和重新采样音频文件:
>>> dataset[0]["audio"]
{'array': array([ 0.        ,  0.00024414, -0.00024414, ..., -0.00024414,
         0.        ,  0.        ], dtype=float32),
 'path': '/root/.cache/huggingface/datasets/downloads/extracted/f14948e0e84be638dd7943ac36518a4cf3324e8b7aa331c5ab11541518e9368c/en-US~JOINT_ACCOUNT/602ba55abb1e6d0fbce92065.wav',
 'sampling_rate': 8000}
这会返回三个对象:
array是加载的语音信号 - 并在必要时重新采为1D array。path指向音频文件的位置。sampling_rate是每秒测量的语音信号数据点数量。
对于本教程,您将使用Wav2Vec2模型。查看模型卡片,您将了解到Wav2Vec2是在16kHz采样的语音音频数据上预训练的。重要的是,您的音频数据的采样率要与用于预训练模型的数据集的采样率匹配。如果您的数据的采样率不同,那么您需要对数据进行重新采样。
- 使用🤗 Datasets的
cast_column方法将采样率提升到16kHz:
>>> dataset = dataset.cast_column("audio", Audio(sampling_rate=16_000))- 再次调用
audio列以重新采样音频文件:
>>> dataset[0]["audio"]
{'array': array([ 2.3443763e-05,  2.1729663e-04,  2.2145823e-04, ...,
         3.8356509e-05, -7.3497440e-06, -2.1754686e-05], dtype=float32),
 'path': '/root/.cache/huggingface/datasets/downloads/extracted/f14948e0e84be638dd7943ac36518a4cf3324e8b7aa331c5ab11541518e9368c/en-US~JOINT_ACCOUNT/602ba55abb1e6d0fbce92065.wav',
'sampling_rate': 16000}接下来,加载一个feature extractor以对输入进行标准化和填充。当填充文本数据时,会为较短的序列添加 0。相同的理念适用于音频数据。feature extractor添加 0 - 被解释为静音 - 到array 。
使用 AutoFeatureExtractor.from_pretrained() 加载feature extractor:
>>> from transformers import AutoFeatureExtractor

>>> feature_extractor = AutoFeatureExtractor.from_pretrained("facebook/wav2vec2-base")
将音频 array 传递给feature extractor。我们还建议在feature extractor中添加 sampling_rate 参数,以更好地调试可能发生的静音错误:
>>> audio_input = [dataset[0]["audio"]["array"]]
>>> feature_extractor(audio_input, sampling_rate=16000)
{'input_values': [array([ 3.8106556e-04,  2.7506407e-03,  2.8015103e-03, ...,
5.6335266e-04, 4.6588284e-06, -1.7142107e-04], dtype=float32)]}就像tokenizer一样,您可以应用填充或截断来处理批次中的可变序列。请查看这两个音频样本的序列长度:
>>> dataset[0]["audio"]["array"].shape
(173398,)

>>> dataset[1]["audio"]["array"].shape
(106496,)创建一个函数来预处理数据集,以使音频样本具有相同的长度。通过指定最大样本长度,feature extractor将填充或截断序列以使其匹配:
>>> def preprocess_function(examples):
...     audio_arrays = [x["array"] for x in examples["audio"]]
...     inputs = feature_extractor(
...         audio_arrays,
...         sampling_rate=16000,
...         padding=True,
...         max_length=100000,
...         truncation=True,
...     )
... return inputs将preprocess_function应用于数据集中的前几个示例:
>>> processed_dataset = preprocess_function(dataset[:5])现在样本长度是相同的,并且与指定的最大长度匹配。您现在可以将经过处理的数据集传递给模型了!
>>> processed_dataset["input_values"][0].shape
(100000,)

>>> processed_dataset["input_values"][1].shape
(100000,)
计算机视觉
对于计算机视觉任务,您需要一个image processor来准备数据集以供模型使用。图像预处理包括多个步骤将图像转换为模型期望输入的格式。这些步骤包括但不限于调整大小、标准化、颜色通道校正以及将图像转换为张量。
图像预处理通常遵循某种形式的图像增强。图像预处理和图像增强都会改变图像数据,但它们有不同的目的:
- 图像增强可以帮助防止过拟合并增加模型的鲁棒性。您可以在数据增强方面充分发挥创造性 - 调整亮度和颜色、裁剪、旋转、调整大小、缩放等。但要注意不要改变图像的含义。
- 图像预处理确保图像与模型预期的输入格式匹配。在微调计算机视觉模型时,必须对图像进行与模型训练时相同的预处理。
您可以使用任何您喜欢的图像增强库。对于图像预处理,请使用与模型相关联的
ImageProcessor。
加载food101数据集(有关如何加载数据集的更多详细信息,请参阅🤗 Datasets教程)以了解如何在计算机视觉数据集中使用图像处理器:
因为数据集相当大,请使用🤗 Datasets的
split参数加载训练集中的少量样本!
>>> from datasets import load_dataset

>>> dataset = load_dataset("ethz/food101", split="train[:100]")
接下来,使用🤗 Datasets的Image功能查看图像:
>>> dataset[0]["image"]
使用 AutoImageProcessor.from_pretrained() 加载image processor:
>>> from transformers import AutoImageProcessor

>>> image_processor = AutoImageProcessor.from_pretrained("google/vit-base-patch16-224")首先,让我们进行图像增强。您可以使用任何您喜欢的库,但在本教程中,我们将使用torchvision的transforms模块。如果您有兴趣使用其他数据增强库,请参阅Albumentations或Kornia notebooks中的示例。
- 在这里,我们使用
Compose将RandomResizedCrop和ColorJitter变换连接在一起。请注意,对于调整大小,我们可以从image_processor中获取图像尺寸要求。对于一些模型,精确的高度和宽度需要被定义,对于其他模型只需定义shortest_edge。
>>> from torchvision.transforms import RandomResizedCrop, ColorJitter, Compose

>>> size = (
...     image_processor.size["shortest_edge"]
...     if "shortest_edge" in image_processor.size
...     else (image_processor.size["height"], image_processor.size["width"])
... )

>>> _transforms = Compose([RandomResizedCrop(size), ColorJitter(brightness=0.5, hue=0.5)])- 模型接受
pixel_values作为输入。ImageProcessor可以进行图像的标准化,并生成适当的张量。创建一个函数,将图像增强和图像预处理步骤组合起来处理批量图像,并生成pixel_values:
>>> def transforms(examples):
...     images = [_transforms(img.convert("RGB")) for img in examples["image"]]
...     examples["pixel_values"] = image_processor(images, do_resize=False, return_tensors="pt")["pixel_values"]
...     return examples
在上面的示例中,我们设置
do_resize=False,因为我们已经在图像增强转换中调整了图像的大小,并利用了适当的image_processor的size属性。如果您在图像增强期间不调整图像的大小,请将此参数排除在外。默认情况下ImageProcessor将处理调整大小。如果希望将图像标准化步骤为图像增强的一部分,请使用
image_processor.image_mean和image_processor.image_std。
- 然后使用🤗 Datasets的
set_transform在运行时应用这些变换:
>>> dataset.set_transform(transforms)- 现在,当您访问图像时,您将注意到
image processor已添加了pixel_values。您现在可以将经过处理的数据集传递给模型了!
>>> dataset[0].keys()这是在应用变换后的图像样子。图像已被随机裁剪,并其颜色属性发生了变化。
>>> import numpy as np
>>> import matplotlib.pyplot as plt

>>> img = dataset[0]["pixel_values"]
>>> plt.imshow(img.permute(1, 2, 0))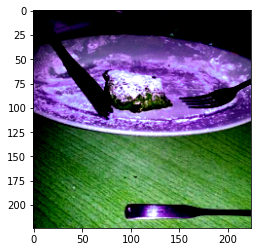
对于诸如目标检测、语义分割、实例分割和全景分割等任务,
ImageProcessor提供了训练后处理方法。这些方法将模型的原始输出转换为有意义的预测,如边界框或分割地图。
填充
在某些情况下,例如,在微调DETR时,模型在训练时应用了尺度增强。这可能导致批处理中的图像大小不同。您可以使用DetrImageProcessor.pad()来指定自定义的collate_fn将图像批处理在一起。
>>> def collate_fn(batch):
...     pixel_values = [item["pixel_values"] for item in batch]
...     encoding = image_processor.pad(pixel_values, return_tensors="pt")
...     labels = [item["labels"] for item in batch]
...     batch = {}
...     batch["pixel_values"] = encoding["pixel_values"]
...     batch["pixel_mask"] = encoding["pixel_mask"]
...     batch["labels"] = labels
...     return batch
多模态
对于涉及多模态输入的任务,您需要processor来为模型准备数据集。processor将两个处理对象-例如tokenizer和feature extractor-组合在一起。
加载LJ Speech数据集(有关如何加载数据集的更多详细信息,请参阅🤗 Datasets 教程)以了解如何使用processor进行自动语音识别(ASR):
>>> from datasets import load_dataset

>>> lj_speech = load_dataset("lj_speech", split="train")对于ASR(自动语音识别),主要关注audio和text,因此可以删除其他列:
>>> lj_speech = lj_speech.map(remove_columns=["file", "id", "normalized_text"])现在查看audio和text列:
>>> lj_speech[0]["audio"]
{'array': array([-7.3242188e-04, -7.6293945e-04, -6.4086914e-04, ...,
         7.3242188e-04,  2.1362305e-04,  6.1035156e-05], dtype=float32),
 'path': '/root/.cache/huggingface/datasets/downloads/extracted/917ece08c95cf0c4115e45294e3cd0dee724a1165b7fc11798369308a465bd26/LJSpeech-1.1/wavs/LJ001-0001.wav',
 'sampling_rate': 22050}

>>> lj_speech[0]["text"]
'Printing, in the only sense with which we are at present concerned, differs from most if not from all the arts and crafts represented in the Exhibition'请记住,您应始终重新采样音频数据集的采样率,以匹配用于预训练模型数据集的采样率!
>>> lj_speech = lj_speech.cast_column("audio", Audio(sampling_rate=16_000))使用AutoProcessor.from_pretrained()加载一个processor:
>>> from transformers import AutoProcessor

>>> processor = AutoProcessor.from_pretrained("facebook/wav2vec2-base-960h")- 创建一个函数,用于将包含在
array中的音频数据处理为input_values,并将text标记为labels。这些将是输入模型的数据:
>>> def prepare_dataset(example):
...     audio = example["audio"]

...     example.update(processor(audio=audio["array"], text=example["text"], sampling_rate=16000))

... return example- 将
prepare_dataset函数应用于一个示例:
>>> prepare_dataset(lj_speech[0])processor现在已经添加了 input_values 和 labels,并且采样率也正确降低为为16kHz。现在可以将处理后的数据集传递给模型!