Diffusers documentation
Kandinsky
Kandinsky
The Kandinsky models are a series of multilingual text-to-image generation models. The Kandinsky 2.0 model uses two multilingual text encoders and concatenates those results for the UNet.
Kandinsky 2.1 changes the architecture to include an image prior model (CLIP) to generate a mapping between text and image embeddings. The mapping provides better text-image alignment and it is used with the text embeddings during training, leading to higher quality results. Finally, Kandinsky 2.1 uses a Modulating Quantized Vectors (MoVQ) decoder - which adds a spatial conditional normalization layer to increase photorealism - to decode the latents into images.
Kandinsky 2.2 improves on the previous model by replacing the image encoder of the image prior model with a larger CLIP-ViT-G model to improve quality. The image prior model was also retrained on images with different resolutions and aspect ratios to generate higher-resolution images and different image sizes.
Kandinsky 3 simplifies the architecture and shifts away from the two-stage generation process involving the prior model and diffusion model. Instead, Kandinsky 3 uses Flan-UL2 to encode text, a UNet with BigGan-deep blocks, and Sber-MoVQGAN to decode the latents into images. Text understanding and generated image quality are primarily achieved by using a larger text encoder and UNet.
This guide will show you how to use the Kandinsky models for text-to-image, image-to-image, inpainting, interpolation, and more.
Before you begin, make sure you have the following libraries installed:
# uncomment to install the necessary libraries in Colab
#!pip install -q diffusers transformers accelerate
Kandinsky 2.1 and 2.2 usage is very similar! The only difference is Kandinsky 2.2 doesn’t accept
promptas an input when decoding the latents. Instead, Kandinsky 2.2 only acceptsimage_embedsduring decoding.
Kandinsky 3 has a more concise architecture and it doesn’t require a prior model. This means it’s usage is identical to other diffusion models like Stable Diffusion XL.
Text-to-image
To use the Kandinsky models for any task, you always start by setting up the prior pipeline to encode the prompt and generate the image embeddings. The prior pipeline also generates negative_image_embeds that correspond to the negative prompt "". For better results, you can pass an actual negative_prompt to the prior pipeline, but this’ll increase the effective batch size of the prior pipeline by 2x.
from diffusers import KandinskyPriorPipeline, KandinskyPipeline
import torch

prior_pipeline = KandinskyPriorPipeline.from_pretrained("kandinsky-community/kandinsky-2-1-prior", torch_dtype=torch.float16).to("cuda")
pipeline = KandinskyPipeline.from_pretrained("kandinsky-community/kandinsky-2-1", torch_dtype=torch.float16).to("cuda")

prompt = "A alien cheeseburger creature eating itself, claymation, cinematic, moody lighting"
negative_prompt = "low quality, bad quality" # optional to include a negative prompt, but results are usually better
image_embeds, negative_image_embeds = prior_pipeline(prompt, negative_prompt, guidance_scale=1.0).to_tuple()
Now pass all the prompts and embeddings to the KandinskyPipeline to generate an image:
image = pipeline(prompt, image_embeds=image_embeds, negative_prompt=negative_prompt, negative_image_embeds=negative_image_embeds, height=768, width=768).images[0]
image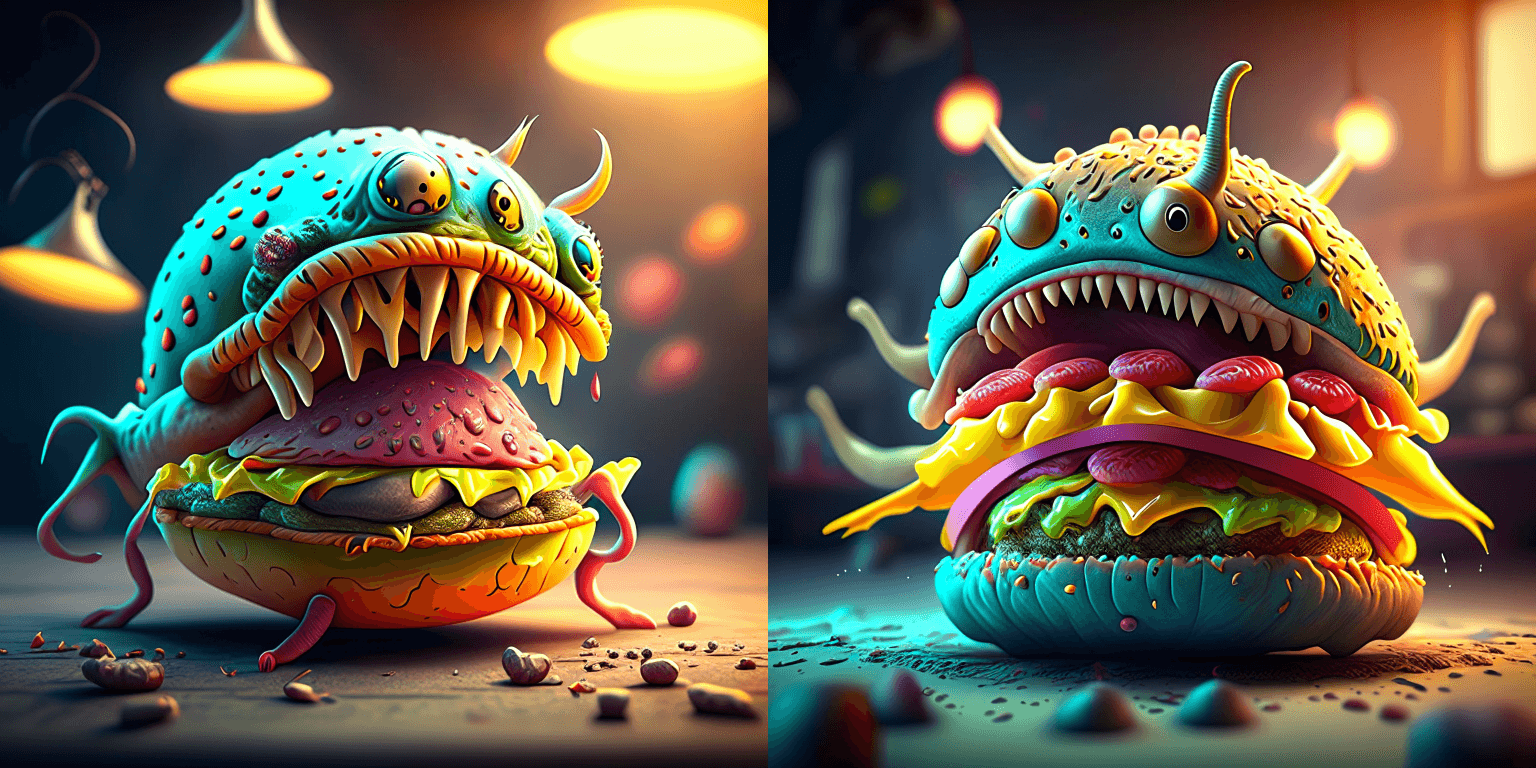
🤗 Diffusers also provides an end-to-end API with the KandinskyCombinedPipeline and KandinskyV22CombinedPipeline, meaning you don’t have to separately load the prior and text-to-image pipeline. The combined pipeline automatically loads both the prior model and the decoder. You can still set different values for the prior pipeline with the prior_guidance_scale and prior_num_inference_steps parameters if you want.
Use the AutoPipelineForText2Image to automatically call the combined pipelines under the hood:
from diffusers import AutoPipelineForText2Image
import torch

pipeline = AutoPipelineForText2Image.from_pretrained("kandinsky-community/kandinsky-2-1", torch_dtype=torch.float16)
pipeline.enable_model_cpu_offload()

prompt = "A alien cheeseburger creature eating itself, claymation, cinematic, moody lighting"
negative_prompt = "low quality, bad quality"

image = pipeline(prompt=prompt, negative_prompt=negative_prompt, prior_guidance_scale=1.0, guidance_scale=4.0, height=768, width=768).images[0]
image
Image-to-image
For image-to-image, pass the initial image and text prompt to condition the image to the pipeline. Start by loading the prior pipeline:
import torch
from diffusers import KandinskyImg2ImgPipeline, KandinskyPriorPipeline

prior_pipeline = KandinskyPriorPipeline.from_pretrained("kandinsky-community/kandinsky-2-1-prior", torch_dtype=torch.float16, use_safetensors=True).to("cuda")
pipeline = KandinskyImg2ImgPipeline.from_pretrained("kandinsky-community/kandinsky-2-1", torch_dtype=torch.float16, use_safetensors=True).to("cuda")
Download an image to condition on:
from diffusers.utils import load_image

# download image
url = "https://raw.githubusercontent.com/CompVis/stable-diffusion/main/assets/stable-samples/img2img/sketch-mountains-input.jpg"
original_image = load_image(url)
original_image = original_image.resize((768, 512))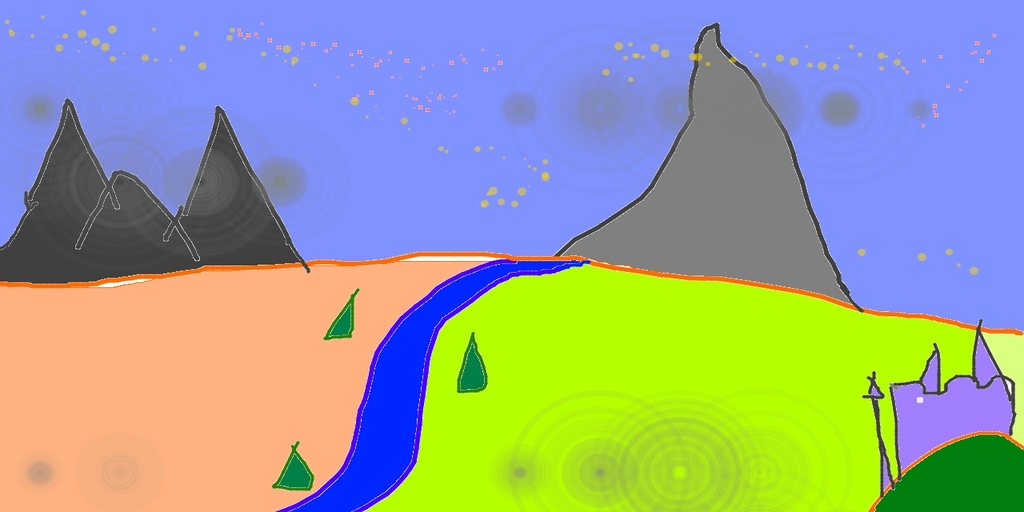
Generate the image_embeds and negative_image_embeds with the prior pipeline:
prompt = "A fantasy landscape, Cinematic lighting"
negative_prompt = "low quality, bad quality"

image_embeds, negative_image_embeds = prior_pipeline(prompt, negative_prompt).to_tuple()
Now pass the original image, and all the prompts and embeddings to the pipeline to generate an image:
from diffusers.utils import make_image_grid

image = pipeline(prompt, negative_prompt=negative_prompt, image=original_image, image_embeds=image_embeds, negative_image_embeds=negative_image_embeds, height=768, width=768, strength=0.3).images[0]
make_image_grid([original_image.resize((512, 512)), image.resize((512, 512))], rows=1, cols=2)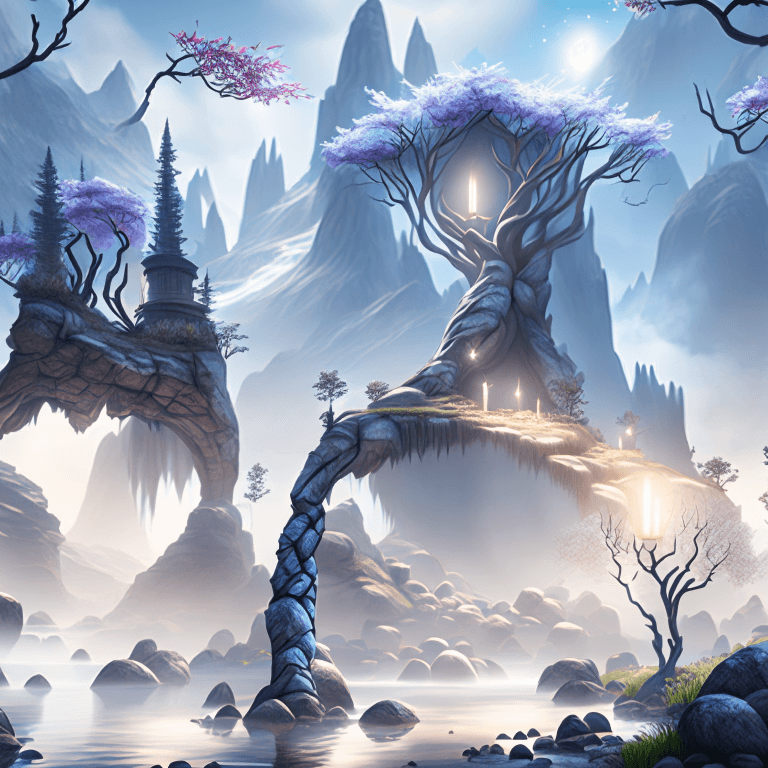
🤗 Diffusers also provides an end-to-end API with the KandinskyImg2ImgCombinedPipeline and KandinskyV22Img2ImgCombinedPipeline, meaning you don’t have to separately load the prior and image-to-image pipeline. The combined pipeline automatically loads both the prior model and the decoder. You can still set different values for the prior pipeline with the prior_guidance_scale and prior_num_inference_steps parameters if you want.
Use the AutoPipelineForImage2Image to automatically call the combined pipelines under the hood:
from diffusers import AutoPipelineForImage2Image
from diffusers.utils import make_image_grid, load_image
import torch

pipeline = AutoPipelineForImage2Image.from_pretrained("kandinsky-community/kandinsky-2-1", torch_dtype=torch.float16, use_safetensors=True)
pipeline.enable_model_cpu_offload()

prompt = "A fantasy landscape, Cinematic lighting"
negative_prompt = "low quality, bad quality"

url = "https://raw.githubusercontent.com/CompVis/stable-diffusion/main/assets/stable-samples/img2img/sketch-mountains-input.jpg"
original_image = load_image(url)

original_image.thumbnail((768, 768))

image = pipeline(prompt=prompt, negative_prompt=negative_prompt, image=original_image, strength=0.3).images[0]
make_image_grid([original_image.resize((512, 512)), image.resize((512, 512))], rows=1, cols=2)
Inpainting
⚠️ The Kandinsky models use ⬜️ white pixels to represent the masked area now instead of black pixels. If you are using KandinskyInpaintPipeline in production, you need to change the mask to use white pixels:
# For PIL input
import PIL.ImageOps
mask = PIL.ImageOps.invert(mask)

# For PyTorch and NumPy input
mask = 1 - mask
For inpainting, you’ll need the original image, a mask of the area to replace in the original image, and a text prompt of what to inpaint. Load the prior pipeline:
from diffusers import KandinskyInpaintPipeline, KandinskyPriorPipeline
from diffusers.utils import load_image, make_image_grid
import torch
import numpy as np
from PIL import Image

prior_pipeline = KandinskyPriorPipeline.from_pretrained("kandinsky-community/kandinsky-2-1-prior", torch_dtype=torch.float16, use_safetensors=True).to("cuda")
pipeline = KandinskyInpaintPipeline.from_pretrained("kandinsky-community/kandinsky-2-1-inpaint", torch_dtype=torch.float16, use_safetensors=True).to("cuda")
Load an initial image and create a mask:
init_image = load_image("https://huggingface.co/datasets/hf-internal-testing/diffusers-images/resolve/main/kandinsky/cat.png")
mask = np.zeros((768, 768), dtype=np.float32)
# mask area above cat's head
mask[:250, 250:-250] = 1
Generate the embeddings with the prior pipeline:
prompt = "a hat"
prior_output = prior_pipeline(prompt)
Now pass the initial image, mask, and prompt and embeddings to the pipeline to generate an image:
output_image = pipeline(prompt, image=init_image, mask_image=mask, **prior_output, height=768, width=768, num_inference_steps=150).images[0]
mask = Image.fromarray((mask*255).astype('uint8'), 'L')
make_image_grid([init_image, mask, output_image], rows=1, cols=3)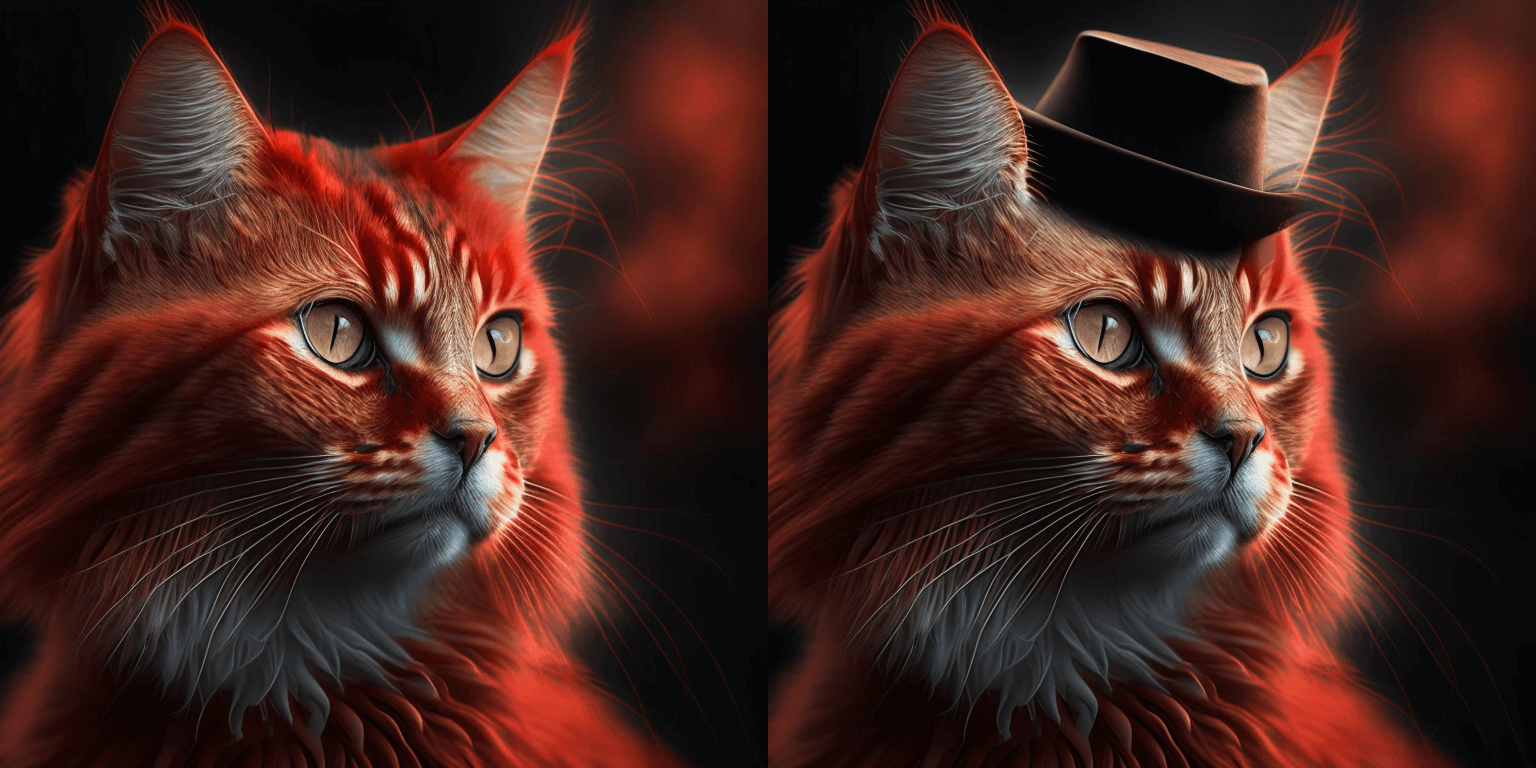
You can also use the end-to-end KandinskyInpaintCombinedPipeline and KandinskyV22InpaintCombinedPipeline to call the prior and decoder pipelines together under the hood. Use the AutoPipelineForInpainting for this:
import torch
import numpy as np
from PIL import Image
from diffusers import AutoPipelineForInpainting
from diffusers.utils import load_image, make_image_grid

pipe = AutoPipelineForInpainting.from_pretrained("kandinsky-community/kandinsky-2-1-inpaint", torch_dtype=torch.float16)
pipe.enable_model_cpu_offload()

init_image = load_image("https://huggingface.co/datasets/hf-internal-testing/diffusers-images/resolve/main/kandinsky/cat.png")
mask = np.zeros((768, 768), dtype=np.float32)
# mask area above cat's head
mask[:250, 250:-250] = 1
prompt = "a hat"

output_image = pipe(prompt=prompt, image=init_image, mask_image=mask).images[0]
mask = Image.fromarray((mask*255).astype('uint8'), 'L')
make_image_grid([init_image, mask, output_image], rows=1, cols=3)
Interpolation
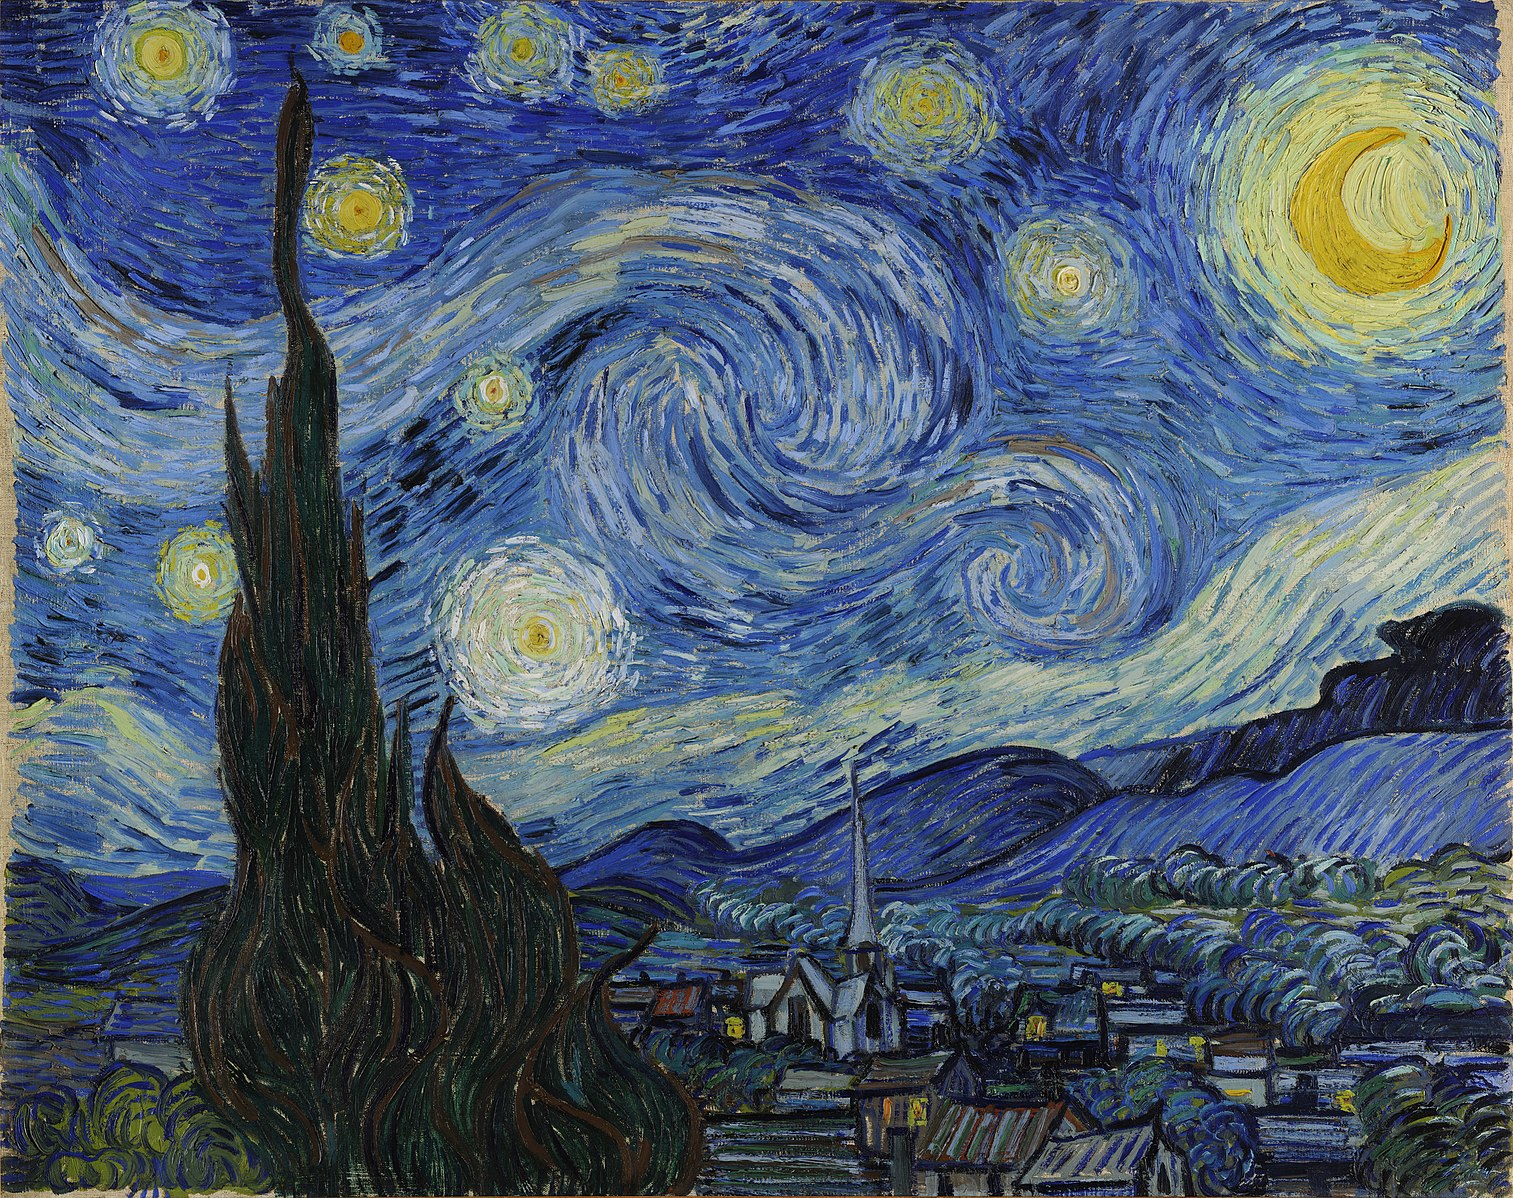
Interpolation allows you to explore the latent space between the image and text embeddings which is a cool way to see some of the prior model’s intermediate outputs. Load the prior pipeline and two images you’d like to interpolate:
from diffusers import KandinskyPriorPipeline, KandinskyPipeline
from diffusers.utils import load_image, make_image_grid
import torch

prior_pipeline = KandinskyPriorPipeline.from_pretrained("kandinsky-community/kandinsky-2-1-prior", torch_dtype=torch.float16, use_safetensors=True).to("cuda")
img_1 = load_image("https://huggingface.co/datasets/hf-internal-testing/diffusers-images/resolve/main/kandinsky/cat.png")
img_2 = load_image("https://huggingface.co/datasets/hf-internal-testing/diffusers-images/resolve/main/kandinsky/starry_night.jpeg")
make_image_grid([img_1.resize((512,512)), img_2.resize((512,512))], rows=1, cols=2)
Specify the text or images to interpolate, and set the weights for each text or image. Experiment with the weights to see how they affect the interpolation!
images_texts = ["a cat", img_1, img_2]
weights = [0.3, 0.3, 0.4]
Call the interpolate function to generate the embeddings, and then pass them to the pipeline to generate the image:
# prompt can be left empty
prompt = ""
prior_out = prior_pipeline.interpolate(images_texts, weights)

pipeline = KandinskyPipeline.from_pretrained("kandinsky-community/kandinsky-2-1", torch_dtype=torch.float16, use_safetensors=True).to("cuda")

image = pipeline(prompt, **prior_out, height=768, width=768).images[0]
image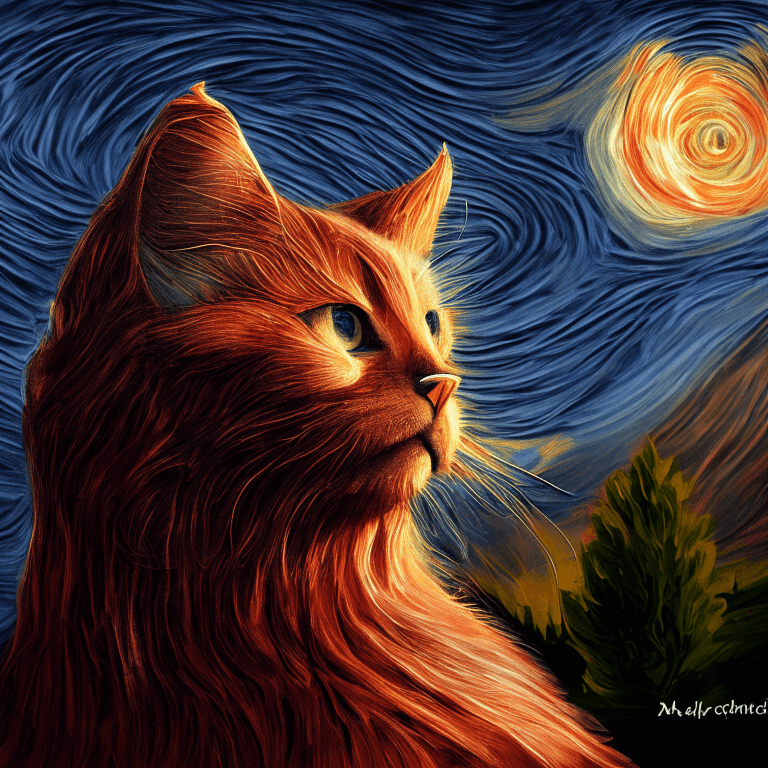
ControlNet
⚠️ ControlNet is only supported for Kandinsky 2.2!
ControlNet enables conditioning large pretrained diffusion models with additional inputs such as a depth map or edge detection. For example, you can condition Kandinsky 2.2 with a depth map so the model understands and preserves the structure of the depth image.
Let’s load an image and extract it’s depth map:
from diffusers.utils import load_image

img = load_image(
    "https://huggingface.co/datasets/hf-internal-testing/diffusers-images/resolve/main/kandinskyv22/cat.png"
).resize((768, 768))
img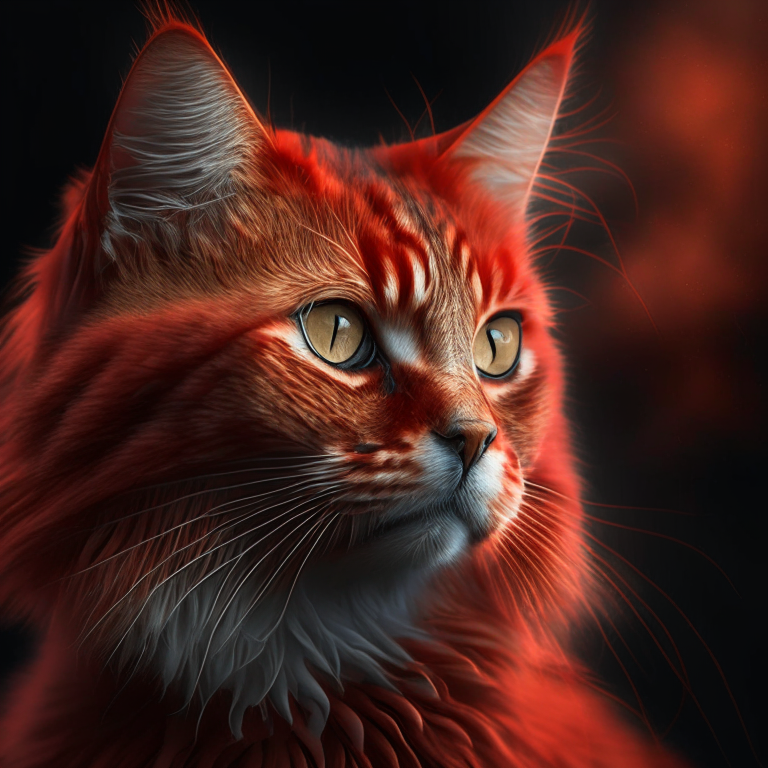
Then you can use the depth-estimation Pipeline from 🤗 Transformers to process the image and retrieve the depth map:
import torch
import numpy as np

from transformers import pipeline

def make_hint(image, depth_estimator):
    image = depth_estimator(image)["depth"]
    image = np.array(image)
    image = image[:, :, None]
    image = np.concatenate([image, image, image], axis=2)
    detected_map = torch.from_numpy(image).float() / 255.0
    hint = detected_map.permute(2, 0, 1)
    return hint

depth_estimator = pipeline("depth-estimation")
hint = make_hint(img, depth_estimator).unsqueeze(0).half().to("cuda")
Text-to-image
Load the prior pipeline and the KandinskyV22ControlnetPipeline:
from diffusers import KandinskyV22PriorPipeline, KandinskyV22ControlnetPipeline

prior_pipeline = KandinskyV22PriorPipeline.from_pretrained(
    "kandinsky-community/kandinsky-2-2-prior", torch_dtype=torch.float16, use_safetensors=True
).to("cuda")

pipeline = KandinskyV22ControlnetPipeline.from_pretrained(
    "kandinsky-community/kandinsky-2-2-controlnet-depth", torch_dtype=torch.float16
).to("cuda")
Generate the image embeddings from a prompt and negative prompt:
prompt = "A robot, 4k photo"
negative_prior_prompt = "lowres, text, error, cropped, worst quality, low quality, jpeg artifacts, ugly, duplicate, morbid, mutilated, out of frame, extra fingers, mutated hands, poorly drawn hands, poorly drawn face, mutation, deformed, blurry, dehydrated, bad anatomy, bad proportions, extra limbs, cloned face, disfigured, gross proportions, malformed limbs, missing arms, missing legs, extra arms, extra legs, fused fingers, too many fingers, long neck, username, watermark, signature"

generator = torch.Generator(device="cuda").manual_seed(43)

image_emb, zero_image_emb = prior_pipeline(
    prompt=prompt, negative_prompt=negative_prior_prompt, generator=generator
).to_tuple()
Finally, pass the image embeddings and the depth image to the KandinskyV22ControlnetPipeline to generate an image:
image = pipeline(image_embeds=image_emb, negative_image_embeds=zero_image_emb, hint=hint, num_inference_steps=50, generator=generator, height=768, width=768).images[0]
image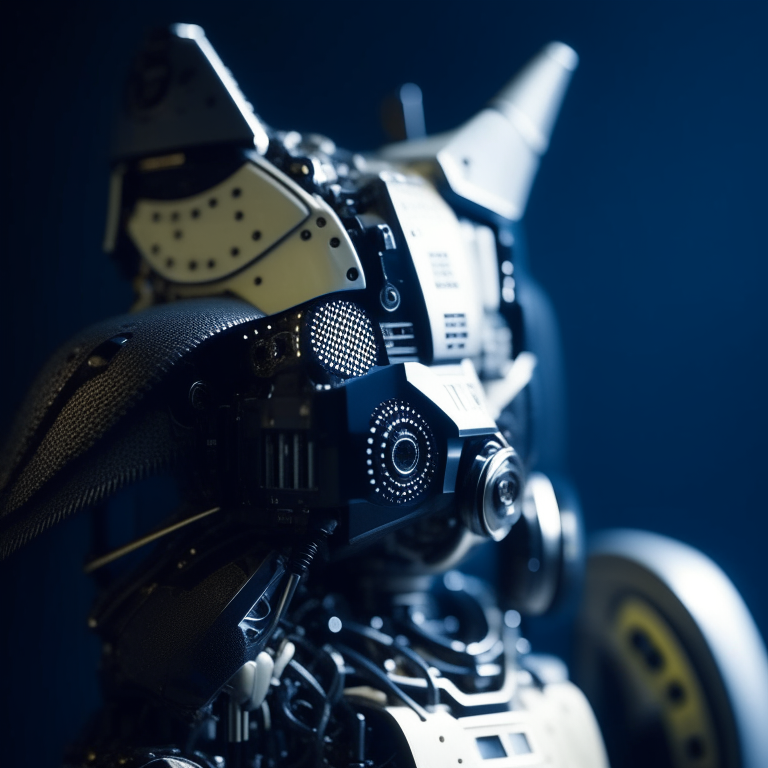
Image-to-image
For image-to-image with ControlNet, you’ll need to use the:
- KandinskyV22PriorEmb2EmbPipeline to generate the image embeddings from a text prompt and an image
- KandinskyV22ControlnetImg2ImgPipeline to generate an image from the initial image and the image embeddings
Process and extract a depth map of an initial image of a cat with the depth-estimation Pipeline from 🤗 Transformers:
import torch
import numpy as np

from diffusers import KandinskyV22PriorEmb2EmbPipeline, KandinskyV22ControlnetImg2ImgPipeline
from diffusers.utils import load_image
from transformers import pipeline

img = load_image(
    "https://huggingface.co/datasets/hf-internal-testing/diffusers-images/resolve/main/kandinskyv22/cat.png"
).resize((768, 768))

def make_hint(image, depth_estimator):
    image = depth_estimator(image)["depth"]
    image = np.array(image)
    image = image[:, :, None]
    image = np.concatenate([image, image, image], axis=2)
    detected_map = torch.from_numpy(image).float() / 255.0
    hint = detected_map.permute(2, 0, 1)
    return hint

depth_estimator = pipeline("depth-estimation")
hint = make_hint(img, depth_estimator).unsqueeze(0).half().to("cuda")
Load the prior pipeline and the KandinskyV22ControlnetImg2ImgPipeline:
prior_pipeline = KandinskyV22PriorEmb2EmbPipeline.from_pretrained(
    "kandinsky-community/kandinsky-2-2-prior", torch_dtype=torch.float16, use_safetensors=True
).to("cuda")

pipeline = KandinskyV22ControlnetImg2ImgPipeline.from_pretrained(
    "kandinsky-community/kandinsky-2-2-controlnet-depth", torch_dtype=torch.float16
).to("cuda")
Pass a text prompt and the initial image to the prior pipeline to generate the image embeddings:
prompt = "A robot, 4k photo"
negative_prior_prompt = "lowres, text, error, cropped, worst quality, low quality, jpeg artifacts, ugly, duplicate, morbid, mutilated, out of frame, extra fingers, mutated hands, poorly drawn hands, poorly drawn face, mutation, deformed, blurry, dehydrated, bad anatomy, bad proportions, extra limbs, cloned face, disfigured, gross proportions, malformed limbs, missing arms, missing legs, extra arms, extra legs, fused fingers, too many fingers, long neck, username, watermark, signature"

generator = torch.Generator(device="cuda").manual_seed(43)

img_emb = prior_pipeline(prompt=prompt, image=img, strength=0.85, generator=generator)
negative_emb = prior_pipeline(prompt=negative_prior_prompt, image=img, strength=1, generator=generator)
Now you can run the KandinskyV22ControlnetImg2ImgPipeline to generate an image from the initial image and the image embeddings:
image = pipeline(image=img, strength=0.5, image_embeds=img_emb.image_embeds, negative_image_embeds=negative_emb.image_embeds, hint=hint, num_inference_steps=50, generator=generator, height=768, width=768).images[0]
make_image_grid([img.resize((512, 512)), image.resize((512, 512))], rows=1, cols=2)
Optimizations
Kandinsky is unique because it requires a prior pipeline to generate the mappings, and a second pipeline to decode the latents into an image. Optimization efforts should be focused on the second pipeline because that is where the bulk of the computation is done. Here are some tips to improve Kandinsky during inference.
- Enable xFormers if you’re using PyTorch < 2.0:
  from diffusers import DiffusionPipeline
  import torch

  pipe = DiffusionPipeline.from_pretrained("kandinsky-community/kandinsky-2-1", torch_dtype=torch.float16)
+ pipe.enable_xformers_memory_efficient_attention()- Enable
torch.compileif you’re using PyTorch >= 2.0 to automatically use scaled dot-product attention (SDPA):
  pipe.unet.to(memory_format=torch.channels_last)
+ pipe.unet = torch.compile(pipe.unet, mode="reduce-overhead", fullgraph=True)
This is the same as explicitly setting the attention processor to use AttnAddedKVProcessor2_0:
from diffusers.models.attention_processor import AttnAddedKVProcessor2_0

pipe.unet.set_attn_processor(AttnAddedKVProcessor2_0())- Offload the model to the CPU with enable_model_cpu_offload() to avoid out-of-memory errors:
  from diffusers import DiffusionPipeline
  import torch

  pipe = DiffusionPipeline.from_pretrained("kandinsky-community/kandinsky-2-1", torch_dtype=torch.float16)
+ pipe.enable_model_cpu_offload()- By default, the text-to-image pipeline uses the DDIMScheduler but you can replace it with another scheduler like DDPMScheduler to see how that affects the tradeoff between inference speed and image quality:
from diffusers import DDPMScheduler
from diffusers import DiffusionPipeline

scheduler = DDPMScheduler.from_pretrained("kandinsky-community/kandinsky-2-1", subfolder="ddpm_scheduler")
pipe = DiffusionPipeline.from_pretrained("kandinsky-community/kandinsky-2-1", scheduler=scheduler, torch_dtype=torch.float16, use_safetensors=True).to("cuda")