Diffusers documentation
Image-to-image
Image-to-image
Image-to-image is similar to text-to-image, but in addition to a prompt, you can also pass an initial image as a starting point for the diffusion process. The initial image is encoded to latent space and noise is added to it. Then the latent diffusion model takes a prompt and the noisy latent image, predicts the added noise, and removes the predicted noise from the initial latent image to get the new latent image. Lastly, a decoder decodes the new latent image back into an image.
With 🤗 Diffusers, this is as easy as 1-2-3:
- Load a checkpoint into the AutoPipelineForImage2Image class; this pipeline automatically handles loading the correct pipeline class based on the checkpoint:
import torch
from diffusers import AutoPipelineForImage2Image
from diffusers.utils import load_image, make_image_grid

pipeline = AutoPipelineForImage2Image.from_pretrained(
    "kandinsky-community/kandinsky-2-2-decoder", torch_dtype=torch.float16, use_safetensors=True
)
pipeline.enable_model_cpu_offload()
# remove following line if xFormers is not installed or you have PyTorch 2.0 or higher installed
pipeline.enable_xformers_memory_efficient_attention()
You’ll notice throughout the guide, we use enable_model_cpu_offload() and enable_xformers_memory_efficient_attention(), to save memory and increase inference speed. If you’re using PyTorch 2.0, then you don’t need to call enable_xformers_memory_efficient_attention() on your pipeline because it’ll already be using PyTorch 2.0’s native scaled-dot product attention.
- Load an image to pass to the pipeline:
init_image = load_image("https://huggingface.co/datasets/huggingface/documentation-images/resolve/main/diffusers/cat.png")- Pass a prompt and image to the pipeline to generate an image:
prompt = "cat wizard, gandalf, lord of the rings, detailed, fantasy, cute, adorable, Pixar, Disney, 8k"
image = pipeline(prompt, image=init_image).images[0]
make_image_grid([init_image, image], rows=1, cols=2)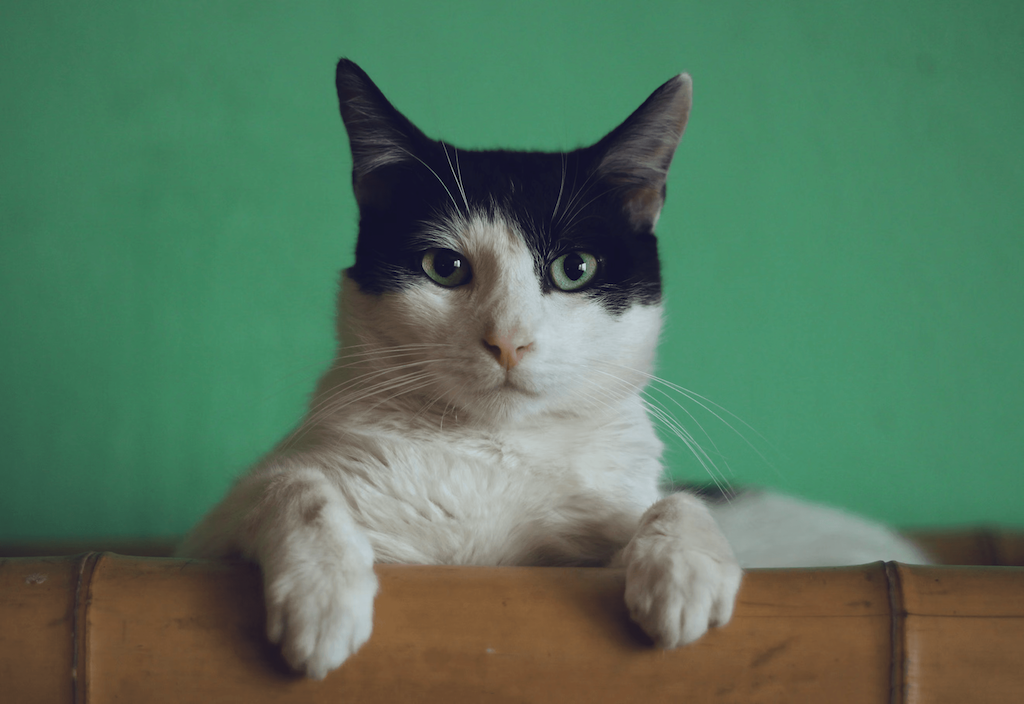

Popular models
The most popular image-to-image models are Stable Diffusion v1.5, Stable Diffusion XL (SDXL), and Kandinsky 2.2. The results from the Stable Diffusion and Kandinsky models vary due to their architecture differences and training process; you can generally expect SDXL to produce higher quality images than Stable Diffusion v1.5. Let’s take a quick look at how to use each of these models and compare their results.
Stable Diffusion v1.5
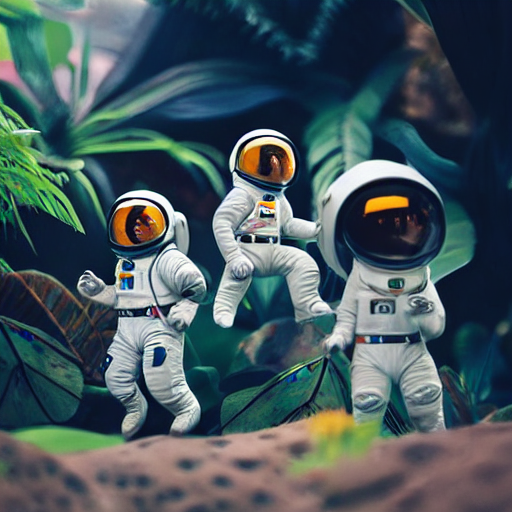
Stable Diffusion v1.5 is a latent diffusion model initialized from an earlier checkpoint, and further finetuned for 595K steps on 512x512 images. To use this pipeline for image-to-image, you’ll need to prepare an initial image to pass to the pipeline. Then you can pass a prompt and the image to the pipeline to generate a new image:
import torch
from diffusers import AutoPipelineForImage2Image
from diffusers.utils import make_image_grid, load_image
pipeline = AutoPipelineForImage2Image.from_pretrained(
"stable-diffusion-v1-5/stable-diffusion-v1-5", torch_dtype=torch.float16, variant="fp16", use_safetensors=True
)
pipeline.enable_model_cpu_offload()
# remove following line if xFormers is not installed or you have PyTorch 2.0 or higher installed
pipeline.enable_xformers_memory_efficient_attention()
# prepare image
url = "https://huggingface.co/datasets/huggingface/documentation-images/resolve/main/diffusers/img2img-init.png"
init_image = load_image(url)
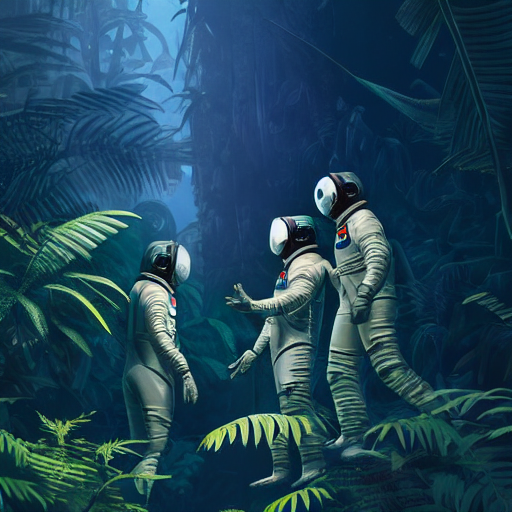
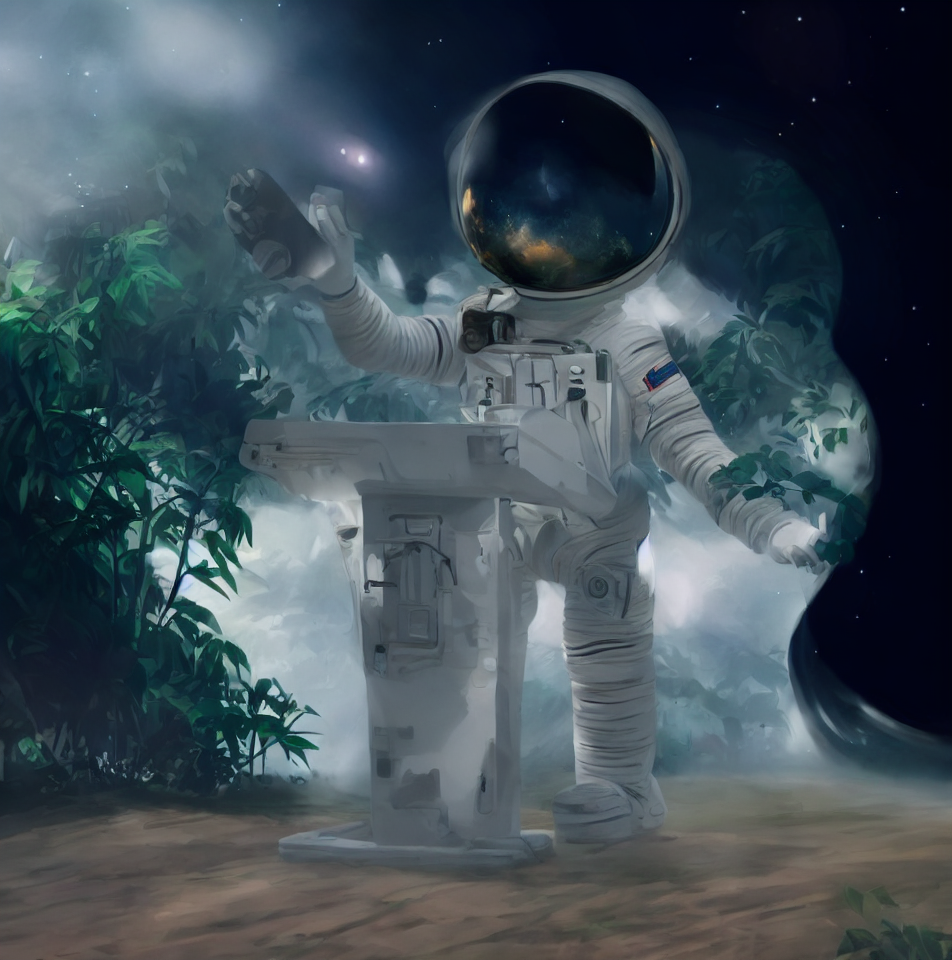
prompt = "Astronaut in a jungle, cold color palette, muted colors, detailed, 8k"
# pass prompt and image to pipeline
image = pipeline(prompt, image=init_image).images[0]
make_image_grid([init_image, image], rows=1, cols=2)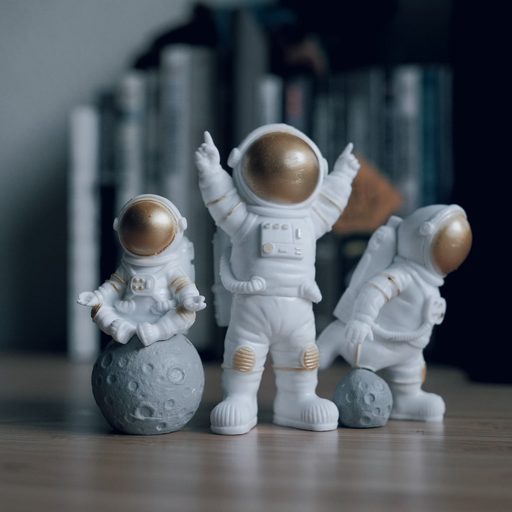
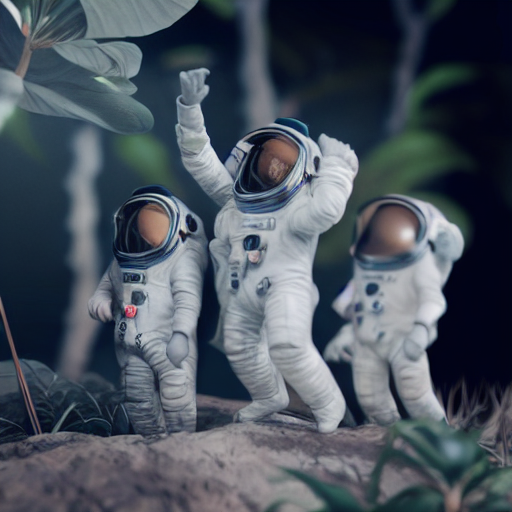
Stable Diffusion XL (SDXL)
SDXL is a more powerful version of the Stable Diffusion model. It uses a larger base model, and an additional refiner model to increase the quality of the base model’s output. Read the SDXL guide for a more detailed walkthrough of how to use this model, and other techniques it uses to produce high quality images.
import torch
from diffusers import AutoPipelineForImage2Image
from diffusers.utils import make_image_grid, load_image

pipeline = AutoPipelineForImage2Image.from_pretrained(
    "stabilityai/stable-diffusion-xl-refiner-1.0", torch_dtype=torch.float16, variant="fp16", use_safetensors=True
)
pipeline.enable_model_cpu_offload()
# remove following line if xFormers is not installed or you have PyTorch 2.0 or higher installed
pipeline.enable_xformers_memory_efficient_attention()

# prepare image
url = "https://huggingface.co/datasets/huggingface/documentation-images/resolve/main/diffusers/img2img-sdxl-init.png"
init_image = load_image(url)

prompt = "Astronaut in a jungle, cold color palette, muted colors, detailed, 8k"

# pass prompt and image to pipeline
image = pipeline(prompt, image=init_image, strength=0.5).images[0]
make_image_grid([init_image, image], rows=1, cols=2)

Kandinsky 2.2
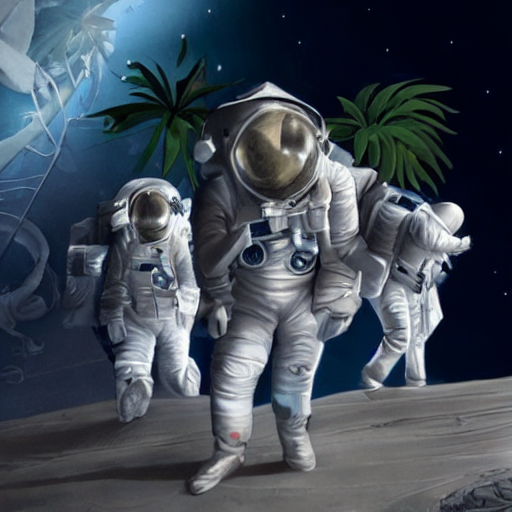
The Kandinsky model is different from the Stable Diffusion models because it uses an image prior model to create image embeddings. The embeddings help create a better alignment between text and images, allowing the latent diffusion model to generate better images.
The simplest way to use Kandinsky 2.2 is:
import torch
from diffusers import AutoPipelineForImage2Image
from diffusers.utils import make_image_grid, load_image

pipeline = AutoPipelineForImage2Image.from_pretrained(
    "kandinsky-community/kandinsky-2-2-decoder", torch_dtype=torch.float16, use_safetensors=True
)
pipeline.enable_model_cpu_offload()
# remove following line if xFormers is not installed or you have PyTorch 2.0 or higher installed
pipeline.enable_xformers_memory_efficient_attention()

# prepare image
url = "https://huggingface.co/datasets/huggingface/documentation-images/resolve/main/diffusers/img2img-init.png"
init_image = load_image(url)

prompt = "Astronaut in a jungle, cold color palette, muted colors, detailed, 8k"

# pass prompt and image to pipeline
image = pipeline(prompt, image=init_image).images[0]
make_image_grid([init_image, image], rows=1, cols=2) 
Configure pipeline parameters
There are several important parameters you can configure in the pipeline that’ll affect the image generation process and image quality. Let’s take a closer look at what these parameters do and how changing them affects the output.
Strength
strength is one of the most important parameters to consider and it’ll have a huge impact on your generated image. It determines how much the generated image resembles the initial image. In other words:
- 📈 a higher
strengthvalue gives the model more “creativity” to generate an image that’s different from the initial image; astrengthvalue of 1.0 means the initial image is more or less ignored - 📉 a lower
strengthvalue means the generated image is more similar to the initial image
The strength and num_inference_steps parameters are related because strength determines the number of noise steps to add. For example, if the num_inference_steps is 50 and strength is 0.8, then this means adding 40 (50 * 0.8) steps of noise to the initial image and then denoising for 40 steps to get the newly generated image.
import torch
from diffusers import AutoPipelineForImage2Image
from diffusers.utils import make_image_grid, load_image

pipeline = AutoPipelineForImage2Image.from_pretrained(
    "stable-diffusion-v1-5/stable-diffusion-v1-5", torch_dtype=torch.float16, variant="fp16", use_safetensors=True
)
pipeline.enable_model_cpu_offload()
# remove following line if xFormers is not installed or you have PyTorch 2.0 or higher installed
pipeline.enable_xformers_memory_efficient_attention()

# prepare image
url = "https://huggingface.co/datasets/huggingface/documentation-images/resolve/main/diffusers/img2img-init.png"
init_image = load_image(url)

prompt = "Astronaut in a jungle, cold color palette, muted colors, detailed, 8k"

# pass prompt and image to pipeline
image = pipeline(prompt, image=init_image, strength=0.8).images[0]
make_image_grid([init_image, image], rows=1, cols=2)
Guidance scale
The guidance_scale parameter is used to control how closely aligned the generated image and text prompt are. A higher guidance_scale value means your generated image is more aligned with the prompt, while a lower guidance_scale value means your generated image has more space to deviate from the prompt.
You can combine guidance_scale with strength for even more precise control over how expressive the model is. For example, combine a high strength + guidance_scale for maximum creativity or use a combination of low strength and low guidance_scale to generate an image that resembles the initial image but is not as strictly bound to the prompt.
import torch
from diffusers import AutoPipelineForImage2Image
from diffusers.utils import make_image_grid, load_image

pipeline = AutoPipelineForImage2Image.from_pretrained(
    "stable-diffusion-v1-5/stable-diffusion-v1-5", torch_dtype=torch.float16, variant="fp16", use_safetensors=True
)
pipeline.enable_model_cpu_offload()
# remove following line if xFormers is not installed or you have PyTorch 2.0 or higher installed
pipeline.enable_xformers_memory_efficient_attention()

# prepare image
url = "https://huggingface.co/datasets/huggingface/documentation-images/resolve/main/diffusers/img2img-init.png"
init_image = load_image(url)

prompt = "Astronaut in a jungle, cold color palette, muted colors, detailed, 8k"

# pass prompt and image to pipeline
image = pipeline(prompt, image=init_image, guidance_scale=8.0).images[0]
make_image_grid([init_image, image], rows=1, cols=2)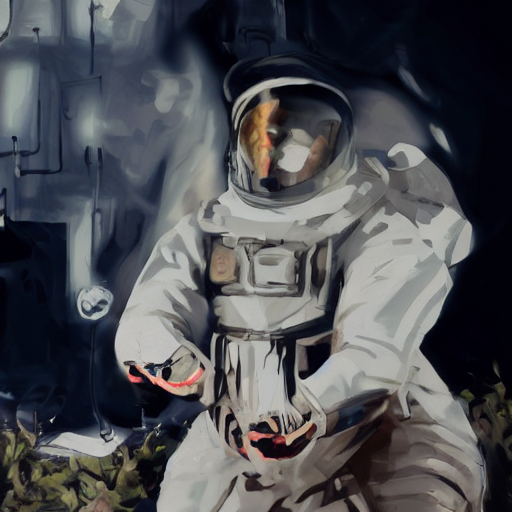

Negative prompt
A negative prompt conditions the model to not include things in an image, and it can be used to improve image quality or modify an image. For example, you can improve image quality by including negative prompts like “poor details” or “blurry” to encourage the model to generate a higher quality image. Or you can modify an image by specifying things to exclude from an image.
import torch
from diffusers import AutoPipelineForImage2Image
from diffusers.utils import make_image_grid, load_image

pipeline = AutoPipelineForImage2Image.from_pretrained(
    "stabilityai/stable-diffusion-xl-refiner-1.0", torch_dtype=torch.float16, variant="fp16", use_safetensors=True
)
pipeline.enable_model_cpu_offload()
# remove following line if xFormers is not installed or you have PyTorch 2.0 or higher installed
pipeline.enable_xformers_memory_efficient_attention()

# prepare image
url = "https://huggingface.co/datasets/huggingface/documentation-images/resolve/main/diffusers/img2img-init.png"
init_image = load_image(url)

prompt = "Astronaut in a jungle, cold color palette, muted colors, detailed, 8k"
negative_prompt = "ugly, deformed, disfigured, poor details, bad anatomy"

# pass prompt and image to pipeline
image = pipeline(prompt, negative_prompt=negative_prompt, image=init_image).images[0]
make_image_grid([init_image, image], rows=1, cols=2)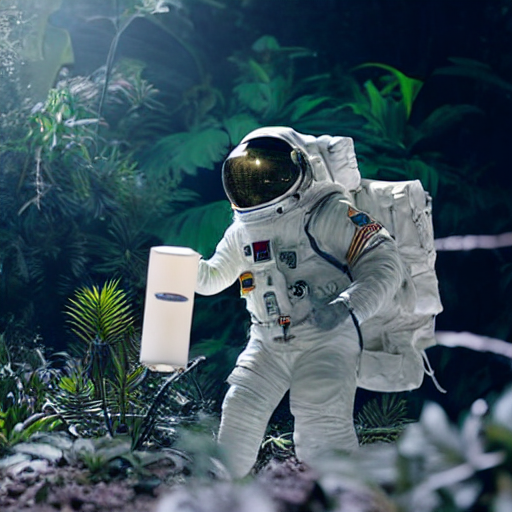

Chained image-to-image pipelines
There are some other interesting ways you can use an image-to-image pipeline aside from just generating an image (although that is pretty cool too). You can take it a step further and chain it with other pipelines.
Text-to-image-to-image
Chaining a text-to-image and image-to-image pipeline allows you to generate an image from text and use the generated image as the initial image for the image-to-image pipeline. This is useful if you want to generate an image entirely from scratch. For example, let’s chain a Stable Diffusion and a Kandinsky model.
Start by generating an image with the text-to-image pipeline:
from diffusers import AutoPipelineForText2Image, AutoPipelineForImage2Image
import torch
from diffusers.utils import make_image_grid

pipeline = AutoPipelineForText2Image.from_pretrained(
    "stable-diffusion-v1-5/stable-diffusion-v1-5", torch_dtype=torch.float16, variant="fp16", use_safetensors=True
)
pipeline.enable_model_cpu_offload()
# remove following line if xFormers is not installed or you have PyTorch 2.0 or higher installed
pipeline.enable_xformers_memory_efficient_attention()

text2image = pipeline("Astronaut in a jungle, cold color palette, muted colors, detailed, 8k").images[0]
text2image
Now you can pass this generated image to the image-to-image pipeline:
pipeline = AutoPipelineForImage2Image.from_pretrained(
    "kandinsky-community/kandinsky-2-2-decoder", torch_dtype=torch.float16, use_safetensors=True
)
pipeline.enable_model_cpu_offload()
# remove following line if xFormers is not installed or you have PyTorch 2.0 or higher installed
pipeline.enable_xformers_memory_efficient_attention()

image2image = pipeline("Astronaut in a jungle, cold color palette, muted colors, detailed, 8k", image=text2image).images[0]
make_image_grid([text2image, image2image], rows=1, cols=2)
Image-to-image-to-image
You can also chain multiple image-to-image pipelines together to create more interesting images. This can be useful for iteratively performing style transfer on an image, generating short GIFs, restoring color to an image, or restoring missing areas of an image.
Start by generating an image:
import torch
from diffusers import AutoPipelineForImage2Image
from diffusers.utils import make_image_grid, load_image

pipeline = AutoPipelineForImage2Image.from_pretrained(
    "stable-diffusion-v1-5/stable-diffusion-v1-5", torch_dtype=torch.float16, variant="fp16", use_safetensors=True
)
pipeline.enable_model_cpu_offload()
# remove following line if xFormers is not installed or you have PyTorch 2.0 or higher installed
pipeline.enable_xformers_memory_efficient_attention()

# prepare image
url = "https://huggingface.co/datasets/huggingface/documentation-images/resolve/main/diffusers/img2img-init.png"
init_image = load_image(url)

prompt = "Astronaut in a jungle, cold color palette, muted colors, detailed, 8k"

# pass prompt and image to pipeline
image = pipeline(prompt, image=init_image, output_type="latent").images[0]
It is important to specify
output_type="latent"in the pipeline to keep all the outputs in latent space to avoid an unnecessary decode-encode step. This only works if the chained pipelines are using the same VAE.
Pass the latent output from this pipeline to the next pipeline to generate an image in a comic book art style:
pipeline = AutoPipelineForImage2Image.from_pretrained(
    "ogkalu/Comic-Diffusion", torch_dtype=torch.float16
)
pipeline.enable_model_cpu_offload()
# remove following line if xFormers is not installed or you have PyTorch 2.0 or higher installed
pipeline.enable_xformers_memory_efficient_attention()

# need to include the token "charliebo artstyle" in the prompt to use this checkpoint
image = pipeline("Astronaut in a jungle, charliebo artstyle", image=image, output_type="latent").images[0]
Repeat one more time to generate the final image in a pixel art style:
pipeline = AutoPipelineForImage2Image.from_pretrained(
    "kohbanye/pixel-art-style", torch_dtype=torch.float16
)
pipeline.enable_model_cpu_offload()
# remove following line if xFormers is not installed or you have PyTorch 2.0 or higher installed
pipeline.enable_xformers_memory_efficient_attention()

# need to include the token "pixelartstyle" in the prompt to use this checkpoint
image = pipeline("Astronaut in a jungle, pixelartstyle", image=image).images[0]
make_image_grid([init_image, image], rows=1, cols=2)
Image-to-upscaler-to-super-resolution
Another way you can chain your image-to-image pipeline is with an upscaler and super-resolution pipeline to really increase the level of details in an image.
Start with an image-to-image pipeline:
import torch
from diffusers import AutoPipelineForImage2Image
from diffusers.utils import make_image_grid, load_image

pipeline = AutoPipelineForImage2Image.from_pretrained(
    "stable-diffusion-v1-5/stable-diffusion-v1-5", torch_dtype=torch.float16, variant="fp16", use_safetensors=True
)
pipeline.enable_model_cpu_offload()
# remove following line if xFormers is not installed or you have PyTorch 2.0 or higher installed
pipeline.enable_xformers_memory_efficient_attention()

# prepare image
url = "https://huggingface.co/datasets/huggingface/documentation-images/resolve/main/diffusers/img2img-init.png"
init_image = load_image(url)

prompt = "Astronaut in a jungle, cold color palette, muted colors, detailed, 8k"

# pass prompt and image to pipeline
image_1 = pipeline(prompt, image=init_image, output_type="latent").images[0]
It is important to specify
output_type="latent"in the pipeline to keep all the outputs in latent space to avoid an unnecessary decode-encode step. This only works if the chained pipelines are using the same VAE.
Chain it to an upscaler pipeline to increase the image resolution:
from diffusers import StableDiffusionLatentUpscalePipeline

upscaler = StableDiffusionLatentUpscalePipeline.from_pretrained(
    "stabilityai/sd-x2-latent-upscaler", torch_dtype=torch.float16, use_safetensors=True
)
upscaler.enable_model_cpu_offload()
upscaler.enable_xformers_memory_efficient_attention()

image_2 = upscaler(prompt, image=image_1).images[0]
Finally, chain it to a super-resolution pipeline to further enhance the resolution:
from diffusers import StableDiffusionUpscalePipeline

super_res = StableDiffusionUpscalePipeline.from_pretrained(
    "stabilityai/stable-diffusion-x4-upscaler", torch_dtype=torch.float16, variant="fp16", use_safetensors=True
)
super_res.enable_model_cpu_offload()
super_res.enable_xformers_memory_efficient_attention()

image_3 = super_res(prompt, image=image_2).images[0]
make_image_grid([init_image, image_3.resize((512, 512))], rows=1, cols=2)
Control image generation
Trying to generate an image that looks exactly the way you want can be difficult, which is why controlled generation techniques and models are so useful. While you can use the negative_prompt to partially control image generation, there are more robust methods like prompt weighting and ControlNets.
Prompt weighting
Prompt weighting allows you to scale the representation of each concept in a prompt. For example, in a prompt like “Astronaut in a jungle, cold color palette, muted colors, detailed, 8k”, you can choose to increase or decrease the embeddings of “astronaut” and “jungle”. The Compel library provides a simple syntax for adjusting prompt weights and generating the embeddings. You can learn how to create the embeddings in the Prompt weighting guide.
AutoPipelineForImage2Image has a prompt_embeds (and negative_prompt_embeds if you’re using a negative prompt) parameter where you can pass the embeddings which replaces the prompt parameter.
from diffusers import AutoPipelineForImage2Image
import torch

pipeline = AutoPipelineForImage2Image.from_pretrained(
    "stable-diffusion-v1-5/stable-diffusion-v1-5", torch_dtype=torch.float16, variant="fp16", use_safetensors=True
)
pipeline.enable_model_cpu_offload()
# remove following line if xFormers is not installed or you have PyTorch 2.0 or higher installed
pipeline.enable_xformers_memory_efficient_attention()

image = pipeline(prompt_embeds=prompt_embeds, # generated from Compel
    negative_prompt_embeds=negative_prompt_embeds, # generated from Compel
    image=init_image,
).images[0]
ControlNet
ControlNets provide a more flexible and accurate way to control image generation because you can use an additional conditioning image. The conditioning image can be a canny image, depth map, image segmentation, and even scribbles! Whatever type of conditioning image you choose, the ControlNet generates an image that preserves the information in it.
For example, let’s condition an image with a depth map to keep the spatial information in the image.
from diffusers.utils import load_image, make_image_grid

# prepare image
url = "https://huggingface.co/datasets/huggingface/documentation-images/resolve/main/diffusers/img2img-init.png"
init_image = load_image(url)
init_image = init_image.resize((958, 960)) # resize to depth image dimensions
depth_image = load_image("https://huggingface.co/lllyasviel/control_v11f1p_sd15_depth/resolve/main/images/control.png")
make_image_grid([init_image, depth_image], rows=1, cols=2)
Load a ControlNet model conditioned on depth maps and the AutoPipelineForImage2Image:
from diffusers import ControlNetModel, AutoPipelineForImage2Image
import torch

controlnet = ControlNetModel.from_pretrained("lllyasviel/control_v11f1p_sd15_depth", torch_dtype=torch.float16, variant="fp16", use_safetensors=True)
pipeline = AutoPipelineForImage2Image.from_pretrained(
    "stable-diffusion-v1-5/stable-diffusion-v1-5", controlnet=controlnet, torch_dtype=torch.float16, variant="fp16", use_safetensors=True
)
pipeline.enable_model_cpu_offload()
# remove following line if xFormers is not installed or you have PyTorch 2.0 or higher installed
pipeline.enable_xformers_memory_efficient_attention()
Now generate a new image conditioned on the depth map, initial image, and prompt:
prompt = "Astronaut in a jungle, cold color palette, muted colors, detailed, 8k"
image_control_net = pipeline(prompt, image=init_image, control_image=depth_image).images[0]
make_image_grid([init_image, depth_image, image_control_net], rows=1, cols=3) 
Let’s apply a new style to the image generated from the ControlNet by chaining it with an image-to-image pipeline:
pipeline = AutoPipelineForImage2Image.from_pretrained(
    "nitrosocke/elden-ring-diffusion", torch_dtype=torch.float16,
)
pipeline.enable_model_cpu_offload()
# remove following line if xFormers is not installed or you have PyTorch 2.0 or higher installed
pipeline.enable_xformers_memory_efficient_attention()

prompt = "elden ring style astronaut in a jungle" # include the token "elden ring style" in the prompt
negative_prompt = "ugly, deformed, disfigured, poor details, bad anatomy"

image_elden_ring = pipeline(prompt, negative_prompt=negative_prompt, image=image_control_net, strength=0.45, guidance_scale=10.5).images[0]
make_image_grid([init_image, depth_image, image_control_net, image_elden_ring], rows=2, cols=2)
Optimize
Running diffusion models is computationally expensive and intensive, but with a few optimization tricks, it is entirely possible to run them on consumer and free-tier GPUs. For example, you can use a more memory-efficient form of attention such as PyTorch 2.0’s scaled-dot product attention or xFormers (you can use one or the other, but there’s no need to use both). You can also offload the model to the GPU while the other pipeline components wait on the CPU.
+ pipeline.enable_model_cpu_offload()
+ pipeline.enable_xformers_memory_efficient_attention()
With torch.compile, you can boost your inference speed even more by wrapping your UNet with it:
pipeline.unet = torch.compile(pipeline.unet, mode="reduce-overhead", fullgraph=True)To learn more, take a look at the Reduce memory usage and Accelerate inference guides.
Update on GitHub