
title
stringlengths 4
55
| url
stringlengths 37
87
| main_content_html
stringlengths 2.75k
20.8k
| main_content_str
stringlengths 236
13.1k
| main_content_md
stringlengths 419
15k
|
|---|---|---|---|---|
Frappe HR | https://frappehr.com/docs/v14/en/intro | <div class="from-markdown ">
<div class="d-flex justify-content-between align-items-center">
<h1 class="wiki-title">Frappe HR</h1>
<div class="dropdown wiki-options">
<div class="dropdown-toggle" type="button" role="button" id="wikiOptionsButton" data-toggle="dropdown" aria-label="Wiki Option Button" aria-expanded="false">
<svg xmlns="http://www.w3.org/2000/svg" width="16" height="16" viewbox="0 0 24 24" fill="none" stroke="currentColor" stroke-width="2" stroke-linecap="round" stroke-linejoin="round" class="feather feather-more-vertical">
<circle cx="12" cy="12" r="1"></circle>
<circle cx="12" cy="5" r="1"></circle>
<circle cx="12" cy="19" r="1"></circle>
</svg>
</div>
<div class="dropdown-menu d-print-none" aria-labelledby="wikiOptionsButton">
<a class="dropdown-item edit-wiki-btn" href="#">Edit Page</a>
<a class="dropdown-item add-wiki-btn" href="#">New Page</a>
<a class="dropdown-item show-revisions" href="#" data-toggle="modal" data-target="#revisionsModal">Revisions</a>
</div>
</div>
</div>
<div class="wiki-content">
<p>Frappe HR is an open Source, modern, and easy-to-use HR and Payroll Software for all organizations.</p>
<h2 id="introduction">Introduction</h2>
<p>Frappe HR has everything you need to drive excellence within the company. It's a complete HRMS solution with over 13 different modules right from Employee Management, Onboarding, Leaves, to Payroll, Taxation, and more!</p>
<h2 id="key-features">Key Features</h2>
<ul>
<li>Employee Management</li>
<li>Employee Lifecycle</li>
<li>Leave and Attendance</li>
<li>Shift Management</li>
<li>Expense Claims and Advances</li>
<li>Hiring</li>
<li>Performance Management</li>
<li>Fleet Management</li>
<li>Training</li>
<li>Payroll</li>
<li>Taxation</li>
<li>Compensation</li>
<li>Analytics</li>
</ul>
</div>
<input value="06bfe374ad" class="d-none" name="wiki-page-name">
<div class="modal revisions-modal fade" id="revisionsModal" tabindex="-1" role="dialog" aria-labelledby="revisionsModalTitle" aria-hidden="true">
<div class="modal-dialog modal-dialog-centered" role="document">
<div class="modal-content">
<div class="modal-header">
<h5 class="modal-title revision-title" id="revisionsModalTitle">Frappe HR</h5>
<button type="button" class="d-block d-sm-none close" data-dismiss="modal" aria-label="Close">
<span aria-hidden="true">×</span>
</button>
<span class="small text-muted revision-time">rucha_mahabal edited 1 year ago</span>
</div>
<div class="modal-body">
<div class="revision-content wiki-content">
<h3>No Revisions</h3>
</div>
</div>
<div class="modal-footer">
<button type="button" data-modal-button="previous" class="previous-revision btn btn-secondary btn-sm hide">Previous</button>
<button type="button" data-modal-button="next" class="next-revision btn btn-secondary btn-sm hide">Next</button>
</div>
</div>
</div>
</div>
</div> | Frappe HR
Frappe HR is an open Source, modern, and easy-to-use HR and Payroll Software for all organizations.
Introduction
Frappe HR has everything you need to drive excellence within the company. It's a complete HRMS solution with over 13 different modules right from Employee Management, Onboarding, Leaves, to Payroll, Taxation, and more!
Key Features
Employee Management
Employee Lifecycle
Leave and Attendance
Shift Management
Expense Claims and Advances
Hiring
Performance Management
Fleet Management
Training
Payroll
Taxation
Compensation
Analytics | # Frappe HR
Edit Page New Page Revisions
Frappe HR is an open Source, modern, and easy-to-use HR and Payroll Software
for all organizations.
## Introduction
Frappe HR has everything you need to drive excellence within the company. It's
a complete HRMS solution with over 13 different modules right from Employee
Management, Onboarding, Leaves, to Payroll, Taxation, and more!
## Key Features
* Employee Management
* Employee Lifecycle
* Leave and Attendance
* Shift Management
* Expense Claims and Advances
* Hiring
* Performance Management
* Fleet Management
* Training
* Payroll
* Taxation
* Compensation
* Analytics
##### Frappe HR
× rucha_mahabal edited 1 year ago
### No Revisions
Previous Next
|
Videos | https://frappehr.com/docs/v14/en/learn | <div class="from-markdown ">
<div class="d-flex justify-content-between align-items-center">
<h1 class="wiki-title">Videos</h1>
<div class="dropdown wiki-options">
<div class="dropdown-toggle" type="button" role="button" id="wikiOptionsButton" data-toggle="dropdown" aria-label="Wiki Option Button" aria-expanded="false">
<svg xmlns="http://www.w3.org/2000/svg" width="16" height="16" viewbox="0 0 24 24" fill="none" stroke="currentColor" stroke-width="2" stroke-linecap="round" stroke-linejoin="round" class="feather feather-more-vertical">
<circle cx="12" cy="12" r="1"></circle>
<circle cx="12" cy="5" r="1"></circle>
<circle cx="12" cy="19" r="1"></circle>
</svg>
</div>
<div class="dropdown-menu d-print-none" aria-labelledby="wikiOptionsButton">
<a class="dropdown-item edit-wiki-btn" href="#">Edit Page</a>
<a class="dropdown-item add-wiki-btn" href="#">New Page</a>
<a class="dropdown-item show-revisions" href="#" data-toggle="modal" data-target="#revisionsModal">Revisions</a>
</div>
</div>
</div>
<div class="wiki-content">
<p>The Human Resources (HR) module covers the processes related to the HR department of a company. It maintains a complete employee database including contact information,
salary details, attendance, performance evaluation, leaves, and appraisal records.</p>
<h2 id="talks-amp-webinars">Talks & Webinars</h2>
<h3 id="introducing-frappe-hr">Introducing Frappe HR</h3>
<div>
<p>
<iframe allowfullscreen="" frameborder="0" height="371" src="https://www.youtube.com/embed/WNvqA9QsVmY?start=231" width="660">
</iframe>
</p>
<p><strong>Duration: 14:24</strong></p>
<p>Introducing Frappe HR at the ERPNext conference 2022</p>
</div>
<h3 id="simplify-your-hr-and-payroll-operations-with-frappe-hr">Simplify your HR and Payroll operations with Frappe HR</h3>
<div>
<p>
<iframe allowfullscreen="" frameborder="0" height="371" src="https://www.youtube.com/embed/-7PhoqDaHjQ" width="660">
</iframe>
</p>
<p><strong>Duration: 43:27</strong></p>
<p>Discover the latest updates on Frappe HR - the ultimate open-source solution for seamless HR and payroll management</p>
</div>
<h2 id="video-tutorial">Video Tutorial</h2>
<ol>
<li><a href="/docs/v14/en/videos/learn/employee">Employees</a></li>
<li><a href="/docs/v14/en/videos/learn/leave-management">Leave Management</a></li>
<li><a href="/docs/v14/en/videos/learn/expense-claim">Expense Claims</a></li>
<li><a href="/docs/v14/en/videos/learn/employee-advance">Employee Advance</a></li>
</ol>
</div>
<input value="2e038ac417" class="d-none" name="wiki-page-name">
<div class="modal revisions-modal fade" id="revisionsModal" tabindex="-1" role="dialog" aria-labelledby="revisionsModalTitle" aria-hidden="true">
<div class="modal-dialog modal-dialog-centered" role="document">
<div class="modal-content">
<div class="modal-header">
<h5 class="modal-title revision-title" id="revisionsModalTitle">Videos</h5>
<button type="button" class="d-block d-sm-none close" data-dismiss="modal" aria-label="Close">
<span aria-hidden="true">×</span>
</button>
<span class="small text-muted revision-time">Administrator edited 2 years ago</span>
</div>
<div class="modal-body">
<div class="revision-content wiki-content">
<h3>No Revisions</h3>
</div>
</div>
<div class="modal-footer">
<button type="button" data-modal-button="previous" class="previous-revision btn btn-secondary btn-sm hide">Previous</button>
<button type="button" data-modal-button="next" class="next-revision btn btn-secondary btn-sm hide">Next</button>
</div>
</div>
</div>
</div>
</div> | Videos
The Human Resources (HR) module covers the processes related to the HR department of a company. It maintains a complete employee database including contact information, salary details, attendance, performance evaluation, leaves, and appraisal records.
Talks & Webinars
Introducing Frappe HR
Duration: 14:24
Introducing Frappe HR at the ERPNext conference 2022
Simplify your HR and Payroll operations with Frappe HR
Duration: 43:27
Discover the latest updates on Frappe HR - the ultimate open-source solution for seamless HR and payroll management
Video Tutorial
Employees
Leave Management
Expense Claims
Employee Advance | # Videos
Edit Page New Page Revisions
The Human Resources (HR) module covers the processes related to the HR
department of a company. It maintains a complete employee database including
contact information, salary details, attendance, performance evaluation,
leaves, and appraisal records.
## Talks & Webinars
### Introducing Frappe HR
**Duration: 14:24**
Introducing Frappe HR at the ERPNext conference 2022
### Simplify your HR and Payroll operations with Frappe HR
**Duration: 43:27**
Discover the latest updates on Frappe HR - the ultimate open-source solution
for seamless HR and payroll management
## Video Tutorial
1. [Employees](/docs/v14/en/videos/learn/employee)
2. [Leave Management](/docs/v14/en/videos/learn/leave-management)
3. [Expense Claims](/docs/v14/en/videos/learn/expense-claim)
4. [Employee Advance](/docs/v14/en/videos/learn/employee-advance)
##### Videos
× Administrator edited 2 years ago
### No Revisions
Previous Next
|
Mobile App Installation | https://frappehr.com/docs/v14/en/mobile-app-installation | <div class="from-markdown ">
<div class="d-flex justify-content-between align-items-center">
<h1 class="wiki-title">Mobile App Installation</h1>
<div class="dropdown wiki-options">
<div class="dropdown-toggle" type="button" role="button" id="wikiOptionsButton" data-toggle="dropdown" aria-label="Wiki Option Button" aria-expanded="false">
<svg xmlns="http://www.w3.org/2000/svg" width="16" height="16" viewbox="0 0 24 24" fill="none" stroke="currentColor" stroke-width="2" stroke-linecap="round" stroke-linejoin="round" class="feather feather-more-vertical">
<circle cx="12" cy="12" r="1"></circle>
<circle cx="12" cy="5" r="1"></circle>
<circle cx="12" cy="19" r="1"></circle>
</svg>
</div>
<div class="dropdown-menu d-print-none" aria-labelledby="wikiOptionsButton">
<a class="dropdown-item edit-wiki-btn" href="#">Edit Page</a>
<a class="dropdown-item add-wiki-btn" href="#">New Page</a>
<a class="dropdown-item show-revisions" href="#" data-toggle="modal" data-target="#revisionsModal">Revisions</a>
</div>
</div>
</div>
<div class="wiki-content">
<div><p>Frappe HR ships with a mobile frontend (progressive web app) v15 onwards. To install the app on your phones, go to</p><p>https://<sitename>/hrms</p><p>eg: if my site name is <a href="https://frappeio.frappe.cloud" rel="noopener noreferrer nofollow" target="_blank">https://frappeio.frappe.cloud</a>, the mobile app can be installed from <a href="https://frappeio.frappe.cloud/hrms" rel="noopener noreferrer nofollow" target="_blank">https://frappeio.frappe.cloud/hrms</a></p><p>Go to this URL on your mobile browser (Chrome/Safari) and install the app.</p><blockquote><p>Note: Firefox does not support PWA installation unless you have a plugin.</p></blockquote><h2>Android</h2><ol><li><p>On Android, you will get a prompt to install the app on this URL.</p></li><li><p>If you do not see the prompt, tap on the hamburger menu (three dots), and tap on Install app from the list of options.</p></li><li><p>Tap on Install, and wait for a few seconds.</p></li><li><p>You will then be able to find the Frappe HR app in your applications. You can login to this app with your site credentials.</p></li></ol><p><img class="screenshot" contenteditable="false" draggable="true" src="https://gameplan.frappe.cloud/files/wqkysO0.jpg"><img alt="" class="ProseMirror-separator"><br class="ProseMirror-trailingBreak"></p><h3>Installation GIF</h3><p><img alt="frappehr-android-pwa-install" class="screenshot" contenteditable="false" draggable="true" src="/files/frappehr-android-pwa-install.gif" title="frappehr-android-pwa-install.gif"><img alt="" class="ProseMirror-separator"><br class="ProseMirror-trailingBreak"></p><h2>iOS</h2><ol><li><p>On iOS, if you're using Safari, tap on the share button shown in the image below.</p></li><li><p>Scroll down the list of options, then tap Add to Home Screen.</p></li><li><p>If you do not see "Add to Home Screen", click on "Edit Actions" and you should find the option.</p></li><li><p>The icon will then appear on your home screen. You can login to this app with your site credentials.</p></li></ol><p><img class="screenshot" contenteditable="false" draggable="true" src="https://gameplan.frappe.cloud/files/bG9exfR.jpg"><img alt="" class="ProseMirror-separator"><br class="ProseMirror-trailingBreak"></p><h3>Installation GIF</h3><p><img alt="frappehr-ios-pwa-install" class="screenshot" contenteditable="false" draggable="true" src="/files/frappehr-ios-pwa-installe60ce5.gif" title="frappehr-ios-pwa-install.gif"><img alt="" class="ProseMirror-separator"><br class="ProseMirror-trailingBreak"></p></div>
</div>
<input value="4818991f48" class="d-none" name="wiki-page-name">
<div class="modal revisions-modal fade" id="revisionsModal" tabindex="-1" role="dialog" aria-labelledby="revisionsModalTitle" aria-hidden="true">
<div class="modal-dialog modal-dialog-centered" role="document">
<div class="modal-content">
<div class="modal-header">
<h5 class="modal-title revision-title" id="revisionsModalTitle">Mobile App Installation</h5>
<button type="button" class="d-block d-sm-none close" data-dismiss="modal" aria-label="Close">
<span aria-hidden="true">×</span>
</button>
<span class="small text-muted revision-time">rucha_mahabal edited 3 minutes ago</span>
</div>
<div class="modal-body">
<div class="revision-content wiki-content">
<div markdown="1"><p>Frappe HR ships with a mobile frontend (progressive web app) v15 onwards. To install the app on your phones, go to</p><p>https://<sitename>/hrms</p><p>eg: if my site name is <a target="_blank" rel="noopener noreferrer nofollow" href="https://frappeio.frappe.cloud">https://frappeio.frappe.cloud</a>, the mobile app can be installed from <a target="_blank" rel="noopener noreferrer nofollow" href="https://frappeio.frappe.cloud/hrms">https://frappeio.frappe.cloud/hrms</a></p><p>Go to this URL on your mobile browser (Chrome/Safari) and install the app.</p><blockquote><p>Note: Firefox does not support PWA installation unless you have a plugin.</p></blockquote><h2>Android</h2><ol><li><p>On Android, you will get a prompt to install the app on this URL.</p></li><li><p>If you do not see the prompt, tap on the hamburger menu (three dots), and tap on Install app from the list of options.</p></li><li><p>Tap on Install, and wait for a few seconds.</p></li><li><p>You will then be able to find the Frappe HR app in your applications. You can login to this app with your site credentials.</p></li></ol><p><img class="screenshot" src="https://gameplan.frappe.cloud/files/wqkysO0.jpg" contenteditable="false" draggable="true"><img class="ProseMirror-separator" alt=""><br class="ProseMirror-trailingBreak"></p><h3>Installation GIF</h3><p><img class="screenshot" src="/files/frappehr-android-pwa-install.gif" alt="frappehr-android-pwa-install" title="frappehr-android-pwa-install.gif" contenteditable="false" draggable="true"><img class="ProseMirror-separator" alt=""><br class="ProseMirror-trailingBreak"></p><h2>iOS</h2><ol><li><p>On iOS, if you're using Safari, tap on the share button shown in the image below.</p></li><li><p>Scroll down the list of options, then tap Add to Home Screen.</p></li><li><p>If you do not see "Add to Home Screen", click on "Edit Actions" and you should find the option.</p></li><li><p>The icon will then appear on your home screen. You can login to this app with your site credentials.</p></li></ol><p><img class="screenshot" src="https://gameplan.frappe.cloud/files/bG9exfR.jpg" contenteditable="false" draggable="true"><img class="ProseMirror-separator" alt=""><br class="ProseMirror-trailingBreak"></p><h3>Installation GIF</h3><p><img class="screenshot" src="/files/frappehr-ios-pwa-installe60ce5.gif" alt="frappehr-ios-pwa-install" title="frappehr-ios-pwa-install.gif" contenteditable="false" draggable="true"><img class="ProseMirror-separator" alt=""><br class="ProseMirror-trailingBreak"></p></div>
</div>
</div>
<div class="modal-footer">
<button type="button" data-modal-button="previous" class="previous-revision btn btn-secondary btn-sm hide">Previous</button>
<button type="button" data-modal-button="next" class="next-revision btn btn-secondary btn-sm hide">Next</button>
</div>
</div>
</div>
</div>
</div> | Mobile App Installation
Frappe HR ships with a mobile frontend (progressive web app) v15 onwards. To install the app on your phones, go to
https://<sitename>/hrms
eg: if my site name is https://frappeio.frappe.cloud, the mobile app can be installed from https://frappeio.frappe.cloud/hrms
Go to this URL on your mobile browser (Chrome/Safari) and install the app.
Note: Firefox does not support PWA installation unless you have a plugin.
Android
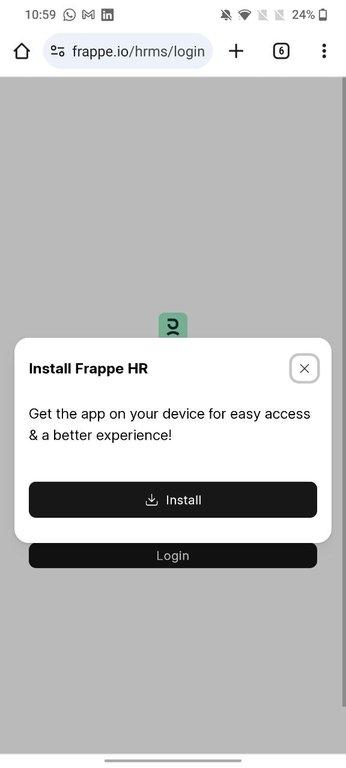
On Android, you will get a prompt to install the app on this URL.
If you do not see the prompt, tap on the hamburger menu (three dots), and tap on Install app from the list of options.
Tap on Install, and wait for a few seconds.
You will then be able to find the Frappe HR app in your applications. You can login to this app with your site credentials.
Installation GIF
iOS
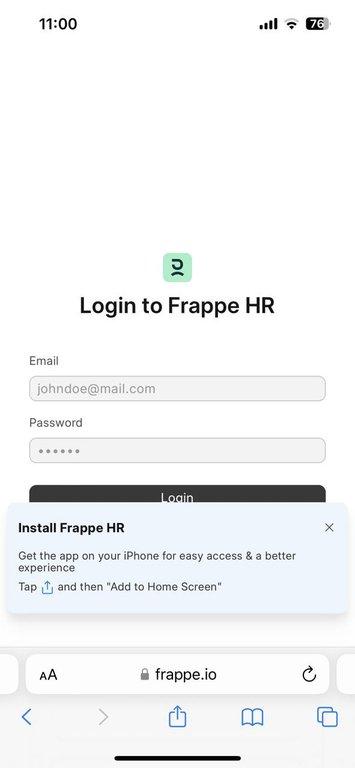
On iOS, if you're using Safari, tap on the share button shown in the image below.
Scroll down the list of options, then tap Add to Home Screen.
If you do not see "Add to Home Screen", click on "Edit Actions" and you should find the option.
The icon will then appear on your home screen. You can login to this app with your site credentials.
Installation GIF | # Mobile App Installation
Edit Page New Page Revisions
Frappe HR ships with a mobile frontend (progressive web app) v15 onwards. To
install the app on your phones, go to
https://<sitename>/hrms
eg: if my site name is <https://frappeio.frappe.cloud>, the mobile app can be
installed from <https://frappeio.frappe.cloud/hrms>
Go to this URL on your mobile browser (Chrome/Safari) and install the app.
> Note: Firefox does not support PWA installation unless you have a plugin.
## Android
1. On Android, you will get a prompt to install the app on this URL.
2. If you do not see the prompt, tap on the hamburger menu (three dots), and tap on Install app from the list of options.
3. Tap on Install, and wait for a few seconds.
4. You will then be able to find the Frappe HR app in your applications. You can login to this app with your site credentials.
### Installation GIF

## iOS
1. On iOS, if you're using Safari, tap on the share button shown in the image below.
2. Scroll down the list of options, then tap Add to Home Screen.
3. If you do not see "Add to Home Screen", click on "Edit Actions" and you should find the option.
4. The icon will then appear on your home screen. You can login to this app with your site credentials.
### Installation GIF

##### Mobile App Installation
× rucha_mahabal edited 3 minutes ago
Frappe HR ships with a mobile frontend (progressive web app) v15 onwards. To
install the app on your phones, go to
https://<sitename>/hrms
eg: if my site name is <https://frappeio.frappe.cloud>, the mobile app can be
installed from <https://frappeio.frappe.cloud/hrms>
Go to this URL on your mobile browser (Chrome/Safari) and install the app.
> Note: Firefox does not support PWA installation unless you have a plugin.
## Android
1. On Android, you will get a prompt to install the app on this URL.
2. If you do not see the prompt, tap on the hamburger menu (three dots), and tap on Install app from the list of options.
3. Tap on Install, and wait for a few seconds.
4. You will then be able to find the Frappe HR app in your applications. You can login to this app with your site credentials.

### Installation GIF

## iOS
1. On iOS, if you're using Safari, tap on the share button shown in the image below.
2. Scroll down the list of options, then tap Add to Home Screen.
3. If you do not see "Add to Home Screen", click on "Edit Actions" and you should find the option.
4. The icon will then appear on your home screen. You can login to this app with your site credentials.

### Installation GIF

Previous Next
|
Push Notifications | https://frappehr.com/docs/v14/en/push-notifications | <div class="from-markdown ">
<div class="d-flex justify-content-between align-items-center">
<h1 class="wiki-title">Push Notifications</h1>
<div class="dropdown wiki-options">
<div class="dropdown-toggle" type="button" role="button" id="wikiOptionsButton" data-toggle="dropdown" aria-label="Wiki Option Button" aria-expanded="false">
<svg xmlns="http://www.w3.org/2000/svg" width="16" height="16" viewbox="0 0 24 24" fill="none" stroke="currentColor" stroke-width="2" stroke-linecap="round" stroke-linejoin="round" class="feather feather-more-vertical">
<circle cx="12" cy="12" r="1"></circle>
<circle cx="12" cy="5" r="1"></circle>
<circle cx="12" cy="19" r="1"></circle>
</svg>
</div>
<div class="dropdown-menu d-print-none" aria-labelledby="wikiOptionsButton">
<a class="dropdown-item edit-wiki-btn" href="#">Edit Page</a>
<a class="dropdown-item add-wiki-btn" href="#">New Page</a>
<a class="dropdown-item show-revisions" href="#" data-toggle="modal" data-target="#revisionsModal">Revisions</a>
</div>
</div>
</div>
<div class="wiki-content">
<div><p>v15 onwards, all sites hosted on Frappe Cloud can enable Push Notifications for the mobile app.</p><p>Go to</p><blockquote><p>Integrations > Push Notification Settings</p></blockquote><p>Check the <strong>Enable Push Notification Relay </strong>checkbox</p><p><img alt="" class="screenshot" contenteditable="false" draggable="true" src="/files/LoM5jEH.png"><img alt="" class="ProseMirror-separator"><br class="ProseMirror-trailingBreak"></p><p>In your mobile app:</p><p>Go to <strong>Profile > Settings </strong>or <strong>Notification Icon > Settings</strong> and click on "<strong>Enable Push Notifications"</strong></p><p><img alt="push" contenteditable="false" draggable="true" src="/files/push.png" title="push.png"><img alt="" class="ProseMirror-separator"><br class="ProseMirror-trailingBreak"></p><p>This will register your site on the Frappe Cloud relay server and you will receive push notifications.</p><p><img alt="push-notifications" contenteditable="false" draggable="true" src="/files/push-notifications.png" title="push-notifications.png"><img alt="" class="ProseMirror-separator"><br class="ProseMirror-trailingBreak"></p></div>
</div>
<input value="d1d5b8355d" class="d-none" name="wiki-page-name">
<div class="modal revisions-modal fade" id="revisionsModal" tabindex="-1" role="dialog" aria-labelledby="revisionsModalTitle" aria-hidden="true">
<div class="modal-dialog modal-dialog-centered" role="document">
<div class="modal-content">
<div class="modal-header">
<h5 class="modal-title revision-title" id="revisionsModalTitle">Push Notifications</h5>
<button type="button" class="d-block d-sm-none close" data-dismiss="modal" aria-label="Close">
<span aria-hidden="true">×</span>
</button>
<span class="small text-muted revision-time">rucha_mahabal edited 1 second ago</span>
</div>
<div class="modal-body">
<div class="revision-content wiki-content">
<div markdown="1"><p>v15 onwards, all sites hosted on Frappe Cloud can enable Push Notifications for the Frappe HR mobile app.</p><p>Go to</p><blockquote><p>Integrations > Push Notification Settings</p></blockquote><p>Check the <strong>Enable Push Notification Relay </strong>checkbox</p><p><img class="screenshot" src="/files/LoM5jEH.png" alt="" contenteditable="false" draggable="true"><img class="ProseMirror-separator" alt=""><br class="ProseMirror-trailingBreak"></p><p>In your mobile app:</p><p>Go to <strong>Profile > Settings </strong>or <strong>Notification Icon > Settings</strong> and click on "<strong>Enable Push Notifications"</strong></p><p><img src="/files/ZVme41a.png" alt="" contenteditable="false" draggable="true"><img class="ProseMirror-separator" alt=""><br class="ProseMirror-trailingBreak"></p><p>This will register your site on the Frappe Cloud relay server and you will receive push notifications.</p><p><img src="/files/NHjLztO.png" alt="" contenteditable="false" draggable="true"><img class="ProseMirror-separator" alt=""><br class="ProseMirror-trailingBreak"></p></div>
</div>
</div>
<div class="modal-footer">
<button type="button" data-modal-button="previous" class="previous-revision btn btn-secondary btn-sm hide">Previous</button>
<button type="button" data-modal-button="next" class="next-revision btn btn-secondary btn-sm hide">Next</button>
</div>
</div>
</div>
</div>
</div> | Push Notifications
v15 onwards, all sites hosted on Frappe Cloud can enable Push Notifications for the mobile app.
Go to
Integrations > Push Notification Settings
Check the Enable Push Notification Relay checkbox
In your mobile app:
Go to Profile > Settings or Notification Icon > Settings and click on "Enable Push Notifications"
This will register your site on the Frappe Cloud relay server and you will receive push notifications. | # Push Notifications
Edit Page New Page Revisions
v15 onwards, all sites hosted on Frappe Cloud can enable Push Notifications
for the mobile app.
Go to
> Integrations > Push Notification Settings
Check the **Enable Push Notification Relay** checkbox

In your mobile app:
Go to **Profile > Settings **or **Notification Icon > Settings** and click on
"**Enable Push Notifications"**

This will register your site on the Frappe Cloud relay server and you will
receive push notifications.

##### Push Notifications
× rucha_mahabal edited 1 second ago
v15 onwards, all sites hosted on Frappe Cloud can enable Push Notifications
for the Frappe HR mobile app.
Go to
> Integrations > Push Notification Settings
Check the **Enable Push Notification Relay** checkbox

In your mobile app:
Go to **Profile > Settings **or **Notification Icon > Settings** and click on
"**Enable Push Notifications"**

This will register your site on the Frappe Cloud relay server and you will
receive push notifications.

Previous Next
|
Employee | https://frappehr.com/docs/v14/en/employee | <div class="from-markdown ">
<div class="d-flex justify-content-between align-items-center">
<h1 class="wiki-title">Employee</h1>
<div class="dropdown wiki-options">
<div class="dropdown-toggle" type="button" role="button" id="wikiOptionsButton" data-toggle="dropdown" aria-label="Wiki Option Button" aria-expanded="false">
<svg xmlns="http://www.w3.org/2000/svg" width="16" height="16" viewbox="0 0 24 24" fill="none" stroke="currentColor" stroke-width="2" stroke-linecap="round" stroke-linejoin="round" class="feather feather-more-vertical">
<circle cx="12" cy="12" r="1"></circle>
<circle cx="12" cy="5" r="1"></circle>
<circle cx="12" cy="19" r="1"></circle>
</svg>
</div>
<div class="dropdown-menu d-print-none" aria-labelledby="wikiOptionsButton">
<a class="dropdown-item edit-wiki-btn" href="#">Edit Page</a>
<a class="dropdown-item add-wiki-btn" href="#">New Page</a>
<a class="dropdown-item show-revisions" href="#" data-toggle="modal" data-target="#revisionsModal">Revisions</a>
</div>
</div>
</div>
<div class="wiki-content">
<div><p><strong>An individual who works part-time or full-time under a contract of employment, and has recognized rights and duties of your company is your Employee.</strong></p><p>In Frappe HR, you can manage the Employee master. It captures the demographic, personal, and professional details, joining and leave details, etc. of the Employee.</p><p>To access the Employee master, go to:</p><blockquote><p>Home > Human Resources > Employee</p></blockquote><p><img src="/files/RtArfPD.gif"></p><h2>1. Prerequisites</h2><p>Before creating an Employee, it is advised to create the following:</p><ul><li><p><a href="https://docs.erpnext.com/docs/v14/user/manual/en/setting-up/company-setup#1-how-to-create-a-new-company" rel="noopener noreferrer nofollow" target="_blank">Company</a></p></li></ul><h2>2. How to create an Employee</h2><ol><li><p>Go to the Employee list, and click on New.</p></li><li><p>Enter the Employee's personal details such as Name, Gender, Date of Birth, and Date of Joining.</p></li><li><p>Save.</p></li></ol><p>As shown below, all the mandatory fields are marked with red asterisks.</p><p><img alt="" src="/files/rqUdH4m.png"></p><h2>3. Features</h2><p>Apart from the aforementioned mandatory details, some additional details that can be captured in the Employee master are as follows:</p><h3>3.1 Employment Type</h3><p>You can set an <a href="/docs/v14/user/manual/en/human-resources/employment-type" rel="noopener noreferrer nofollow" target="_blank">Employment Type</a> such as Intern, Contract, Full-time, Part-time, Probation, etc. for an Employee.</p><h3>3.2 Create User</h3><p>The User ID can be linked to the Employee. In case the User ID is not created, you can click on 'Create a New User' in the dropdown to create one.</p><p>By clicking on the 'Create User Permission' checkbox, the Employee's access to other records can be restricted. Check <a href="https://docs.erpnext.com/docs/v14/user/manual/en/setting-up/users-and-permissions/adding-users" rel="noopener noreferrer nofollow" target="_blank">Adding Users</a> to learn how to create users and add permissions.</p><h3>3.3 Joining Details</h3><p>The Joining Details of the Employee such as the Offer Date, Confirmation Date, Contract End Date, Notice (Days), and Date of Retirement can be captured.</p><h3>3.4 Department and Grade</h3><p>In a company, the Employees are usually grouped on the basis of <a href="/docs/v14/user/manual/en/human-resources/department" rel="noopener noreferrer nofollow" target="_blank">Department</a>, <a href="/docs/v14/user/manual/en/human-resources/employee-grade" rel="noopener noreferrer nofollow" target="_blank">Grade</a>, <a href="/docs/v14/user/manual/en/human-resources/designation" rel="noopener noreferrer nofollow" target="_blank">Designation</a>, and <a href="/docs/v14/user/manual/en/human-resources/branch" rel="noopener noreferrer nofollow" target="_blank">Branch</a>.</p><p>In the Department and Grade section, these details of the Employee can be saved. In the 'Reports to' field, the person to whom the Employee has to report his duties to can be captured.</p><h3>3.5 Leave Details</h3><p>In Leave Details, you can save the <a href="/docs/v14/user/manual/en/human-resources/leave-policy" rel="noopener noreferrer nofollow" target="_blank">Leave Policy</a> and <a href="/docs/v14/user/manual/en/human-resources/holiday-list" rel="noopener noreferrer nofollow" target="_blank">Holiday List</a> details. Leave Policy specifies the type and number of leaves an Employee is entitled to, and Holiday List is a list which contains the dates of holidays and weekly offs.</p><h3>3.6 Salary Details</h3><p>Here, the mode of salary payment, i.e. through Bank, Cheque or Cash can be selected.</p><h3>3.7 Contact Details</h3><p>Employee's Contact information such as Mobile Number, Current and Permanent Address, Personal and Company Email ID can be captured here. In the Preferred Email ID field, either the the Company Email, Personal Email or User ID of the Employee can be selected depending on the user's preference.</p><h3>3.8 Personal Details</h3><p>Personal Details of the Employee such as Family Background details like name and occupation of parent, spouse and children, Passport Details including date and place of issue, Health Details like height, weight, allergies, medical concerns, etc. can be saved.</p><h3>3.9 Educational Qualification</h3><p>Here, the Educational Details such as School/University, Qualification, Level and Year of Passing of the Employee can be saved as shown below:</p><p><img src="/files/educational-qualification.png"></p><p>Additionally, details such as Class/Percentage and Subjects can also be saved by clicking on the downward arrow in the Education table.</p><h3>3.10 Previous Work Experience</h3><p>Just like Educational Qualification, an Employee's Previous Work Experience can also be captured in the External Work History table as shown below:</p><p><img alt="Previous Work Experience" src="/files/previous-work-experience.png"></p><p>Additionally, details such as Contact of the previous company and Total Experience in years can also be saved in the External Work History table.</p><h3>3.11 Exit</h3><p>Exit details of the employee (if any) such as Resignation, Exit Interview and <a href="/docs/v14/user/manual/en/human-resources/leave-encashment" rel="noopener noreferrer nofollow" target="_blank">Leave Encashment</a> details can be saved. When the status of the Employee is set to 'Left', it is mandatory to fill the Relieving Date.</p><blockquote><p><strong>Note:</strong> Once the Employee status is set to 'Left', that particular Employee master won't be accessible in further transactions.</p></blockquote><h3>3.12 Additional Features</h3><p>Some additional features included in the Employee master are as follows:</p><ul><li><p>Emergency Contact</p></li><li><p>Health Insurance</p></li><li><p>Personal Bio</p></li><li><p>History in the Company</p></li></ul><h2>3. Related Topics</h2><ol><li><p><a href="/docs/v14/user/manual/en/human-resources/leave-management-intro" rel="noopener noreferrer nofollow" target="_blank">Leave Management</a></p></li><li><p><a href="/docs/v14/user/manual/en/human-resources/payroll-intro" rel="noopener noreferrer nofollow" target="_blank">Payroll Management</a></p></li></ol><hr></div>
</div>
<input value="91877f057d" class="d-none" name="wiki-page-name">
<div class="modal revisions-modal fade" id="revisionsModal" tabindex="-1" role="dialog" aria-labelledby="revisionsModalTitle" aria-hidden="true">
<div class="modal-dialog modal-dialog-centered" role="document">
<div class="modal-content">
<div class="modal-header">
<h5 class="modal-title revision-title" id="revisionsModalTitle">Employee</h5>
<button type="button" class="d-block d-sm-none close" data-dismiss="modal" aria-label="Close">
<span aria-hidden="true">×</span>
</button>
<span class="small text-muted revision-time">rucha_mahabal edited 1 year ago</span>
</div>
<div class="modal-body">
<div class="revision-content wiki-content">
<div markdown="1"><p><strong>An individual who works part-time or full-time under a contract of employment, and has recognized rights and duties of your company is your Employee.</strong></p><p>In Frappe HR, you can manage the Employee master. It captures the demographic, personal, and professional details, joining and leave details, etc. of the Employee.</p><p>To access the Employee master, go to:</p><blockquote><p>Home > Human Resources > Employee</p></blockquote><p><img src="/files/RtArfPD.gif"></p><h2>1. Prerequisites</h2><p>Before creating an Employee, it is advised to create the following:</p><ul><li><p><a target="_blank" rel="noopener noreferrer nofollow" href="https://docs.erpnext.com/docs/v14/user/manual/en/setting-up/company-setup#1-how-to-create-a-new-company">Company</a></p></li></ul><h2>2. How to create an Employee</h2><ol><li><p>Go to the Employee list, and click on New.</p></li><li><p>Enter the Employee's personal details such as Name, Gender, Date of Birth, and Date of Joining.</p></li><li><p>Save.</p></li></ol><p>As shown below, all the mandatory fields are marked with red asterisks.</p><p><img src="/files/rqUdH4m.png" alt=""></p><h2>3. Features</h2><p>Apart from the aforementioned mandatory details, some additional details that can be captured in the Employee master are as follows:</p><h3>3.1 Employment Type</h3><p>You can set an <a target="_blank" rel="noopener noreferrer nofollow" href="/docs/v14/user/manual/en/human-resources/employment-type">Employment Type</a> such as Intern, Contract, Full-time, Part-time, Probation, etc. for an Employee.</p><h3>3.2 Create User</h3><p>The User ID can be linked to the Employee. In case the User ID is not created, you can click on 'Create a New User' in the dropdown to create one.</p><p>By clicking on the 'Create User Permission' checkbox, the Employee's access to other records can be restricted. Check <a target="_blank" rel="noopener noreferrer nofollow" href="https://docs.erpnext.com/docs/v14/user/manual/en/setting-up/users-and-permissions/adding-users">Adding Users</a> to learn how to create users and add permissions.</p><h3>3.3 Joining Details</h3><p>The Joining Details of the Employee such as the Offer Date, Confirmation Date, Contract End Date, Notice (Days), and Date of Retirement can be captured.</p><h3>3.4 Department and Grade</h3><p>In a company, the Employees are usually grouped on the basis of <a target="_blank" rel="noopener noreferrer nofollow" href="/docs/v14/user/manual/en/human-resources/department">Department</a>, <a target="_blank" rel="noopener noreferrer nofollow" href="/docs/v14/user/manual/en/human-resources/employee-grade">Grade</a>, <a target="_blank" rel="noopener noreferrer nofollow" href="/docs/v14/user/manual/en/human-resources/designation">Designation</a>, and <a target="_blank" rel="noopener noreferrer nofollow" href="/docs/v14/user/manual/en/human-resources/branch">Branch</a>.</p><p>In the Department and Grade section, these details of the Employee can be saved. In the 'Reports to' field, the person to whom the Employee has to report his duties to can be captured.</p><h3>3.5 Leave Details</h3><p>In Leave Details, you can save the <a target="_blank" rel="noopener noreferrer nofollow" href="/docs/v14/user/manual/en/human-resources/leave-policy">Leave Policy</a> and <a target="_blank" rel="noopener noreferrer nofollow" href="/docs/v14/user/manual/en/human-resources/holiday-list">Holiday List</a> details. Leave Policy specifies the type and number of leaves an Employee is entitled to, and Holiday List is a list which contains the dates of holidays and weekly offs.</p><h3>3.6 Salary Details</h3><p>Here, the mode of salary payment, i.e. through Bank, Cheque or Cash can be selected.</p><h3>3.7 Contact Details</h3><p>Employee's Contact information such as Mobile Number, Current and Permanent Address, Personal and Company Email ID can be captured here. In the Preferred Email ID field, either the the Company Email, Personal Email or User ID of the Employee can be selected depending on the user's preference.</p><h3>3.8 Personal Details</h3><p>Personal Details of the Employee such as Family Background details like name and occupation of parent, spouse and children, Passport Details including date and place of issue, Health Details like height, weight, allergies, medical concerns, etc. can be saved.</p><h3>3.9 Educational Qualification</h3><p>Here, the Educational Details such as School/University, Qualification, Level and Year of Passing of the Employee can be saved as shown below:</p><p><img src="/files/educational-qualification.png" alt="Educational Qualification"></p><p>Additionally, details such as Class/Percentage and Subjects can also be saved by clicking on the downward arrow in the Education table.</p><h3>3.10 Previous Work Experience</h3><p>Just like Educational Qualification, an Employee's Previous Work Experience can also be captured in the External Work History table as shown below:</p><p><img src="/files/previous-work-experience.png" alt="Previous Work Experience"></p><p>Additionally, details such as Contact of the previous company and Total Experience in years can also be saved in the External Work History table.</p><h3>3.11 Exit</h3><p>Exit details of the employee (if any) such as Resignation, Exit Interview and <a target="_blank" rel="noopener noreferrer nofollow" href="/docs/v14/user/manual/en/human-resources/leave-encashment">Leave Encashment</a> details can be saved. When the status of the Employee is set to 'Left', it is mandatory to fill the Relieving Date.</p><blockquote><p><strong>Note:</strong> Once the Employee status is set to 'Left', that particular Employee master won't be accessible in further transactions.</p></blockquote><h3>3.12 Additional Features</h3><p>Some additional features included in the Employee master are as follows:</p><ul><li><p>Emergency Contact</p></li><li><p>Health Insurance</p></li><li><p>Personal Bio</p></li><li><p>History in the Company</p></li></ul><h2>3. Related Topics</h2><ol><li><p><a target="_blank" rel="noopener noreferrer nofollow" href="/docs/v14/user/manual/en/human-resources/leave-management-intro">Leave Management</a></p></li><li><p><a target="_blank" rel="noopener noreferrer nofollow" href="/docs/v14/user/manual/en/human-resources/payroll-intro">Payroll Management</a></p></li></ol><hr></div>
</div>
</div>
<div class="modal-footer">
<button type="button" data-modal-button="previous" class="previous-revision btn btn-secondary btn-sm hide">Previous</button>
<button type="button" data-modal-button="next" class="next-revision btn btn-secondary btn-sm hide">Next</button>
</div>
</div>
</div>
</div>
</div> | Employee
An individual who works part-time or full-time under a contract of employment, and has recognized rights and duties of your company is your Employee.
In Frappe HR, you can manage the Employee master. It captures the demographic, personal, and professional details, joining and leave details, etc. of the Employee.
To access the Employee master, go to:
Home > Human Resources > Employee
1. Prerequisites
Before creating an Employee, it is advised to create the following:
Company
2. How to create an Employee
Go to the Employee list, and click on New.
Enter the Employee's personal details such as Name, Gender, Date of Birth, and Date of Joining.
Save.
As shown below, all the mandatory fields are marked with red asterisks.
3. Features
Apart from the aforementioned mandatory details, some additional details that can be captured in the Employee master are as follows:
3.1 Employment Type
You can set an Employment Type such as Intern, Contract, Full-time, Part-time, Probation, etc. for an Employee.
3.2 Create User
The User ID can be linked to the Employee. In case the User ID is not created, you can click on 'Create a New User' in the dropdown to create one.
By clicking on the 'Create User Permission' checkbox, the Employee's access to other records can be restricted. Check Adding Users to learn how to create users and add permissions.
3.3 Joining Details
The Joining Details of the Employee such as the Offer Date, Confirmation Date, Contract End Date, Notice (Days), and Date of Retirement can be captured.
3.4 Department and Grade
In a company, the Employees are usually grouped on the basis of Department, Grade, Designation, and Branch.
In the Department and Grade section, these details of the Employee can be saved. In the 'Reports to' field, the person to whom the Employee has to report his duties to can be captured.
3.5 Leave Details
In Leave Details, you can save the Leave Policy and Holiday List details. Leave Policy specifies the type and number of leaves an Employee is entitled to, and Holiday List is a list which contains the dates of holidays and weekly offs.
3.6 Salary Details
Here, the mode of salary payment, i.e. through Bank, Cheque or Cash can be selected.
3.7 Contact Details
Employee's Contact information such as Mobile Number, Current and Permanent Address, Personal and Company Email ID can be captured here. In the Preferred Email ID field, either the the Company Email, Personal Email or User ID of the Employee can be selected depending on the user's preference.
3.8 Personal Details
Personal Details of the Employee such as Family Background details like name and occupation of parent, spouse and children, Passport Details including date and place of issue, Health Details like height, weight, allergies, medical concerns, etc. can be saved.
3.9 Educational Qualification
Here, the Educational Details such as School/University, Qualification, Level and Year of Passing of the Employee can be saved as shown below:
Additionally, details such as Class/Percentage and Subjects can also be saved by clicking on the downward arrow in the Education table.
3.10 Previous Work Experience
Just like Educational Qualification, an Employee's Previous Work Experience can also be captured in the External Work History table as shown below:
Additionally, details such as Contact of the previous company and Total Experience in years can also be saved in the External Work History table.
3.11 Exit
Exit details of the employee (if any) such as Resignation, Exit Interview and Leave Encashment details can be saved. When the status of the Employee is set to 'Left', it is mandatory to fill the Relieving Date.
Note: Once the Employee status is set to 'Left', that particular Employee master won't be accessible in further transactions.
3.12 Additional Features
Some additional features included in the Employee master are as follows:
Emergency Contact
Health Insurance
Personal Bio
History in the Company
3. Related Topics
Leave Management
Payroll Management | # Employee
Edit Page New Page Revisions
**An individual who works part-time or full-time under a contract of
employment, and has recognized rights and duties of your company is your
Employee.**
In Frappe HR, you can manage the Employee master. It captures the demographic,
personal, and professional details, joining and leave details, etc. of the
Employee.
To access the Employee master, go to:
> Home > Human Resources > Employee

## 1\. Prerequisites
Before creating an Employee, it is advised to create the following:
* [Company](https://docs.erpnext.com/docs/v14/user/manual/en/setting-up/company-setup#1-how-to-create-a-new-company)
## 2\. How to create an Employee
1. Go to the Employee list, and click on New.
2. Enter the Employee's personal details such as Name, Gender, Date of Birth, and Date of Joining.
3. Save.
As shown below, all the mandatory fields are marked with red asterisks.

## 3\. Features
Apart from the aforementioned mandatory details, some additional details that
can be captured in the Employee master are as follows:
### 3.1 Employment Type
You can set an [Employment Type](/docs/v14/user/manual/en/human-
resources/employment-type) such as Intern, Contract, Full-time, Part-time,
Probation, etc. for an Employee.
### 3.2 Create User
The User ID can be linked to the Employee. In case the User ID is not created,
you can click on 'Create a New User' in the dropdown to create one.
By clicking on the 'Create User Permission' checkbox, the Employee's access to
other records can be restricted. Check [Adding
Users](https://docs.erpnext.com/docs/v14/user/manual/en/setting-up/users-and-
permissions/adding-users) to learn how to create users and add permissions.
### 3.3 Joining Details
The Joining Details of the Employee such as the Offer Date, Confirmation Date,
Contract End Date, Notice (Days), and Date of Retirement can be captured.
### 3.4 Department and Grade
In a company, the Employees are usually grouped on the basis of
[Department](/docs/v14/user/manual/en/human-resources/department),
[Grade](/docs/v14/user/manual/en/human-resources/employee-grade),
[Designation](/docs/v14/user/manual/en/human-resources/designation), and
[Branch](/docs/v14/user/manual/en/human-resources/branch).
In the Department and Grade section, these details of the Employee can be
saved. In the 'Reports to' field, the person to whom the Employee has to
report his duties to can be captured.
### 3.5 Leave Details
In Leave Details, you can save the [Leave
Policy](/docs/v14/user/manual/en/human-resources/leave-policy) and [Holiday
List](/docs/v14/user/manual/en/human-resources/holiday-list) details. Leave
Policy specifies the type and number of leaves an Employee is entitled to, and
Holiday List is a list which contains the dates of holidays and weekly offs.
### 3.6 Salary Details
Here, the mode of salary payment, i.e. through Bank, Cheque or Cash can be
selected.
### 3.7 Contact Details
Employee's Contact information such as Mobile Number, Current and Permanent
Address, Personal and Company Email ID can be captured here. In the Preferred
Email ID field, either the the Company Email, Personal Email or User ID of the
Employee can be selected depending on the user's preference.
### 3.8 Personal Details
Personal Details of the Employee such as Family Background details like name
and occupation of parent, spouse and children, Passport Details including date
and place of issue, Health Details like height, weight, allergies, medical
concerns, etc. can be saved.
### 3.9 Educational Qualification
Here, the Educational Details such as School/University, Qualification, Level
and Year of Passing of the Employee can be saved as shown below:

Additionally, details such as Class/Percentage and Subjects can also be saved
by clicking on the downward arrow in the Education table.
### 3.10 Previous Work Experience
Just like Educational Qualification, an Employee's Previous Work Experience
can also be captured in the External Work History table as shown below:

Additionally, details such as Contact of the previous company and Total
Experience in years can also be saved in the External Work History table.
### 3.11 Exit
Exit details of the employee (if any) such as Resignation, Exit Interview and
[Leave Encashment](/docs/v14/user/manual/en/human-resources/leave-encashment)
details can be saved. When the status of the Employee is set to 'Left', it is
mandatory to fill the Relieving Date.
> **Note:** Once the Employee status is set to 'Left', that particular
> Employee master won't be accessible in further transactions.
### 3.12 Additional Features
Some additional features included in the Employee master are as follows:
* Emergency Contact
* Health Insurance
* Personal Bio
* History in the Company
## 3\. Related Topics
1. [Leave Management](/docs/v14/user/manual/en/human-resources/leave-management-intro)
2. [Payroll Management](/docs/v14/user/manual/en/human-resources/payroll-intro)
* * *
##### Employee
× rucha_mahabal edited 1 year ago
**An individual who works part-time or full-time under a contract of
employment, and has recognized rights and duties of your company is your
Employee.**
In Frappe HR, you can manage the Employee master. It captures the demographic,
personal, and professional details, joining and leave details, etc. of the
Employee.
To access the Employee master, go to:
> Home > Human Resources > Employee

## 1\. Prerequisites
Before creating an Employee, it is advised to create the following:
* [Company](https://docs.erpnext.com/docs/v14/user/manual/en/setting-up/company-setup#1-how-to-create-a-new-company)
## 2\. How to create an Employee
1. Go to the Employee list, and click on New.
2. Enter the Employee's personal details such as Name, Gender, Date of Birth, and Date of Joining.
3. Save.
As shown below, all the mandatory fields are marked with red asterisks.

## 3\. Features
Apart from the aforementioned mandatory details, some additional details that
can be captured in the Employee master are as follows:
### 3.1 Employment Type
You can set an [Employment Type](/docs/v14/user/manual/en/human-
resources/employment-type) such as Intern, Contract, Full-time, Part-time,
Probation, etc. for an Employee.
### 3.2 Create User
The User ID can be linked to the Employee. In case the User ID is not created,
you can click on 'Create a New User' in the dropdown to create one.
By clicking on the 'Create User Permission' checkbox, the Employee's access to
other records can be restricted. Check [Adding
Users](https://docs.erpnext.com/docs/v14/user/manual/en/setting-up/users-and-
permissions/adding-users) to learn how to create users and add permissions.
### 3.3 Joining Details
The Joining Details of the Employee such as the Offer Date, Confirmation Date,
Contract End Date, Notice (Days), and Date of Retirement can be captured.
### 3.4 Department and Grade
In a company, the Employees are usually grouped on the basis of
[Department](/docs/v14/user/manual/en/human-resources/department),
[Grade](/docs/v14/user/manual/en/human-resources/employee-grade),
[Designation](/docs/v14/user/manual/en/human-resources/designation), and
[Branch](/docs/v14/user/manual/en/human-resources/branch).
In the Department and Grade section, these details of the Employee can be
saved. In the 'Reports to' field, the person to whom the Employee has to
report his duties to can be captured.
### 3.5 Leave Details
In Leave Details, you can save the [Leave
Policy](/docs/v14/user/manual/en/human-resources/leave-policy) and [Holiday
List](/docs/v14/user/manual/en/human-resources/holiday-list) details. Leave
Policy specifies the type and number of leaves an Employee is entitled to, and
Holiday List is a list which contains the dates of holidays and weekly offs.
### 3.6 Salary Details
Here, the mode of salary payment, i.e. through Bank, Cheque or Cash can be
selected.
### 3.7 Contact Details
Employee's Contact information such as Mobile Number, Current and Permanent
Address, Personal and Company Email ID can be captured here. In the Preferred
Email ID field, either the the Company Email, Personal Email or User ID of the
Employee can be selected depending on the user's preference.
### 3.8 Personal Details
Personal Details of the Employee such as Family Background details like name
and occupation of parent, spouse and children, Passport Details including date
and place of issue, Health Details like height, weight, allergies, medical
concerns, etc. can be saved.
### 3.9 Educational Qualification
Here, the Educational Details such as School/University, Qualification, Level
and Year of Passing of the Employee can be saved as shown below:

Additionally, details such as Class/Percentage and Subjects can also be saved
by clicking on the downward arrow in the Education table.
### 3.10 Previous Work Experience
Just like Educational Qualification, an Employee's Previous Work Experience
can also be captured in the External Work History table as shown below:

Additionally, details such as Contact of the previous company and Total
Experience in years can also be saved in the External Work History table.
### 3.11 Exit
Exit details of the employee (if any) such as Resignation, Exit Interview and
[Leave Encashment](/docs/v14/user/manual/en/human-resources/leave-encashment)
details can be saved. When the status of the Employee is set to 'Left', it is
mandatory to fill the Relieving Date.
> **Note:** Once the Employee status is set to 'Left', that particular
> Employee master won't be accessible in further transactions.
### 3.12 Additional Features
Some additional features included in the Employee master are as follows:
* Emergency Contact
* Health Insurance
* Personal Bio
* History in the Company
## 3\. Related Topics
1. [Leave Management](/docs/v14/user/manual/en/human-resources/leave-management-intro)
2. [Payroll Management](/docs/v14/user/manual/en/human-resources/payroll-intro)
* * *
Previous Next
|
Employment Type | https://frappehr.com/docs/v14/en/employment-type | <div class="from-markdown ">
<div class="d-flex justify-content-between align-items-center">
<h1 class="wiki-title">Employment Type</h1>
<div class="dropdown wiki-options">
<div class="dropdown-toggle" type="button" role="button" id="wikiOptionsButton" data-toggle="dropdown" aria-label="Wiki Option Button" aria-expanded="false">
<svg xmlns="http://www.w3.org/2000/svg" width="16" height="16" viewbox="0 0 24 24" fill="none" stroke="currentColor" stroke-width="2" stroke-linecap="round" stroke-linejoin="round" class="feather feather-more-vertical">
<circle cx="12" cy="12" r="1"></circle>
<circle cx="12" cy="5" r="1"></circle>
<circle cx="12" cy="19" r="1"></circle>
</svg>
</div>
<div class="dropdown-menu d-print-none" aria-labelledby="wikiOptionsButton">
<a class="dropdown-item edit-wiki-btn" href="#">Edit Page</a>
<a class="dropdown-item add-wiki-btn" href="#">New Page</a>
<a class="dropdown-item show-revisions" href="#" data-toggle="modal" data-target="#revisionsModal">Revisions</a>
</div>
</div>
</div>
<div class="wiki-content">
<div><p><strong>You can employ people under a number of categories each having their own wage and leave entitlements. This is called an Employment Type.</strong></p><p>Frappe HR allows you to select an Employment Type from a pre-defined list or even create a new Employment Type based on your requirements.</p><p>To access the Employment Type, go to:</p><blockquote><p>Home > Human Resources > Employee > Employment Type</p></blockquote><h2>1. How to create an Employment Type</h2><ol><li><p>Go to the Employment Type list, click on New.</p></li><li><p>Enter the Name of the Employment Type.</p></li><li><p>Save.</p><p><img alt="Employment Type" src="/files/employment-type.png"></p></li></ol><p>The Employment Type can be linked to the <a href="/docs/v14/user/manual/en/human-resources/employee" rel="noopener noreferrer nofollow" target="_blank">Employee</a> master.</p><h2>2. Related Topics</h2><ol><li><p><a href="/docs/v14/user/manual/en/human-resources/employee" rel="noopener noreferrer nofollow" target="_blank">Employee</a></p></li><li><p><a href="/docs/v14/user/manual/en/human-resources/employment-type" rel="noopener noreferrer nofollow" target="_blank">Employment Type</a></p></li><li><p><a href="/docs/v14/user/manual/en/human-resources/branch" rel="noopener noreferrer nofollow" target="_blank">Branch</a></p></li><li><p><a href="/docs/v14/user/manual/en/human-resources/department" rel="noopener noreferrer nofollow" target="_blank">Department</a></p></li><li><p><a href="/docs/v14/user/manual/en/human-resources/designation" rel="noopener noreferrer nofollow" target="_blank">Designation</a></p></li><li><p><a href="/docs/v14/user/manual/en/human-resources/employee-grade" rel="noopener noreferrer nofollow" target="_blank">Employee Grade</a></p></li></ol></div>
</div>
<input value="ab48d9a971" class="d-none" name="wiki-page-name">
<div class="modal revisions-modal fade" id="revisionsModal" tabindex="-1" role="dialog" aria-labelledby="revisionsModalTitle" aria-hidden="true">
<div class="modal-dialog modal-dialog-centered" role="document">
<div class="modal-content">
<div class="modal-header">
<h5 class="modal-title revision-title" id="revisionsModalTitle">Employment Type</h5>
<button type="button" class="d-block d-sm-none close" data-dismiss="modal" aria-label="Close">
<span aria-hidden="true">×</span>
</button>
<span class="small text-muted revision-time">rucha_mahabal edited 1 year ago</span>
</div>
<div class="modal-body">
<div class="revision-content wiki-content">
<p><strong>You can employ people under a number of categories each having their own wage and leave entitlements. This is called an Employment Type.</strong></p>
<p>ERPNext allows you to select an Employment Type from a pre-defined list or even create a new Employment Type based on your requirements.</p>
<p>To access the Employment Type, go to:</p>
<blockquote>
<p>Home > Human Resources > Employee > Employment Type</p>
</blockquote>
<h2 id="1-how-to-create-an-employment-type">1. How to create an Employment Type</h2>
<ol>
<li>Go to the Employment Type list, click on New.</li>
<li>Enter the Name of the Employment Type.</li>
<li><p>Save.</p>
<p><img class="screenshot" alt="Employment Type" src="/files/employment-type.png"></p></li>
</ol>
<p>The Employment Type can be linked to the <a href="/docs/v14/user/manual/en/human-resources/employee">Employee</a> master.</p>
<h2 id="2-related-topics">2. Related Topics</h2>
<ol>
<li><a href="/docs/v14/user/manual/en/human-resources/employee">Employee</a></li>
<li><a href="/docs/v14/user/manual/en/human-resources/employment-type">Employment Type</a></li>
<li><a href="/docs/v14/user/manual/en/human-resources/branch">Branch</a></li>
<li><a href="/docs/v14/user/manual/en/human-resources/department">Department</a></li>
<li><a href="/docs/v14/user/manual/en/human-resources/designation">Designation</a></li>
<li><a href="/docs/v14/user/manual/en/human-resources/employee-grade">Employee Grade</a></li>
</ol>
</div>
</div>
<div class="modal-footer">
<button type="button" data-modal-button="previous" class="previous-revision btn btn-secondary btn-sm hide">Previous</button>
<button type="button" data-modal-button="next" class="next-revision btn btn-secondary btn-sm hide">Next</button>
</div>
</div>
</div>
</div>
</div> | Employment Type
You can employ people under a number of categories each having their own wage and leave entitlements. This is called an Employment Type.
Frappe HR allows you to select an Employment Type from a pre-defined list or even create a new Employment Type based on your requirements.
To access the Employment Type, go to:
Home > Human Resources > Employee > Employment Type
1. How to create an Employment Type
Go to the Employment Type list, click on New.
Enter the Name of the Employment Type.
Save.
The Employment Type can be linked to the Employee master.
2. Related Topics
Employee
Employment Type
Branch
Department
Designation
Employee Grade | # Employment Type
Edit Page New Page Revisions
**You can employ people under a number of categories each having their own
wage and leave entitlements. This is called an Employment Type.**
Frappe HR allows you to select an Employment Type from a pre-defined list or
even create a new Employment Type based on your requirements.
To access the Employment Type, go to:
> Home > Human Resources > Employee > Employment Type
## 1\. How to create an Employment Type
1. Go to the Employment Type list, click on New.
2. Enter the Name of the Employment Type.
3. Save.

The Employment Type can be linked to the
[Employee](/docs/v14/user/manual/en/human-resources/employee) master.
## 2\. Related Topics
1. [Employee](/docs/v14/user/manual/en/human-resources/employee)
2. [Employment Type](/docs/v14/user/manual/en/human-resources/employment-type)
3. [Branch](/docs/v14/user/manual/en/human-resources/branch)
4. [Department](/docs/v14/user/manual/en/human-resources/department)
5. [Designation](/docs/v14/user/manual/en/human-resources/designation)
6. [Employee Grade](/docs/v14/user/manual/en/human-resources/employee-grade)
##### Employment Type
× rucha_mahabal edited 1 year ago
**You can employ people under a number of categories each having their own
wage and leave entitlements. This is called an Employment Type.**
ERPNext allows you to select an Employment Type from a pre-defined list or
even create a new Employment Type based on your requirements.
To access the Employment Type, go to:
> Home > Human Resources > Employee > Employment Type
## 1\. How to create an Employment Type
1. Go to the Employment Type list, click on New.
2. Enter the Name of the Employment Type.
3. Save.

The Employment Type can be linked to the
[Employee](/docs/v14/user/manual/en/human-resources/employee) master.
## 2\. Related Topics
1. [Employee](/docs/v14/user/manual/en/human-resources/employee)
2. [Employment Type](/docs/v14/user/manual/en/human-resources/employment-type)
3. [Branch](/docs/v14/user/manual/en/human-resources/branch)
4. [Department](/docs/v14/user/manual/en/human-resources/department)
5. [Designation](/docs/v14/user/manual/en/human-resources/designation)
6. [Employee Grade](/docs/v14/user/manual/en/human-resources/employee-grade)
Previous Next
|
Branch | https://frappehr.com/docs/v14/en/branch | <div class="from-markdown ">
<div class="d-flex justify-content-between align-items-center">
<h1 class="wiki-title">Branch</h1>
<div class="dropdown wiki-options">
<div class="dropdown-toggle" type="button" role="button" id="wikiOptionsButton" data-toggle="dropdown" aria-label="Wiki Option Button" aria-expanded="false">
<svg xmlns="http://www.w3.org/2000/svg" width="16" height="16" viewbox="0 0 24 24" fill="none" stroke="currentColor" stroke-width="2" stroke-linecap="round" stroke-linejoin="round" class="feather feather-more-vertical">
<circle cx="12" cy="12" r="1"></circle>
<circle cx="12" cy="5" r="1"></circle>
<circle cx="12" cy="19" r="1"></circle>
</svg>
</div>
<div class="dropdown-menu d-print-none" aria-labelledby="wikiOptionsButton">
<a class="dropdown-item edit-wiki-btn" href="#">Edit Page</a>
<a class="dropdown-item add-wiki-btn" href="#">New Page</a>
<a class="dropdown-item show-revisions" href="#" data-toggle="modal" data-target="#revisionsModal">Revisions</a>
</div>
</div>
</div>
<div class="wiki-content">
<div><p><strong>A Branch office is an outlet of a company located at a different location, other than the main office.</strong></p><p>Frappe HR allows you to create and keep a record of the different branches of your organization.</p><p>To access Branch, go to:</p><blockquote><p>Home > Human Resources > Employee > Branch</p></blockquote><h2>1. Prerequisites</h2><p>Before creating a Branch, it is mandatory you create the following documents:</p><ul><li><p><a href="/docs/v14/user/manual/en/setting-up/company-setup" rel="noopener noreferrer nofollow" target="_blank">Company</a></p></li></ul><h2>2. How to create a Branch</h2><ol><li><p>Go to the Branch list, click on New.</p></li><li><p>Enter the name of the Branch.</p></li><li><p>Save.</p></li></ol><p><img alt="Branch" src="/files/branch.png"></p><p>You can link the Branch to the <a href="/docs/v14/user/manual/en/human-resources/employee" rel="noopener noreferrer nofollow" target="_blank">Employee</a> master.</p><h2>3. Related Topics</h2><ol><li><p><a href="/docs/v14/user/manual/en/human-resources/employee" rel="noopener noreferrer nofollow" target="_blank">Employee</a></p></li><li><p><a href="/docs/v14/user/manual/en/human-resources/employment-type" rel="noopener noreferrer nofollow" target="_blank">Employment Type</a></p></li><li><p><a href="/docs/v14/user/manual/en/human-resources/department" rel="noopener noreferrer nofollow" target="_blank">Department</a></p></li><li><p><a href="/docs/v14/user/manual/en/human-resources/designation" rel="noopener noreferrer nofollow" target="_blank">Designation</a></p></li><li><p><a href="/docs/v14/user/manual/en/human-resources/employee-grade" rel="noopener noreferrer nofollow" target="_blank">Employee Grade</a></p></li><li><p><a href="/docs/v14/user/manual/en/human-resources/employee-group" rel="noopener noreferrer nofollow" target="_blank">Employee Group</a></p></li></ol></div>
</div>
<input value="93ddd4474e" class="d-none" name="wiki-page-name">
<div class="modal revisions-modal fade" id="revisionsModal" tabindex="-1" role="dialog" aria-labelledby="revisionsModalTitle" aria-hidden="true">
<div class="modal-dialog modal-dialog-centered" role="document">
<div class="modal-content">
<div class="modal-header">
<h5 class="modal-title revision-title" id="revisionsModalTitle">Branch</h5>
<button type="button" class="d-block d-sm-none close" data-dismiss="modal" aria-label="Close">
<span aria-hidden="true">×</span>
</button>
<span class="small text-muted revision-time">rucha_mahabal edited 1 year ago</span>
</div>
<div class="modal-body">
<div class="revision-content wiki-content">
<p><strong>A Branch office is an outlet of a company located at a different location, other than the main office.</strong></p>
<p>ERPNext allows you to create and keep a record of the different branches of your organization.</p>
<p>To access Branch, go to:</p>
<blockquote>
<p>Home > Human Resources > Employee > Branch</p>
</blockquote>
<h2 id="1-prerequisites">1. Prerequisites</h2>
<p>Before creating a Branch, it is mandatory you create the following documents:</p>
<ul>
<li><a href="/docs/v14/user/manual/en/setting-up/company-setup">Company</a></li>
</ul>
<h2 id="2-how-to-create-a-branch">2. How to create a Branch</h2>
<ol>
<li>Go to the Branch list, click on New.</li>
<li>Enter the name of the Branch.</li>
<li>Save.</li>
</ol>
<p><img class="screenshot" alt="Branch" src="/files/branch.png"></p>
<p>You can link the Branch to the <a href="/docs/v14/user/manual/en/human-resources/employee">Employee</a> master.</p>
<h2 id="3-related-topics">3. Related Topics</h2>
<ol>
<li><a href="/docs/v14/user/manual/en/human-resources/employee">Employee</a></li>
<li><a href="/docs/v14/user/manual/en/human-resources/employment-type">Employment Type</a></li>
<li><a href="/docs/v14/user/manual/en/human-resources/department">Department</a></li>
<li><a href="/docs/v14/user/manual/en/human-resources/designation">Designation</a></li>
<li><a href="/docs/v14/user/manual/en/human-resources/employee-grade">Employee Grade</a></li>
<li><a href="/docs/v14/user/manual/en/human-resources/employee-group">Employee Group</a></li>
</ol>
</div>
</div>
<div class="modal-footer">
<button type="button" data-modal-button="previous" class="previous-revision btn btn-secondary btn-sm hide">Previous</button>
<button type="button" data-modal-button="next" class="next-revision btn btn-secondary btn-sm hide">Next</button>
</div>
</div>
</div>
</div>
</div> | Branch
A Branch office is an outlet of a company located at a different location, other than the main office.
Frappe HR allows you to create and keep a record of the different branches of your organization.
To access Branch, go to:
Home > Human Resources > Employee > Branch
1. Prerequisites
Before creating a Branch, it is mandatory you create the following documents:
Company
2. How to create a Branch
Go to the Branch list, click on New.
Enter the name of the Branch.
Save.
You can link the Branch to the Employee master.
3. Related Topics
Employee
Employment Type
Department
Designation
Employee Grade
Employee Group | # Branch
Edit Page New Page Revisions
**A Branch office is an outlet of a company located at a different location,
other than the main office.**
Frappe HR allows you to create and keep a record of the different branches of
your organization.
To access Branch, go to:
> Home > Human Resources > Employee > Branch
## 1\. Prerequisites
Before creating a Branch, it is mandatory you create the following documents:
* [Company](/docs/v14/user/manual/en/setting-up/company-setup)
## 2\. How to create a Branch
1. Go to the Branch list, click on New.
2. Enter the name of the Branch.
3. Save.

You can link the Branch to the [Employee](/docs/v14/user/manual/en/human-
resources/employee) master.
## 3\. Related Topics
1. [Employee](/docs/v14/user/manual/en/human-resources/employee)
2. [Employment Type](/docs/v14/user/manual/en/human-resources/employment-type)
3. [Department](/docs/v14/user/manual/en/human-resources/department)
4. [Designation](/docs/v14/user/manual/en/human-resources/designation)
5. [Employee Grade](/docs/v14/user/manual/en/human-resources/employee-grade)
6. [Employee Group](/docs/v14/user/manual/en/human-resources/employee-group)
##### Branch
× rucha_mahabal edited 1 year ago
**A Branch office is an outlet of a company located at a different location,
other than the main office.**
ERPNext allows you to create and keep a record of the different branches of
your organization.
To access Branch, go to:
> Home > Human Resources > Employee > Branch
## 1\. Prerequisites
Before creating a Branch, it is mandatory you create the following documents:
* [Company](/docs/v14/user/manual/en/setting-up/company-setup)
## 2\. How to create a Branch
1. Go to the Branch list, click on New.
2. Enter the name of the Branch.
3. Save.

You can link the Branch to the [Employee](/docs/v14/user/manual/en/human-
resources/employee) master.
## 3\. Related Topics
1. [Employee](/docs/v14/user/manual/en/human-resources/employee)
2. [Employment Type](/docs/v14/user/manual/en/human-resources/employment-type)
3. [Department](/docs/v14/user/manual/en/human-resources/department)
4. [Designation](/docs/v14/user/manual/en/human-resources/designation)
5. [Employee Grade](/docs/v14/user/manual/en/human-resources/employee-grade)
6. [Employee Group](/docs/v14/user/manual/en/human-resources/employee-group)
Previous Next
|
Department | https://frappehr.com/docs/v14/en/department | <div class="from-markdown ">
<div class="d-flex justify-content-between align-items-center">
<h1 class="wiki-title">Department</h1>
<div class="dropdown wiki-options">
<div class="dropdown-toggle" type="button" role="button" id="wikiOptionsButton" data-toggle="dropdown" aria-label="Wiki Option Button" aria-expanded="false">
<svg xmlns="http://www.w3.org/2000/svg" width="16" height="16" viewbox="0 0 24 24" fill="none" stroke="currentColor" stroke-width="2" stroke-linecap="round" stroke-linejoin="round" class="feather feather-more-vertical">
<circle cx="12" cy="12" r="1"></circle>
<circle cx="12" cy="5" r="1"></circle>
<circle cx="12" cy="19" r="1"></circle>
</svg>
</div>
<div class="dropdown-menu d-print-none" aria-labelledby="wikiOptionsButton">
<a class="dropdown-item edit-wiki-btn" href="#">Edit Page</a>
<a class="dropdown-item add-wiki-btn" href="#">New Page</a>
<a class="dropdown-item show-revisions" href="#" data-toggle="modal" data-target="#revisionsModal">Revisions</a>
</div>
</div>
</div>
<div class="wiki-content">
<div><p><strong>A Department is a specialized functional area or a division within an organization.</strong></p><p>You can configure the Departments in your organization, set Leave Block List, and also Leave and Expense Approvers for the same.</p><p>To access Department, go to:</p><p>> Home > Human Resources > Employee > Department</p><p>Department is a tree-structured master, which means you can create parent departments and sub-departments as shown below:</p><p><img alt="Department Tree" src="/files/department-tree.png"></p><p>> <strong>Note:</strong> The 'Is Group' checkbox needs to be checked if the Department is a parent department.</p><h2>1. Prerequisites</h2><p>Before creating a Department, it is advisable you create the following documents:</p><ul><li><p><a href="/docs/v14/user/manual/en/setting-up/company-setup" rel="noopener noreferrer nofollow" target="_blank">Company</a></p></li></ul><h2>2. How to create a Department</h2><ol><li><p>Go to the Department list, click on New.</p></li><li><p>Enter Department name.</p></li><li><p>Select Company name.</p></li><li><p>Select Leave Block List (optional) applicable for this department.</p></li><li><p>Save.</p><p><img alt="Department" src="/files/department.png"></p></li></ol><h2>3. Features</h2><h3>3.1 Leave and Expense Approvers</h3><p>You can set Leave and Expense Approvers for a particular Department in the 'Leave Approver' and 'Expense Approver' table respectively.</p><p><img alt="Leave and Expense Approver" src="/files/leave-and-expense.png"></p><p>> <strong>Note:</strong> Multiple Leave and Expense Approvers can be set for a particular Department. However, the first Approver in the list will be set as the default Approver.</p><h2>4. Related Topics</h2><ol><li><p><a href="/docs/v14/user/manual/en/human-resources/employment-type" rel="noopener noreferrer nofollow" target="_blank">Employment Type</a></p></li><li><p><a href="/docs/v14/user/manual/en/human-resources/employee-grade" rel="noopener noreferrer nofollow" target="_blank">Employee Grade</a></p></li><li><p><a href="/docs/v14/user/manual/en/human-resources/branch" rel="noopener noreferrer nofollow" target="_blank">Employee Branch</a></p></li><li><p><a href="/docs/v14/user/manual/en/human-resources/designation" rel="noopener noreferrer nofollow" target="_blank">Employee Designation</a></p></li></ol></div>
</div>
<input value="c81bc7266d" class="d-none" name="wiki-page-name">
<div class="modal revisions-modal fade" id="revisionsModal" tabindex="-1" role="dialog" aria-labelledby="revisionsModalTitle" aria-hidden="true">
<div class="modal-dialog modal-dialog-centered" role="document">
<div class="modal-content">
<div class="modal-header">
<h5 class="modal-title revision-title" id="revisionsModalTitle">Department</h5>
<button type="button" class="d-block d-sm-none close" data-dismiss="modal" aria-label="Close">
<span aria-hidden="true">×</span>
</button>
<span class="small text-muted revision-time">rucha_mahabal edited 10 months ago</span>
</div>
<div class="modal-body">
<div class="revision-content wiki-content">
<p><strong>A Department is a specialized functional area or a division within an organization.</strong></p>
<p>You can configure the Departments in your organization, set Leave Block List, and also Leave and Expense Approvers for the same.</p>
<p>To access Department, go to:</p>
<blockquote>
<p>Home > Human Resources > Employee > Department</p>
</blockquote>
<p>Department is a tree-structured master, which means you can create parent departments and sub-departments as shown below:</p>
<p><img class="screenshot" alt="Department Tree" src="/files/department-tree.png"></p>
<blockquote>
<p><strong>Note:</strong> The 'Is Group' checkbox needs to be checked if the Department is a parent department.</p>
</blockquote>
<h2 id="1-prerequisites">1. Prerequisites</h2>
<p>Before creating a Department, it is advisable you create the following documents:</p>
<ul>
<li><a href="/docs/v14/user/manual/en/setting-up/company-setup">Company</a></li>
<li><a href="/docs/v14/user/manual/en/human-resources/leave-block-list">Leave Block List</a></li>
</ul>
<h2 id="2-how-to-create-a-department">2. How to create a Department</h2>
<ol>
<li>Go to the Department list, click on New.</li>
<li>Enter Department name.</li>
<li>Select Company name.</li>
<li>Select Leave Block List (optional) applicable for this department.</li>
<li><p>Save.</p>
<p><img class="screenshot" alt="Department" src="/files/department.png"></p></li>
</ol>
<h2 id="3-features">3. Features</h2>
<h3 id="31-leave-and-expense-approvers">3.1 Leave and Expense Approvers</h3>
<p>You can set Leave and Expense Approvers for a particular Department in the 'Leave Approver' and 'Expense Approver' table respectively.</p>
<p><img class="screenshot" alt="Leave and Expense Approver" src="/files/leave-and-expense.png"></p>
<blockquote>
<p><strong>Note:</strong> Multiple Leave and Expense Approvers can be set for a particular Department. However, the first Approver in the list will be set as the default Approver.</p>
</blockquote>
<h2 id="4-related-topics">4. Related Topics</h2>
<ol>
<li><a href="/docs/v14/user/manual/en/human-resources/employment-type">Employment Type</a></li>
<li><a href="/docs/v14/user/manual/en/human-resources/employee-grade">Employee Grade</a></li>
<li><a href="/docs/v14/user/manual/en/human-resources/branch">Employee Branch</a></li>
<li><a href="/docs/v14/user/manual/en/human-resources/designation">Employee Designation</a></li>
</ol>
</div>
</div>
<div class="modal-footer">
<button type="button" data-modal-button="previous" class="previous-revision btn btn-secondary btn-sm hide">Previous</button>
<button type="button" data-modal-button="next" class="next-revision btn btn-secondary btn-sm hide">Next</button>
</div>
</div>
</div>
</div>
</div> | Department
A Department is a specialized functional area or a division within an organization.
You can configure the Departments in your organization, set Leave Block List, and also Leave and Expense Approvers for the same.
To access Department, go to:
> Home > Human Resources > Employee > Department
Department is a tree-structured master, which means you can create parent departments and sub-departments as shown below:
> Note: The 'Is Group' checkbox needs to be checked if the Department is a parent department.
1. Prerequisites
Before creating a Department, it is advisable you create the following documents:
Company
2. How to create a Department
Go to the Department list, click on New.
Enter Department name.
Select Company name.
Select Leave Block List (optional) applicable for this department.
Save.
3. Features
3.1 Leave and Expense Approvers
You can set Leave and Expense Approvers for a particular Department in the 'Leave Approver' and 'Expense Approver' table respectively.
> Note: Multiple Leave and Expense Approvers can be set for a particular Department. However, the first Approver in the list will be set as the default Approver.
4. Related Topics
Employment Type
Employee Grade
Employee Branch
Employee Designation | # Department
Edit Page New Page Revisions
**A Department is a specialized functional area or a division within an
organization.**
You can configure the Departments in your organization, set Leave Block List,
and also Leave and Expense Approvers for the same.
To access Department, go to:
> Home > Human Resources > Employee > Department
Department is a tree-structured master, which means you can create parent
departments and sub-departments as shown below:

> **Note:** The 'Is Group' checkbox needs to be checked if the Department is a
> parent department.
## 1\. Prerequisites
Before creating a Department, it is advisable you create the following
documents:
* [Company](/docs/v14/user/manual/en/setting-up/company-setup)
## 2\. How to create a Department
1. Go to the Department list, click on New.
2. Enter Department name.
3. Select Company name.
4. Select Leave Block List (optional) applicable for this department.
5. Save.

## 3\. Features
### 3.1 Leave and Expense Approvers
You can set Leave and Expense Approvers for a particular Department in the
'Leave Approver' and 'Expense Approver' table respectively.

> **Note:** Multiple Leave and Expense Approvers can be set for a particular
> Department. However, the first Approver in the list will be set as the
> default Approver.
## 4\. Related Topics
1. [Employment Type](/docs/v14/user/manual/en/human-resources/employment-type)
2. [Employee Grade](/docs/v14/user/manual/en/human-resources/employee-grade)
3. [Employee Branch](/docs/v14/user/manual/en/human-resources/branch)
4. [Employee Designation](/docs/v14/user/manual/en/human-resources/designation)
##### Department
× rucha_mahabal edited 10 months ago
**A Department is a specialized functional area or a division within an
organization.**
You can configure the Departments in your organization, set Leave Block List,
and also Leave and Expense Approvers for the same.
To access Department, go to:
> Home > Human Resources > Employee > Department
Department is a tree-structured master, which means you can create parent
departments and sub-departments as shown below:

> **Note:** The 'Is Group' checkbox needs to be checked if the Department is a
> parent department.
## 1\. Prerequisites
Before creating a Department, it is advisable you create the following
documents:
* [Company](/docs/v14/user/manual/en/setting-up/company-setup)
* [Leave Block List](/docs/v14/user/manual/en/human-resources/leave-block-list)
## 2\. How to create a Department
1. Go to the Department list, click on New.
2. Enter Department name.
3. Select Company name.
4. Select Leave Block List (optional) applicable for this department.
5. Save.

## 3\. Features
### 3.1 Leave and Expense Approvers
You can set Leave and Expense Approvers for a particular Department in the
'Leave Approver' and 'Expense Approver' table respectively.

> **Note:** Multiple Leave and Expense Approvers can be set for a particular
> Department. However, the first Approver in the list will be set as the
> default Approver.
## 4\. Related Topics
1. [Employment Type](/docs/v14/user/manual/en/human-resources/employment-type)
2. [Employee Grade](/docs/v14/user/manual/en/human-resources/employee-grade)
3. [Employee Branch](/docs/v14/user/manual/en/human-resources/branch)
4. [Employee Designation](/docs/v14/user/manual/en/human-resources/designation)
Previous Next
|
Designation | https://frappehr.com/docs/v14/en/designation | <div class="from-markdown ">
<div class="d-flex justify-content-between align-items-center">
<h1 class="wiki-title">Designation</h1>
<div class="dropdown wiki-options">
<div class="dropdown-toggle" type="button" role="button" id="wikiOptionsButton" data-toggle="dropdown" aria-label="Wiki Option Button" aria-expanded="false">
<svg xmlns="http://www.w3.org/2000/svg" width="16" height="16" viewbox="0 0 24 24" fill="none" stroke="currentColor" stroke-width="2" stroke-linecap="round" stroke-linejoin="round" class="feather feather-more-vertical">
<circle cx="12" cy="12" r="1"></circle>
<circle cx="12" cy="5" r="1"></circle>
<circle cx="12" cy="19" r="1"></circle>
</svg>
</div>
<div class="dropdown-menu d-print-none" aria-labelledby="wikiOptionsButton">
<a class="dropdown-item edit-wiki-btn" href="#">Edit Page</a>
<a class="dropdown-item add-wiki-btn" href="#">New Page</a>
<a class="dropdown-item show-revisions" href="#" data-toggle="modal" data-target="#revisionsModal">Revisions</a>
</div>
</div>
</div>
<div class="wiki-content">
<div><p><strong>Designations are the official job titles given to employees.</strong></p><p>With reference to company management, there are various stakeholders like directors, officers, managers and shareholders who guide a company towards the fulfillment of its business objectives.</p><p>Frappe HR allows you to create various designations and also mention the skills required for the same.</p><p>To access Designation, go to:</p><blockquote><p>Home > Human Resources > Employee > Designation</p></blockquote><h2>1. How to create a Designation</h2><ol><li><p>Go to Designation list, click on New.</p></li><li><p>Enter the Designation name.</p></li><li><p>Enter Description and Required Skills (optional).</p></li><li><p>Save.</p><p><img alt="Designation" src="/files/designation.png"></p></li></ol><blockquote><p><strong>Note:</strong> The skills required for an Employee of a particular Designation that are specified in the "Required Skills" section of the Designation doctype can be directly fetched in the <a href="/docs/v14/user/manual/en/human-resources/employee_skill_map" rel="noopener noreferrer nofollow" target="_blank">Employee Skill Map</a> to evaluate an employee's performance based on his skills.</p></blockquote><h2>3. Related Topics</h2><ol><li><p><a href="/docs/v14/user/manual/en/human-resources/employee" rel="noopener noreferrer nofollow" target="_blank">Employee</a></p></li><li><p><a href="/docs/v14/user/manual/en/human-resources/employment-type" rel="noopener noreferrer nofollow" target="_blank">Employment Type</a></p></li><li><p><a href="/docs/v14/user/manual/en/human-resources/branch" rel="noopener noreferrer nofollow" target="_blank">Branch</a></p></li><li><p><a href="/docs/v14/user/manual/en/human-resources/department" rel="noopener noreferrer nofollow" target="_blank">Department</a></p></li><li><p><a href="/docs/v14/user/manual/en/human-resources/employee-grade" rel="noopener noreferrer nofollow" target="_blank">Employee Grade</a></p></li><li><p><a href="/docs/v14/user/manual/en/human-resources/employee_skill_map" rel="noopener noreferrer nofollow" target="_blank">Employee Skill Map</a></p></li></ol></div>
</div>
<input value="10db3b52d1" class="d-none" name="wiki-page-name">
<div class="modal revisions-modal fade" id="revisionsModal" tabindex="-1" role="dialog" aria-labelledby="revisionsModalTitle" aria-hidden="true">
<div class="modal-dialog modal-dialog-centered" role="document">
<div class="modal-content">
<div class="modal-header">
<h5 class="modal-title revision-title" id="revisionsModalTitle">Designation</h5>
<button type="button" class="d-block d-sm-none close" data-dismiss="modal" aria-label="Close">
<span aria-hidden="true">×</span>
</button>
<span class="small text-muted revision-time">rucha_mahabal edited 1 year ago</span>
</div>
<div class="modal-body">
<div class="revision-content wiki-content">
<p><strong>Designations are the official job titles given to employees.</strong></p>
<p>With reference to company management, there are various stakeholders like directors, officers, managers and shareholders who guide a company towards the fulfillment of its business objectives.</p>
<p>ERPNext allows you to create various designations and also mention the skills required for the same.</p>
<p>To access Designation, go to:</p>
<blockquote>
<p>Home > Human Resources > Employee > Designation</p>
</blockquote>
<h2 id="1-how-to-create-a-designation">1. How to create a Designation</h2>
<ol>
<li>Go to Designation list, click on New.</li>
<li>Enter the Designation name.</li>
<li>Enter Description and Required Skills (optional).</li>
<li><p>Save.</p>
<p><img class="screenshot" alt="Designation" src="/files/designation.png"></p></li>
</ol>
<blockquote>
<p><strong>Note:</strong> The skills required for an Employee of a particular Designation that are specified in the "Required Skills" section of the Designation doctype can be directly fetched in the <a href="/docs/v14/user/manual/en/human-resources/employee_skill_map">Employee Skill Map</a> to evaluate an employee's performance based on his skills.</p>
</blockquote>
<h2 id="3-related-topics">3. Related Topics</h2>
<ol>
<li><a href="/docs/v14/user/manual/en/human-resources/employee">Employee</a></li>
<li><a href="/docs/v14/user/manual/en/human-resources/employment-type">Employment Type</a></li>
<li><a href="/docs/v14/user/manual/en/human-resources/branch">Branch</a></li>
<li><a href="/docs/v14/user/manual/en/human-resources/department">Department</a></li>
<li><a href="/docs/v14/user/manual/en/human-resources/employee-grade">Employee Grade</a></li>
<li><a href="/docs/v14/user/manual/en/human-resources/employee_skill_map">Employee Skill Map</a></li>
</ol>
</div>
</div>
<div class="modal-footer">
<button type="button" data-modal-button="previous" class="previous-revision btn btn-secondary btn-sm hide">Previous</button>
<button type="button" data-modal-button="next" class="next-revision btn btn-secondary btn-sm hide">Next</button>
</div>
</div>
</div>
</div>
</div> | Designation
Designations are the official job titles given to employees.
With reference to company management, there are various stakeholders like directors, officers, managers and shareholders who guide a company towards the fulfillment of its business objectives.
Frappe HR allows you to create various designations and also mention the skills required for the same.
To access Designation, go to:
Home > Human Resources > Employee > Designation
1. How to create a Designation
Go to Designation list, click on New.
Enter the Designation name.
Enter Description and Required Skills (optional).
Save.
Note: The skills required for an Employee of a particular Designation that are specified in the "Required Skills" section of the Designation doctype can be directly fetched in the Employee Skill Map to evaluate an employee's performance based on his skills.
3. Related Topics
Employee
Employment Type
Branch
Department
Employee Grade
Employee Skill Map | # Designation
Edit Page New Page Revisions
**Designations are the official job titles given to employees.**
With reference to company management, there are various stakeholders like
directors, officers, managers and shareholders who guide a company towards the
fulfillment of its business objectives.
Frappe HR allows you to create various designations and also mention the
skills required for the same.
To access Designation, go to:
> Home > Human Resources > Employee > Designation
## 1\. How to create a Designation
1. Go to Designation list, click on New.
2. Enter the Designation name.
3. Enter Description and Required Skills (optional).
4. Save.

> **Note:** The skills required for an Employee of a particular Designation
> that are specified in the "Required Skills" section of the Designation
> doctype can be directly fetched in the [Employee Skill
> Map](/docs/v14/user/manual/en/human-resources/employee_skill_map) to
> evaluate an employee's performance based on his skills.
## 3\. Related Topics
1. [Employee](/docs/v14/user/manual/en/human-resources/employee)
2. [Employment Type](/docs/v14/user/manual/en/human-resources/employment-type)
3. [Branch](/docs/v14/user/manual/en/human-resources/branch)
4. [Department](/docs/v14/user/manual/en/human-resources/department)
5. [Employee Grade](/docs/v14/user/manual/en/human-resources/employee-grade)
6. [Employee Skill Map](/docs/v14/user/manual/en/human-resources/employee_skill_map)
##### Designation
× rucha_mahabal edited 1 year ago
**Designations are the official job titles given to employees.**
With reference to company management, there are various stakeholders like
directors, officers, managers and shareholders who guide a company towards the
fulfillment of its business objectives.
ERPNext allows you to create various designations and also mention the skills
required for the same.
To access Designation, go to:
> Home > Human Resources > Employee > Designation
## 1\. How to create a Designation
1. Go to Designation list, click on New.
2. Enter the Designation name.
3. Enter Description and Required Skills (optional).
4. Save.

> **Note:** The skills required for an Employee of a particular Designation
> that are specified in the "Required Skills" section of the Designation
> doctype can be directly fetched in the [Employee Skill
> Map](/docs/v14/user/manual/en/human-resources/employee_skill_map) to
> evaluate an employee's performance based on his skills.
## 3\. Related Topics
1. [Employee](/docs/v14/user/manual/en/human-resources/employee)
2. [Employment Type](/docs/v14/user/manual/en/human-resources/employment-type)
3. [Branch](/docs/v14/user/manual/en/human-resources/branch)
4. [Department](/docs/v14/user/manual/en/human-resources/department)
5. [Employee Grade](/docs/v14/user/manual/en/human-resources/employee-grade)
6. [Employee Skill Map](/docs/v14/user/manual/en/human-resources/employee_skill_map)
Previous Next
|
Employee Grade | https://frappehr.com/docs/v14/en/employee-grade | <div class="from-markdown ">
<div class="d-flex justify-content-between align-items-center">
<h1 class="wiki-title">Employee Grade</h1>
<div class="dropdown wiki-options">
<div class="dropdown-toggle" type="button" role="button" id="wikiOptionsButton" data-toggle="dropdown" aria-label="Wiki Option Button" aria-expanded="false">
<svg xmlns="http://www.w3.org/2000/svg" width="16" height="16" viewbox="0 0 24 24" fill="none" stroke="currentColor" stroke-width="2" stroke-linecap="round" stroke-linejoin="round" class="feather feather-more-vertical">
<circle cx="12" cy="12" r="1"></circle>
<circle cx="12" cy="5" r="1"></circle>
<circle cx="12" cy="19" r="1"></circle>
</svg>
</div>
<div class="dropdown-menu d-print-none" aria-labelledby="wikiOptionsButton">
<a class="dropdown-item edit-wiki-btn" href="#">Edit Page</a>
<a class="dropdown-item add-wiki-btn" href="#">New Page</a>
<a class="dropdown-item show-revisions" href="#" data-toggle="modal" data-target="#revisionsModal">Revisions</a>
</div>
</div>
</div>
<div class="wiki-content">
<div><p><strong>An Employee Grade is a grouping of employees with similar positions or values in order to assign compensation rates and salary structures.</strong></p><p>Frappe HR allows you to configure Employee Grades, helping you to easily categorize employees based on seniority or any other criteria.</p><p>Employee Grade also helps you fetch Employee records in bulk based on their grades while processing payroll, allocating leaves, etc.</p><p>To access Employee Grade, go to:</p><blockquote><p>Home > Human Resources > Employee > Employee Grade</p></blockquote><h2>1. Prerequisites</h2><p>Before creating an Employee Grade, it is advisable you create the following documents:</p><ul><li><p><a href="/docs/v14/user/manual/en/human-resources/leave-policy" rel="noopener noreferrer nofollow" target="_blank">Leave Policy</a></p></li><li><p><a href="/docs/v14/user/manual/en/human-resources/salary-structure" rel="noopener noreferrer nofollow" target="_blank">Salary Structure</a></p></li></ul><h2>2. How to create an Employee Grade</h2><ol><li><p>Go to Employee Grade list, click on New.</p></li><li><p>Enter the Name of the Employee Grade.</p></li><li><p>Enter the Default <a href="/docs/v14/user/manual/en/human-resources/leave-policy" rel="noopener noreferrer nofollow" target="_blank">Leave Policy</a> and Default <a href="/docs/v14/user/manual/en/human-resources/salary-structure" rel="noopener noreferrer nofollow" target="_blank">Salary Structure</a> for that Grade.</p></li><li><p>Save.</p><p><img alt="Employee Grade" src="/files/employee-grade.png"></p></li></ol><p>Shown below are the different Employee Grades created.</p><p><img alt="New Employee Grade" src="/files/employee-grade1.png"></p><p>You also can access <a href="/docs/v14/user/manual/en/human-resources/employee" rel="noopener noreferrer nofollow" target="_blank">Employee</a>, <a href="/docs/v14/user/manual/en/human-resources/leave-type" rel="noopener noreferrer nofollow" target="_blank">Leave Period</a>, <a href="/docs/v14/user/manual/en/human-resources/employee-onboarding" rel="noopener noreferrer nofollow" target="_blank">Employee Onboarding Template</a> and <a href="/docs/v14/user/manual/en/human-resources/employee-separation" rel="noopener noreferrer nofollow" target="_blank">Employee Separation Template</a>.</p><h2>3. Related Topics</h2><ol><li><p><a href="/docs/v14/user/manual/en/human-resources/leave-type" rel="noopener noreferrer nofollow" target="_blank">Leave Type</a></p></li></ol></div>
</div>
<input value="0b273932b3" class="d-none" name="wiki-page-name">
<div class="modal revisions-modal fade" id="revisionsModal" tabindex="-1" role="dialog" aria-labelledby="revisionsModalTitle" aria-hidden="true">
<div class="modal-dialog modal-dialog-centered" role="document">
<div class="modal-content">
<div class="modal-header">
<h5 class="modal-title revision-title" id="revisionsModalTitle">Employee Grade</h5>
<button type="button" class="d-block d-sm-none close" data-dismiss="modal" aria-label="Close">
<span aria-hidden="true">×</span>
</button>
<span class="small text-muted revision-time">rucha_mahabal edited 1 year ago</span>
</div>
<div class="modal-body">
<div class="revision-content wiki-content">
<p><strong>An Employee Grade is a grouping of the employees with similar positions or values in order to assign compensation rates and salary structures.</strong></p>
<p>ERPNext allows you to configure Employee Grades, helping you to easily categorize employees based on seniority or any other criteria.</p>
<p>Employee Grade also helps you fetch Employee records in bulk based on their grades while processing payroll, allocating leaves, etc.</p>
<p>To access Employee Grade, go to:</p>
<blockquote>
<p>Home > Human Resources > Employee > Employee Grade</p>
</blockquote>
<h2 id="1-prerequisites">1. Prerequisites</h2>
<p>Before creating an Employee Grade, it is advisable you create the following documents:</p>
<ul>
<li><a href="/docs/v14/user/manual/en/human-resources/leave-policy">Leave Policy</a></li>
<li><a href="/docs/v14/user/manual/en/human-resources/salary-structure">Salary Structure</a></li>
</ul>
<h2 id="2-how-to-create-an-employee-grade">2. How to create an Employee Grade</h2>
<ol>
<li>Go to Employee Grade list, click on New.</li>
<li>Enter the Name of the Employee Grade.</li>
<li>Enter the Default <a href="/docs/v14/user/manual/en/human-resources/leave-policy">Leave Policy</a> and Default <a href="/docs/v14/user/manual/en/human-resources/salary-structure">Salary Structure</a> for that Grade.</li>
<li><p>Save.</p>
<p><img class="screenshot" alt="Employee Grade" src="/files/employee-grade.png"></p></li>
</ol>
<p>Shown below are the different Employee Grades created.</p>
<p><img class="screenshot" alt="New Employee Grade" src="/files/employee-grade1.png"></p>
<p>You also can access <a href="/docs/v14/user/manual/en/human-resources/employee">Employee</a>, <a href="/docs/v14/user/manual/en/human-resources/leave-type">Leave Period</a>, <a href="/docs/v14/user/manual/en/human-resources/employee-onboarding">Employee Onboarding Template</a> and <a href="/docs/v14/user/manual/en/human-resources/employee-separation">Employee Separation Template</a>.</p>
<h2 id="3-related-topics">3. Related Topics</h2>
<ol>
<li><a href="/docs/v14/user/manual/en/human-resources/leave-type">Leave Type</a></li>
</ol>
</div>
</div>
<div class="modal-footer">
<button type="button" data-modal-button="previous" class="previous-revision btn btn-secondary btn-sm hide">Previous</button>
<button type="button" data-modal-button="next" class="next-revision btn btn-secondary btn-sm hide">Next</button>
</div>
</div>
</div>
</div>
</div> | Employee Grade
An Employee Grade is a grouping of employees with similar positions or values in order to assign compensation rates and salary structures.
Frappe HR allows you to configure Employee Grades, helping you to easily categorize employees based on seniority or any other criteria.
Employee Grade also helps you fetch Employee records in bulk based on their grades while processing payroll, allocating leaves, etc.
To access Employee Grade, go to:
Home > Human Resources > Employee > Employee Grade
1. Prerequisites
Before creating an Employee Grade, it is advisable you create the following documents:
Leave Policy
Salary Structure
2. How to create an Employee Grade
Go to Employee Grade list, click on New.
Enter the Name of the Employee Grade.
Enter the Default Leave Policy and Default Salary Structure for that Grade.
Save.
Shown below are the different Employee Grades created.
You also can access Employee, Leave Period, Employee Onboarding Template and Employee Separation Template.
3. Related Topics
Leave Type | # Employee Grade
Edit Page New Page Revisions
**An Employee Grade is a grouping of employees with similar positions or
values in order to assign compensation rates and salary structures.**
Frappe HR allows you to configure Employee Grades, helping you to easily
categorize employees based on seniority or any other criteria.
Employee Grade also helps you fetch Employee records in bulk based on their
grades while processing payroll, allocating leaves, etc.
To access Employee Grade, go to:
> Home > Human Resources > Employee > Employee Grade
## 1\. Prerequisites
Before creating an Employee Grade, it is advisable you create the following
documents:
* [Leave Policy](/docs/v14/user/manual/en/human-resources/leave-policy)
* [Salary Structure](/docs/v14/user/manual/en/human-resources/salary-structure)
## 2\. How to create an Employee Grade
1. Go to Employee Grade list, click on New.
2. Enter the Name of the Employee Grade.
3. Enter the Default [Leave Policy](/docs/v14/user/manual/en/human-resources/leave-policy) and Default [Salary Structure](/docs/v14/user/manual/en/human-resources/salary-structure) for that Grade.
4. Save.

Shown below are the different Employee Grades created.

You also can access [Employee](/docs/v14/user/manual/en/human-
resources/employee), [Leave Period](/docs/v14/user/manual/en/human-
resources/leave-type), [Employee Onboarding
Template](/docs/v14/user/manual/en/human-resources/employee-onboarding) and
[Employee Separation Template](/docs/v14/user/manual/en/human-
resources/employee-separation).
## 3\. Related Topics
1. [Leave Type](/docs/v14/user/manual/en/human-resources/leave-type)
##### Employee Grade
× rucha_mahabal edited 1 year ago
**An Employee Grade is a grouping of the employees with similar positions or
values in order to assign compensation rates and salary structures.**
ERPNext allows you to configure Employee Grades, helping you to easily
categorize employees based on seniority or any other criteria.
Employee Grade also helps you fetch Employee records in bulk based on their
grades while processing payroll, allocating leaves, etc.
To access Employee Grade, go to:
> Home > Human Resources > Employee > Employee Grade
## 1\. Prerequisites
Before creating an Employee Grade, it is advisable you create the following
documents:
* [Leave Policy](/docs/v14/user/manual/en/human-resources/leave-policy)
* [Salary Structure](/docs/v14/user/manual/en/human-resources/salary-structure)
## 2\. How to create an Employee Grade
1. Go to Employee Grade list, click on New.
2. Enter the Name of the Employee Grade.
3. Enter the Default [Leave Policy](/docs/v14/user/manual/en/human-resources/leave-policy) and Default [Salary Structure](/docs/v14/user/manual/en/human-resources/salary-structure) for that Grade.
4. Save.

Shown below are the different Employee Grades created.

You also can access [Employee](/docs/v14/user/manual/en/human-
resources/employee), [Leave Period](/docs/v14/user/manual/en/human-
resources/leave-type), [Employee Onboarding
Template](/docs/v14/user/manual/en/human-resources/employee-onboarding) and
[Employee Separation Template](/docs/v14/user/manual/en/human-
resources/employee-separation).
## 3\. Related Topics
1. [Leave Type](/docs/v14/user/manual/en/human-resources/leave-type)
Previous Next
|
Employee Group | https://frappehr.com/docs/v14/en/employee-group | <div class="from-markdown ">
<div class="d-flex justify-content-between align-items-center">
<h1 class="wiki-title">Employee Group</h1>
<div class="dropdown wiki-options">
<div class="dropdown-toggle" type="button" role="button" id="wikiOptionsButton" data-toggle="dropdown" aria-label="Wiki Option Button" aria-expanded="false">
<svg xmlns="http://www.w3.org/2000/svg" width="16" height="16" viewbox="0 0 24 24" fill="none" stroke="currentColor" stroke-width="2" stroke-linecap="round" stroke-linejoin="round" class="feather feather-more-vertical">
<circle cx="12" cy="12" r="1"></circle>
<circle cx="12" cy="5" r="1"></circle>
<circle cx="12" cy="19" r="1"></circle>
</svg>
</div>
<div class="dropdown-menu d-print-none" aria-labelledby="wikiOptionsButton">
<a class="dropdown-item edit-wiki-btn" href="#">Edit Page</a>
<a class="dropdown-item add-wiki-btn" href="#">New Page</a>
<a class="dropdown-item show-revisions" href="#" data-toggle="modal" data-target="#revisionsModal">Revisions</a>
</div>
</div>
</div>
<div class="wiki-content">
<div><p><strong>Employee Group is grouping of Employees based on some attributes such as Designation, Grade, Branch, etc.</strong></p><p>To access Employee Group, go to:</p><blockquote><p>Home > Human Resources > Employee > Employee Group</p></blockquote><h2>1. Prerequisites</h2><p>Before creating an Employee Group, it is advisable you create the following documents:</p><ul><li><p><a href="/docs/v14/user/manual/en/human-resources/employee" rel="noopener noreferrer nofollow" target="_blank">Employee</a></p></li></ul><h2>2. How to create an Employee Group</h2><ol><li><p>Go to Employee Group list, click on New.</p></li><li><p>Enter the Name.</p></li><li><p>Select and add Employee ID to the group. The Employee Name will get automatically fetched.</p></li><li><p>Save.</p><p><img alt="Employee Group" src="/files/employee-group.png"></p></li></ol><h2>3. Features</h2><h3>3.1 Service Level Agreement</h3><p>An Employee Group can be added to the <a href="https://docs.erpnext.com/docs/v14/user/manual/en/support/service-level-agreement" rel="noopener noreferrer nofollow" target="_blank">Service Level Agreement</a> doctype, where the Service Level can be specified for a particular Employee Group.</p><h2>4. Related Topics</h2><ol><li><p><a href="/docs/v14/user/manual/en/human-resources/employment-type" rel="noopener noreferrer nofollow" target="_blank">Employment Type</a></p></li><li><p><a href="/docs/v14/user/manual/en/human-resources/branch" rel="noopener noreferrer nofollow" target="_blank">Branch</a></p></li><li><p><a href="/docs/v14/user/manual/en/human-resources/department" rel="noopener noreferrer nofollow" target="_blank">Department</a></p></li><li><p><a href="/docs/v14/user/manual/en/human-resources/designation" rel="noopener noreferrer nofollow" target="_blank">Designation</a></p></li><li><p><a href="/docs/v14/user/manual/en/human-resources/employee-grade" rel="noopener noreferrer nofollow" target="_blank">Employee Grade</a></p></li></ol></div>
</div>
<input value="272daf3517" class="d-none" name="wiki-page-name">
<div class="modal revisions-modal fade" id="revisionsModal" tabindex="-1" role="dialog" aria-labelledby="revisionsModalTitle" aria-hidden="true">
<div class="modal-dialog modal-dialog-centered" role="document">
<div class="modal-content">
<div class="modal-header">
<h5 class="modal-title revision-title" id="revisionsModalTitle">Employee Group</h5>
<button type="button" class="d-block d-sm-none close" data-dismiss="modal" aria-label="Close">
<span aria-hidden="true">×</span>
</button>
<span class="small text-muted revision-time">rucha_mahabal edited 1 year ago</span>
</div>
<div class="modal-body">
<div class="revision-content wiki-content">
<p><strong>Employee Group is grouping of Employees based on some attributes such as Designation, Grade, Branch, etc.</strong></p>
<p>To access Employee Group, go to:</p>
<blockquote>
<p>Home > Human Resources > Employee > Employee Group</p>
</blockquote>
<h2 id="1-prerequisites">1. Prerequisites</h2>
<p>Before creating an Employee Group, it is advisable you create the following documents:</p>
<ul>
<li><a href="/docs/v14/user/manual/en/human-resources/employee">Employee</a></li>
</ul>
<h2 id="2-how-to-create-an-employee-group">2. How to create an Employee Group</h2>
<ol>
<li>Go to Employee Group list, click on New.</li>
<li>Enter the Name.</li>
<li>Select and add Employee ID to the group. The Employee Name will get automatically fetched.</li>
<li><p>Save.</p>
<p><img class="screenshot" alt="Employee Group" src="/files/employee-group.png"></p></li>
</ol>
<h2 id="3-features">3. Features</h2>
<h3 id="31-service-level-agreement">3.1 Service Level Agreement</h3>
<p>An Employee Group can be added to the <a href="/docs/v14/user/manual/en/support/service-level-agreement">Service Level Agreement</a> doctype, where the Service Level can be specified for a particular Employee Group.</p>
<h2 id="4-related-topics">4. Related Topics</h2>
<ol>
<li><a href="/docs/v14/user/manual/en/human-resources/employment-type">Employment Type</a></li>
<li><a href="/docs/v14/user/manual/en/human-resources/branch">Branch</a></li>
<li><a href="/docs/v14/user/manual/en/human-resources/department">Department</a></li>
<li><a href="/docs/v14/user/manual/en/human-resources/designation">Designation</a></li>
<li><a href="/docs/v14/user/manual/en/human-resources/employee-grade">Employee Grade</a></li>
</ol>
</div>
</div>
<div class="modal-footer">
<button type="button" data-modal-button="previous" class="previous-revision btn btn-secondary btn-sm hide">Previous</button>
<button type="button" data-modal-button="next" class="next-revision btn btn-secondary btn-sm hide">Next</button>
</div>
</div>
</div>
</div>
</div> | Employee Group
Employee Group is grouping of Employees based on some attributes such as Designation, Grade, Branch, etc.
To access Employee Group, go to:
Home > Human Resources > Employee > Employee Group
1. Prerequisites
Before creating an Employee Group, it is advisable you create the following documents:
Employee
2. How to create an Employee Group
Go to Employee Group list, click on New.
Enter the Name.
Select and add Employee ID to the group. The Employee Name will get automatically fetched.
Save.
3. Features
3.1 Service Level Agreement
An Employee Group can be added to the Service Level Agreement doctype, where the Service Level can be specified for a particular Employee Group.
4. Related Topics
Employment Type
Branch
Department
Designation
Employee Grade | # Employee Group
Edit Page New Page Revisions
**Employee Group is grouping of Employees based on some attributes such as
Designation, Grade, Branch, etc.**
To access Employee Group, go to:
> Home > Human Resources > Employee > Employee Group
## 1\. Prerequisites
Before creating an Employee Group, it is advisable you create the following
documents:
* [Employee](/docs/v14/user/manual/en/human-resources/employee)
## 2\. How to create an Employee Group
1. Go to Employee Group list, click on New.
2. Enter the Name.
3. Select and add Employee ID to the group. The Employee Name will get automatically fetched.
4. Save.

## 3\. Features
### 3.1 Service Level Agreement
An Employee Group can be added to the [Service Level
Agreement](https://docs.erpnext.com/docs/v14/user/manual/en/support/service-
level-agreement) doctype, where the Service Level can be specified for a
particular Employee Group.
## 4\. Related Topics
1. [Employment Type](/docs/v14/user/manual/en/human-resources/employment-type)
2. [Branch](/docs/v14/user/manual/en/human-resources/branch)
3. [Department](/docs/v14/user/manual/en/human-resources/department)
4. [Designation](/docs/v14/user/manual/en/human-resources/designation)
5. [Employee Grade](/docs/v14/user/manual/en/human-resources/employee-grade)
##### Employee Group
× rucha_mahabal edited 1 year ago
**Employee Group is grouping of Employees based on some attributes such as
Designation, Grade, Branch, etc.**
To access Employee Group, go to:
> Home > Human Resources > Employee > Employee Group
## 1\. Prerequisites
Before creating an Employee Group, it is advisable you create the following
documents:
* [Employee](/docs/v14/user/manual/en/human-resources/employee)
## 2\. How to create an Employee Group
1. Go to Employee Group list, click on New.
2. Enter the Name.
3. Select and add Employee ID to the group. The Employee Name will get automatically fetched.
4. Save.

## 3\. Features
### 3.1 Service Level Agreement
An Employee Group can be added to the [Service Level
Agreement](/docs/v14/user/manual/en/support/service-level-agreement) doctype,
where the Service Level can be specified for a particular Employee Group.
## 4\. Related Topics
1. [Employment Type](/docs/v14/user/manual/en/human-resources/employment-type)
2. [Branch](/docs/v14/user/manual/en/human-resources/branch)
3. [Department](/docs/v14/user/manual/en/human-resources/department)
4. [Designation](/docs/v14/user/manual/en/human-resources/designation)
5. [Employee Grade](/docs/v14/user/manual/en/human-resources/employee-grade)
Previous Next
|
Employee Health Insurance | https://frappehr.com/docs/v14/en/health-insurance | <div class="from-markdown ">
<div class="d-flex justify-content-between align-items-center">
<h1 class="wiki-title">Employee Health Insurance</h1>
<div class="dropdown wiki-options">
<div class="dropdown-toggle" type="button" role="button" id="wikiOptionsButton" data-toggle="dropdown" aria-label="Wiki Option Button" aria-expanded="false">
<svg xmlns="http://www.w3.org/2000/svg" width="16" height="16" viewbox="0 0 24 24" fill="none" stroke="currentColor" stroke-width="2" stroke-linecap="round" stroke-linejoin="round" class="feather feather-more-vertical">
<circle cx="12" cy="12" r="1"></circle>
<circle cx="12" cy="5" r="1"></circle>
<circle cx="12" cy="19" r="1"></circle>
</svg>
</div>
<div class="dropdown-menu d-print-none" aria-labelledby="wikiOptionsButton">
<a class="dropdown-item edit-wiki-btn" href="#">Edit Page</a>
<a class="dropdown-item add-wiki-btn" href="#">New Page</a>
<a class="dropdown-item show-revisions" href="#" data-toggle="modal" data-target="#revisionsModal">Revisions</a>
</div>
</div>
</div>
<div class="wiki-content">
<div><p><strong>Employee Health Insurance is a benefit extended by the company to their employees. When a company provides health insurance assistance, they pay full or part premiums for the health insurance policy.</strong></p><p>Frappe HR allows you to save the Employee Health Insurance detail and link it to that particular Employee's master.</p><p>To access Health Insurance Provider document, go to:</p><blockquote><p>Home > Human Resources > Employee > Employee Health Insurance</p></blockquote><h2>1. How to create an Employee Health Insurance</h2><ol><li><p>Go to Employee Health Insurance list, click on New.</p></li><li><p>Enter the Health Insurance Name.</p></li><li><p>Save.</p><p><img alt="Employee" src="/files/health-insurance.png"></p></li></ol><p>Additionally, in the Employee master, you can attach the Health Insurance Provider Name and fill in the Health Insurance No.</p><p><img alt="Employee" src="/files/employee-health-insurance.png"></p><h2>2. Related Topics</h2><ol><li><p><a href="/docs/v14/user/manual/en/human-resources/employee" rel="noopener noreferrer nofollow" target="_blank">Employee</a></p></li></ol></div>
</div>
<input value="ea91ba9304" class="d-none" name="wiki-page-name">
<div class="modal revisions-modal fade" id="revisionsModal" tabindex="-1" role="dialog" aria-labelledby="revisionsModalTitle" aria-hidden="true">
<div class="modal-dialog modal-dialog-centered" role="document">
<div class="modal-content">
<div class="modal-header">
<h5 class="modal-title revision-title" id="revisionsModalTitle">Employee Health Insurance</h5>
<button type="button" class="d-block d-sm-none close" data-dismiss="modal" aria-label="Close">
<span aria-hidden="true">×</span>
</button>
<span class="small text-muted revision-time">rucha_mahabal edited 1 year ago</span>
</div>
<div class="modal-body">
<div class="revision-content wiki-content">
<p><strong>Employee Health Insurance is a benefit extended by the company to their employees. When a company provides health insurance assistance, they pay full or part premiums for the health insurance policy.</strong></p>
<p>ERPNext allows you to save the Employee Health Insurance detail and link it to that particular Employee's master.</p>
<p>To access Health Insurance Provider document, go to:</p>
<blockquote>
<p>Home > Human Resources > Employee > Employee Health Insurance</p>
</blockquote>
<h2 id="1-how-to-create-an-employee-health-insurance">1. How to create an Employee Health Insurance</h2>
<ol>
<li>Go to Employee Health Insurance list, click on New.</li>
<li>Enter the Health Insurance Name.</li>
<li><p>Save.</p>
<p><img class="screenshot" alt="Employee" src="/files/health-insurance.png"></p></li>
</ol>
<p>Additionally, in the Employee master, you can attach the Health Insurance Provider Name and fill in the Health Insurance No.</p>
<p><img class="screenshot" alt="Employee" src="/files/employee-health-insurance.png"></p>
<h2 id="2-related-topics">2. Related Topics</h2>
<ol>
<li><a href="/docs/v14/user/manual/en/human-resources/employee">Employee</a></li>
</ol>
</div>
</div>
<div class="modal-footer">
<button type="button" data-modal-button="previous" class="previous-revision btn btn-secondary btn-sm hide">Previous</button>
<button type="button" data-modal-button="next" class="next-revision btn btn-secondary btn-sm hide">Next</button>
</div>
</div>
</div>
</div>
</div> | Employee Health Insurance
Employee Health Insurance is a benefit extended by the company to their employees. When a company provides health insurance assistance, they pay full or part premiums for the health insurance policy.
Frappe HR allows you to save the Employee Health Insurance detail and link it to that particular Employee's master.
To access Health Insurance Provider document, go to:
Home > Human Resources > Employee > Employee Health Insurance
1. How to create an Employee Health Insurance
Go to Employee Health Insurance list, click on New.
Enter the Health Insurance Name.
Save.
Additionally, in the Employee master, you can attach the Health Insurance Provider Name and fill in the Health Insurance No.
2. Related Topics
Employee | # Employee Health Insurance
Edit Page New Page Revisions
**Employee Health Insurance is a benefit extended by the company to their
employees. When a company provides health insurance assistance, they pay full
or part premiums for the health insurance policy.**
Frappe HR allows you to save the Employee Health Insurance detail and link it
to that particular Employee's master.
To access Health Insurance Provider document, go to:
> Home > Human Resources > Employee > Employee Health Insurance
## 1\. How to create an Employee Health Insurance
1. Go to Employee Health Insurance list, click on New.
2. Enter the Health Insurance Name.
3. Save.

Additionally, in the Employee master, you can attach the Health Insurance
Provider Name and fill in the Health Insurance No.

## 2\. Related Topics
1. [Employee](/docs/v14/user/manual/en/human-resources/employee)
##### Employee Health Insurance
× rucha_mahabal edited 1 year ago
**Employee Health Insurance is a benefit extended by the company to their
employees. When a company provides health insurance assistance, they pay full
or part premiums for the health insurance policy.**
ERPNext allows you to save the Employee Health Insurance detail and link it to
that particular Employee's master.
To access Health Insurance Provider document, go to:
> Home > Human Resources > Employee > Employee Health Insurance
## 1\. How to create an Employee Health Insurance
1. Go to Employee Health Insurance list, click on New.
2. Enter the Health Insurance Name.
3. Save.

Additionally, in the Employee master, you can attach the Health Insurance
Provider Name and fill in the Health Insurance No.

## 2\. Related Topics
1. [Employee](/docs/v14/user/manual/en/human-resources/employee)
Previous Next
|
Organizational Chart | https://frappehr.com/docs/v14/en/organizational_chart | <div class="from-markdown ">
<div class="d-flex justify-content-between align-items-center">
<h1 class="wiki-title">Organizational Chart</h1>
<div class="dropdown wiki-options">
<div class="dropdown-toggle" type="button" role="button" id="wikiOptionsButton" data-toggle="dropdown" aria-label="Wiki Option Button" aria-expanded="false">
<svg xmlns="http://www.w3.org/2000/svg" width="16" height="16" viewbox="0 0 24 24" fill="none" stroke="currentColor" stroke-width="2" stroke-linecap="round" stroke-linejoin="round" class="feather feather-more-vertical">
<circle cx="12" cy="12" r="1"></circle>
<circle cx="12" cy="5" r="1"></circle>
<circle cx="12" cy="19" r="1"></circle>
</svg>
</div>
<div class="dropdown-menu d-print-none" aria-labelledby="wikiOptionsButton">
<a class="dropdown-item edit-wiki-btn" href="#">Edit Page</a>
<a class="dropdown-item add-wiki-btn" href="#">New Page</a>
<a class="dropdown-item show-revisions" href="#" data-toggle="modal" data-target="#revisionsModal">Revisions</a>
</div>
</div>
</div>
<div class="wiki-content">
<p><strong>An organizational chart shows the organizational structure by depicting connections between different employees with their designation, image, and name. In large organizations where it's difficult to remember names, people can interact with the org chart and know the hierarchy through faces and other info.</strong></p>
<p>To access Employee Grade, go to:</p>
<p>> Home > Human Resources > Employee > Organizational Chart</p>
<ul>
<li>The org chart is created based on the "Reports To" field in Employee master.</li>
<li>The employees that don't report to anyone are shown in the first level.</li>
<li>The chart expands horizontally on the desktop view and vertically on mobile.</li>
<li>Each node has details like the Employee Name, Image, Designation, and the total number of connections.</li>
<li>The connections are the total number of descendants a particular node has till the end of the hierarchy.</li>
<li>The edit button in every node navigates to the Employee Master.</li>
<li>As you navigate through the chart, the active hierarchy is highlighted.</li>
<li>You can use the Company filter to check the org chart for individual companies.</li>
</ul>
<p><img alt="Org Chart" class="screenshot" src="/files/org-chart.png"></p>
<p><img alt="Org Chart Mobile" class="screenshot" height="350" src="/files/org-chart-mobile-2.png" width="250"></p>
</div>
<input value="9b6642c98a" class="d-none" name="wiki-page-name">
<div class="modal revisions-modal fade" id="revisionsModal" tabindex="-1" role="dialog" aria-labelledby="revisionsModalTitle" aria-hidden="true">
<div class="modal-dialog modal-dialog-centered" role="document">
<div class="modal-content">
<div class="modal-header">
<h5 class="modal-title revision-title" id="revisionsModalTitle">Organizational Chart</h5>
<button type="button" class="d-block d-sm-none close" data-dismiss="modal" aria-label="Close">
<span aria-hidden="true">×</span>
</button>
<span class="small text-muted revision-time">rucha_mahabal edited 1 year ago</span>
</div>
<div class="modal-body">
<div class="revision-content wiki-content">
<h3>No Revisions</h3>
</div>
</div>
<div class="modal-footer">
<button type="button" data-modal-button="previous" class="previous-revision btn btn-secondary btn-sm hide">Previous</button>
<button type="button" data-modal-button="next" class="next-revision btn btn-secondary btn-sm hide">Next</button>
</div>
</div>
</div>
</div>
</div> | Organizational Chart
An organizational chart shows the organizational structure by depicting connections between different employees with their designation, image, and name. In large organizations where it's difficult to remember names, people can interact with the org chart and know the hierarchy through faces and other info.
To access Employee Grade, go to:
> Home > Human Resources > Employee > Organizational Chart
The org chart is created based on the "Reports To" field in Employee master.
The employees that don't report to anyone are shown in the first level.
The chart expands horizontally on the desktop view and vertically on mobile.
Each node has details like the Employee Name, Image, Designation, and the total number of connections.
The connections are the total number of descendants a particular node has till the end of the hierarchy.
The edit button in every node navigates to the Employee Master.
As you navigate through the chart, the active hierarchy is highlighted.
You can use the Company filter to check the org chart for individual companies. | # Organizational Chart
Edit Page New Page Revisions
**An organizational chart shows the organizational structure by depicting
connections between different employees with their designation, image, and
name. In large organizations where it's difficult to remember names, people
can interact with the org chart and know the hierarchy through faces and other
info.**
To access Employee Grade, go to:
> Home > Human Resources > Employee > Organizational Chart
* The org chart is created based on the "Reports To" field in Employee master.
* The employees that don't report to anyone are shown in the first level.
* The chart expands horizontally on the desktop view and vertically on mobile.
* Each node has details like the Employee Name, Image, Designation, and the total number of connections.
* The connections are the total number of descendants a particular node has till the end of the hierarchy.
* The edit button in every node navigates to the Employee Master.
* As you navigate through the chart, the active hierarchy is highlighted.
* You can use the Company filter to check the org chart for individual companies.


##### Organizational Chart
× rucha_mahabal edited 1 year ago
### No Revisions
Previous Next
|
Attendance | https://frappehr.com/docs/v14/en/attendance | <div class="from-markdown ">
<div class="d-flex justify-content-between align-items-center">
<h1 class="wiki-title">Attendance</h1>
<div class="dropdown wiki-options">
<div class="dropdown-toggle" type="button" role="button" id="wikiOptionsButton" data-toggle="dropdown" aria-label="Wiki Option Button" aria-expanded="false">
<svg xmlns="http://www.w3.org/2000/svg" width="16" height="16" viewbox="0 0 24 24" fill="none" stroke="currentColor" stroke-width="2" stroke-linecap="round" stroke-linejoin="round" class="feather feather-more-vertical">
<circle cx="12" cy="12" r="1"></circle>
<circle cx="12" cy="5" r="1"></circle>
<circle cx="12" cy="19" r="1"></circle>
</svg>
</div>
<div class="dropdown-menu d-print-none" aria-labelledby="wikiOptionsButton">
<a class="dropdown-item edit-wiki-btn" href="#">Edit Page</a>
<a class="dropdown-item add-wiki-btn" href="#">New Page</a>
<a class="dropdown-item show-revisions" href="#" data-toggle="modal" data-target="#revisionsModal">Revisions</a>
</div>
</div>
</div>
<div class="wiki-content">
<div><p><strong>Attendance is a record stating whether an Employee has been present on a particular day or not.</strong></p><p>In Frappe HR, you can mark and record attendance of an Employee on a daily basis using the Attendance doctype.</p><p>To access Attendance, go to:</p><p>> Home > Human Resources > Attendance</p><h2>1. Prerequisites</h2><p>Before creating an Attendance record, it is advised that you create the following first:</p><ul><li><p><a href="/docs/v14/user/manual/en/human-resources/employee" rel="noopener noreferrer nofollow" target="_blank">Employee</a></p></li><li><p><a href="/docs/v14/user/manual/en/human-resources/shift-management" rel="noopener noreferrer nofollow" target="_blank">Shift Type</a></p></li></ul><h2>2. How to create an Attendance</h2><ol><li><p>Go to the Attendance list, click on New.</p></li><li><p>Select the Employee.</p></li><li><p>Select the Attendance Date.</p></li><li><p>Select the Shift (optional).</p></li><li><p>Select the Status (Present, Absent, On Leave, Half Day).</p></li><li><p>Save and Submit.</p><p><img alt="Attendance" src="/files/attendance.png"></p></li></ol><p>> <strong>Note:</strong> Attendance cannot be marked for future dates.</p><p>You can get a monthly report of your Attendance data by going to the <strong>Monthly Attendance Details</strong> report.</p><p>You can easily set attendance for Employees using the <a href="/docs/v14/user/manual/en/human-resources/employee-attendance-tool" rel="noopener noreferrer nofollow" target="_blank">Employee Attendance Tool</a>.</p><p>You can also bulk upload attendance using the <a href="/docs/v14/user/manual/en/human-resources/upload-attendance" rel="noopener noreferrer nofollow" target="_blank">Upload Attendance</a>.</p><h2>3. Features</h2><h3>3.1 Marking Unmarked Attendance</h3><p>In case the attendance for some employees is not marked, you can mark them as present, absent, or half-day.</p><h4>How to Mark Attendance</h4><ol><li><p>Go to the Attendance list.</p></li><li><p>Click on the <strong>Mark Attendance</strong> button.</p></li><li><p>A dialog will appear.</p></li><li><p>Select the Employee and Month.</p></li><li><p>Select the Status whether Present, Absent, or Half Day.</p></li><li><p>If you want to exclude holidays while doing so, check <em>Exclude Holidays</em>.</p></li><li><p>Select the dates on which you want to mark attendance for a selected Employee.</p></li><li><p>Click on the <strong>Mark Attendance</strong> button and click on <strong>Yes</strong>.</p><p><img alt="Attendance" src="/files/mark-attendance.gif"></p></li></ol><h2>4. Related Topics</h2><ol><li><p><a href="/docs/v14/user/manual/en/human-resources/employee-attendance-tool" rel="noopener noreferrer nofollow" target="_blank">Employee Attendance Tool</a></p></li><li><p><a href="/docs/v14/user/manual/en/human-resources/shift-management" rel="noopener noreferrer nofollow" target="_blank">Shift Management</a></p></li><li><p><a href="/docs/v14/user/manual/en/human-resources/auto-attendance" rel="noopener noreferrer nofollow" target="_blank">Auto Attendance</a></p></li><li><p><a href="/docs/v14/user/manual/en/human-resources/upload-attendance" rel="noopener noreferrer nofollow" target="_blank">Upload Attendance</a></p></li><li><p><a href="/docs/v14/user/manual/en/human-resources/attendance-request" rel="noopener noreferrer nofollow" target="_blank">Attendance Request</a></p></li></ol><p>It is also, possible to set up marking of attendance automatically based on check-in/check-out logs from Biometric/RFID Devices (or any other similar mechanisms that produce IN/OUT logs of the employee). Please refer to <a href="/docs/v14/user/manual/en/human-resources/auto-attendance" rel="noopener noreferrer nofollow" target="_blank">Auto Attendance</a> feature for more information.</p></div>
</div>
<input value="f1cef38e45" class="d-none" name="wiki-page-name">
<div class="modal revisions-modal fade" id="revisionsModal" tabindex="-1" role="dialog" aria-labelledby="revisionsModalTitle" aria-hidden="true">
<div class="modal-dialog modal-dialog-centered" role="document">
<div class="modal-content">
<div class="modal-header">
<h5 class="modal-title revision-title" id="revisionsModalTitle">Attendance</h5>
<button type="button" class="d-block d-sm-none close" data-dismiss="modal" aria-label="Close">
<span aria-hidden="true">×</span>
</button>
<span class="small text-muted revision-time">rucha_mahabal edited 1 year ago</span>
</div>
<div class="modal-body">
<div class="revision-content wiki-content">
<p><strong>Attendance is a record stating whether an Employee has been present on a particular
day or not.</strong></p>
<p>In ERPNext, you can mark and record attendance of an Employee on a daily basis using the Attendance doctype.</p>
<p>To access Attendance, go to:</p>
<blockquote>
<p>Home > Human Resources > Attendance</p>
</blockquote>
<h2 id="1-prerequisites">1. Prerequisites</h2>
<p>Before creating an Attendance record, it is advised that you create the following first:</p>
<ul>
<li><a href="/docs/v14/user/manual/en/human-resources/employee">Employee</a></li>
<li><a href="/docs/v14/user/manual/en/human-resources/shift-management">Shift Type</a></li>
</ul>
<h2 id="2-how-to-create-an-attendance">2. How to create an Attendance</h2>
<ol>
<li>Go to the Attendance list, click on New.</li>
<li>Select the Employee.</li>
<li>Select the Attendance Date.</li>
<li>Select the Shift (optional).</li>
<li>Select the Status (Present, Absent, On Leave, Half Day).</li>
<li><p>Save and Submit.</p>
<p><img class="screenshot" alt="Attendance" src="/files/attendance.png"></p></li>
</ol>
<blockquote>
<p><strong>Note:</strong> Attendance cannot be marked for future dates.</p>
</blockquote>
<p>You can get a monthly report of your Attendance data by going to the <strong>Monthly
Attendance Details</strong> report.</p>
<p>You can easily set attendance for Employees using the <a href="/docs/v14/user/manual/en/human-resources/employee-attendance-tool">Employee Attendance Tool</a>.</p>
<p>You can also bulk upload attendance using the <a href="/docs/v14/user/manual/en/human-resources/upload-attendance">Upload Attendance</a>.</p>
<h2 id="3-features">3. Features</h2>
<h3 id="31-marking-unmarked-attendance">3.1 Marking Unmarked Attendance</h3>
<p>In case the attendance for some employees is not marked, you can mark them as present, absent, or half-day.</p>
<h4 id="how-to-mark-attendance">How to Mark Attendance</h4>
<ol>
<li>Go to the Attendance list.</li>
<li>Click on the <strong>Mark Attendance</strong> button.</li>
<li>A dialog will appear.</li>
<li>Select the Employee and Month.</li>
<li>Select the Status whether Present, Absent, or Half Day.</li>
<li>If you want to exclude holidays while doing so, check <em>Exclude Holidays</em>.</li>
<li>Select the dates on which you want to mark attendance for a selected Employee.</li>
<li><p>Click on the <strong>Mark Attendance<em>* button and click on *</em>Yes</strong>.</p>
<p><img class="screenshot" alt="Attendance" src="/files/mark-attendance.gif"></p></li>
</ol>
<h2 id="4-related-topics">4. Related Topics</h2>
<ol>
<li><a href="/docs/v14/user/manual/en/human-resources/employee-attendance-tool">Employee Attendance Tool</a></li>
<li><a href="/docs/v14/user/manual/en/human-resources/shift-management">Shift Management</a></li>
<li><a href="/docs/v14/user/manual/en/human-resources/auto-attendance">Auto Attendance</a></li>
<li><a href="/docs/v14/user/manual/en/human-resources/upload-attendance">Upload Attendance</a></li>
<li><a href="/docs/v14/user/manual/en/human-resources/attendance-request">Attendance Request</a></li>
</ol>
<p>It is also, possible to set up marking of attendance automatically based on check-in/check-out logs from Biometric/RFID Devices (or any other similar mechanisms that produce IN/OUT logs of the employee). Please refer to <a href="/docs/v14/user/manual/en/human-resources/auto-attendance">Auto Attendance</a> feature for more information.</p>
</div>
</div>
<div class="modal-footer">
<button type="button" data-modal-button="previous" class="previous-revision btn btn-secondary btn-sm hide">Previous</button>
<button type="button" data-modal-button="next" class="next-revision btn btn-secondary btn-sm hide">Next</button>
</div>
</div>
</div>
</div>
</div> | Attendance
Attendance is a record stating whether an Employee has been present on a particular day or not.
In Frappe HR, you can mark and record attendance of an Employee on a daily basis using the Attendance doctype.
To access Attendance, go to:
> Home > Human Resources > Attendance
1. Prerequisites
Before creating an Attendance record, it is advised that you create the following first:
Employee
Shift Type
2. How to create an Attendance
Go to the Attendance list, click on New.
Select the Employee.
Select the Attendance Date.
Select the Shift (optional).
Select the Status (Present, Absent, On Leave, Half Day).
Save and Submit.
> Note: Attendance cannot be marked for future dates.
You can get a monthly report of your Attendance data by going to the Monthly Attendance Details report.
You can easily set attendance for Employees using the Employee Attendance Tool.
You can also bulk upload attendance using the Upload Attendance.
3. Features
3.1 Marking Unmarked Attendance
In case the attendance for some employees is not marked, you can mark them as present, absent, or half-day.
How to Mark Attendance
Go to the Attendance list.
Click on the Mark Attendance button.
A dialog will appear.
Select the Employee and Month.
Select the Status whether Present, Absent, or Half Day.
If you want to exclude holidays while doing so, check Exclude Holidays.
Select the dates on which you want to mark attendance for a selected Employee.
Click on the Mark Attendance button and click on Yes.
4. Related Topics
Employee Attendance Tool
Shift Management
Auto Attendance
Upload Attendance
Attendance Request
It is also, possible to set up marking of attendance automatically based on check-in/check-out logs from Biometric/RFID Devices (or any other similar mechanisms that produce IN/OUT logs of the employee). Please refer to Auto Attendance feature for more information. | # Attendance
Edit Page New Page Revisions
**Attendance is a record stating whether an Employee has been present on a
particular day or not.**
In Frappe HR, you can mark and record attendance of an Employee on a daily
basis using the Attendance doctype.
To access Attendance, go to:
> Home > Human Resources > Attendance
## 1\. Prerequisites
Before creating an Attendance record, it is advised that you create the
following first:
* [Employee](/docs/v14/user/manual/en/human-resources/employee)
* [Shift Type](/docs/v14/user/manual/en/human-resources/shift-management)
## 2\. How to create an Attendance
1. Go to the Attendance list, click on New.
2. Select the Employee.
3. Select the Attendance Date.
4. Select the Shift (optional).
5. Select the Status (Present, Absent, On Leave, Half Day).
6. Save and Submit.

> **Note:** Attendance cannot be marked for future dates.
You can get a monthly report of your Attendance data by going to the **Monthly
Attendance Details** report.
You can easily set attendance for Employees using the [Employee Attendance
Tool](/docs/v14/user/manual/en/human-resources/employee-attendance-tool).
You can also bulk upload attendance using the [Upload
Attendance](/docs/v14/user/manual/en/human-resources/upload-attendance).
## 3\. Features
### 3.1 Marking Unmarked Attendance
In case the attendance for some employees is not marked, you can mark them as
present, absent, or half-day.
#### How to Mark Attendance
1. Go to the Attendance list.
2. Click on the **Mark Attendance** button.
3. A dialog will appear.
4. Select the Employee and Month.
5. Select the Status whether Present, Absent, or Half Day.
6. If you want to exclude holidays while doing so, check _Exclude Holidays_.
7. Select the dates on which you want to mark attendance for a selected Employee.
8. Click on the **Mark Attendance** button and click on **Yes**.

## 4\. Related Topics
1. [Employee Attendance Tool](/docs/v14/user/manual/en/human-resources/employee-attendance-tool)
2. [Shift Management](/docs/v14/user/manual/en/human-resources/shift-management)
3. [Auto Attendance](/docs/v14/user/manual/en/human-resources/auto-attendance)
4. [Upload Attendance](/docs/v14/user/manual/en/human-resources/upload-attendance)
5. [Attendance Request](/docs/v14/user/manual/en/human-resources/attendance-request)
It is also, possible to set up marking of attendance automatically based on
check-in/check-out logs from Biometric/RFID Devices (or any other similar
mechanisms that produce IN/OUT logs of the employee). Please refer to [Auto
Attendance](/docs/v14/user/manual/en/human-resources/auto-attendance) feature
for more information.
##### Attendance
× rucha_mahabal edited 1 year ago
**Attendance is a record stating whether an Employee has been present on a
particular day or not.**
In ERPNext, you can mark and record attendance of an Employee on a daily basis
using the Attendance doctype.
To access Attendance, go to:
> Home > Human Resources > Attendance
## 1\. Prerequisites
Before creating an Attendance record, it is advised that you create the
following first:
* [Employee](/docs/v14/user/manual/en/human-resources/employee)
* [Shift Type](/docs/v14/user/manual/en/human-resources/shift-management)
## 2\. How to create an Attendance
1. Go to the Attendance list, click on New.
2. Select the Employee.
3. Select the Attendance Date.
4. Select the Shift (optional).
5. Select the Status (Present, Absent, On Leave, Half Day).
6. Save and Submit.

> **Note:** Attendance cannot be marked for future dates.
You can get a monthly report of your Attendance data by going to the **Monthly
Attendance Details** report.
You can easily set attendance for Employees using the [Employee Attendance
Tool](/docs/v14/user/manual/en/human-resources/employee-attendance-tool).
You can also bulk upload attendance using the [Upload
Attendance](/docs/v14/user/manual/en/human-resources/upload-attendance).
## 3\. Features
### 3.1 Marking Unmarked Attendance
In case the attendance for some employees is not marked, you can mark them as
present, absent, or half-day.
#### How to Mark Attendance
1. Go to the Attendance list.
2. Click on the **Mark Attendance** button.
3. A dialog will appear.
4. Select the Employee and Month.
5. Select the Status whether Present, Absent, or Half Day.
6. If you want to exclude holidays while doing so, check _Exclude Holidays_.
7. Select the dates on which you want to mark attendance for a selected Employee.
8. Click on the **Mark Attendance _* button and click on *_ Yes**.

## 4\. Related Topics
1. [Employee Attendance Tool](/docs/v14/user/manual/en/human-resources/employee-attendance-tool)
2. [Shift Management](/docs/v14/user/manual/en/human-resources/shift-management)
3. [Auto Attendance](/docs/v14/user/manual/en/human-resources/auto-attendance)
4. [Upload Attendance](/docs/v14/user/manual/en/human-resources/upload-attendance)
5. [Attendance Request](/docs/v14/user/manual/en/human-resources/attendance-request)
It is also, possible to set up marking of attendance automatically based on
check-in/check-out logs from Biometric/RFID Devices (or any other similar
mechanisms that produce IN/OUT logs of the employee). Please refer to [Auto
Attendance](/docs/v14/user/manual/en/human-resources/auto-attendance) feature
for more information.
Previous Next
|
Employee Attendance Tool | https://frappehr.com/docs/v14/en/employee-attendance-tool | <div class="from-markdown ">
<div class="d-flex justify-content-between align-items-center">
<h1 class="wiki-title">Employee Attendance Tool</h1>
<div class="dropdown wiki-options">
<div class="dropdown-toggle" type="button" role="button" id="wikiOptionsButton" data-toggle="dropdown" aria-label="Wiki Option Button" aria-expanded="false">
<svg xmlns="http://www.w3.org/2000/svg" width="16" height="16" viewbox="0 0 24 24" fill="none" stroke="currentColor" stroke-width="2" stroke-linecap="round" stroke-linejoin="round" class="feather feather-more-vertical">
<circle cx="12" cy="12" r="1"></circle>
<circle cx="12" cy="5" r="1"></circle>
<circle cx="12" cy="19" r="1"></circle>
</svg>
</div>
<div class="dropdown-menu d-print-none" aria-labelledby="wikiOptionsButton">
<a class="dropdown-item edit-wiki-btn" href="#">Edit Page</a>
<a class="dropdown-item add-wiki-btn" href="#">New Page</a>
<a class="dropdown-item show-revisions" href="#" data-toggle="modal" data-target="#revisionsModal">Revisions</a>
</div>
</div>
</div>
<div class="wiki-content">
<div><p><strong>Employee Attendance Tool allows you to mark the attendance of multiple employees for a particular date.</strong></p><p>To access the Employee Attendance Tool, go to:</p><blockquote><p>Home > Human Resources > Attendance > Employee Attendance Tool</p></blockquote><p>This tool allows you to add attendance records for multiple employees based on their Department and Branch for a given day quickly.</p><h2>1. Prerequisites</h2><p>Before creating an Employee Attendance, it is advised that you create the following first:</p><ul><li><p><a href="/docs/v14/user/manual/en/human-resources/employee" rel="noopener noreferrer nofollow" target="_blank">Employee</a></p></li><li><p><a href="/docs/v14/user/manual/en/human-resources/department" rel="noopener noreferrer nofollow" target="_blank">Department</a></p></li><li><p><a href="/docs/v14/user/manual/en/human-resources/branch" rel="noopener noreferrer nofollow" target="_blank">Branch</a></p></li></ul><h2>2. How to mark attendance using Employee Attendance Tool</h2><ol><li><p>Enter the Date.</p></li><li><p>Select the Department and Branch (optional).</p></li><li><p>Select the Employees.</p></li><li><p>Mark Present, Absent, or Half Day as required.</p></li><li><p>You can also select the shift and mark employees with Late Entry and Early Exit from this view.</p></li><li><p>The Marked Attendance table below the tool will show you all the employees you have marked attendance for along with their attendance status. You can use column filters to search for a particular employee or employees with a particular status form this table.</p></li></ol><p><img src="/files/pOo6Zsf.gif"></p><blockquote><p><strong>Note:</strong> Attendance cannot be marked for future dates.</p></blockquote><p>Once the attendance is marked using the Employee Attendance Tool, the employee attendance is saved in the <a href="/docs/v14/user/manual/en/human-resources/attendance" rel="noopener noreferrer nofollow" target="_blank">Attendance</a> record as shown:</p><p><img alt="" src="/files/dxhxNaV.png"></p><h2>3. Related Topics</h2><ol><li><p><a href="/docs/v14/user/manual/en/human-resources/attendance" rel="noopener noreferrer nofollow" target="_blank">Attendance</a></p></li><li><p><a href="/docs/v14/user/manual/en/human-resources/attendance-request" rel="noopener noreferrer nofollow" target="_blank">Attendance Request</a></p></li><li><p><a href="/docs/v14/user/manual/en/human-resources/upload-attendance" rel="noopener noreferrer nofollow" target="_blank">Upload Attendance</a></p></li><li><p><a href="/docs/v14/user/manual/en/human-resources/shift-management" rel="noopener noreferrer nofollow" target="_blank">Shift Management</a></p></li><li><p><a href="/docs/v14/user/manual/en/human-resources/auto-attendance" rel="noopener noreferrer nofollow" target="_blank">Auto Attendance</a></p></li></ol></div>
</div>
<input value="ab9ef33c8d" class="d-none" name="wiki-page-name">
<div class="modal revisions-modal fade" id="revisionsModal" tabindex="-1" role="dialog" aria-labelledby="revisionsModalTitle" aria-hidden="true">
<div class="modal-dialog modal-dialog-centered" role="document">
<div class="modal-content">
<div class="modal-header">
<h5 class="modal-title revision-title" id="revisionsModalTitle">Employee Attendance Tool</h5>
<button type="button" class="d-block d-sm-none close" data-dismiss="modal" aria-label="Close">
<span aria-hidden="true">×</span>
</button>
<span class="small text-muted revision-time">rucha_mahabal edited 1 year ago</span>
</div>
<div class="modal-body">
<div class="revision-content wiki-content">
<p><strong>Employee Attendance Tool allows you to mark attendance of multiple employees for a particular date.</strong></p>
<p>To access the Employee Attendance Tool, go to:</p>
<blockquote>
<p>Home > Human Resources > Attendance > Employee Attendance Tool</p>
</blockquote>
<p>This tool allows you to add attendance records for multiple employees based on their Department and Branch for a given day quickly.</p>
<h2 id="1-prerequisites">1. Prerequisites</h2>
<p>Before creating an Employee Attendance, it is advised that you create the following first:</p>
<ul>
<li><a href="/docs/v14/user/manual/en/human-resources/employee">Employee</a></li>
<li><a href="/docs/v14/user/manual/en/human-resources/department">Department</a></li>
<li><a href="/docs/v14/user/manual/en/human-resources/branch">Branch</a></li>
</ul>
<h2 id="2-how-to-mark-attendance-using-employee-attendance-tool">2. How to mark attendance using Employee Attendance Tool</h2>
<ol>
<li>Enter the Date.</li>
<li>Select the Department and Branch (optional).</li>
<li>Select the Employees.</li>
<li><p>Mark Present, Absent or Half Day as required.</p>
<p><img class="screenshot" alt="Attendance upload" src="/files/employee-attendance-tool.gif"></p></li>
</ol>
<blockquote>
<p><strong>Note:</strong> Attendance cannot be marked for future dates.</p>
</blockquote>
<p>Once the attendance is marked using the Employee Attendance Tool, the employee attendance is saved in the <a href="/docs/v14/user/manual/en/human-resources/attendance">Attendance</a> record as shown:</p>
<p><img class="screenshot" alt="Attendance" src="/files/attendance_tool1.png"></p>
<h2 id="3-related-topics">3. Related Topics</h2>
<ol>
<li><a href="/docs/v14/user/manual/en/human-resources/attendance">Attendance</a></li>
<li><a href="/docs/v14/user/manual/en/human-resources/attendance-request">Attendance Request</a></li>
<li><a href="/docs/v14/user/manual/en/human-resources/upload-attendance">Upload Attendance</a></li>
<li><a href="/docs/v14/user/manual/en/human-resources/shift-management">Shift Management</a></li>
<li><a href="/docs/v14/user/manual/en/human-resources/auto-attendance">Auto Attendance</a></li>
</ol>
</div>
</div>
<div class="modal-footer">
<button type="button" data-modal-button="previous" class="previous-revision btn btn-secondary btn-sm hide">Previous</button>
<button type="button" data-modal-button="next" class="next-revision btn btn-secondary btn-sm hide">Next</button>
</div>
</div>
</div>
</div>
</div> | Employee Attendance Tool
Employee Attendance Tool allows you to mark the attendance of multiple employees for a particular date.
To access the Employee Attendance Tool, go to:
Home > Human Resources > Attendance > Employee Attendance Tool
This tool allows you to add attendance records for multiple employees based on their Department and Branch for a given day quickly.
1. Prerequisites
Before creating an Employee Attendance, it is advised that you create the following first:
Employee
Department
Branch
2. How to mark attendance using Employee Attendance Tool
Enter the Date.
Select the Department and Branch (optional).
Select the Employees.
Mark Present, Absent, or Half Day as required.
You can also select the shift and mark employees with Late Entry and Early Exit from this view.
The Marked Attendance table below the tool will show you all the employees you have marked attendance for along with their attendance status. You can use column filters to search for a particular employee or employees with a particular status form this table.
Note: Attendance cannot be marked for future dates.
Once the attendance is marked using the Employee Attendance Tool, the employee attendance is saved in the Attendance record as shown:
3. Related Topics
Attendance
Attendance Request
Upload Attendance
Shift Management
Auto Attendance | # Employee Attendance Tool
Edit Page New Page Revisions
**Employee Attendance Tool allows you to mark the attendance of multiple
employees for a particular date.**
To access the Employee Attendance Tool, go to:
> Home > Human Resources > Attendance > Employee Attendance Tool
This tool allows you to add attendance records for multiple employees based on
their Department and Branch for a given day quickly.
## 1\. Prerequisites
Before creating an Employee Attendance, it is advised that you create the
following first:
* [Employee](/docs/v14/user/manual/en/human-resources/employee)
* [Department](/docs/v14/user/manual/en/human-resources/department)
* [Branch](/docs/v14/user/manual/en/human-resources/branch)
## 2\. How to mark attendance using Employee Attendance Tool
1. Enter the Date.
2. Select the Department and Branch (optional).
3. Select the Employees.
4. Mark Present, Absent, or Half Day as required.
5. You can also select the shift and mark employees with Late Entry and Early Exit from this view.
6. The Marked Attendance table below the tool will show you all the employees you have marked attendance for along with their attendance status. You can use column filters to search for a particular employee or employees with a particular status form this table.

> **Note:** Attendance cannot be marked for future dates.
Once the attendance is marked using the Employee Attendance Tool, the employee
attendance is saved in the [Attendance](/docs/v14/user/manual/en/human-
resources/attendance) record as shown:

## 3\. Related Topics
1. [Attendance](/docs/v14/user/manual/en/human-resources/attendance)
2. [Attendance Request](/docs/v14/user/manual/en/human-resources/attendance-request)
3. [Upload Attendance](/docs/v14/user/manual/en/human-resources/upload-attendance)
4. [Shift Management](/docs/v14/user/manual/en/human-resources/shift-management)
5. [Auto Attendance](/docs/v14/user/manual/en/human-resources/auto-attendance)
##### Employee Attendance Tool
× rucha_mahabal edited 1 year ago
**Employee Attendance Tool allows you to mark attendance of multiple employees
for a particular date.**
To access the Employee Attendance Tool, go to:
> Home > Human Resources > Attendance > Employee Attendance Tool
This tool allows you to add attendance records for multiple employees based on
their Department and Branch for a given day quickly.
## 1\. Prerequisites
Before creating an Employee Attendance, it is advised that you create the
following first:
* [Employee](/docs/v14/user/manual/en/human-resources/employee)
* [Department](/docs/v14/user/manual/en/human-resources/department)
* [Branch](/docs/v14/user/manual/en/human-resources/branch)
## 2\. How to mark attendance using Employee Attendance Tool
1. Enter the Date.
2. Select the Department and Branch (optional).
3. Select the Employees.
4. Mark Present, Absent or Half Day as required.

> **Note:** Attendance cannot be marked for future dates.
Once the attendance is marked using the Employee Attendance Tool, the employee
attendance is saved in the [Attendance](/docs/v14/user/manual/en/human-
resources/attendance) record as shown:

## 3\. Related Topics
1. [Attendance](/docs/v14/user/manual/en/human-resources/attendance)
2. [Attendance Request](/docs/v14/user/manual/en/human-resources/attendance-request)
3. [Upload Attendance](/docs/v14/user/manual/en/human-resources/upload-attendance)
4. [Shift Management](/docs/v14/user/manual/en/human-resources/shift-management)
5. [Auto Attendance](/docs/v14/user/manual/en/human-resources/auto-attendance)
Previous Next
|
Attendance Request | https://frappehr.com/docs/v14/en/attendance-request | <div class="from-markdown ">
<div class="d-flex justify-content-between align-items-center">
<h1 class="wiki-title">Attendance Request</h1>
<div class="dropdown wiki-options">
<div class="dropdown-toggle" type="button" role="button" id="wikiOptionsButton" data-toggle="dropdown" aria-label="Wiki Option Button" aria-expanded="false">
<svg xmlns="http://www.w3.org/2000/svg" width="16" height="16" viewbox="0 0 24 24" fill="none" stroke="currentColor" stroke-width="2" stroke-linecap="round" stroke-linejoin="round" class="feather feather-more-vertical">
<circle cx="12" cy="12" r="1"></circle>
<circle cx="12" cy="5" r="1"></circle>
<circle cx="12" cy="19" r="1"></circle>
</svg>
</div>
<div class="dropdown-menu d-print-none" aria-labelledby="wikiOptionsButton">
<a class="dropdown-item edit-wiki-btn" href="#">Edit Page</a>
<a class="dropdown-item add-wiki-btn" href="#">New Page</a>
<a class="dropdown-item show-revisions" href="#" data-toggle="modal" data-target="#revisionsModal">Revisions</a>
</div>
</div>
</div>
<div class="wiki-content">
<div><p><strong>Using the Attendance Request, employees can submit their attendance request for the days when their attendance wasn't marked due to various reasons such as on-site duty or work from home. Attendance Request can also be used for Attendance Regularization to overwrite existing attendance records.</strong></p><p>To access Attendance Request, go to:</p><p>> Home > Human Resources > Attendance > Attendance Request</p><h2>1. Prerequisites</h2><p>Before creating an Attendance Request, it is advised that you create the following first:</p><ul><li><p><a href="/docs/v14/user/manual/en/human-resources/employee" rel="noopener noreferrer nofollow" target="_blank">Employee</a></p></li></ul><h2>2. How to create an Attendance Request</h2><ol><li><p>Go to Attendance Request list, click on New.</p></li><li><p>Select Employee who wants to submit the Attendance Request.</p></li><li><p>Select From Date and To Date of Attendance Request.</p></li><li><p>You can enable <strong>"Include Holidays"</strong> if you want to mark attendance for holidays in between these dates too. This feature was introduced v15 onwards.</p></li><li><p>Select Reason and enter Explanation (optional).</p></li><li><p>Save and Submit.</p><p><img alt="Attendance Request" class="screenshot" contenteditable="false" draggable="true" src="/files/attendance-request.png"><img alt="" class="ProseMirror-separator"><br class="ProseMirror-trailingBreak"></p></li></ol><p>> <strong>Note 1:</strong> You can check the 'Half Day' checkbox and enter the Date in case the attendance is for Half Day.</p><p>> <strong>Note 2:</strong> On submission of the same, Attendance documents will be created for the days you mentioned as shown.</p><p><img alt="Attendance Request Submit" class="screenshot" contenteditable="false" draggable="true" src="/files/attendance-request-submission.png"><img alt="" class="ProseMirror-separator"><br class="ProseMirror-trailingBreak"></p><p>As seen below, respective Attendance records are linked with the submitted Attendance Request.</p><p><img alt="Attendance Request Linked" class="screenshot" contenteditable="false" draggable="true" src="/files/attendance-request-link.png"><img alt="" class="ProseMirror-separator"><br class="ProseMirror-trailingBreak"></p><p>If you cancel the Attendance Request, the linked Attendance documents created will be cancelled as well.</p><p><img alt="Attendance Request Cancelled" class="screenshot" contenteditable="false" draggable="true" src="/files/attendance-request-cancelled.png"><img alt="" class="ProseMirror-separator"><br class="ProseMirror-trailingBreak"></p><h2>3. Features</h2><h3>3.1 Overwrite an existing Attendance record</h3><p>Consider a scenario where the auto-attendance tool marked an employee as Absent. If the employee wants to rectify their attendance, they can raise a request. On submission, the Attendance record will be updated:</p><p><img alt="changed status" class="screenshot" contenteditable="false" draggable="true" src="/files/changed%20status.png"><img alt="" class="ProseMirror-separator"><br class="ProseMirror-trailingBreak"></p><p>The submission can be controlled via <a href="https://docs.erpnext.com/docs/v14/user/manual/en/setting-up/workflows" rel="noopener noreferrer nofollow" target="_blank">workflows</a> to undergo approvals.</p><h3>3.2 Request for Attendance in Bulk</h3><p>Employees can also request for attendance for an entire month or week. On submission, attendance marking is skipped for holidays or leave days.</p><p>You can enable "Include Holidays" if you want to mark attendance for holidays too.</p><p><img alt="" contenteditable="false" draggable="true" src="/files/FYdSpw9.png"><img alt="" class="ProseMirror-separator"><br class="ProseMirror-trailingBreak"></p><p>Attendance warnings are shown on the request dashboard for the same:</p><p><img alt="attendance warnings" class="screenshot" contenteditable="false" draggable="true" src="/files/attendance-warnings.png"><img alt="" class="ProseMirror-separator"><br class="ProseMirror-trailingBreak"></p><h2>4. Related Topics</h2><ol><li><p><a href="/docs/v14/user/manual/en/human-resources/employee-attendance-tool" rel="noopener noreferrer nofollow" target="_blank">Employee Attendance Tool</a></p></li><li><p><a href="/docs/v14/user/manual/en/human-resources/shift-management" rel="noopener noreferrer nofollow" target="_blank">Shift Management</a></p></li><li><p><a href="/docs/v14/user/manual/en/human-resources/auto-attendance" rel="noopener noreferrer nofollow" target="_blank">Auto Attendance</a></p></li><li><p><a href="/docs/v14/user/manual/en/human-resources/upload-attendance" rel="noopener noreferrer nofollow" target="_blank">Upload Attendance</a></p></li><li><p><a href="/docs/v14/user/manual/en/human-resources/attendance" rel="noopener noreferrer nofollow" target="_blank">Attendance</a></p></li></ol></div>
</div>
<input value="2f9b95b4b3" class="d-none" name="wiki-page-name">
<div class="modal revisions-modal fade" id="revisionsModal" tabindex="-1" role="dialog" aria-labelledby="revisionsModalTitle" aria-hidden="true">
<div class="modal-dialog modal-dialog-centered" role="document">
<div class="modal-content">
<div class="modal-header">
<h5 class="modal-title revision-title" id="revisionsModalTitle">Attendance Request</h5>
<button type="button" class="d-block d-sm-none close" data-dismiss="modal" aria-label="Close">
<span aria-hidden="true">×</span>
</button>
<span class="small text-muted revision-time">rucha_mahabal edited 2 months ago</span>
</div>
<div class="modal-body">
<div class="revision-content wiki-content">
<p><strong>Using the Attendance Request, employees can submit their attendance request for the days when their attendance wasn't marked due to various reasons such as on-site duty or work from home. Attendance Request can also be used for Attendance Regularization to overwrite existing attendance records.</strong></p>
<p>To access Attendance Request, go to:</p>
<blockquote>
<p>Home > Human Resources > Attendance > Attendance Request</p>
</blockquote>
<h2 id="1-prerequisites">1. Prerequisites</h2>
<p>Before creating an Attendance Request, it is advised that you create the following first:</p>
<ul>
<li><a href="/docs/v14/user/manual/en/human-resources/employee">Employee</a></li>
</ul>
<h2 id="2-how-to-create-an-attendance-request">2. How to create an Attendance Request</h2>
<ol>
<li>Go to Attendance Request list, click on New.</li>
<li>Select Employee who wants to submit the Attendance Request.</li>
<li>Select From Date and To Date of Attendance Request.</li>
<li>Select Reason and enter Explanation (optional).</li>
<li><p>Save and Submit.</p>
<p><img class="screenshot" alt="Attendance Request" src="/files/attendance-request.png"></p></li>
</ol>
<blockquote>
<p><strong>Note 1:</strong> You can check the 'Half Day' checkbox and enter the Date in case the attendance is for Half Day.</p>
</blockquote>
<blockquote>
<p><strong>Note 2:</strong> On submission of the same, Attendance documents will be created for the days you mentioned as shown.</p>
</blockquote>
<p><img class="screenshot" alt="Attendance Request Submit" src="/files/attendance-request-submission.png"></p>
<p>As seen below, respective Attendance records are linked with the submitted Attendance Request.</p>
<p><img class="screenshot" alt="Attendance Request Linked" src="/files/attendance-request-link.png"></p>
<p>If you cancel the Attendance Request, the linked Attendance documents created will be cancelled as well.</p>
<p><img class="screenshot" alt="Attendance Request Cancelled" src="/files/attendance-request-cancelled.png"></p>
<h2 id="3-features">3. Features</h2>
<h3 id="31-overwrite-an-existing-attendance-record">3.1 Overwrite an existing Attendance record</h3>
<p>Consider a scenario where the auto-attendance tool marked an employee as Absent. If the employee wants to rectify their attendance, they can raise a request. On submission, the Attendance record will be updated:</p>
<p><img src="/files/changed%20status.png" alt="changed status" class="screenshot"></p>
<p>The submission can be controlled via <a href="https://docs.erpnext.com/docs/v14/user/manual/en/setting-up/workflows">workflows</a> to undergo approvals.</p>
<h3 id="32-request-for-attendance-in-bulk">3.2 Request for Attendance in bulk</h3>
<p>Employees can also request for attendance for an entire month or week. On submission, attendance marking is skipped for holidays or leave days.</p>
<p>Attendance warnings are shown on the request dashboard for the same:</p>
<p><img src="/files/attendance-warnings.png" alt="attendance warnings" class="screenshot"></p>
<h2 id="4-related-topics">4. Related Topics</h2>
<ol>
<li><a href="/docs/v14/user/manual/en/human-resources/employee-attendance-tool">Employee Attendance Tool</a></li>
<li><a href="/docs/v14/user/manual/en/human-resources/shift-management">Shift Management</a></li>
<li><a href="/docs/v14/user/manual/en/human-resources/auto-attendance">Auto Attendance</a></li>
<li><a href="/docs/v14/user/manual/en/human-resources/upload-attendance">Upload Attendance</a></li>
<li><a href="/docs/v14/user/manual/en/human-resources/attendance">Attendance</a></li>
</ol>
</div>
</div>
<div class="modal-footer">
<button type="button" data-modal-button="previous" class="previous-revision btn btn-secondary btn-sm hide">Previous</button>
<button type="button" data-modal-button="next" class="next-revision btn btn-secondary btn-sm hide">Next</button>
</div>
</div>
</div>
</div>
</div> | Attendance Request
Using the Attendance Request, employees can submit their attendance request for the days when their attendance wasn't marked due to various reasons such as on-site duty or work from home. Attendance Request can also be used for Attendance Regularization to overwrite existing attendance records.
To access Attendance Request, go to:
> Home > Human Resources > Attendance > Attendance Request
1. Prerequisites
Before creating an Attendance Request, it is advised that you create the following first:
Employee
2. How to create an Attendance Request
Go to Attendance Request list, click on New.
Select Employee who wants to submit the Attendance Request.
Select From Date and To Date of Attendance Request.
You can enable "Include Holidays" if you want to mark attendance for holidays in between these dates too. This feature was introduced v15 onwards.
Select Reason and enter Explanation (optional).
Save and Submit.
> Note 1: You can check the 'Half Day' checkbox and enter the Date in case the attendance is for Half Day.
> Note 2: On submission of the same, Attendance documents will be created for the days you mentioned as shown.
As seen below, respective Attendance records are linked with the submitted Attendance Request.
If you cancel the Attendance Request, the linked Attendance documents created will be cancelled as well.
3. Features
3.1 Overwrite an existing Attendance record
Consider a scenario where the auto-attendance tool marked an employee as Absent. If the employee wants to rectify their attendance, they can raise a request. On submission, the Attendance record will be updated:
The submission can be controlled via workflows to undergo approvals.
3.2 Request for Attendance in Bulk
Employees can also request for attendance for an entire month or week. On submission, attendance marking is skipped for holidays or leave days.
You can enable "Include Holidays" if you want to mark attendance for holidays too.
Attendance warnings are shown on the request dashboard for the same:
4. Related Topics
Employee Attendance Tool
Shift Management
Auto Attendance
Upload Attendance
Attendance | # Attendance Request
Edit Page New Page Revisions
**Using the Attendance Request, employees can submit their attendance request
for the days when their attendance wasn't marked due to various reasons such
as on-site duty or work from home. Attendance Request can also be used for
Attendance Regularization to overwrite existing attendance records.**
To access Attendance Request, go to:
> Home > Human Resources > Attendance > Attendance Request
## 1\. Prerequisites
Before creating an Attendance Request, it is advised that you create the
following first:
* [Employee](/docs/v14/user/manual/en/human-resources/employee)
## 2\. How to create an Attendance Request
1. Go to Attendance Request list, click on New.
2. Select Employee who wants to submit the Attendance Request.
3. Select From Date and To Date of Attendance Request.
4. You can enable **"Include Holidays"** if you want to mark attendance for holidays in between these dates too. This feature was introduced v15 onwards.
5. Select Reason and enter Explanation (optional).
6. Save and Submit.

> **Note 1:** You can check the 'Half Day' checkbox and enter the Date in case
> the attendance is for Half Day.
> **Note 2:** On submission of the same, Attendance documents will be created
> for the days you mentioned as shown.

As seen below, respective Attendance records are linked with the submitted
Attendance Request.

If you cancel the Attendance Request, the linked Attendance documents created
will be cancelled as well.

## 3\. Features
### 3.1 Overwrite an existing Attendance record
Consider a scenario where the auto-attendance tool marked an employee as
Absent. If the employee wants to rectify their attendance, they can raise a
request. On submission, the Attendance record will be updated:

The submission can be controlled via
[workflows](https://docs.erpnext.com/docs/v14/user/manual/en/setting-
up/workflows) to undergo approvals.
### 3.2 Request for Attendance in Bulk
Employees can also request for attendance for an entire month or week. On
submission, attendance marking is skipped for holidays or leave days.
You can enable "Include Holidays" if you want to mark attendance for holidays
too.

Attendance warnings are shown on the request dashboard for the same:

## 4\. Related Topics
1. [Employee Attendance Tool](/docs/v14/user/manual/en/human-resources/employee-attendance-tool)
2. [Shift Management](/docs/v14/user/manual/en/human-resources/shift-management)
3. [Auto Attendance](/docs/v14/user/manual/en/human-resources/auto-attendance)
4. [Upload Attendance](/docs/v14/user/manual/en/human-resources/upload-attendance)
5. [Attendance](/docs/v14/user/manual/en/human-resources/attendance)
##### Attendance Request
× rucha_mahabal edited 2 months ago
**Using the Attendance Request, employees can submit their attendance request
for the days when their attendance wasn't marked due to various reasons such
as on-site duty or work from home. Attendance Request can also be used for
Attendance Regularization to overwrite existing attendance records.**
To access Attendance Request, go to:
> Home > Human Resources > Attendance > Attendance Request
## 1\. Prerequisites
Before creating an Attendance Request, it is advised that you create the
following first:
* [Employee](/docs/v14/user/manual/en/human-resources/employee)
## 2\. How to create an Attendance Request
1. Go to Attendance Request list, click on New.
2. Select Employee who wants to submit the Attendance Request.
3. Select From Date and To Date of Attendance Request.
4. Select Reason and enter Explanation (optional).
5. Save and Submit.

> **Note 1:** You can check the 'Half Day' checkbox and enter the Date in case
> the attendance is for Half Day.
> **Note 2:** On submission of the same, Attendance documents will be created
> for the days you mentioned as shown.

As seen below, respective Attendance records are linked with the submitted
Attendance Request.

If you cancel the Attendance Request, the linked Attendance documents created
will be cancelled as well.

## 3\. Features
### 3.1 Overwrite an existing Attendance record
Consider a scenario where the auto-attendance tool marked an employee as
Absent. If the employee wants to rectify their attendance, they can raise a
request. On submission, the Attendance record will be updated:

The submission can be controlled via
[workflows](https://docs.erpnext.com/docs/v14/user/manual/en/setting-
up/workflows) to undergo approvals.
### 3.2 Request for Attendance in bulk
Employees can also request for attendance for an entire month or week. On
submission, attendance marking is skipped for holidays or leave days.
Attendance warnings are shown on the request dashboard for the same:

## 4\. Related Topics
1. [Employee Attendance Tool](/docs/v14/user/manual/en/human-resources/employee-attendance-tool)
2. [Shift Management](/docs/v14/user/manual/en/human-resources/shift-management)
3. [Auto Attendance](/docs/v14/user/manual/en/human-resources/auto-attendance)
4. [Upload Attendance](/docs/v14/user/manual/en/human-resources/upload-attendance)
5. [Attendance](/docs/v14/user/manual/en/human-resources/attendance)
Previous Next
|
End of preview. Expand
in Dataset Viewer.
Details About the Dataset
This dataset is prepared from this document.
The entire site details is there.
you can see the Five column
title- Its a title of the main content.url- Its a url of that respective pagemain_content_html- The main content its inhtmlformat.main_content_str- The main content in theStringformat.main_content_md- The main contetn in theMark Downformat.
This document is generate from the the frappehr.com
This datasets helps what is Frappe HR? and How to use Frappe HR?.
- Downloads last month
- 17