Running Privacy-Preserving Inferences on Hugging Face Endpoints


This is a guest blog post by the Zama team. Zama is an open source cryptography company building state-of-the-art FHE solutions for blockchain and AI.
Eighteen months ago, Zama started Concrete ML, a privacy-preserving ML framework with bindings to traditional ML frameworks such as scikit-learn, ONNX, PyTorch, and TensorFlow. To ensure privacy for users' data, Zama uses Fully Homomorphic Encryption (FHE), a cryptographic tool that allows to make direct computations over encrypted data, without ever knowing the private key.
From the start, we wanted to pre-compile some FHE-friendly networks and make them available somewhere on the internet, allowing users to use them trivially. We are ready today! And not in a random place on the internet, but directly on Hugging Face.
More precisely, we use Hugging Face Endpoints and custom inference handlers, to be able to store our Concrete ML models and let users deploy on HF machines in one click. At the end of this blog post, you will understand how to use pre-compiled models and how to prepare yours. This blog can also be considered as another tutorial for custom inference handlers.
Deploying a pre-compiled model
Let's start with deploying an FHE-friendly model (prepared by Zama or third parties - see Preparing your pre-compiled model section below for learning how to prepare yours).
First, look for the model you want to deploy: We have pre-compiled a bunch of models on Zama's HF page (or you can find them with tags). Let's suppose you have chosen concrete-ml-encrypted-decisiontree: As explained in the description, this pre-compiled model allows you to detect spam without looking at the message content in the clear.
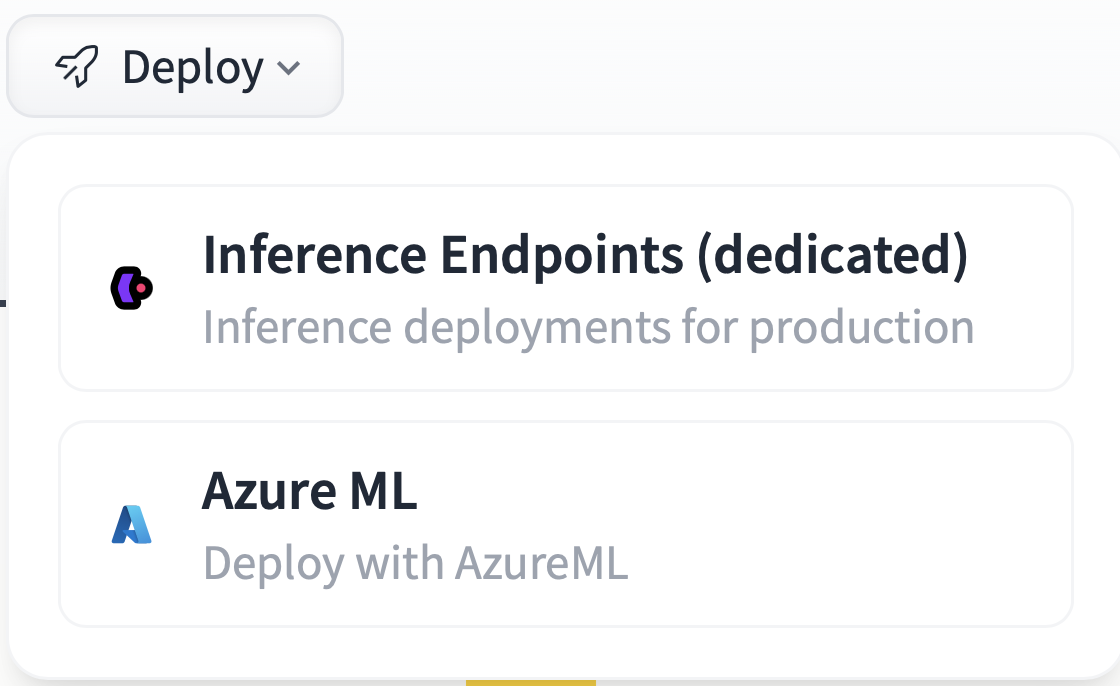
Like with any other model available on the Hugging Face platform, select Deploy and then Inference Endpoint (dedicated):
Next, choose the Endpoint name or the region, and most importantly, the CPU (Concrete ML models do not use GPUs for now; we are working on it) as well as the best machine available - in the example below we chose eight vCPU. Now click on Create Endpoint and wait for the initialization to finish.
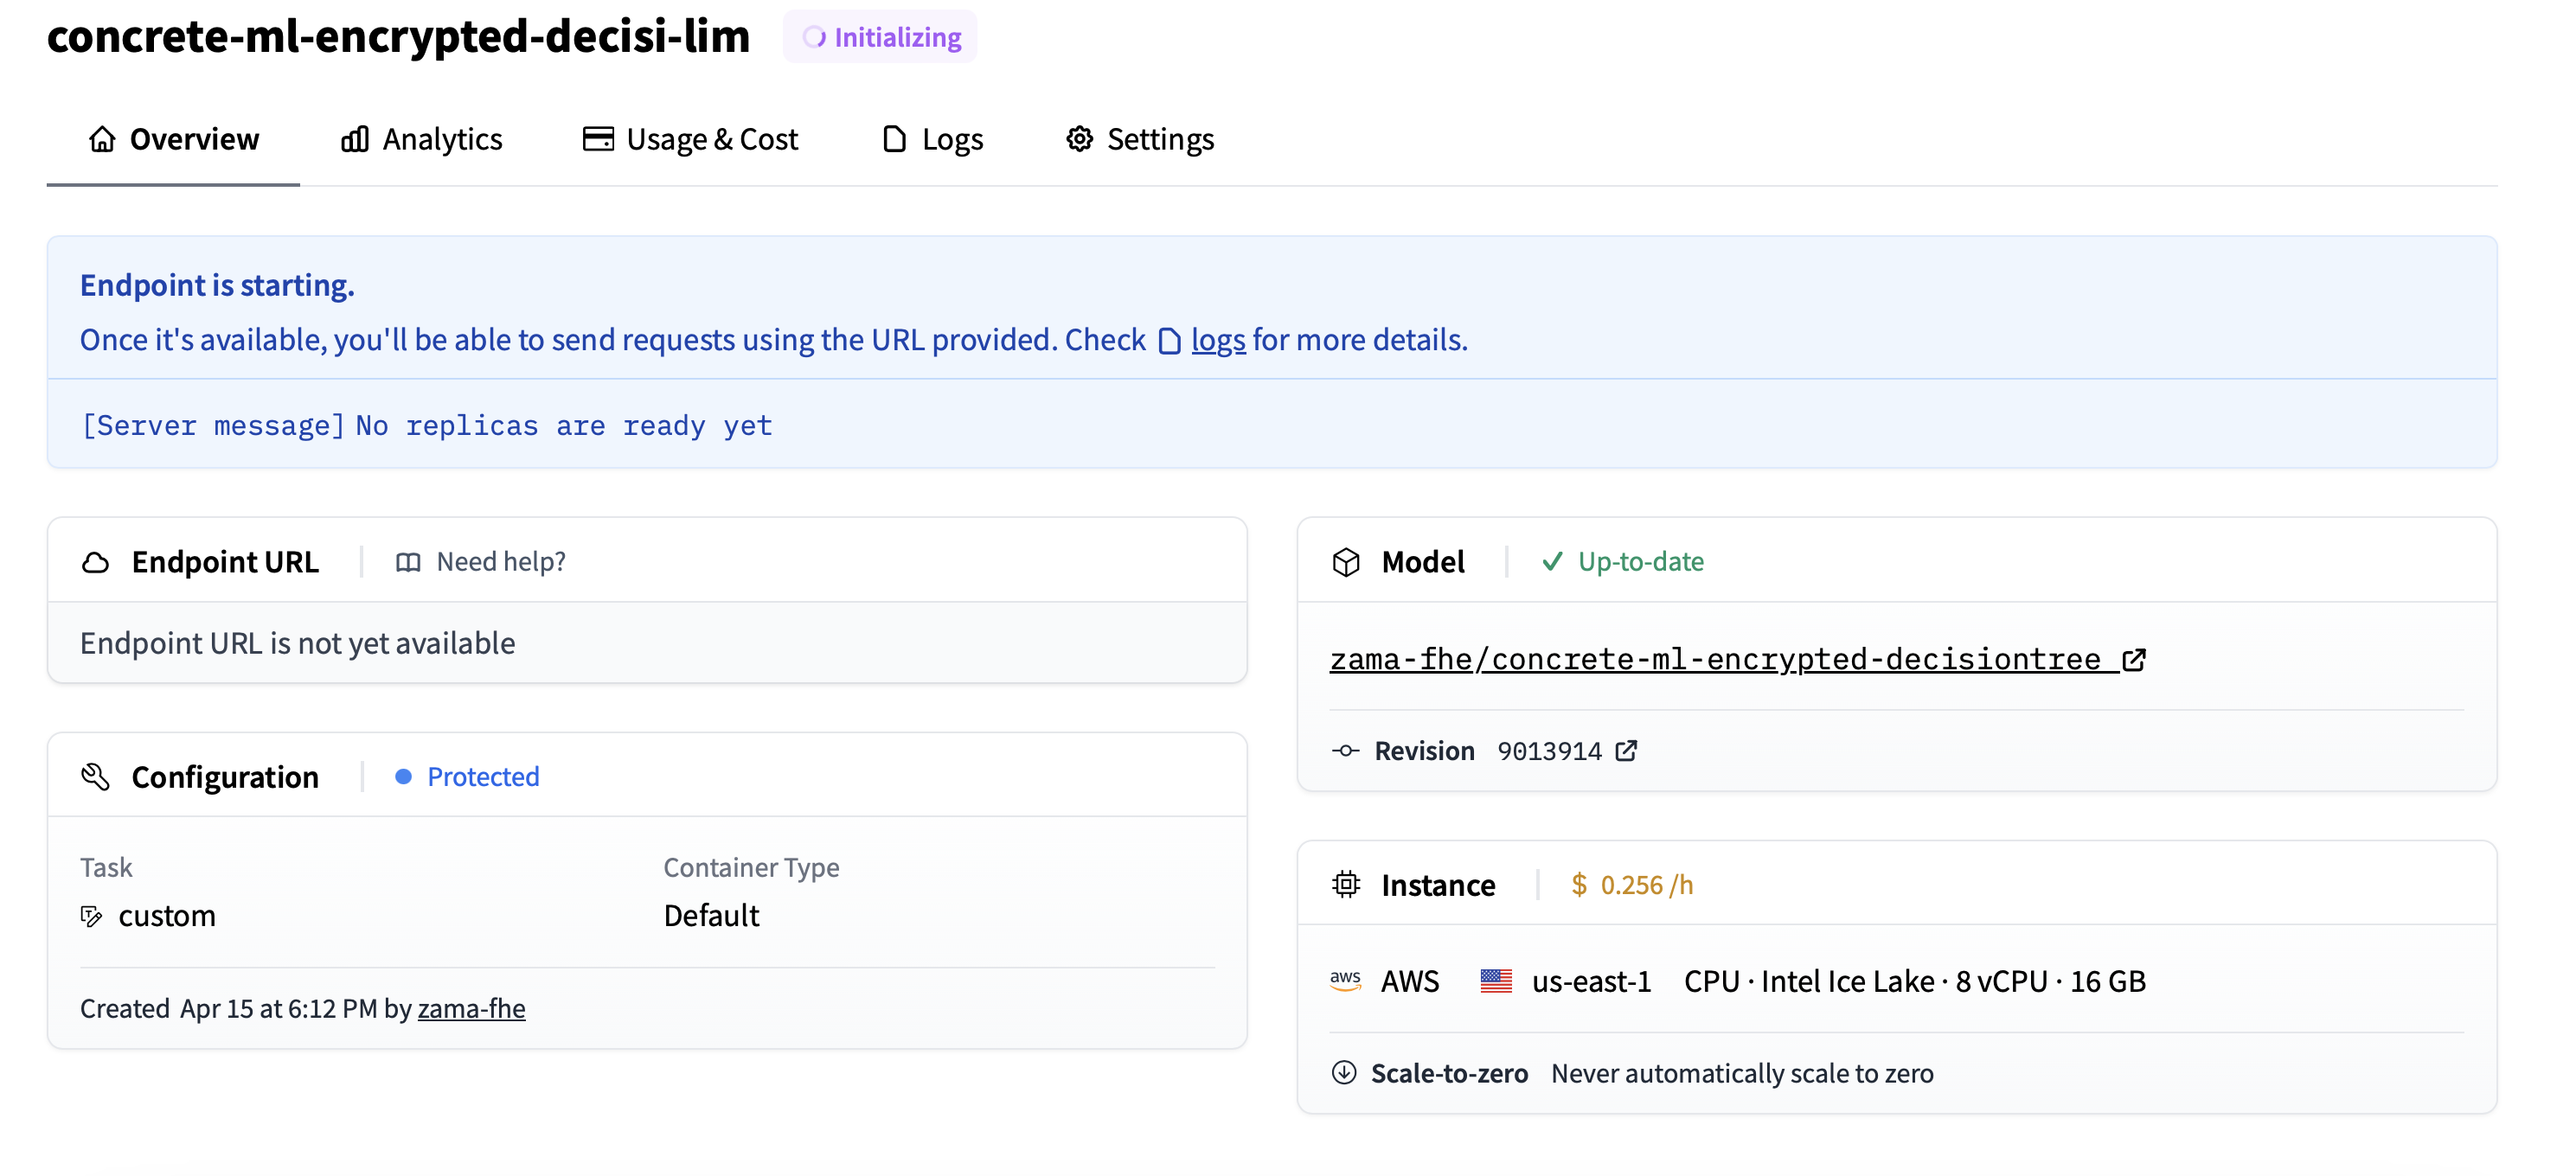
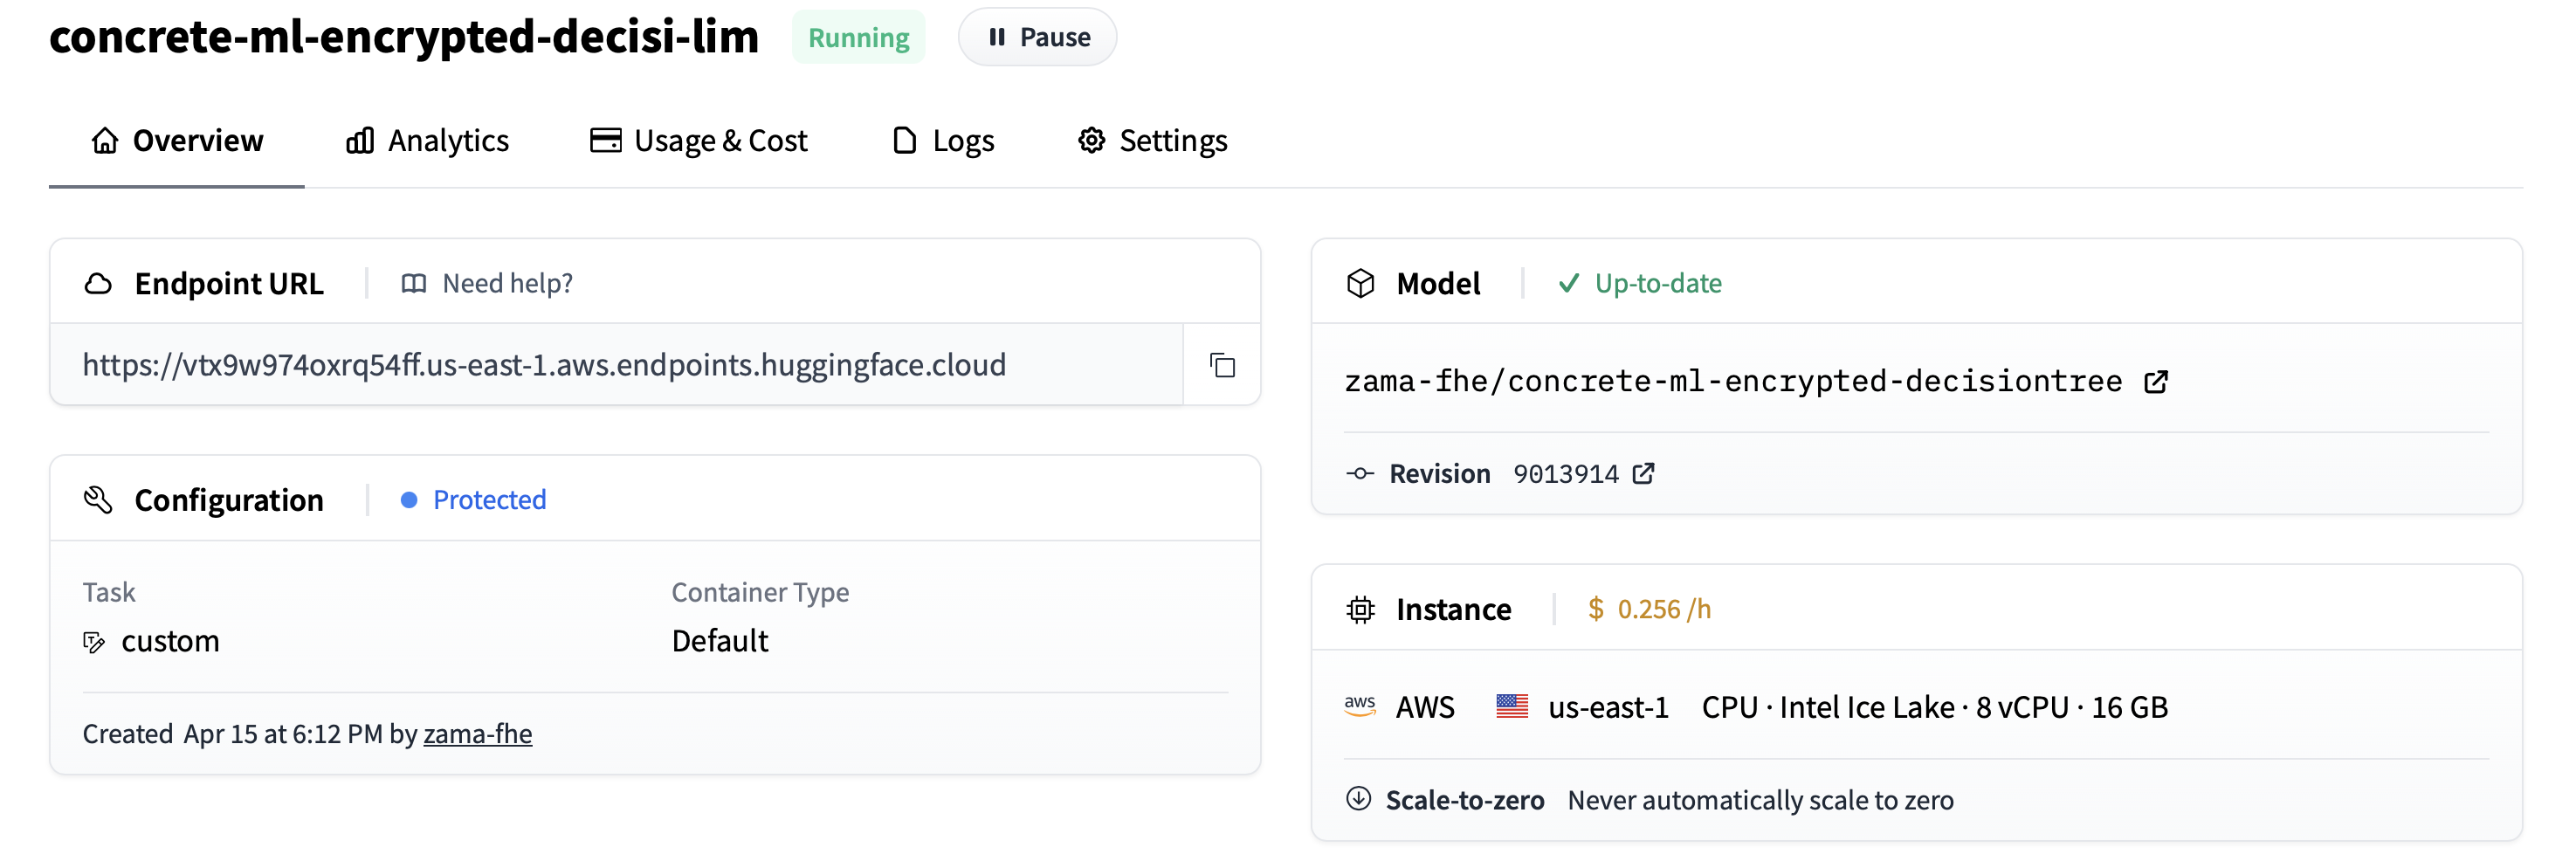
After a few seconds, the Endpoint is deployed, and your privacy-preserving model is ready to operate.
: Don’t forget to delete the Endpoint (or at least pause it) when you are no longer using it, or else it will cost more than anticipated.
Using the Endpoint
Installing the client side
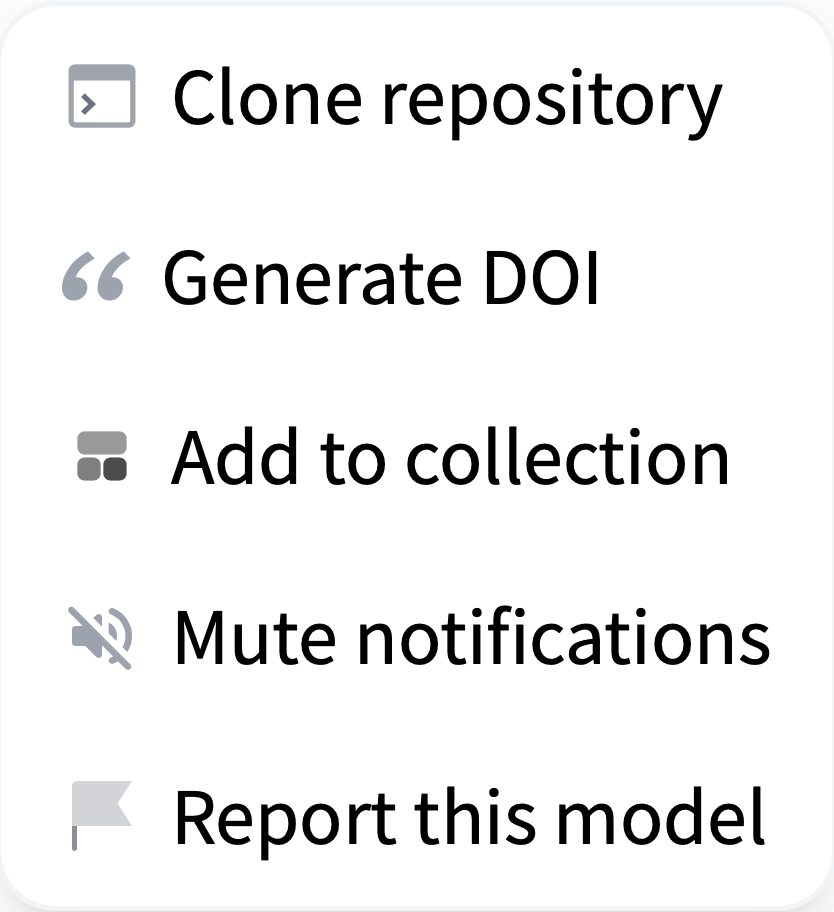
The goal is not only to deploy your Endpoint but also to let your users play with it. For that, they need to clone the repository on their computer. This is done by selecting Clone Repository, in the dropdown menu:
They will be given a small command line that they can run in their terminal:
git clone https://huggingface.co/zama-fhe/concrete-ml-encrypted-decisiontree
Once the command is done, they go to the concrete-ml-encrypted-decisiontree directory and open play_with_endpoint.py with their editor. Here, they will find the line with API_URL = … and should replace it with the new URL of the Endpoint created in the previous section.
API_URL = "https://vtx9w974oxrq54ff.us-east-1.aws.endpoints.huggingface.cloud"
Of course, fill it in with with your Entrypoint’s URL. Also, define an access token and store it in an environment variable:
export HF_TOKEN=[your token hf_XX..XX]
Lastly, your user machines need to have Concrete ML installed locally: Make a virtual environment, source it, and install the necessary dependencies:
python3.10 -m venv .venv
source .venv/bin/activate
pip install -U setuptools pip wheel
pip install -r requirements.txt
Remark that we currently force the use of Python 3.10 (which is also the default python version used in Hugging Face Endpoints). This is because our development files currently depend on the Python version. We are working on making them independent. This should be available in a further version.
Running inferences
Now, your users can run inference on the Endpoint launching the script:
python play_with_endpoint.py
It should generate some logs similar to the following:
Sending 0-th piece of the key (remaining size is 71984.14 kbytes)
Storing the key in the database under uid=3307376977
Sending 1-th piece of the key (remaining size is 0.02 kbytes)
Size of the payload: 0.23 kilobytes
for 0-th input, prediction=0 with expected 0 in 3.242 seconds
for 1-th input, prediction=0 with expected 0 in 3.612 seconds
for 2-th input, prediction=0 with expected 0 in 4.765 seconds

(...)

for 688-th input, prediction=0 with expected 1 in 3.176 seconds
for 689-th input, prediction=1 with expected 1 in 4.027 seconds
for 690-th input, prediction=0 with expected 0 in 4.329 seconds
Accuracy on 691 samples is 0.8958031837916064
Total time: 2873.860 seconds
Duration per inference: 4.123 seconds
Adapting to your application or needs
If you edit play_with_endpoint.py, you'll see that we iterate over different samples of the test dataset and run encrypted inferences directly on the Endpoint.
for i in range(nb_samples):

    # Quantize the input and encrypt it
    encrypted_inputs = fhemodel_client.quantize_encrypt_serialize(X_test[i].reshape(1, -1))

    # Prepare the payload
    payload = {
        "inputs": "fake",
        "encrypted_inputs": to_json(encrypted_inputs),
        "method": "inference",
        "uid": uid,
    }

    if is_first:
        print(f"Size of the payload: {sys.getsizeof(payload) / 1024:.2f} kilobytes")
        is_first = False

    # Run the inference on HF servers
    duration -= time.time()
    duration_inference = -time.time()
    encrypted_prediction = query(payload)
    duration += time.time()
    duration_inference += time.time()

    encrypted_prediction = from_json(encrypted_prediction)

    # Decrypt the result and dequantize
    prediction_proba = fhemodel_client.deserialize_decrypt_dequantize(encrypted_prediction)[0]
    prediction = np.argmax(prediction_proba)

    if verbose:
        print(
            f"for {i}-th input, {prediction=} with expected {Y_test[i]} in {duration_inference:.3f} seconds"
        )

    # Measure accuracy
    nb_good += Y_test[i] == prediction
Of course, this is just an example of the Entrypoint's usage. Developers are encouraged to adapt this example to their own use-case or application.
Under the hood
Please note that all of this is done thanks to the flexibility of custom handlers, and we express our gratitude to the Hugging Face developers for offering such flexibility. The mechanism is defined in handler.py. As explained in the Hugging Face documentation, you can define the __call__ method of EndpointHandler pretty much as you want: In our case, we have defined a method parameter, which can be save_key (to save FHE evaluation keys), append_key (to save FHE evaluation keys piece by piece if the key is too large to be sent in one single call) and finally inference (to run FHE inferences). These methods are used to set the evaluation key once and then run all the inferences, one by one, as seen in play_with_endpoint.py.
Limits
One can remark, however, that keys are stored in the RAM of the Endpoint, which is not convenient for a production environment: At each restart, the keys are lost and need to be re-sent. Plus, when you have several machines to handle massive traffic, this RAM is not shared between the machines. Finally, the available CPU machines only provide eight vCPUs at most for Endpoints, which could be a limit for high-load applications.
Preparing your pre-compiled model
Now that you know how easy it is to deploy a pre-compiled model, you may want to prepare yours. For this, you can fork one of the repositories we have prepared. All the model categories supported by Concrete ML (linear models, tree-based models, built-in MLP, PyTorch models) have at least one example, that can be used as a template for new pre-compiled models.
Then, edit creating_models.py, and change the ML task to be the one you want to tackle in your pre-compiled model: For example, if you started with concrete-ml-encrypted-decisiontree, change the dataset and the model kind.
As explained earlier, you must have installed Concrete ML to prepare your pre-compiled model. Remark that you may have to use the same python version than Hugging Face use by default (3.10 when this blog is written), or your models may need people to use a container with your python during the deployment.
Now you can launch python creating_models.py. This will train the model and create the necessary development files (client.zip, server.zip, and versions.json) in the compiled_model directory. As explained in the documentation, these files contain your pre-compiled model. If you have any issues, you can get support on the fhe.org discord.
The last step is to modify play_with_endpoint.py to also deal with the same ML task as in creating_models.py: Set the dataset accordingly.
Now, you can save this directory with the compiled_model directory and files, as well as your modifications in creating_models.py and play_with_endpoint.py on Hugging Face models. Certainly, you will need to run some tests and make slight adjustments for it to work. Do not forget to add a concrete-ml and FHE tag, such that your pre-compiled model appears easily in searches.
Pre-compiled models available today
For now, we have prepared a few pre-compiled models as examples, hoping the community will extend this soon. Pre-compiled models can be found by searching for the concrete-ml or FHE tags.
| Model kind | Dataset | Execution time on HF Endpoint |
|---|---|---|
| Logistic Regression | Synthetic | 0.4 sec |
| DecisionTree | Spam | 2.0 sec |
| QNN | Iris | 3.7 sec |
| CNN | MNIST | 24 sec |
Keep in mind that there's a limited set of configuration options in Hugging Face for CPU-backed Endpoints (up to 8 vCPU with 16 GB of RAM today). Depending on your production requirements and model characteristics, execution times could be faster on more powerful cloud instances. Hopefully, more powerful machines will soon be available on Hugging Face Endpoints to improve these timings.
Additional resources
- Check out Zama libraries Concrete and Concrete-ML and start using FHE in your own applications.
- Check out Zama's Hugging Face profile to read more blog posts and try practical FHE demos.
- Check out @zama_fhe on twitter to get our latest updates.
Conclusion and next steps
In this blog post, we have shown that custom Endpoints are pretty easy yet powerful to use. What we do in Concrete ML is pretty different from the regular workflow of ML practitioners, but we are still able to accommodate the custom Endpoints to deal with most of our needs. Kudos to Hugging Face engineers for developing such a generic solution.
We explained how:
- Developers can create their own pre-compiled models and make them available on Hugging Face models.
- Companies can deploy developers' pre-compiled models and make them available to their users via HF Endpoints.
- Final users can use these Endpoints to run their ML tasks over encrypted data.
To go further, it would be useful to have more powerful machines available on Hugging Face Endpoints to make inferences faster. Also, we could imagine that Concrete ML becomes more integrated into Hugging Face's interface and has a Private-Preserving Inference Endpoint button, simplifying developers' lives even more. Finally, for integration in several server machines, it could be helpful to have a way to share a state between machines and keep this state non-volatile (FHE inference keys would be stored there).