Diffusers documentation
Performing inference with LCM-LoRA
Performing inference with LCM-LoRA
Latent Consistency Models (LCM) enable quality image generation in typically 2-4 steps making it possible to use diffusion models in almost real-time settings.
From the official website:
LCMs can be distilled from any pre-trained Stable Diffusion (SD) in only 4,000 training steps (~32 A100 GPU Hours) for generating high quality 768 x 768 resolution images in 2~4 steps or even one step, significantly accelerating text-to-image generation. We employ LCM to distill the Dreamshaper-V7 version of SD in just 4,000 training iterations.
For a more technical overview of LCMs, refer to the paper.
However, each model needs to be distilled separately for latent consistency distillation. The core idea with LCM-LoRA is to train just a few adapter layers, the adapter being LoRA in this case. This way, we don’t have to train the full model and keep the number of trainable parameters manageable. The resulting LoRAs can then be applied to any fine-tuned version of the model without distilling them separately. Additionally, the LoRAs can be applied to image-to-image, ControlNet/T2I-Adapter, inpainting, AnimateDiff etc. The LCM-LoRA can also be combined with other LoRAs to generate styled images in very few steps (4-8).
LCM-LoRAs are available for stable-diffusion-v1-5, stable-diffusion-xl-base-1.0, and the SSD-1B model. All the checkpoints can be found in this collection.
For more details about LCM-LoRA, refer to the technical report.
This guide shows how to perform inference with LCM-LoRAs for
- text-to-image
- image-to-image
- combined with styled LoRAs
- ControlNet/T2I-Adapter
- inpainting
- AnimateDiff
Before going through this guide, we’ll take a look at the general workflow for performing inference with LCM-LoRAs. LCM-LoRAs are similar to other Stable Diffusion LoRAs so they can be used with any DiffusionPipeline that supports LoRAs.
- Load the task specific pipeline and model.
- Set the scheduler to LCMScheduler.
- Load the LCM-LoRA weights for the model.
- Reduce the
guidance_scalebetween[1.0, 2.0]and set thenum_inference_stepsbetween [4, 8]. - Perform inference with the pipeline with the usual parameters.
Let’s look at how we can perform inference with LCM-LoRAs for different tasks.
First, make sure you have peft installed, for better LoRA support.
pip install -U peft
Text-to-image
You’ll use the StableDiffusionXLPipeline with the scheduler: LCMScheduler and then load the LCM-LoRA. Together with the LCM-LoRA and the scheduler, the pipeline enables a fast inference workflow overcoming the slow iterative nature of diffusion models.
import torch
from diffusers import DiffusionPipeline, LCMScheduler

pipe = DiffusionPipeline.from_pretrained(
    "stabilityai/stable-diffusion-xl-base-1.0",
    variant="fp16",
    torch_dtype=torch.float16
).to("cuda")

# set scheduler
pipe.scheduler = LCMScheduler.from_config(pipe.scheduler.config)

# load LCM-LoRA
pipe.load_lora_weights("latent-consistency/lcm-lora-sdxl")

prompt = "Self-portrait oil painting, a beautiful cyborg with golden hair, 8k"

generator = torch.manual_seed(42)
image = pipe(
    prompt=prompt, num_inference_steps=4, generator=generator, guidance_scale=1.0
).images[0]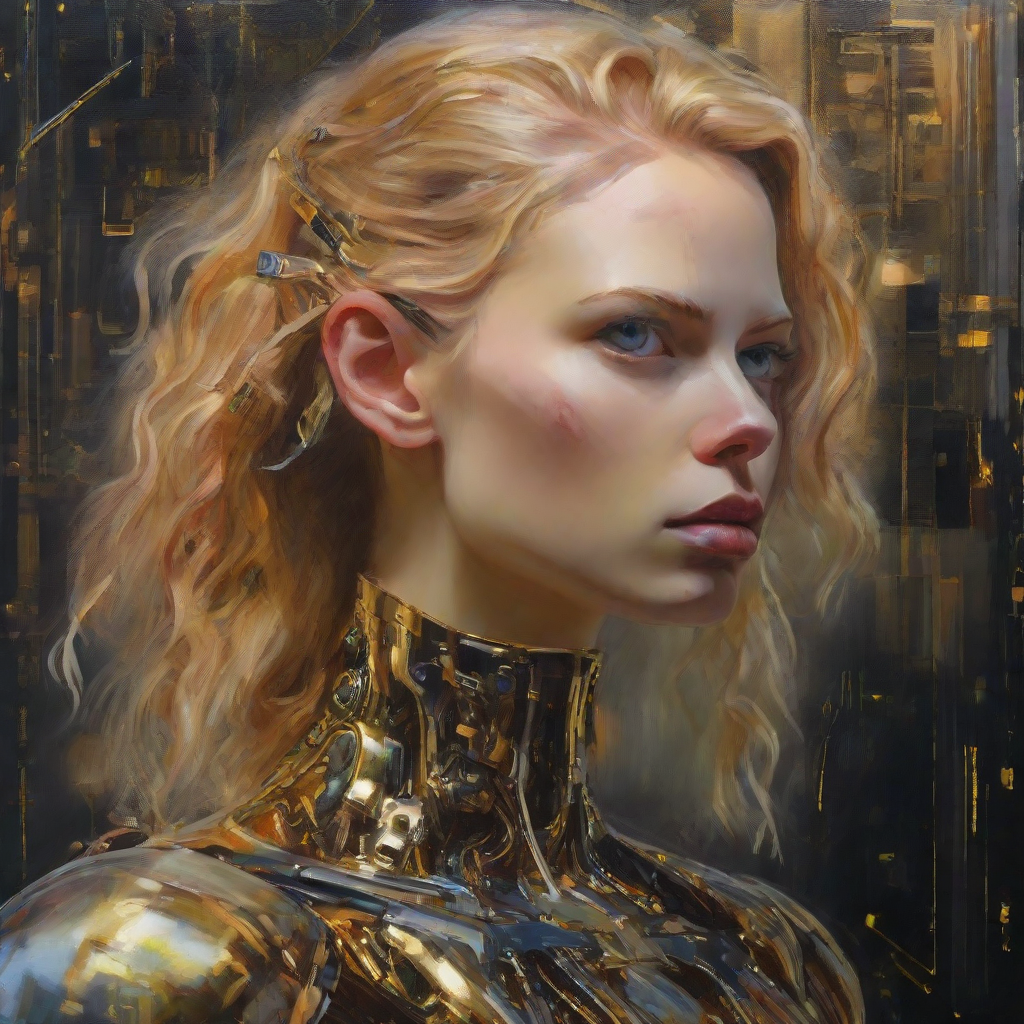
Notice that we use only 4 steps for generation which is way less than what’s typically used for standard SDXL.
You may have noticed that we set guidance_scale=1.0, which disables classifer-free-guidance. This is because the LCM-LoRA is trained with guidance, so the batch size does not have to be doubled in this case. This leads to a faster inference time, with the drawback that negative prompts don’t have any effect on the denoising process.
You can also use guidance with LCM-LoRA, but due to the nature of training the model is very sensitve to the guidance_scale values, high values can lead to artifacts in the generated images. In our experiments, we found that the best values are in the range of [1.0, 2.0].
Inference with a fine-tuned model
As mentioned above, the LCM-LoRA can be applied to any fine-tuned version of the model without having to distill them separately. Let’s look at how we can perform inference with a fine-tuned model. In this example, we’ll use the animagine-xl model, which is a fine-tuned version of the SDXL model for generating anime.
from diffusers import DiffusionPipeline, LCMScheduler

pipe = DiffusionPipeline.from_pretrained(
    "Linaqruf/animagine-xl",
    variant="fp16",
    torch_dtype=torch.float16
).to("cuda")

# set scheduler
pipe.scheduler = LCMScheduler.from_config(pipe.scheduler.config)

# load LCM-LoRA
pipe.load_lora_weights("latent-consistency/lcm-lora-sdxl")

prompt = "face focus, cute, masterpiece, best quality, 1girl, green hair, sweater, looking at viewer, upper body, beanie, outdoors, night, turtleneck"

generator = torch.manual_seed(0)
image = pipe(
    prompt=prompt, num_inference_steps=4, generator=generator, guidance_scale=1.0
).images[0]
Image-to-image
LCM-LoRA can be applied to image-to-image tasks too. Let’s look at how we can perform image-to-image generation with LCMs. For this example we’ll use the dreamshaper-7 model and the LCM-LoRA for stable-diffusion-v1-5 .
import torch
from diffusers import AutoPipelineForImage2Image, LCMScheduler
from diffusers.utils import make_image_grid, load_image

pipe = AutoPipelineForImage2Image.from_pretrained(
    "Lykon/dreamshaper-7",
    torch_dtype=torch.float16,
    variant="fp16",
).to("cuda")

# set scheduler
pipe.scheduler = LCMScheduler.from_config(pipe.scheduler.config)

# load LCM-LoRA
pipe.load_lora_weights("latent-consistency/lcm-lora-sdv1-5")

# prepare image
url = "https://huggingface.co/datasets/huggingface/documentation-images/resolve/main/diffusers/img2img-init.png"
init_image = load_image(url)
prompt = "Astronauts in a jungle, cold color palette, muted colors, detailed, 8k"

# pass prompt and image to pipeline
generator = torch.manual_seed(0)
image = pipe(
    prompt,
    image=init_image,
    num_inference_steps=4,
    guidance_scale=1,
    strength=0.6,
    generator=generator
).images[0]
make_image_grid([init_image, image], rows=1, cols=2)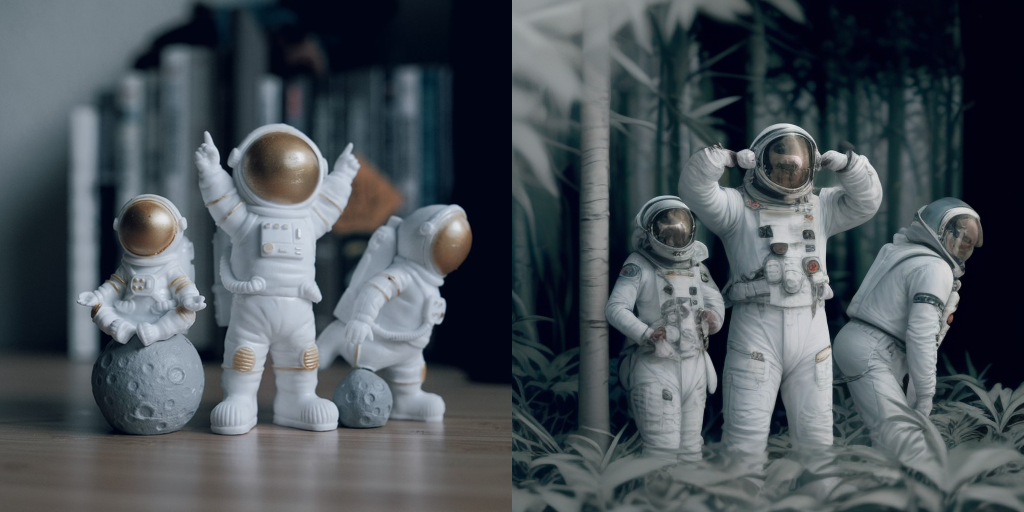
You can get different results based on your prompt and the image you provide. To get the best results, we recommend trying different values for num_inference_steps, strength, and guidance_scale parameters and choose the best one.
Combine with styled LoRAs
LCM-LoRA can be combined with other LoRAs to generate styled-images in very few steps (4-8). In the following example, we’ll use the LCM-LoRA with the papercut LoRA. To learn more about how to combine LoRAs, refer to this guide.
import torch
from diffusers import DiffusionPipeline, LCMScheduler

pipe = DiffusionPipeline.from_pretrained(
    "stabilityai/stable-diffusion-xl-base-1.0",
    variant="fp16",
    torch_dtype=torch.float16
).to("cuda")

# set scheduler
pipe.scheduler = LCMScheduler.from_config(pipe.scheduler.config)

# load LoRAs
pipe.load_lora_weights("latent-consistency/lcm-lora-sdxl", adapter_name="lcm")
pipe.load_lora_weights("TheLastBen/Papercut_SDXL", weight_name="papercut.safetensors", adapter_name="papercut")

# Combine LoRAs
pipe.set_adapters(["lcm", "papercut"], adapter_weights=[1.0, 0.8])

prompt = "papercut, a cute fox"
generator = torch.manual_seed(0)
image = pipe(prompt, num_inference_steps=4, guidance_scale=1, generator=generator).images[0]
image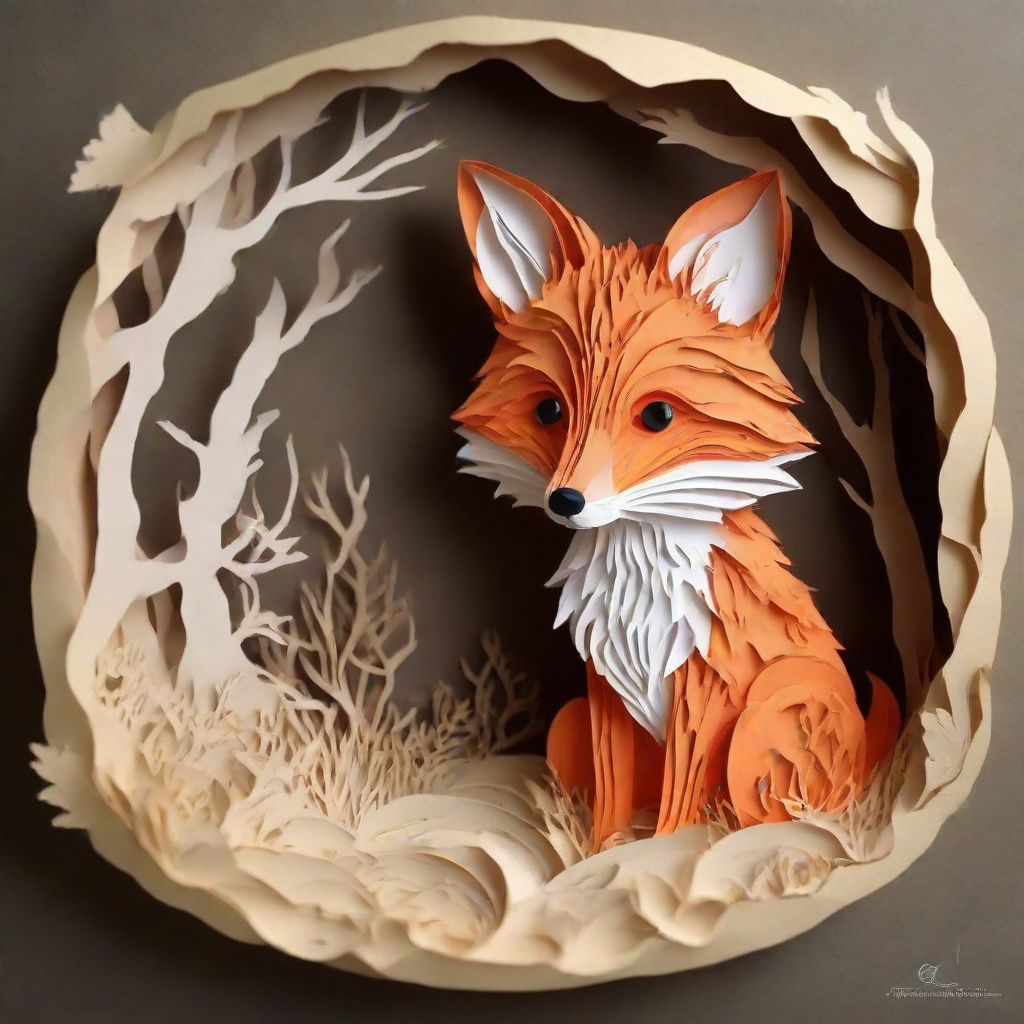
ControlNet/T2I-Adapter
Let’s look at how we can perform inference with ControlNet/T2I-Adapter and LCM-LoRA.
ControlNet
For this example, we’ll use the SD-v1-5 model and the LCM-LoRA for SD-v1-5 with canny ControlNet.
import torch
import cv2
import numpy as np
from PIL import Image

from diffusers import StableDiffusionControlNetPipeline, ControlNetModel, LCMScheduler
from diffusers.utils import load_image

image = load_image(
    "https://hf.co/datasets/huggingface/documentation-images/resolve/main/diffusers/input_image_vermeer.png"
).resize((512, 512))

image = np.array(image)

low_threshold = 100
high_threshold = 200

image = cv2.Canny(image, low_threshold, high_threshold)
image = image[:, :, None]
image = np.concatenate([image, image, image], axis=2)
canny_image = Image.fromarray(image)

controlnet = ControlNetModel.from_pretrained("lllyasviel/sd-controlnet-canny", torch_dtype=torch.float16)
pipe = StableDiffusionControlNetPipeline.from_pretrained(
    "runwayml/stable-diffusion-v1-5",
    controlnet=controlnet,
    torch_dtype=torch.float16,
    safety_checker=None,
    variant="fp16"
).to("cuda")

# set scheduler
pipe.scheduler = LCMScheduler.from_config(pipe.scheduler.config)

# load LCM-LoRA
pipe.load_lora_weights("latent-consistency/lcm-lora-sdv1-5")

generator = torch.manual_seed(0)
image = pipe(
    "the mona lisa",
    image=canny_image,
    num_inference_steps=4,
    guidance_scale=1.5,
    controlnet_conditioning_scale=0.8,
    cross_attention_kwargs={"scale": 1},
    generator=generator,
).images[0]
make_image_grid([canny_image, image], rows=1, cols=2)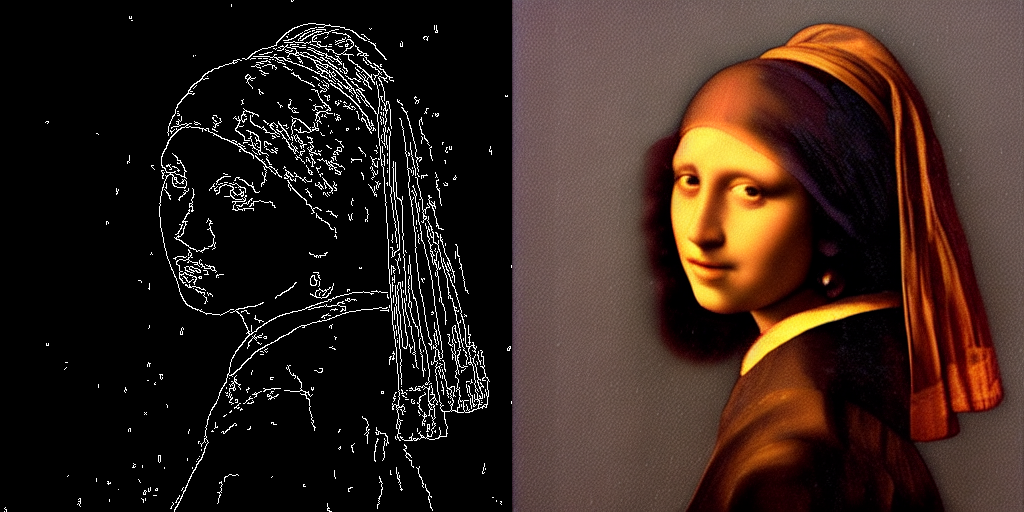
T2I-Adapter
This example shows how to use the LCM-LoRA with the Canny T2I-Adapter and SDXL.
import torch
import cv2
import numpy as np
from PIL import Image

from diffusers import StableDiffusionXLAdapterPipeline, T2IAdapter, LCMScheduler
from diffusers.utils import load_image, make_image_grid

# Prepare image
# Detect the canny map in low resolution to avoid high-frequency details
image = load_image(
    "https://huggingface.co/Adapter/t2iadapter/resolve/main/figs_SDXLV1.0/org_canny.jpg"
).resize((384, 384))

image = np.array(image)

low_threshold = 100
high_threshold = 200

image = cv2.Canny(image, low_threshold, high_threshold)
image = image[:, :, None]
image = np.concatenate([image, image, image], axis=2)
canny_image = Image.fromarray(image).resize((1024, 1024))

# load adapter
adapter = T2IAdapter.from_pretrained("TencentARC/t2i-adapter-canny-sdxl-1.0", torch_dtype=torch.float16, varient="fp16").to("cuda")

pipe = StableDiffusionXLAdapterPipeline.from_pretrained(
    "stabilityai/stable-diffusion-xl-base-1.0",
    adapter=adapter,
    torch_dtype=torch.float16,
    variant="fp16",
).to("cuda")

# set scheduler
pipe.scheduler = LCMScheduler.from_config(pipe.scheduler.config)

# load LCM-LoRA
pipe.load_lora_weights("latent-consistency/lcm-lora-sdxl")

prompt = "Mystical fairy in real, magic, 4k picture, high quality"
negative_prompt = "extra digit, fewer digits, cropped, worst quality, low quality, glitch, deformed, mutated, ugly, disfigured"

generator = torch.manual_seed(0)
image = pipe(
    prompt=prompt,
    negative_prompt=negative_prompt,
    image=canny_image,
    num_inference_steps=4,
    guidance_scale=1.5,
    adapter_conditioning_scale=0.8,
    adapter_conditioning_factor=1,
    generator=generator,
).images[0]
make_image_grid([canny_image, image], rows=1, cols=2)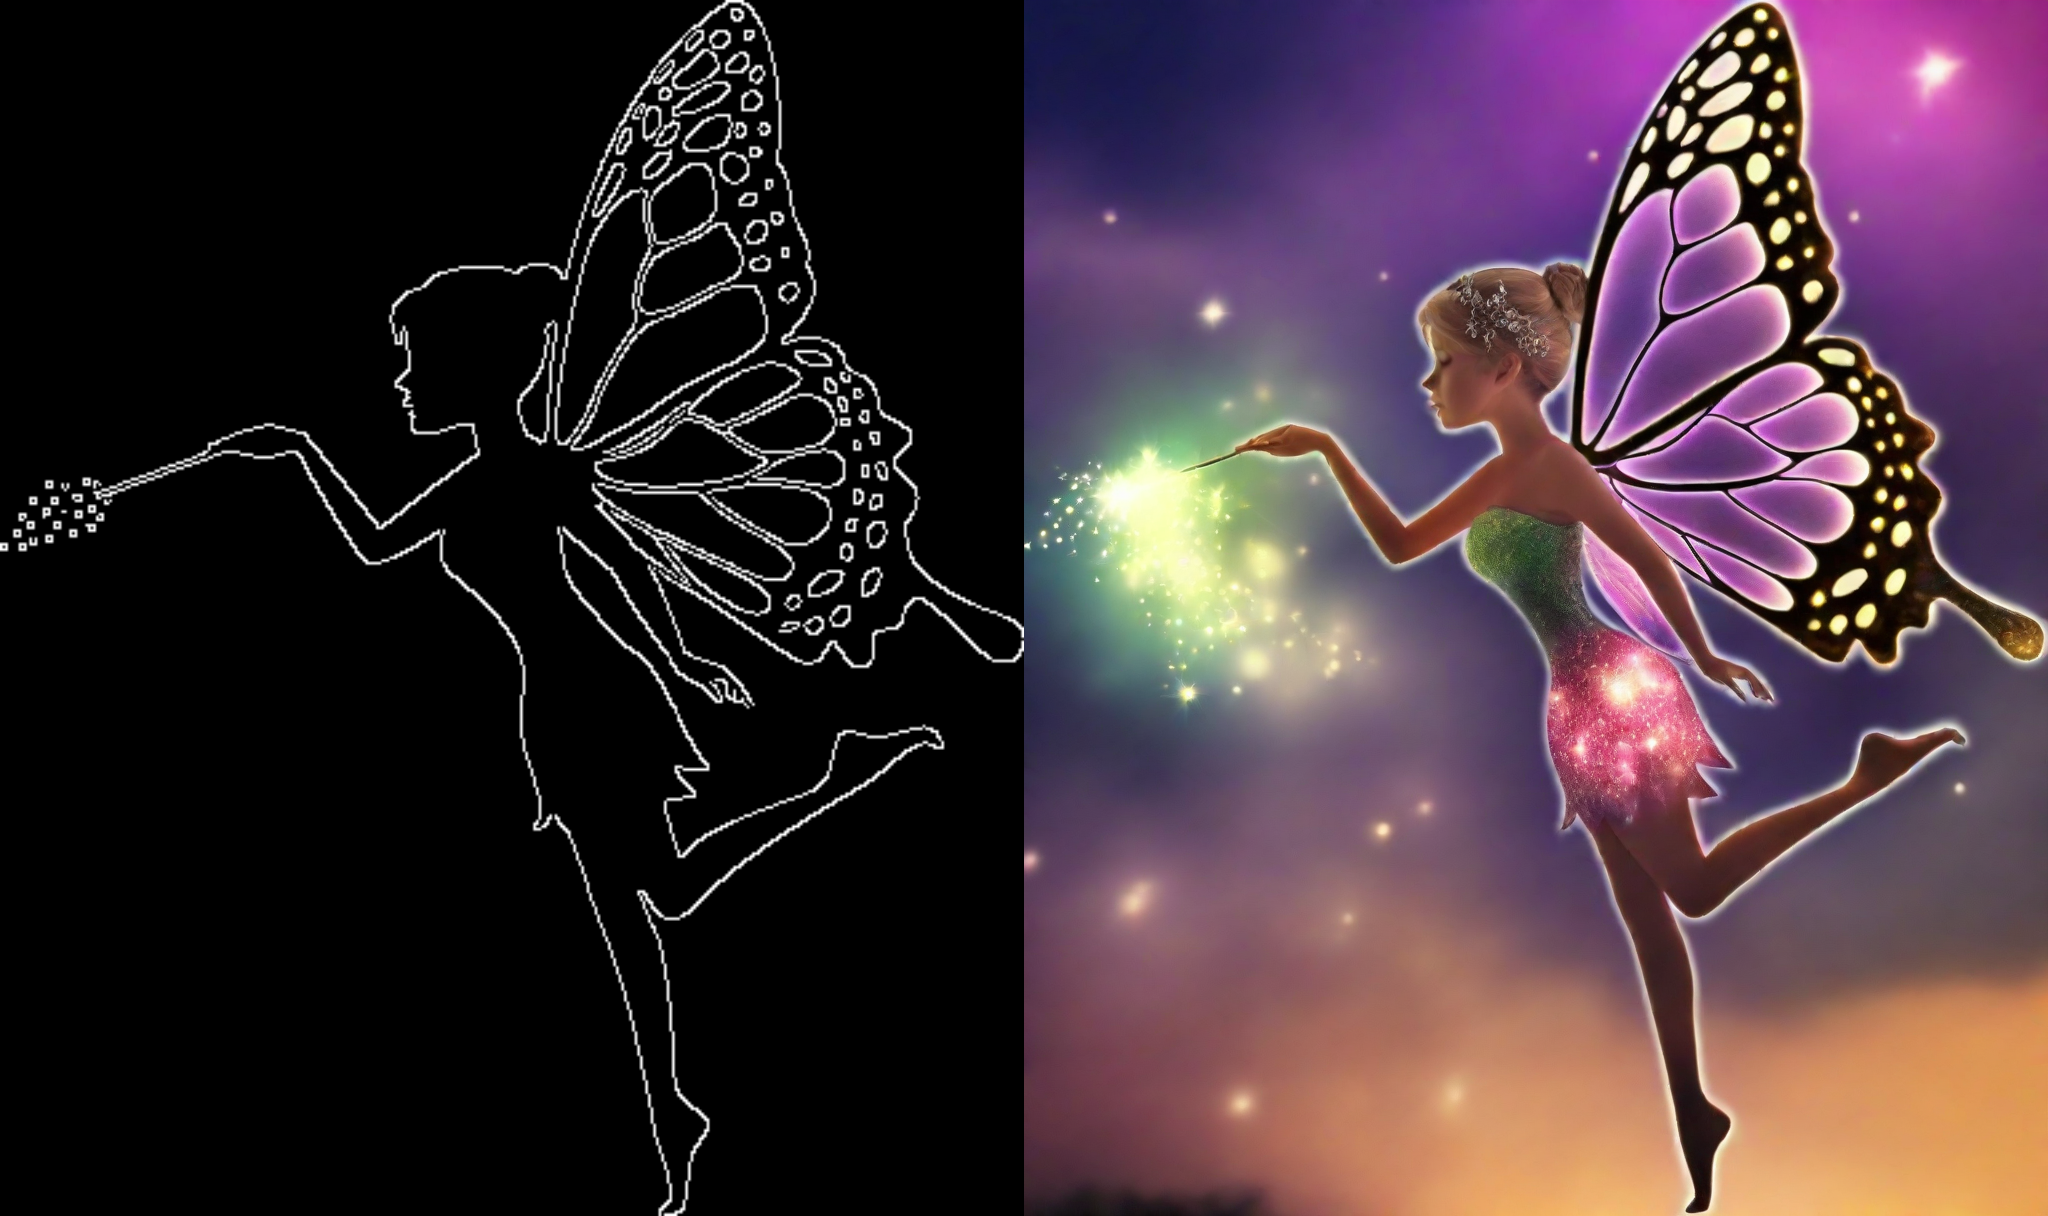
Inpainting
LCM-LoRA can be used for inpainting as well.
import torch
from diffusers import AutoPipelineForInpainting, LCMScheduler
from diffusers.utils import load_image, make_image_grid

pipe = AutoPipelineForInpainting.from_pretrained(
    "runwayml/stable-diffusion-inpainting",
    torch_dtype=torch.float16,
    variant="fp16",
).to("cuda")

# set scheduler
pipe.scheduler = LCMScheduler.from_config(pipe.scheduler.config)

# load LCM-LoRA
pipe.load_lora_weights("latent-consistency/lcm-lora-sdv1-5")

# load base and mask image
init_image = load_image("https://huggingface.co/datasets/huggingface/documentation-images/resolve/main/diffusers/inpaint.png")
mask_image = load_image("https://huggingface.co/datasets/huggingface/documentation-images/resolve/main/diffusers/inpaint_mask.png")

# generator = torch.Generator("cuda").manual_seed(92)
prompt = "concept art digital painting of an elven castle, inspired by lord of the rings, highly detailed, 8k"
generator = torch.manual_seed(0)
image = pipe(
    prompt=prompt,
    image=init_image,
    mask_image=mask_image,
    generator=generator,
    num_inference_steps=4,
    guidance_scale=4,
).images[0]
make_image_grid([init_image, mask_image, image], rows=1, cols=3)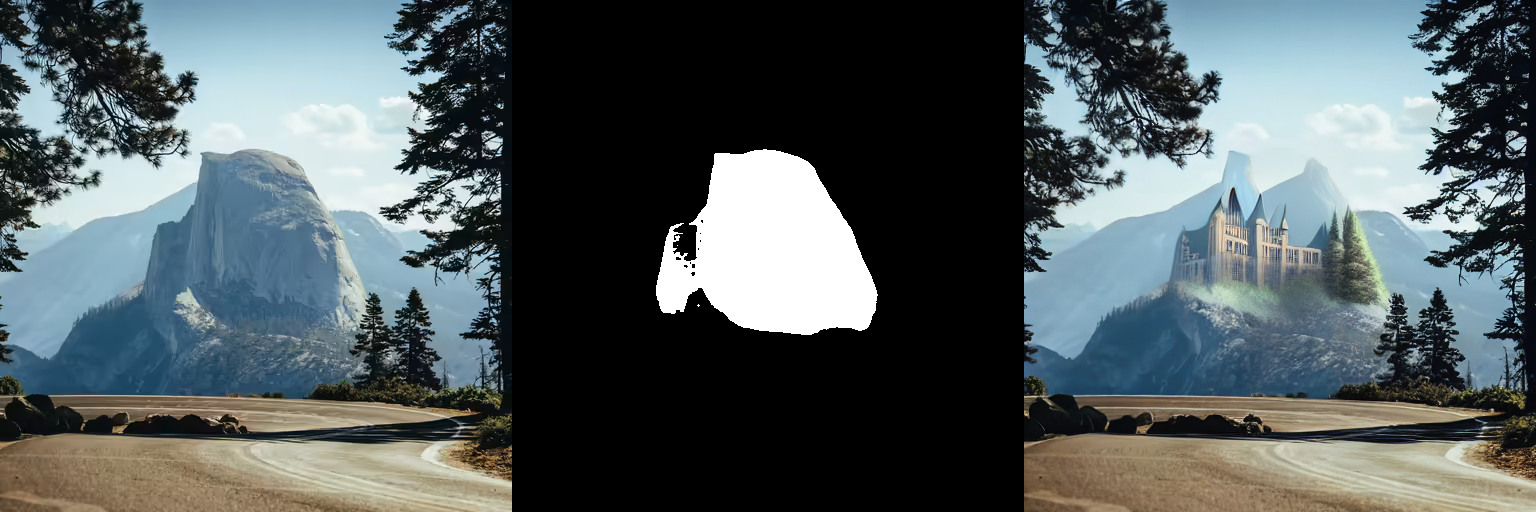
AnimateDiff
AnimateDiff allows you to animate images using Stable Diffusion models. To get good results, we need to generate multiple frames (16-24), and doing this with standard SD models can be very slow.
LCM-LoRA can be used to speed up the process significantly, as you just need to do 4-8 steps for each frame. Let’s look at how we can perform animation with LCM-LoRA and AnimateDiff.
import torch
from diffusers import MotionAdapter, AnimateDiffPipeline, DDIMScheduler, LCMScheduler
from diffusers.utils import export_to_gif

adapter = MotionAdapter.from_pretrained("diffusers/animatediff-motion-adapter-v1-5")
pipe = AnimateDiffPipeline.from_pretrained(
    "frankjoshua/toonyou_beta6",
    motion_adapter=adapter,
).to("cuda")

# set scheduler
pipe.scheduler = LCMScheduler.from_config(pipe.scheduler.config)

# load LCM-LoRA
pipe.load_lora_weights("latent-consistency/lcm-lora-sdv1-5", adapter_name="lcm")
pipe.load_lora_weights("guoyww/animatediff-motion-lora-zoom-in", weight_name="diffusion_pytorch_model.safetensors", adapter_name="motion-lora")

pipe.set_adapters(["lcm", "motion-lora"], adapter_weights=[0.55, 1.2])

prompt = "best quality, masterpiece, 1girl, looking at viewer, blurry background, upper body, contemporary, dress"
generator = torch.manual_seed(0)
frames = pipe(
    prompt=prompt,
    num_inference_steps=5,
    guidance_scale=1.25,
    cross_attention_kwargs={"scale": 1},
    num_frames=24,
    generator=generator
).frames[0]
export_to_gif(frames, "animation.gif")