
Community Examples
For more information about community pipelines, please have a look at this issue.
Community examples consist of both inference and training examples that have been added by the community. Please have a look at the following table to get an overview of all community examples. Click on the Code Example to get a copy-and-paste ready code example that you can try out. If a community doesn't work as expected, please open an issue and ping the author on it.
| Example | Description | Code Example | Colab | Author |
|---|---|---|---|---|
| CLIP Guided Stable Diffusion | Doing CLIP guidance for text to image generation with Stable Diffusion | CLIP Guided Stable Diffusion | Suraj Patil | |
| One Step U-Net (Dummy) | Example showcasing of how to use Community Pipelines (see https://github.com/huggingface/diffusers/issues/841) | One Step U-Net | - | Patrick von Platen |
| Stable Diffusion Interpolation | Interpolate the latent space of Stable Diffusion between different prompts/seeds | Stable Diffusion Interpolation | - | Nate Raw |
| Stable Diffusion Mega | One Stable Diffusion Pipeline with all functionalities of Text2Image, Image2Image and Inpainting | Stable Diffusion Mega | - | Patrick von Platen |
| Long Prompt Weighting Stable Diffusion | One Stable Diffusion Pipeline without tokens length limit, and support parsing weighting in prompt. | Long Prompt Weighting Stable Diffusion | - | SkyTNT |
| Speech to Image | Using automatic-speech-recognition to transcribe text and Stable Diffusion to generate images | Speech to Image | - | Mikail Duzenli |
| Wild Card Stable Diffusion | Stable Diffusion Pipeline that supports prompts that contain wildcard terms (indicated by surrounding double underscores), with values instantiated randomly from a corresponding txt file or a dictionary of possible values | Wildcard Stable Diffusion | - | Shyam Sudhakaran |
| Composable Stable Diffusion | Stable Diffusion Pipeline that supports prompts that contain "|" in prompts (as an AND condition) and weights (separated by "|" as well) to positively / negatively weight prompts. | Composable Stable Diffusion | - | Mark Rich |
| Seed Resizing Stable Diffusion | Stable Diffusion Pipeline that supports resizing an image and retaining the concepts of the 512 by 512 generation. | Seed Resizing | - | Mark Rich |
| Imagic Stable Diffusion | Stable Diffusion Pipeline that enables writing a text prompt to edit an existing image | Imagic Stable Diffusion | - | Mark Rich |
| Multilingual Stable Diffusion | Stable Diffusion Pipeline that supports prompts in 50 different languages. | Multilingual Stable Diffusion | - | Juan Carlos Piñeros |
| Image to Image Inpainting Stable Diffusion | Stable Diffusion Pipeline that enables the overlaying of two images and subsequent inpainting | Image to Image Inpainting Stable Diffusion | - | Alex McKinney |
| Text Based Inpainting Stable Diffusion | Stable Diffusion Inpainting Pipeline that enables passing a text prompt to generate the mask for inpainting | Text Based Inpainting Stable Diffusion | - | Dhruv Karan |
| Bit Diffusion | Diffusion on discrete data | Bit Diffusion | - | Stuti R. |
| K-Diffusion Stable Diffusion | Run Stable Diffusion with any of K-Diffusion's samplers | Stable Diffusion with K Diffusion | - | Patrick von Platen |
| Checkpoint Merger Pipeline | Diffusion Pipeline that enables merging of saved model checkpoints | Checkpoint Merger Pipeline | - | Naga Sai Abhinay Devarinti |
| Stable Diffusion v1.1-1.4 Comparison | Run all 4 model checkpoints for Stable Diffusion and compare their results together | Stable Diffusion Comparison | - | Suvaditya Mukherjee |
| MagicMix | Diffusion Pipeline for semantic mixing of an image and a text prompt | MagicMix | - | Partho Das |
| Stable UnCLIP | Diffusion Pipeline for combining prior model (generate clip image embedding from text, UnCLIPPipeline "kakaobrain/karlo-v1-alpha") and decoder pipeline (decode clip image embedding to image, StableDiffusionImageVariationPipeline "lambdalabs/sd-image-variations-diffusers" ). |
Stable UnCLIP | - | Ray Wang |
| UnCLIP Text Interpolation Pipeline | Diffusion Pipeline that allows passing two prompts and produces images while interpolating between the text-embeddings of the two prompts | UnCLIP Text Interpolation Pipeline | - | Naga Sai Abhinay Devarinti |
| UnCLIP Image Interpolation Pipeline | Diffusion Pipeline that allows passing two images/image_embeddings and produces images while interpolating between their image-embeddings | UnCLIP Image Interpolation Pipeline | - | Naga Sai Abhinay Devarinti |
| DDIM Noise Comparative Analysis Pipeline | Investigating how the diffusion models learn visual concepts from each noise level (which is a contribution of P2 weighting (CVPR 2022)) | DDIM Noise Comparative Analysis Pipeline | - | Aengus (Duc-Anh) |
| CLIP Guided Img2Img Stable Diffusion Pipeline | Doing CLIP guidance for image to image generation with Stable Diffusion | CLIP Guided Img2Img Stable Diffusion | - | Nipun Jindal |
| TensorRT Stable Diffusion Text to Image Pipeline | Accelerates the Stable Diffusion Text2Image Pipeline using TensorRT | TensorRT Stable Diffusion Text to Image Pipeline | - | Asfiya Baig |
| EDICT Image Editing Pipeline | Diffusion pipeline for text-guided image editing | EDICT Image Editing Pipeline | - | Joqsan Azocar |
| Stable Diffusion RePaint | Stable Diffusion pipeline using RePaint for inpainting. | Stable Diffusion RePaint | - | Markus Pobitzer |
| TensorRT Stable Diffusion Image to Image Pipeline | Accelerates the Stable Diffusion Image2Image Pipeline using TensorRT | TensorRT Stable Diffusion Image to Image Pipeline | - | Asfiya Baig |
| Stable Diffusion IPEX Pipeline | Accelerate Stable Diffusion inference pipeline with BF16/FP32 precision on Intel Xeon CPUs with IPEX | Stable Diffusion on IPEX | - | Yingjie Han |
| CLIP Guided Images Mixing Stable Diffusion Pipeline | Сombine images using usual diffusion models. | CLIP Guided Images Mixing Using Stable Diffusion | - | Karachev Denis |
| TensorRT Stable Diffusion Inpainting Pipeline | Accelerates the Stable Diffusion Inpainting Pipeline using TensorRT | TensorRT Stable Diffusion Inpainting Pipeline | - | Asfiya Baig |
| IADB Pipeline | Implementation of Iterative α-(de)Blending: a Minimalist Deterministic Diffusion Model | IADB Pipeline | - | Thomas Chambon |
| Zero1to3 Pipeline | Implementation of Zero-1-to-3: Zero-shot One Image to 3D Object | Zero1to3 Pipeline | - | Xin Kong |
| Stable Diffusion XL Long Weighted Prompt Pipeline | A pipeline support unlimited length of prompt and negative prompt, use A1111 style of prompt weighting | Stable Diffusion XL Long Weighted Prompt Pipeline | - | Andrew Zhu |
| FABRIC - Stable Diffusion with feedback Pipeline | pipeline supports feedback from liked and disliked images | Stable Diffusion Fabric Pipeline | - | Shauray Singh |
| sketch inpaint - Inpainting with non-inpaint Stable Diffusion | sketch inpaint much like in automatic1111 | Masked Im2Im Stable Diffusion Pipeline | - | Anatoly Belikov |
| prompt-to-prompt | change parts of a prompt and retain image structure (see paper page) | Prompt2Prompt Pipeline | - | Umer H. Adil |
| Latent Consistency Pipeline | Implementation of Latent Consistency Models: Synthesizing High-Resolution Images with Few-Step Inference | Latent Consistency Pipeline | - | Simian Luo |
| Latent Consistency Img2img Pipeline | Img2img pipeline for Latent Consistency Models | Latent Consistency Img2Img Pipeline | - | Logan Zoellner |
To load a custom pipeline you just need to pass the custom_pipeline argument to DiffusionPipeline, as one of the files in diffusers/examples/community. Feel free to send a PR with your own pipelines, we will merge them quickly.
pipe = DiffusionPipeline.from_pretrained("runwayml/stable-diffusion-v1-5", custom_pipeline="filename_in_the_community_folder")
Example usages
CLIP Guided Stable Diffusion
CLIP guided stable diffusion can help to generate more realistic images by guiding stable diffusion at every denoising step with an additional CLIP model.
The following code requires roughly 12GB of GPU RAM.
from diffusers import DiffusionPipeline
from transformers import CLIPImageProcessor, CLIPModel
import torch


feature_extractor = CLIPImageProcessor.from_pretrained("laion/CLIP-ViT-B-32-laion2B-s34B-b79K")
clip_model = CLIPModel.from_pretrained("laion/CLIP-ViT-B-32-laion2B-s34B-b79K", torch_dtype=torch.float16)


guided_pipeline = DiffusionPipeline.from_pretrained(
    "runwayml/stable-diffusion-v1-5",
    custom_pipeline="clip_guided_stable_diffusion",
    clip_model=clip_model,
    feature_extractor=feature_extractor,

    torch_dtype=torch.float16,
)
guided_pipeline.enable_attention_slicing()
guided_pipeline = guided_pipeline.to("cuda")

prompt = "fantasy book cover, full moon, fantasy forest landscape, golden vector elements, fantasy magic, dark light night, intricate, elegant, sharp focus, illustration, highly detailed, digital painting, concept art, matte, art by WLOP and Artgerm and Albert Bierstadt, masterpiece"

generator = torch.Generator(device="cuda").manual_seed(0)
images = []
for i in range(4):
    image = guided_pipeline(
        prompt,
        num_inference_steps=50,
        guidance_scale=7.5,
        clip_guidance_scale=100,
        num_cutouts=4,
        use_cutouts=False,
        generator=generator,
    ).images[0]
    images.append(image)

# save images locally
for i, img in enumerate(images):
    img.save(f"./clip_guided_sd/image_{i}.png")
The images list contains a list of PIL images that can be saved locally or displayed directly in a google colab.
Generated images tend to be of higher qualtiy than natively using stable diffusion. E.g. the above script generates the following images:
 .
.
One Step Unet
The dummy "one-step-unet" can be run as follows:
from diffusers import DiffusionPipeline

pipe = DiffusionPipeline.from_pretrained("google/ddpm-cifar10-32", custom_pipeline="one_step_unet")
pipe()
Note: This community pipeline is not useful as a feature, but rather just serves as an example of how community pipelines can be added (see https://github.com/huggingface/diffusers/issues/841).
Stable Diffusion Interpolation
The following code can be run on a GPU of at least 8GB VRAM and should take approximately 5 minutes.
from diffusers import DiffusionPipeline
import torch

pipe = DiffusionPipeline.from_pretrained(
    "CompVis/stable-diffusion-v1-4",
    revision='fp16',
    torch_dtype=torch.float16,
    safety_checker=None,  # Very important for videos...lots of false positives while interpolating
    custom_pipeline="interpolate_stable_diffusion",
).to('cuda')
pipe.enable_attention_slicing()

frame_filepaths = pipe.walk(
    prompts=['a dog', 'a cat', 'a horse'],
    seeds=[42, 1337, 1234],
    num_interpolation_steps=16,
    output_dir='./dreams',
    batch_size=4,
    height=512,
    width=512,
    guidance_scale=8.5,
    num_inference_steps=50,
)
The output of the walk(...) function returns a list of images saved under the folder as defined in output_dir. You can use these images to create videos of stable diffusion.
Please have a look at https://github.com/nateraw/stable-diffusion-videos for more in-detail information on how to create videos using stable diffusion as well as more feature-complete functionality.
Stable Diffusion Mega
The Stable Diffusion Mega Pipeline lets you use the main use cases of the stable diffusion pipeline in a single class.
#!/usr/bin/env python3
from diffusers import DiffusionPipeline
import PIL
import requests
from io import BytesIO
import torch


def download_image(url):
    response = requests.get(url)
    return PIL.Image.open(BytesIO(response.content)).convert("RGB")

pipe = DiffusionPipeline.from_pretrained("runwayml/stable-diffusion-v1-5", custom_pipeline="stable_diffusion_mega", torch_dtype=torch.float16, revision="fp16")
pipe.to("cuda")
pipe.enable_attention_slicing()


### Text-to-Image

images = pipe.text2img("An astronaut riding a horse").images

### Image-to-Image

init_image = download_image("https://raw.githubusercontent.com/CompVis/stable-diffusion/main/assets/stable-samples/img2img/sketch-mountains-input.jpg")

prompt = "A fantasy landscape, trending on artstation"

images = pipe.img2img(prompt=prompt, image=init_image, strength=0.75, guidance_scale=7.5).images

### Inpainting

img_url = "https://raw.githubusercontent.com/CompVis/latent-diffusion/main/data/inpainting_examples/overture-creations-5sI6fQgYIuo.png"
mask_url = "https://raw.githubusercontent.com/CompVis/latent-diffusion/main/data/inpainting_examples/overture-creations-5sI6fQgYIuo_mask.png"
init_image = download_image(img_url).resize((512, 512))
mask_image = download_image(mask_url).resize((512, 512))

prompt = "a cat sitting on a bench"
images = pipe.inpaint(prompt=prompt, image=init_image, mask_image=mask_image, strength=0.75).images
As shown above this one pipeline can run all both "text-to-image", "image-to-image", and "inpainting" in one pipeline.
Long Prompt Weighting Stable Diffusion
Features of this custom pipeline:
- Input a prompt without the 77 token length limit.
- Includes tx2img, img2img. and inpainting pipelines.
- Emphasize/weigh part of your prompt with parentheses as so:
a baby deer with (big eyes) - De-emphasize part of your prompt as so:
a [baby] deer with big eyes - Precisely weigh part of your prompt as so:
a baby deer with (big eyes:1.3)
Prompt weighting equivalents:
a baby deer with==(a baby deer with:1.0)(big eyes)==(big eyes:1.1)((big eyes))==(big eyes:1.21)[big eyes]==(big eyes:0.91)
You can run this custom pipeline as so:
pytorch
from diffusers import DiffusionPipeline
import torch

pipe = DiffusionPipeline.from_pretrained(
    'hakurei/waifu-diffusion',
    custom_pipeline="lpw_stable_diffusion",

    torch_dtype=torch.float16
)
pipe=pipe.to("cuda")

prompt = "best_quality (1girl:1.3) bow bride brown_hair closed_mouth frilled_bow frilled_hair_tubes frills (full_body:1.3) fox_ear hair_bow hair_tubes happy hood japanese_clothes kimono long_sleeves red_bow smile solo tabi uchikake white_kimono wide_sleeves cherry_blossoms"
neg_prompt = "lowres, bad_anatomy, error_body, error_hair, error_arm, error_hands, bad_hands, error_fingers, bad_fingers, missing_fingers, error_legs, bad_legs, multiple_legs, missing_legs, error_lighting, error_shadow, error_reflection, text, error, extra_digit, fewer_digits, cropped, worst_quality, low_quality, normal_quality, jpeg_artifacts, signature, watermark, username, blurry"

pipe.text2img(prompt, negative_prompt=neg_prompt, width=512,height=512,max_embeddings_multiples=3).images[0]
onnxruntime
from diffusers import DiffusionPipeline
import torch

pipe = DiffusionPipeline.from_pretrained(
    'CompVis/stable-diffusion-v1-4',
    custom_pipeline="lpw_stable_diffusion_onnx",
    revision="onnx",
    provider="CUDAExecutionProvider"
)

prompt = "a photo of an astronaut riding a horse on mars, best quality"
neg_prompt = "lowres, bad anatomy, error body, error hair, error arm, error hands, bad hands, error fingers, bad fingers, missing fingers, error legs, bad legs, multiple legs, missing legs, error lighting, error shadow, error reflection, text, error, extra digit, fewer digits, cropped, worst quality, low quality, normal quality, jpeg artifacts, signature, watermark, username, blurry"

pipe.text2img(prompt,negative_prompt=neg_prompt, width=512, height=512, max_embeddings_multiples=3).images[0]
if you see Token indices sequence length is longer than the specified maximum sequence length for this model ( *** > 77 ) . Running this sequence through the model will result in indexing errors. Do not worry, it is normal.
Speech to Image
The following code can generate an image from an audio sample using pre-trained OpenAI whisper-small and Stable Diffusion.
import torch

import matplotlib.pyplot as plt
from datasets import load_dataset
from diffusers import DiffusionPipeline
from transformers import (
    WhisperForConditionalGeneration,
    WhisperProcessor,
)


device = "cuda" if torch.cuda.is_available() else "cpu"

ds = load_dataset("hf-internal-testing/librispeech_asr_dummy", "clean", split="validation")

audio_sample = ds[3]

text = audio_sample["text"].lower()
speech_data = audio_sample["audio"]["array"]

model = WhisperForConditionalGeneration.from_pretrained("openai/whisper-small").to(device)
processor = WhisperProcessor.from_pretrained("openai/whisper-small")

diffuser_pipeline = DiffusionPipeline.from_pretrained(
    "CompVis/stable-diffusion-v1-4",
    custom_pipeline="speech_to_image_diffusion",
    speech_model=model,
    speech_processor=processor,

    torch_dtype=torch.float16,
)

diffuser_pipeline.enable_attention_slicing()
diffuser_pipeline = diffuser_pipeline.to(device)

output = diffuser_pipeline(speech_data)
plt.imshow(output.images[0])
This example produces the following image:
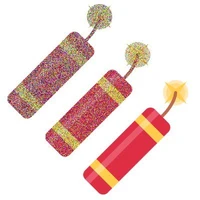
Wildcard Stable Diffusion
Following the great examples from https://github.com/jtkelm2/stable-diffusion-webui-1/blob/master/scripts/wildcards.py and https://github.com/AUTOMATIC1111/stable-diffusion-webui/wiki/Custom-Scripts#wildcards, here's a minimal implementation that allows for users to add "wildcards", denoted by __wildcard__ to prompts that are used as placeholders for randomly sampled values given by either a dictionary or a .txt file. For example:
Say we have a prompt:
prompt = "__animal__ sitting on a __object__ wearing a __clothing__"
We can then define possible values to be sampled for animal, object, and clothing. These can either be from a .txt with the same name as the category.
The possible values can also be defined / combined by using a dictionary like: {"animal":["dog", "cat", mouse"]}.
The actual pipeline works just like StableDiffusionPipeline, except the __call__ method takes in:
wildcard_files: list of file paths for wild card replacement
wildcard_option_dict: dict with key as wildcard and values as a list of possible replacements
num_prompt_samples: number of prompts to sample, uniformly sampling wildcards
A full example:
create animal.txt, with contents like:
dog
cat
mouse
create object.txt, with contents like:
chair
sofa
bench
from diffusers import DiffusionPipeline
import torch

pipe = DiffusionPipeline.from_pretrained(
    "CompVis/stable-diffusion-v1-4",
    custom_pipeline="wildcard_stable_diffusion",

    torch_dtype=torch.float16,
)
prompt = "__animal__ sitting on a __object__ wearing a __clothing__"
out = pipe(
    prompt,
    wildcard_option_dict={
        "clothing":["hat", "shirt", "scarf", "beret"]
    },
    wildcard_files=["object.txt", "animal.txt"],
    num_prompt_samples=1
)
Composable Stable diffusion
Composable Stable Diffusion proposes conjunction and negation (negative prompts) operators for compositional generation with conditional diffusion models.
import torch as th
import numpy as np
import torchvision.utils as tvu

from diffusers import DiffusionPipeline

import argparse

parser = argparse.ArgumentParser()
parser.add_argument("--prompt", type=str, default="mystical trees | A magical pond | dark",
                    help="use '|' as the delimiter to compose separate sentences.")
parser.add_argument("--steps", type=int, default=50)
parser.add_argument("--scale", type=float, default=7.5)
parser.add_argument("--weights", type=str, default="7.5 | 7.5 | -7.5")
parser.add_argument("--seed", type=int, default=2)
parser.add_argument("--model_path", type=str, default="CompVis/stable-diffusion-v1-4")
parser.add_argument("--num_images", type=int, default=1)
args = parser.parse_args()

has_cuda = th.cuda.is_available()
device = th.device('cpu' if not has_cuda else 'cuda')

prompt = args.prompt
scale = args.scale
steps = args.steps

pipe = DiffusionPipeline.from_pretrained(
    args.model_path,
    custom_pipeline="composable_stable_diffusion",
).to(device)

pipe.safety_checker = None

images = []
generator = th.Generator("cuda").manual_seed(args.seed)
for i in range(args.num_images):
    image = pipe(prompt, guidance_scale=scale, num_inference_steps=steps,
                 weights=args.weights, generator=generator).images[0]
    images.append(th.from_numpy(np.array(image)).permute(2, 0, 1) / 255.)
grid = tvu.make_grid(th.stack(images, dim=0), nrow=4, padding=0)
tvu.save_image(grid, f'{prompt}_{args.weights}' + '.png')
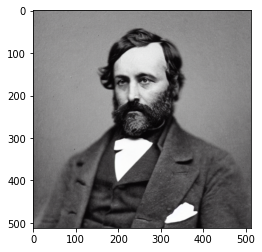
Imagic Stable Diffusion
Allows you to edit an image using stable diffusion.
import requests
from PIL import Image
from io import BytesIO
import torch
import os
from diffusers import DiffusionPipeline, DDIMScheduler
has_cuda = torch.cuda.is_available()
device = torch.device('cpu' if not has_cuda else 'cuda')
pipe = DiffusionPipeline.from_pretrained(
    "CompVis/stable-diffusion-v1-4",
        safety_checker=None,
    use_auth_token=True,
    custom_pipeline="imagic_stable_diffusion",
    scheduler = DDIMScheduler(beta_start=0.00085, beta_end=0.012, beta_schedule="scaled_linear", clip_sample=False, set_alpha_to_one=False)
).to(device)
generator = torch.Generator("cuda").manual_seed(0)
seed = 0
prompt = "A photo of Barack Obama smiling with a big grin"
url = 'https://www.dropbox.com/s/6tlwzr73jd1r9yk/obama.png?dl=1'
response = requests.get(url)
init_image = Image.open(BytesIO(response.content)).convert("RGB")
init_image = init_image.resize((512, 512))
res = pipe.train(
    prompt,
    image=init_image,
    generator=generator)
res = pipe(alpha=1, guidance_scale=7.5, num_inference_steps=50)
os.makedirs("imagic", exist_ok=True)
image = res.images[0]
image.save('./imagic/imagic_image_alpha_1.png')
res = pipe(alpha=1.5, guidance_scale=7.5, num_inference_steps=50)
image = res.images[0]
image.save('./imagic/imagic_image_alpha_1_5.png')
res = pipe(alpha=2, guidance_scale=7.5, num_inference_steps=50)
image = res.images[0]
image.save('./imagic/imagic_image_alpha_2.png')
Seed Resizing
Test seed resizing. Originally generate an image in 512 by 512, then generate image with same seed at 512 by 592 using seed resizing. Finally, generate 512 by 592 using original stable diffusion pipeline.
import torch as th
import numpy as np
from diffusers import DiffusionPipeline

has_cuda = th.cuda.is_available()
device = th.device('cpu' if not has_cuda else 'cuda')

pipe = DiffusionPipeline.from_pretrained(
    "CompVis/stable-diffusion-v1-4",
    use_auth_token=True,
    custom_pipeline="seed_resize_stable_diffusion"
).to(device)

def dummy(images, **kwargs):
    return images, False

pipe.safety_checker = dummy


images = []
th.manual_seed(0)
generator = th.Generator("cuda").manual_seed(0)

seed = 0
prompt = "A painting of a futuristic cop"

width = 512
height = 512

res = pipe(
    prompt,
    guidance_scale=7.5,
    num_inference_steps=50,
    height=height,
    width=width,
    generator=generator)
image = res.images[0]
image.save('./seed_resize/seed_resize_{w}_{h}_image.png'.format(w=width, h=height))


th.manual_seed(0)
generator = th.Generator("cuda").manual_seed(0)

pipe = DiffusionPipeline.from_pretrained(
    "CompVis/stable-diffusion-v1-4",
    use_auth_token=True,
    custom_pipeline="/home/mark/open_source/diffusers/examples/community/"
).to(device)

width = 512
height = 592

res = pipe(
    prompt,
    guidance_scale=7.5,
    num_inference_steps=50,
    height=height,
    width=width,
    generator=generator)
image = res.images[0]
image.save('./seed_resize/seed_resize_{w}_{h}_image.png'.format(w=width, h=height))

pipe_compare = DiffusionPipeline.from_pretrained(
    "CompVis/stable-diffusion-v1-4",
    use_auth_token=True,
    custom_pipeline="/home/mark/open_source/diffusers/examples/community/"
).to(device)

res = pipe_compare(
    prompt,
    guidance_scale=7.5,
    num_inference_steps=50,
    height=height,
    width=width,
    generator=generator
)

image = res.images[0]
image.save('./seed_resize/seed_resize_{w}_{h}_image_compare.png'.format(w=width, h=height))
Multilingual Stable Diffusion Pipeline
The following code can generate an images from texts in different languages using the pre-trained mBART-50 many-to-one multilingual machine translation model and Stable Diffusion.
from PIL import Image

import torch

from diffusers import DiffusionPipeline
from transformers import (
    pipeline,
    MBart50TokenizerFast,
    MBartForConditionalGeneration,
)
device = "cuda" if torch.cuda.is_available() else "cpu"
device_dict = {"cuda": 0, "cpu": -1}

# helper function taken from: https://huggingface.co/blog/stable_diffusion
def image_grid(imgs, rows, cols):
    assert len(imgs) == rows*cols

    w, h = imgs[0].size
    grid = Image.new('RGB', size=(cols*w, rows*h))
    grid_w, grid_h = grid.size

    for i, img in enumerate(imgs):
        grid.paste(img, box=(i%cols*w, i//cols*h))
    return grid

# Add language detection pipeline
language_detection_model_ckpt = "papluca/xlm-roberta-base-language-detection"
language_detection_pipeline = pipeline("text-classification",
                                       model=language_detection_model_ckpt,
                                       device=device_dict[device])

# Add model for language translation
trans_tokenizer = MBart50TokenizerFast.from_pretrained("facebook/mbart-large-50-many-to-one-mmt")
trans_model = MBartForConditionalGeneration.from_pretrained("facebook/mbart-large-50-many-to-one-mmt").to(device)

diffuser_pipeline = DiffusionPipeline.from_pretrained(
    "CompVis/stable-diffusion-v1-4",
    custom_pipeline="multilingual_stable_diffusion",
    detection_pipeline=language_detection_pipeline,
    translation_model=trans_model,
    translation_tokenizer=trans_tokenizer,

    torch_dtype=torch.float16,
)

diffuser_pipeline.enable_attention_slicing()
diffuser_pipeline = diffuser_pipeline.to(device)

prompt = ["a photograph of an astronaut riding a horse",
          "Una casa en la playa",
          "Ein Hund, der Orange isst",
          "Un restaurant parisien"]

output = diffuser_pipeline(prompt)

images = output.images

grid = image_grid(images, rows=2, cols=2)
This example produces the following images:
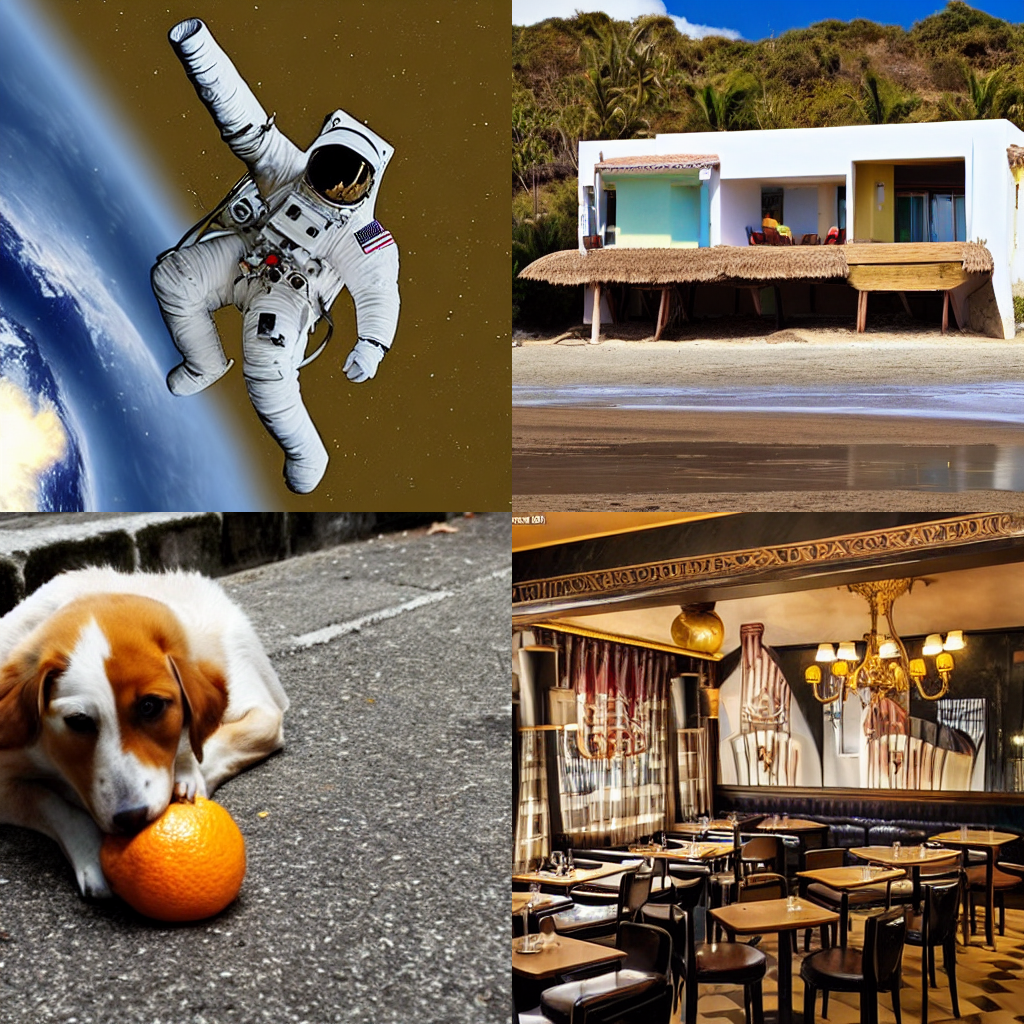
Image to Image Inpainting Stable Diffusion
Similar to the standard stable diffusion inpainting example, except with the addition of an inner_image argument.
image, inner_image, and mask should have the same dimensions. inner_image should have an alpha (transparency) channel.
The aim is to overlay two images, then mask out the boundary between image and inner_image to allow stable diffusion to make the connection more seamless.
For example, this could be used to place a logo on a shirt and make it blend seamlessly.
import PIL
import torch

from diffusers import DiffusionPipeline

image_path = "./path-to-image.png"
inner_image_path = "./path-to-inner-image.png"
mask_path = "./path-to-mask.png"

init_image = PIL.Image.open(image_path).convert("RGB").resize((512, 512))
inner_image = PIL.Image.open(inner_image_path).convert("RGBA").resize((512, 512))
mask_image = PIL.Image.open(mask_path).convert("RGB").resize((512, 512))

pipe = DiffusionPipeline.from_pretrained(
    "runwayml/stable-diffusion-inpainting",
    custom_pipeline="img2img_inpainting",

    torch_dtype=torch.float16
)
pipe = pipe.to("cuda")

prompt = "Your prompt here!"
image = pipe(prompt=prompt, image=init_image, inner_image=inner_image, mask_image=mask_image).images[0]
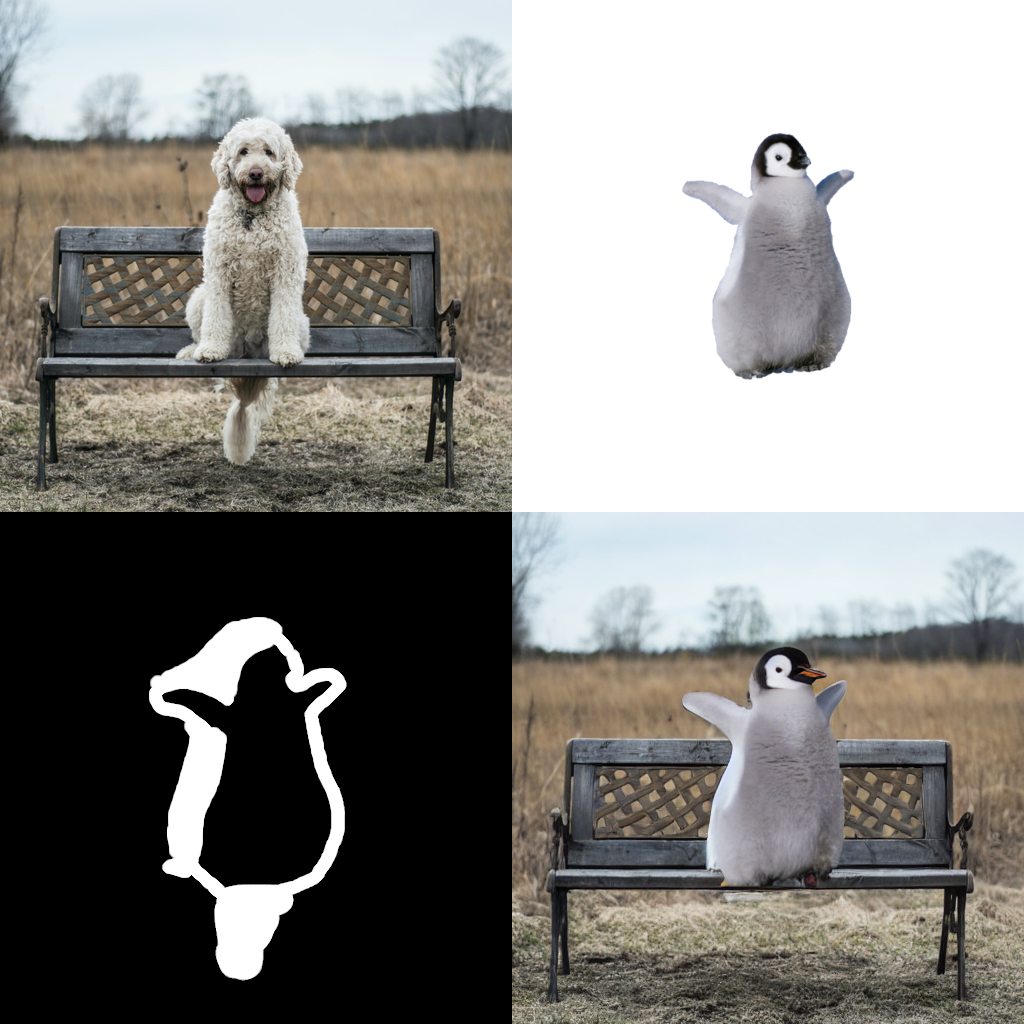
Text Based Inpainting Stable Diffusion
Use a text prompt to generate the mask for the area to be inpainted. Currently uses the CLIPSeg model for mask generation, then calls the standard Stable Diffusion Inpainting pipeline to perform the inpainting.
from transformers import CLIPSegProcessor, CLIPSegForImageSegmentation
from diffusers import DiffusionPipeline

from PIL import Image
import requests

processor = CLIPSegProcessor.from_pretrained("CIDAS/clipseg-rd64-refined")
model = CLIPSegForImageSegmentation.from_pretrained("CIDAS/clipseg-rd64-refined")

pipe = DiffusionPipeline.from_pretrained(
    "runwayml/stable-diffusion-inpainting",
    custom_pipeline="text_inpainting",
    segmentation_model=model,
    segmentation_processor=processor
)
pipe = pipe.to("cuda")


url = "https://github.com/timojl/clipseg/blob/master/example_image.jpg?raw=true"
image = Image.open(requests.get(url, stream=True).raw).resize((512, 512))
text = "a glass"  # will mask out this text
prompt = "a cup"  # the masked out region will be replaced with this

image = pipe(image=image, text=text, prompt=prompt).images[0]
Bit Diffusion
Based https://arxiv.org/abs/2208.04202, this is used for diffusion on discrete data - eg, discreate image data, DNA sequence data. An unconditional discreate image can be generated like this:
from diffusers import DiffusionPipeline
pipe = DiffusionPipeline.from_pretrained("google/ddpm-cifar10-32", custom_pipeline="bit_diffusion")
image = pipe().images[0]
Stable Diffusion with K Diffusion
Make sure you have @crowsonkb's https://github.com/crowsonkb/k-diffusion installed:
pip install k-diffusion
You can use the community pipeline as follows:
from diffusers import DiffusionPipeline

pipe = DiffusionPipeline.from_pretrained("CompVis/stable-diffusion-v1-4", custom_pipeline="sd_text2img_k_diffusion")
pipe = pipe.to("cuda")

prompt = "an astronaut riding a horse on mars"
pipe.set_scheduler("sample_heun")
generator = torch.Generator(device="cuda").manual_seed(seed)
image = pipe(prompt, generator=generator, num_inference_steps=20).images[0]

image.save("./astronaut_heun_k_diffusion.png")
To make sure that K Diffusion and diffusers yield the same results:
Diffusers:
from diffusers import DiffusionPipeline, EulerDiscreteScheduler

seed = 33

pipe = DiffusionPipeline.from_pretrained("CompVis/stable-diffusion-v1-4")
pipe.scheduler = EulerDiscreteScheduler.from_config(pipe.scheduler.config)
pipe = pipe.to("cuda")

generator = torch.Generator(device="cuda").manual_seed(seed)
image = pipe(prompt, generator=generator, num_inference_steps=50).images[0]

K Diffusion:
from diffusers import DiffusionPipeline, EulerDiscreteScheduler

seed = 33

pipe = DiffusionPipeline.from_pretrained("CompVis/stable-diffusion-v1-4", custom_pipeline="sd_text2img_k_diffusion")
pipe.scheduler = EulerDiscreteScheduler.from_config(pipe.scheduler.config)
pipe = pipe.to("cuda")

pipe.set_scheduler("sample_euler")
generator = torch.Generator(device="cuda").manual_seed(seed)
image = pipe(prompt, generator=generator, num_inference_steps=50).images[0]

Checkpoint Merger Pipeline
Based on the AUTOMATIC1111/webui for checkpoint merging. This is a custom pipeline that merges upto 3 pretrained model checkpoints as long as they are in the HuggingFace model_index.json format.
The checkpoint merging is currently memory intensive as it modifies the weights of a DiffusionPipeline object in place. Expect atleast 13GB RAM Usage on Kaggle GPU kernels and on colab you might run out of the 12GB memory even while merging two checkpoints.
Usage:-
from diffusers import DiffusionPipeline

#Return a CheckpointMergerPipeline class that allows you to merge checkpoints.
#The checkpoint passed here is ignored. But still pass one of the checkpoints you plan to
#merge for convenience
pipe = DiffusionPipeline.from_pretrained("CompVis/stable-diffusion-v1-4", custom_pipeline="checkpoint_merger")

#There are multiple possible scenarios:
#The pipeline with the merged checkpoints is returned in all the scenarios

#Compatible checkpoints a.k.a matched model_index.json files. Ignores the meta attributes in model_index.json during comparison.( attrs with _ as prefix )
merged_pipe = pipe.merge(["CompVis/stable-diffusion-v1-4","CompVis/stable-diffusion-v1-2"], interp = "sigmoid", alpha = 0.4)

#Incompatible checkpoints in model_index.json but merge might be possible. Use force = True to ignore model_index.json compatibility
merged_pipe_1 = pipe.merge(["CompVis/stable-diffusion-v1-4","hakurei/waifu-diffusion"], force = True, interp = "sigmoid", alpha = 0.4)

#Three checkpoint merging. Only "add_difference" method actually works on all three checkpoints. Using any other options will ignore the 3rd checkpoint.
merged_pipe_2 = pipe.merge(["CompVis/stable-diffusion-v1-4","hakurei/waifu-diffusion","prompthero/openjourney"], force = True, interp = "add_difference", alpha = 0.4)

prompt = "An astronaut riding a horse on Mars"

image = merged_pipe(prompt).images[0]
Some examples along with the merge details:
- "CompVis/stable-diffusion-v1-4" + "hakurei/waifu-diffusion" ; Sigmoid interpolation; alpha = 0.8

- "hakurei/waifu-diffusion" + "prompthero/openjourney" ; Inverse Sigmoid interpolation; alpha = 0.8

- "CompVis/stable-diffusion-v1-4" + "hakurei/waifu-diffusion" + "prompthero/openjourney"; Add Difference interpolation; alpha = 0.5

Stable Diffusion Comparisons
This Community Pipeline enables the comparison between the 4 checkpoints that exist for Stable Diffusion. They can be found through the following links:
from diffusers import DiffusionPipeline
import matplotlib.pyplot as plt

pipe = DiffusionPipeline.from_pretrained('CompVis/stable-diffusion-v1-4', custom_pipeline='suvadityamuk/StableDiffusionComparison')
pipe.enable_attention_slicing()
pipe = pipe.to('cuda')
prompt = "an astronaut riding a horse on mars"
output = pipe(prompt)

plt.subplots(2,2,1)
plt.imshow(output.images[0])
plt.title('Stable Diffusion v1.1')
plt.axis('off')
plt.subplots(2,2,2)
plt.imshow(output.images[1])
plt.title('Stable Diffusion v1.2')
plt.axis('off')
plt.subplots(2,2,3)
plt.imshow(output.images[2])
plt.title('Stable Diffusion v1.3')
plt.axis('off')
plt.subplots(2,2,4)
plt.imshow(output.images[3])
plt.title('Stable Diffusion v1.4')
plt.axis('off')

plt.show()
As a result, you can look at a grid of all 4 generated images being shown together, that captures a difference the advancement of the training between the 4 checkpoints.
Magic Mix
Implementation of the MagicMix: Semantic Mixing with Diffusion Models paper. This is a Diffusion Pipeline for semantic mixing of an image and a text prompt to create a new concept while preserving the spatial layout and geometry of the subject in the image. The pipeline takes an image that provides the layout semantics and a prompt that provides the content semantics for the mixing process.
There are 3 parameters for the method-
mix_factor: It is the interpolation constant used in the layout generation phase. The greater the value ofmix_factor, the greater the influence of the prompt on the layout generation process.kmaxandkmin: These determine the range for the layout and content generation process. A higher value of kmax results in loss of more information about the layout of the original image and a higher value of kmin results in more steps for content generation process.
Here is an example usage-
from diffusers import DiffusionPipeline, DDIMScheduler
from PIL import Image

pipe = DiffusionPipeline.from_pretrained(
    "CompVis/stable-diffusion-v1-4",
    custom_pipeline="magic_mix",
    scheduler = DDIMScheduler.from_pretrained("CompVis/stable-diffusion-v1-4", subfolder="scheduler"),
).to('cuda')

img = Image.open('phone.jpg')
mix_img = pipe(
    img,
    prompt = 'bed',
    kmin = 0.3,
    kmax = 0.5,
    mix_factor = 0.5,
    )
mix_img.save('phone_bed_mix.jpg')
The mix_img is a PIL image that can be saved locally or displayed directly in a google colab. Generated image is a mix of the layout semantics of the given image and the content semantics of the prompt.
E.g. the above script generates the following image:
phone.jpg

phone_bed_mix.jpg

For more example generations check out this demo notebook.
Stable UnCLIP
UnCLIPPipeline("kakaobrain/karlo-v1-alpha") provide a prior model that can generate clip image embedding from text. StableDiffusionImageVariationPipeline("lambdalabs/sd-image-variations-diffusers") provide a decoder model than can generate images from clip image embedding.
import torch
from diffusers import DiffusionPipeline
device = torch.device("cpu" if not torch.cuda.is_available() else "cuda")
pipeline = DiffusionPipeline.from_pretrained(
"kakaobrain/karlo-v1-alpha",
torch_dtype=torch.float16,
custom_pipeline="stable_unclip",
decoder_pipe_kwargs=dict(
image_encoder=None,
),
)
pipeline.to(device)
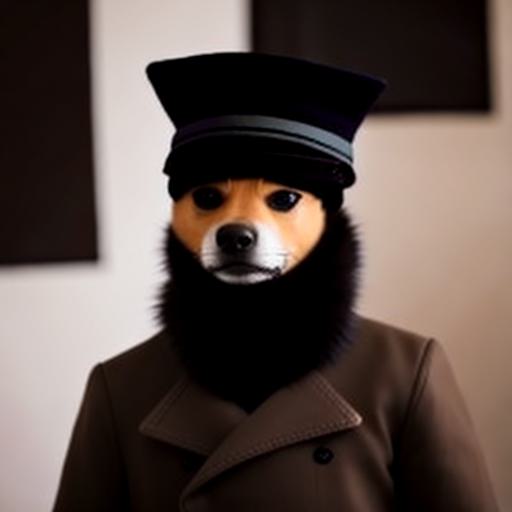
prompt = "a shiba inu wearing a beret and black turtleneck"
random_generator = torch.Generator(device=device).manual_seed(1000)
output = pipeline(
prompt=prompt,
width=512,
height=512,
generator=random_generator,
prior_guidance_scale=4,
prior_num_inference_steps=25,
decoder_guidance_scale=8,
decoder_num_inference_steps=50,
)
image = output.images[0]
image.save("./shiba-inu.jpg")
# debug
# `pipeline.decoder_pipe` is a regular StableDiffusionImageVariationPipeline instance.
# It is used to convert clip image embedding to latents, then fed into VAE decoder.
print(pipeline.decoder_pipe.__class__)
# <class 'diffusers.pipelines.stable_diffusion.pipeline_stable_diffusion_image_variation.StableDiffusionImageVariationPipeline'>
# this pipeline only use prior module in "kakaobrain/karlo-v1-alpha"
# It is used to convert clip text embedding to clip image embedding.
print(pipeline)
# StableUnCLIPPipeline {
# "_class_name": "StableUnCLIPPipeline",
# "_diffusers_version": "0.12.0.dev0",
# "prior": [
# "diffusers",
# "PriorTransformer"
# ],
# "prior_scheduler": [
# "diffusers",
# "UnCLIPScheduler"
# ],
# "text_encoder": [
# "transformers",
# "CLIPTextModelWithProjection"
# ],
# "tokenizer": [
# "transformers",
# "CLIPTokenizer"
# ]
# }
# pipeline.prior_scheduler is the scheduler used for prior in UnCLIP.
print(pipeline.prior_scheduler)
# UnCLIPScheduler {
# "_class_name": "UnCLIPScheduler",
# "_diffusers_version": "0.12.0.dev0",
# "clip_sample": true,
# "clip_sample_range": 5.0,
# "num_train_timesteps": 1000,
# "prediction_type": "sample",
# "variance_type": "fixed_small_log"
# }
shiba-inu.jpg
UnCLIP Text Interpolation Pipeline
This Diffusion Pipeline takes two prompts and interpolates between the two input prompts using spherical interpolation ( slerp ). The input prompts are converted to text embeddings by the pipeline's text_encoder and the interpolation is done on the resulting text_embeddings over the number of steps specified. Defaults to 5 steps.
import torch
from diffusers import DiffusionPipeline

device = torch.device("cpu" if not torch.cuda.is_available() else "cuda")

pipe = DiffusionPipeline.from_pretrained(
    "kakaobrain/karlo-v1-alpha",
    torch_dtype=torch.float16,
    custom_pipeline="unclip_text_interpolation"
)
pipe.to(device)

start_prompt = "A photograph of an adult lion"
end_prompt = "A photograph of a lion cub"
#For best results keep the prompts close in length to each other. Of course, feel free to try out with differing lengths.
generator = torch.Generator(device=device).manual_seed(42)

output = pipe(start_prompt, end_prompt, steps = 6, generator = generator, enable_sequential_cpu_offload=False)

for i,image in enumerate(output.images):
    img.save('result%s.jpg' % i)
The resulting images in order:-


UnCLIP Image Interpolation Pipeline
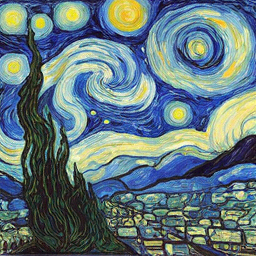
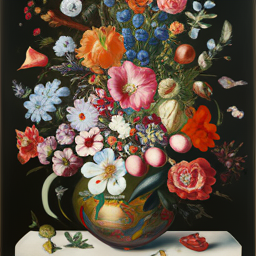
This Diffusion Pipeline takes two images or an image_embeddings tensor of size 2 and interpolates between their embeddings using spherical interpolation ( slerp ). The input images/image_embeddings are converted to image embeddings by the pipeline's image_encoder and the interpolation is done on the resulting image_embeddings over the number of steps specified. Defaults to 5 steps.
import torch
from diffusers import DiffusionPipeline
from PIL import Image

device = torch.device("cpu" if not torch.cuda.is_available() else "cuda")
dtype = torch.float16 if torch.cuda.is_available() else torch.bfloat16

pipe = DiffusionPipeline.from_pretrained(
    "kakaobrain/karlo-v1-alpha-image-variations",
    torch_dtype=dtype,
    custom_pipeline="unclip_image_interpolation"
)
pipe.to(device)

images = [Image.open('./starry_night.jpg'), Image.open('./flowers.jpg')]
#For best results keep the prompts close in length to each other. Of course, feel free to try out with differing lengths.
generator = torch.Generator(device=device).manual_seed(42)

output = pipe(image = images ,steps = 6, generator = generator)

for i,image in enumerate(output.images):
    image.save('starry_to_flowers_%s.jpg' % i)
The original images:-


The resulting images in order:-


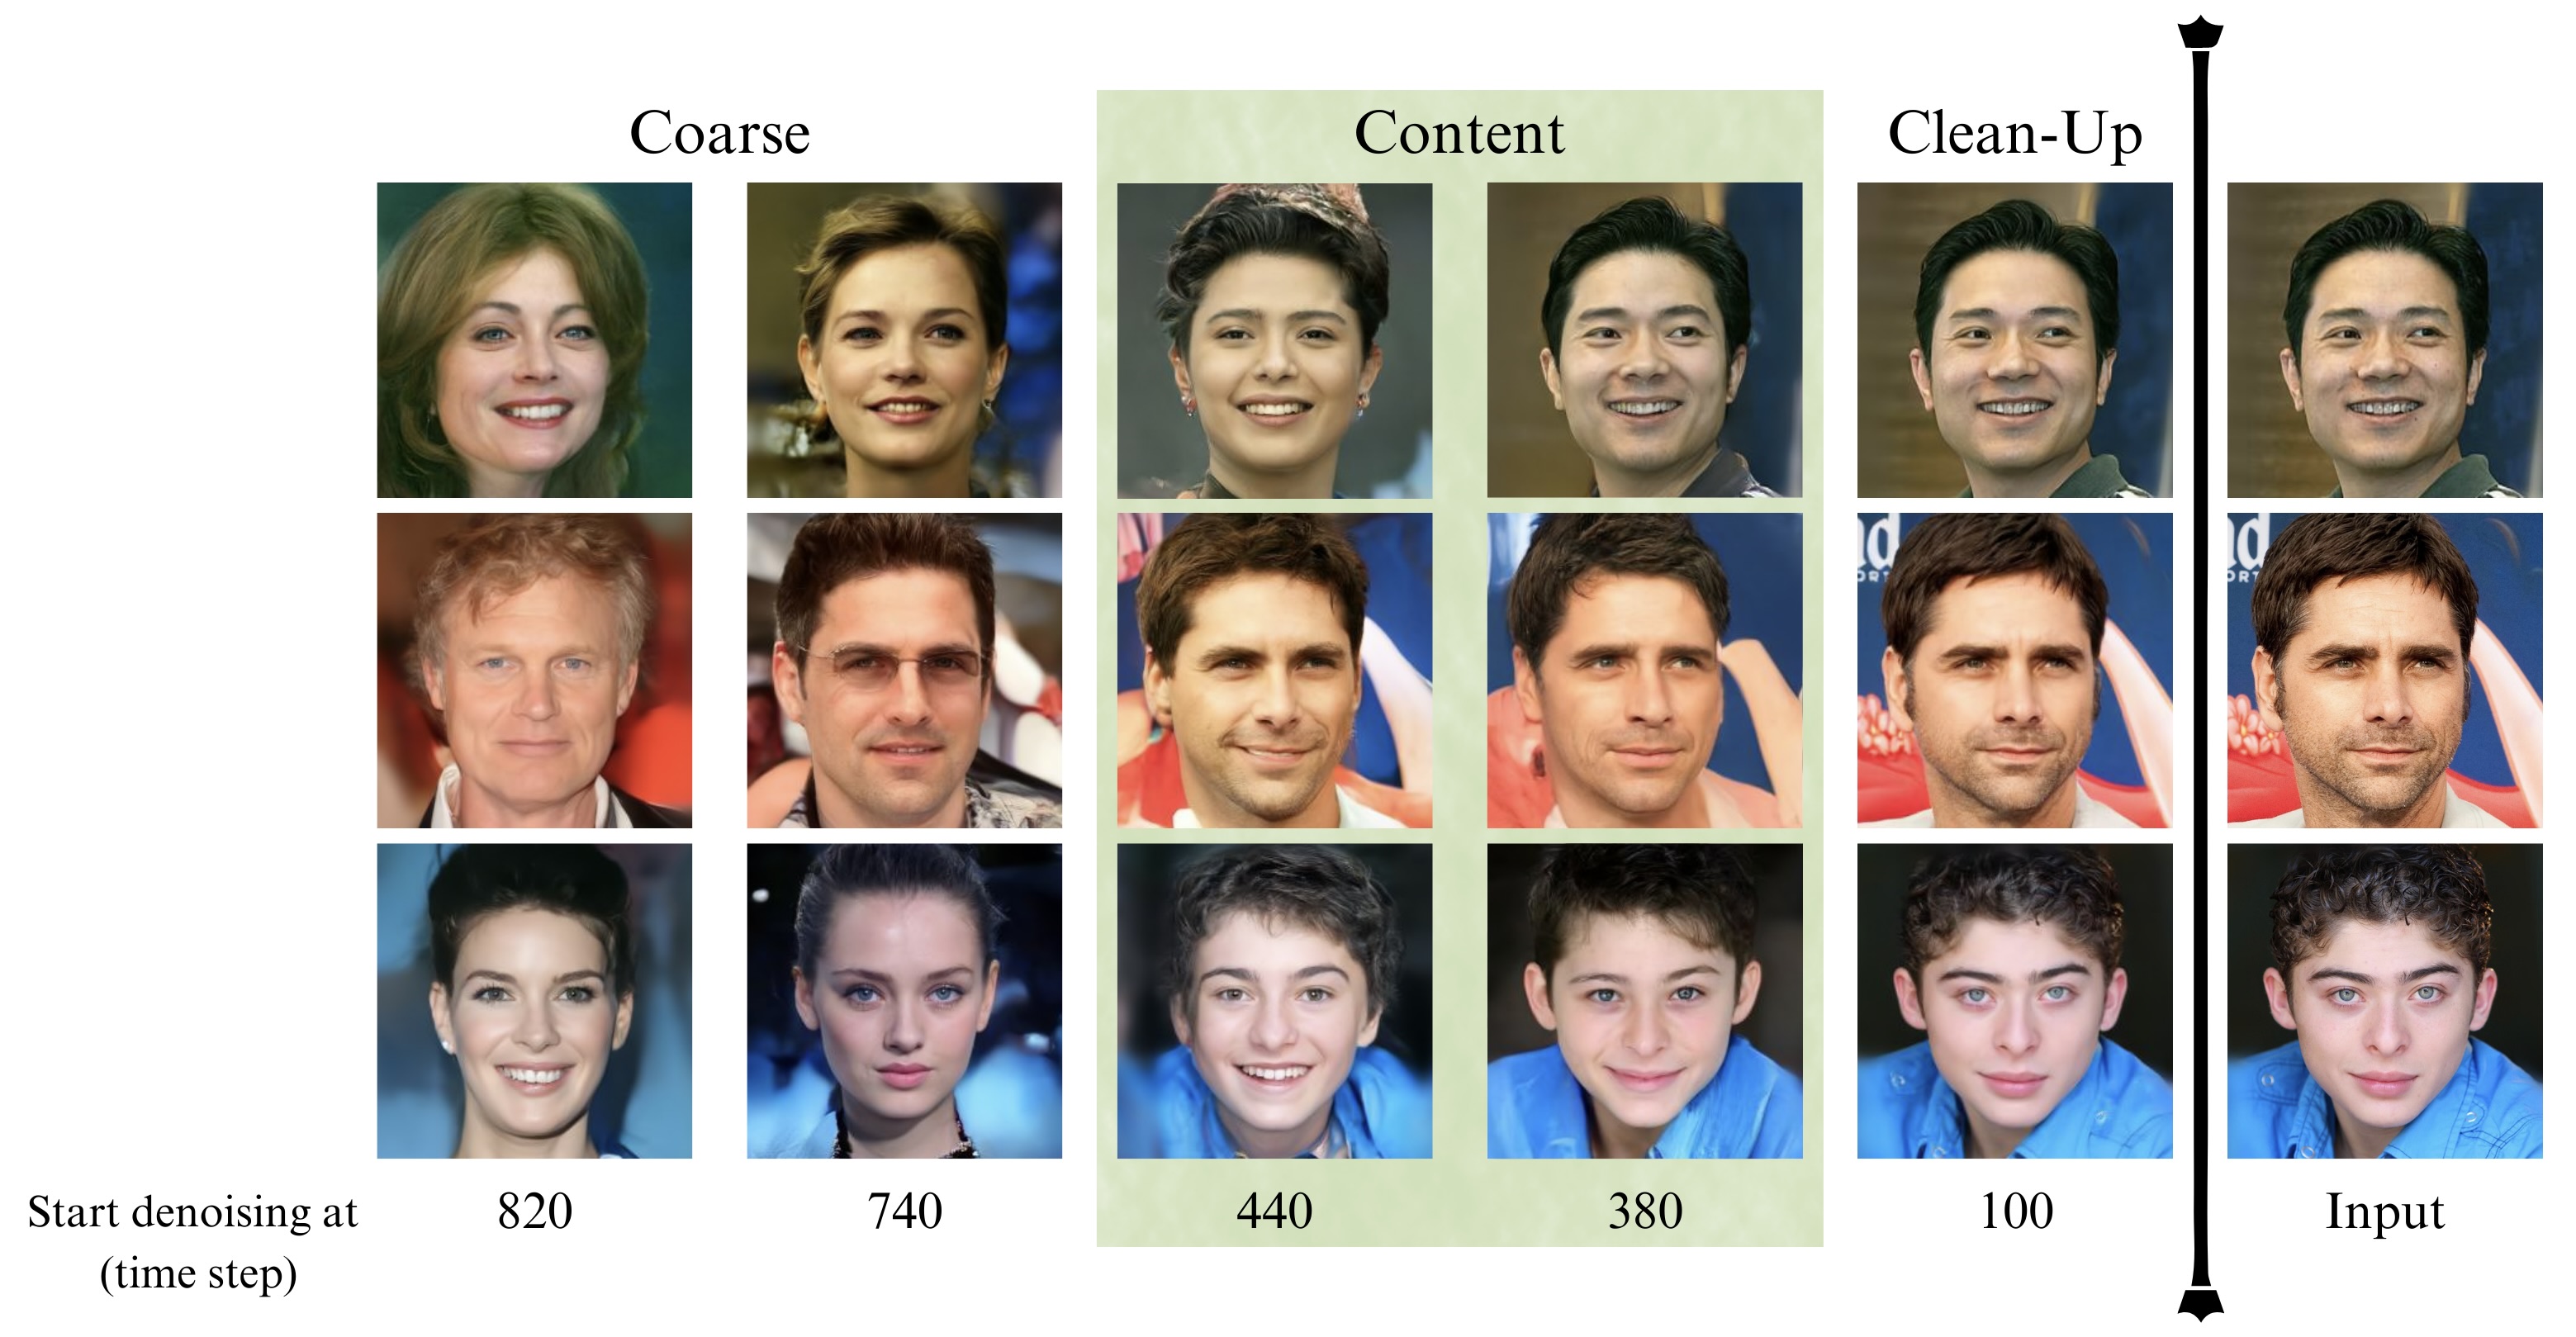
DDIM Noise Comparative Analysis Pipeline
Research question: What visual concepts do the diffusion models learn from each noise level during training?
The P2 weighting (CVPR 2022) paper proposed an approach to answer the above question, which is their second contribution.
The approach consists of the following steps:
- The input is an image x0.
- Perturb it to xt using a diffusion process q(xt|x0).
strengthis a value between 0.0 and 1.0, that controls the amount of noise that is added to the input image. Values that approach 1.0 allow for lots of variations but will also produce images that are not semantically consistent with the input.
- Reconstruct the image with the learned denoising process pθ(ˆx0|xt).
- Compare x0 and ˆx0 among various t to show how each step contributes to the sample. The authors used openai/guided-diffusion model to denoise images in FFHQ dataset. This pipeline extends their second contribution by investigating DDIM on any input image.
import torch
from PIL import Image
import numpy as np

image_path = "path/to/your/image" # images from CelebA-HQ might be better
image_pil = Image.open(image_path)
image_name = image_path.split("/")[-1].split(".")[0]

device = torch.device("cpu" if not torch.cuda.is_available() else "cuda")
pipe = DiffusionPipeline.from_pretrained(
    "google/ddpm-ema-celebahq-256",
    custom_pipeline="ddim_noise_comparative_analysis",
)
pipe = pipe.to(device)

for strength in np.linspace(0.1, 1, 25):
    denoised_image, latent_timestep = pipe(
        image_pil, strength=strength, return_dict=False
    )
    denoised_image = denoised_image[0]
    denoised_image.save(
        f"noise_comparative_analysis_{image_name}_{latent_timestep}.png"
    )
Here is the result of this pipeline (which is DDIM) on CelebA-HQ dataset.
CLIP Guided Img2Img Stable Diffusion
CLIP guided Img2Img stable diffusion can help to generate more realistic images with an initial image by guiding stable diffusion at every denoising step with an additional CLIP model.
The following code requires roughly 12GB of GPU RAM.
from io import BytesIO
import requests
import torch
from diffusers import DiffusionPipeline
from PIL import Image
from transformers import CLIPFeatureExtractor, CLIPModel
feature_extractor = CLIPFeatureExtractor.from_pretrained(
    "laion/CLIP-ViT-B-32-laion2B-s34B-b79K"
)
clip_model = CLIPModel.from_pretrained(
    "laion/CLIP-ViT-B-32-laion2B-s34B-b79K", torch_dtype=torch.float16
)
guided_pipeline = DiffusionPipeline.from_pretrained(
    "CompVis/stable-diffusion-v1-4",
    # custom_pipeline="clip_guided_stable_diffusion",
    custom_pipeline="/home/njindal/diffusers/examples/community/clip_guided_stable_diffusion.py",
    clip_model=clip_model,
    feature_extractor=feature_extractor,
    torch_dtype=torch.float16,
)
guided_pipeline.enable_attention_slicing()
guided_pipeline = guided_pipeline.to("cuda")
prompt = "fantasy book cover, full moon, fantasy forest landscape, golden vector elements, fantasy magic, dark light night, intricate, elegant, sharp focus, illustration, highly detailed, digital painting, concept art, matte, art by WLOP and Artgerm and Albert Bierstadt, masterpiece"
url = "https://raw.githubusercontent.com/CompVis/stable-diffusion/main/assets/stable-samples/img2img/sketch-mountains-input.jpg"
response = requests.get(url)
init_image = Image.open(BytesIO(response.content)).convert("RGB")
image = guided_pipeline(
    prompt=prompt,
    num_inference_steps=30,
    image=init_image,
    strength=0.75,
    guidance_scale=7.5,
    clip_guidance_scale=100,
    num_cutouts=4,
    use_cutouts=False,
).images[0]
display(image)
Init Image

Output Image

TensorRT Text2Image Stable Diffusion Pipeline
The TensorRT Pipeline can be used to accelerate the Text2Image Stable Diffusion Inference run.
NOTE: The ONNX conversions and TensorRT engine build may take up to 30 minutes.
import torch
from diffusers import DDIMScheduler
from diffusers.pipelines.stable_diffusion import StableDiffusionPipeline

# Use the DDIMScheduler scheduler here instead
scheduler = DDIMScheduler.from_pretrained("stabilityai/stable-diffusion-2-1",
                                            subfolder="scheduler")

pipe = StableDiffusionPipeline.from_pretrained("stabilityai/stable-diffusion-2-1",
                                                custom_pipeline="stable_diffusion_tensorrt_txt2img",
                                                revision='fp16',
                                                torch_dtype=torch.float16,
                                                scheduler=scheduler,)

# re-use cached folder to save ONNX models and TensorRT Engines
pipe.set_cached_folder("stabilityai/stable-diffusion-2-1", revision='fp16',)

pipe = pipe.to("cuda")

prompt = "a beautiful photograph of Mt. Fuji during cherry blossom"
image = pipe(prompt).images[0]
image.save('tensorrt_mt_fuji.png')
EDICT Image Editing Pipeline
This pipeline implements the text-guided image editing approach from the paper EDICT: Exact Diffusion Inversion via Coupled Transformations. You have to pass:
- (
PIL)imageyou want to edit. base_prompt: the text prompt describing the current image (before editing).target_prompt: the text prompt describing with the edits.
from diffusers import DiffusionPipeline, DDIMScheduler
from transformers import CLIPTextModel
import torch, PIL, requests
from io import BytesIO
from IPython.display import display

def center_crop_and_resize(im):

    width, height = im.size
    d = min(width, height)
    left = (width - d) / 2
    upper = (height - d) / 2
    right = (width + d) / 2
    lower = (height + d) / 2

    return im.crop((left, upper, right, lower)).resize((512, 512))

torch_dtype = torch.float16
device = torch.device('cuda' if torch.cuda.is_available() else 'cpu')

# scheduler and text_encoder param values as in the paper
scheduler = DDIMScheduler(
        num_train_timesteps=1000,
        beta_start=0.00085,
        beta_end=0.012,
        beta_schedule="scaled_linear",
        set_alpha_to_one=False,
        clip_sample=False,
)

text_encoder = CLIPTextModel.from_pretrained(
    pretrained_model_name_or_path="openai/clip-vit-large-patch14",
    torch_dtype=torch_dtype,
)

# initialize pipeline
pipeline = DiffusionPipeline.from_pretrained(
    pretrained_model_name_or_path="CompVis/stable-diffusion-v1-4",
    custom_pipeline="edict_pipeline",
    revision="fp16",
    scheduler=scheduler,
    text_encoder=text_encoder,
    leapfrog_steps=True,
    torch_dtype=torch_dtype,
).to(device)

# download image
image_url = "https://huggingface.co/datasets/Joqsan/images/resolve/main/imagenet_dog_1.jpeg"
response = requests.get(image_url)
image = PIL.Image.open(BytesIO(response.content))

# preprocess it
cropped_image = center_crop_and_resize(image)

# define the prompts
base_prompt = "A dog"
target_prompt = "A golden retriever"

# run the pipeline
result_image = pipeline(
      base_prompt=base_prompt,
      target_prompt=target_prompt,
      image=cropped_image,
)

display(result_image)
Init Image

Output Image

Stable Diffusion RePaint
This pipeline uses the RePaint logic on the latent space of stable diffusion. It can be used similarly to other image inpainting pipelines but does not rely on a specific inpainting model. This means you can use models that are not specifically created for inpainting.
Make sure to use the RePaintScheduler as shown in the example below.
Disclaimer: The mask gets transferred into latent space, this may lead to unexpected changes on the edge of the masked part. The inference time is a lot slower.
import PIL
import requests
import torch
from io import BytesIO
from diffusers import StableDiffusionPipeline, RePaintScheduler
def download_image(url):
    response = requests.get(url)
    return PIL.Image.open(BytesIO(response.content)).convert("RGB")
img_url = "https://raw.githubusercontent.com/CompVis/latent-diffusion/main/data/inpainting_examples/overture-creations-5sI6fQgYIuo.png"
mask_url = "https://raw.githubusercontent.com/CompVis/latent-diffusion/main/data/inpainting_examples/overture-creations-5sI6fQgYIuo_mask.png"
init_image = download_image(img_url).resize((512, 512))
mask_image = download_image(mask_url).resize((512, 512))
mask_image = PIL.ImageOps.invert(mask_image)
pipe = StableDiffusionPipeline.from_pretrained(
    "CompVis/stable-diffusion-v1-4", torch_dtype=torch.float16, custom_pipeline="stable_diffusion_repaint",
)
pipe.scheduler = RePaintScheduler.from_config(pipe.scheduler.config)
pipe = pipe.to("cuda")
prompt = "Face of a yellow cat, high resolution, sitting on a park bench"
image = pipe(prompt=prompt, image=init_image, mask_image=mask_image).images[0]
TensorRT Image2Image Stable Diffusion Pipeline
The TensorRT Pipeline can be used to accelerate the Image2Image Stable Diffusion Inference run.
NOTE: The ONNX conversions and TensorRT engine build may take up to 30 minutes.
import requests
from io import BytesIO
from PIL import Image
import torch
from diffusers import DDIMScheduler
from diffusers.pipelines.stable_diffusion import StableDiffusionImg2ImgPipeline

# Use the DDIMScheduler scheduler here instead
scheduler = DDIMScheduler.from_pretrained("stabilityai/stable-diffusion-2-1",
                                            subfolder="scheduler")


pipe = StableDiffusionImg2ImgPipeline.from_pretrained("stabilityai/stable-diffusion-2-1",
                                                custom_pipeline="stable_diffusion_tensorrt_img2img",
                                                revision='fp16',
                                                torch_dtype=torch.float16,
                                                scheduler=scheduler,)

# re-use cached folder to save ONNX models and TensorRT Engines
pipe.set_cached_folder("stabilityai/stable-diffusion-2-1", revision='fp16',)

pipe = pipe.to("cuda")

url = "https://pajoca.com/wp-content/uploads/2022/09/tekito-yamakawa-1.png"
response = requests.get(url)
input_image = Image.open(BytesIO(response.content)).convert("RGB")

prompt = "photorealistic new zealand hills"
image = pipe(prompt, image=input_image, strength=0.75,).images[0]
image.save('tensorrt_img2img_new_zealand_hills.png')
Stable Diffusion Reference
This pipeline uses the Reference Control. Refer to the sd-webui-controlnet discussion: Reference-only Controlsd-webui-controlnet discussion: Reference-adain Control.
Based on this issue,
EulerAncestralDiscreteSchedulergot poor results.
import torch
from diffusers import UniPCMultistepScheduler
from diffusers.utils import load_image

input_image = load_image("https://hf.co/datasets/huggingface/documentation-images/resolve/main/diffusers/input_image_vermeer.png")

pipe = StableDiffusionReferencePipeline.from_pretrained(
       "runwayml/stable-diffusion-v1-5",
       safety_checker=None,
       torch_dtype=torch.float16
       ).to('cuda:0')

pipe.scheduler = UniPCMultistepScheduler.from_config(pipe.scheduler.config)

result_img = pipe(ref_image=input_image,
      prompt="1girl",
      num_inference_steps=20,
      reference_attn=True,
      reference_adain=True).images[0]
Reference Image

Output Image of reference_attn=True and reference_adain=False
Output Image of reference_attn=False and reference_adain=True
Output Image of reference_attn=True and reference_adain=True
Stable Diffusion ControlNet Reference
This pipeline uses the Reference Control with ControlNet. Refer to the sd-webui-controlnet discussion: Reference-only Controlsd-webui-controlnet discussion: Reference-adain Control.
Based on this issue,
EulerAncestralDiscreteSchedulergot poor results.guess_mode=Trueworks well for ControlNet v1.1
import cv2
import torch
import numpy as np
from PIL import Image
from diffusers import UniPCMultistepScheduler
from diffusers.utils import load_image

input_image = load_image("https://hf.co/datasets/huggingface/documentation-images/resolve/main/diffusers/input_image_vermeer.png")

# get canny image
image = cv2.Canny(np.array(input_image), 100, 200)
image = image[:, :, None]
image = np.concatenate([image, image, image], axis=2)
canny_image = Image.fromarray(image)

controlnet = ControlNetModel.from_pretrained("lllyasviel/sd-controlnet-canny", torch_dtype=torch.float16)
pipe = StableDiffusionControlNetReferencePipeline.from_pretrained(
       "runwayml/stable-diffusion-v1-5",
       controlnet=controlnet,
       safety_checker=None,
       torch_dtype=torch.float16
       ).to('cuda:0')

pipe.scheduler = UniPCMultistepScheduler.from_config(pipe.scheduler.config)

result_img = pipe(ref_image=input_image,
      prompt="1girl",
      image=canny_image,
      num_inference_steps=20,
      reference_attn=True,
      reference_adain=True).images[0]
Reference Image
Output Image
Stable Diffusion on IPEX
This diffusion pipeline aims to accelarate the inference of Stable-Diffusion on Intel Xeon CPUs with BF16/FP32 precision using IPEX.
To use this pipeline, you need to:
- Install IPEX
Note: For each PyTorch release, there is a corresponding release of the IPEX. Here is the mapping relationship. It is recommended to install Pytorch/IPEX2.0 to get the best performance.
You can simply use pip to install IPEX with the latest version.
python -m pip install intel_extension_for_pytorch
Note: To install a specific version, run with the following command:
python -m pip install intel_extension_for_pytorch==<version_name> -f https://developer.intel.com/ipex-whl-stable-cpu
- After pipeline initialization,
prepare_for_ipex()should be called to enable IPEX accelaration. Supported inference datatypes are Float32 and BFloat16.
Note: The setting of generated image height/width for prepare_for_ipex() should be same as the setting of pipeline inference.
pipe = DiffusionPipeline.from_pretrained("runwayml/stable-diffusion-v1-5", custom_pipeline="stable_diffusion_ipex")
# For Float32
pipe.prepare_for_ipex(prompt, dtype=torch.float32, height=512, width=512) #value of image height/width should be consistent with the pipeline inference
# For BFloat16
pipe.prepare_for_ipex(prompt, dtype=torch.bfloat16, height=512, width=512) #value of image height/width should be consistent with the pipeline inference
Then you can use the ipex pipeline in a similar way to the default stable diffusion pipeline.
# For Float32
image = pipe(prompt, num_inference_steps=20, height=512, width=512).images[0] #value of image height/width should be consistent with 'prepare_for_ipex()'
# For BFloat16
with torch.cpu.amp.autocast(enabled=True, dtype=torch.bfloat16):
    image = pipe(prompt, num_inference_steps=20, height=512, width=512).images[0] #value of image height/width should be consistent with 'prepare_for_ipex()'
The following code compares the performance of the original stable diffusion pipeline with the ipex-optimized pipeline.
import torch
import intel_extension_for_pytorch as ipex
from diffusers import StableDiffusionPipeline
import time

prompt = "sailing ship in storm by Rembrandt"
model_id = "runwayml/stable-diffusion-v1-5"
# Helper function for time evaluation
def elapsed_time(pipeline, nb_pass=3, num_inference_steps=20):
    # warmup
    for _ in range(2):
        images = pipeline(prompt, num_inference_steps=num_inference_steps, height=512, width=512).images
    #time evaluation
    start = time.time()
    for _ in range(nb_pass):
        pipeline(prompt, num_inference_steps=num_inference_steps, height=512, width=512)
    end = time.time()
    return (end - start) / nb_pass

##############     bf16 inference performance    ###############

# 1. IPEX Pipeline initialization
pipe = DiffusionPipeline.from_pretrained(model_id, custom_pipeline="stable_diffusion_ipex")
pipe.prepare_for_ipex(prompt, dtype=torch.bfloat16, height=512, width=512)

# 2. Original Pipeline initialization
pipe2 = StableDiffusionPipeline.from_pretrained(model_id)

# 3. Compare performance between Original Pipeline and IPEX Pipeline
with torch.cpu.amp.autocast(enabled=True, dtype=torch.bfloat16):
    latency = elapsed_time(pipe)
    print("Latency of StableDiffusionIPEXPipeline--bf16", latency)
    latency = elapsed_time(pipe2)
    print("Latency of StableDiffusionPipeline--bf16",latency)

##############     fp32 inference performance    ###############

# 1. IPEX Pipeline initialization
pipe3 = DiffusionPipeline.from_pretrained(model_id, custom_pipeline="stable_diffusion_ipex")
pipe3.prepare_for_ipex(prompt, dtype=torch.float32, height=512, width=512)

# 2. Original Pipeline initialization
pipe4 = StableDiffusionPipeline.from_pretrained(model_id)

# 3. Compare performance between Original Pipeline and IPEX Pipeline
latency = elapsed_time(pipe3)
print("Latency of StableDiffusionIPEXPipeline--fp32", latency)
latency = elapsed_time(pipe4)
print("Latency of StableDiffusionPipeline--fp32",latency)
CLIP Guided Images Mixing With Stable Diffusion

CLIP guided stable diffusion images mixing pipeline allows to combine two images using standard diffusion models.
This approach is using (optional) CoCa model to avoid writing image description.
More code examples
Stable Diffusion XL Long Weighted Prompt Pipeline
This SDXL pipeline support unlimited length prompt and negative prompt, compatible with A1111 prompt weighted style.
You can provide both prompt and prompt_2. if only one prompt is provided, prompt_2 will be a copy of the provided prompt. Here is a sample code to use this pipeline.
from diffusers import DiffusionPipeline
import torch

pipe = DiffusionPipeline.from_pretrained(
    "stabilityai/stable-diffusion-xl-base-1.0"
    , torch_dtype       = torch.float16
    , use_safetensors   = True
    , variant           = "fp16"
    , custom_pipeline   = "lpw_stable_diffusion_xl",
)

prompt = "photo of a cute (white) cat running on the grass"*20
prompt2 = "chasing (birds:1.5)"*20
prompt = f"{prompt},{prompt2}"
neg_prompt = "blur, low quality, carton, animate"

pipe.to("cuda")
images = pipe(
    prompt                  = prompt
    , negative_prompt       = neg_prompt
).images[0]

pipe.to("cpu")
torch.cuda.empty_cache()
images
In the above code, the prompt2 is appended to the prompt, which is more than 77 tokens. "birds" are showing up in the result.

Example Images Mixing (with CoCa)
import requests
from io import BytesIO

import PIL
import torch
import open_clip
from open_clip import SimpleTokenizer
from diffusers import DiffusionPipeline
from transformers import CLIPFeatureExtractor, CLIPModel


def download_image(url):
    response = requests.get(url)
    return PIL.Image.open(BytesIO(response.content)).convert("RGB")

# Loading additional models
feature_extractor = CLIPFeatureExtractor.from_pretrained(
    "laion/CLIP-ViT-B-32-laion2B-s34B-b79K"
)
clip_model = CLIPModel.from_pretrained(
    "laion/CLIP-ViT-B-32-laion2B-s34B-b79K", torch_dtype=torch.float16
)
coca_model = open_clip.create_model('coca_ViT-L-14', pretrained='laion2B-s13B-b90k').to('cuda')
coca_model.dtype = torch.float16
coca_transform = open_clip.image_transform(
    coca_model.visual.image_size,
    is_train = False,
    mean = getattr(coca_model.visual, 'image_mean', None),
    std = getattr(coca_model.visual, 'image_std', None),
)
coca_tokenizer = SimpleTokenizer()

# Pipeline creating
mixing_pipeline = DiffusionPipeline.from_pretrained(
    "CompVis/stable-diffusion-v1-4",
    custom_pipeline="clip_guided_images_mixing_stable_diffusion",
    clip_model=clip_model,
    feature_extractor=feature_extractor,
    coca_model=coca_model,
    coca_tokenizer=coca_tokenizer,
    coca_transform=coca_transform,
    torch_dtype=torch.float16,
)
mixing_pipeline.enable_attention_slicing()
mixing_pipeline = mixing_pipeline.to("cuda")

# Pipeline running
generator = torch.Generator(device="cuda").manual_seed(17)

def download_image(url):
    response = requests.get(url)
    return PIL.Image.open(BytesIO(response.content)).convert("RGB")

content_image = download_image("https://huggingface.co/datasets/TheDenk/images_mixing/resolve/main/boromir.jpg")
style_image = download_image("https://huggingface.co/datasets/TheDenk/images_mixing/resolve/main/gigachad.jpg")

pipe_images = mixing_pipeline(
    num_inference_steps=50,
    content_image=content_image,
    style_image=style_image,
    noise_strength=0.65,
    slerp_latent_style_strength=0.9,
    slerp_prompt_style_strength=0.1,
    slerp_clip_image_style_strength=0.1,
    guidance_scale=9.0,
    batch_size=1,
    clip_guidance_scale=100,
    generator=generator,
).images

Stable Diffusion Mixture Tiling
This pipeline uses the Mixture. Refer to the Mixture paper for more details.
from diffusers import LMSDiscreteScheduler, DiffusionPipeline

# Creater scheduler and model (similar to StableDiffusionPipeline)
scheduler = LMSDiscreteScheduler(beta_start=0.00085, beta_end=0.012, beta_schedule="scaled_linear", num_train_timesteps=1000)
pipeline = DiffusionPipeline.from_pretrained("CompVis/stable-diffusion-v1-4", scheduler=scheduler, custom_pipeline="mixture_tiling")
pipeline.to("cuda")

# Mixture of Diffusers generation
image = pipeline(
    prompt=[[
        "A charming house in the countryside, by jakub rozalski, sunset lighting, elegant, highly detailed, smooth, sharp focus, artstation, stunning masterpiece",
        "A dirt road in the countryside crossing pastures, by jakub rozalski, sunset lighting, elegant, highly detailed, smooth, sharp focus, artstation, stunning masterpiece",
        "An old and rusty giant robot lying on a dirt road, by jakub rozalski, dark sunset lighting, elegant, highly detailed, smooth, sharp focus, artstation, stunning masterpiece"
    ]],
    tile_height=640,
    tile_width=640,
    tile_row_overlap=0,
    tile_col_overlap=256,
    guidance_scale=8,
    seed=7178915308,
    num_inference_steps=50,
)["images"][0]

TensorRT Inpainting Stable Diffusion Pipeline
The TensorRT Pipeline can be used to accelerate the Inpainting Stable Diffusion Inference run.
NOTE: The ONNX conversions and TensorRT engine build may take up to 30 minutes.
import requests
from io import BytesIO
from PIL import Image
import torch
from diffusers import PNDMScheduler
from diffusers.pipelines.stable_diffusion import StableDiffusionInpaintPipeline

# Use the PNDMScheduler scheduler here instead
scheduler = PNDMScheduler.from_pretrained("stabilityai/stable-diffusion-2-inpainting", subfolder="scheduler")


pipe = StableDiffusionInpaintPipeline.from_pretrained("stabilityai/stable-diffusion-2-inpainting",
    custom_pipeline="stable_diffusion_tensorrt_inpaint",
    revision='fp16',
    torch_dtype=torch.float16,
    scheduler=scheduler,
    )

# re-use cached folder to save ONNX models and TensorRT Engines
pipe.set_cached_folder("stabilityai/stable-diffusion-2-inpainting", revision='fp16',)

pipe = pipe.to("cuda")

url = "https://raw.githubusercontent.com/CompVis/latent-diffusion/main/data/inpainting_examples/overture-creations-5sI6fQgYIuo.png"
response = requests.get(url)
input_image = Image.open(BytesIO(response.content)).convert("RGB")

mask_url = "https://raw.githubusercontent.com/CompVis/latent-diffusion/main/data/inpainting_examples/overture-creations-5sI6fQgYIuo_mask.png"
response = requests.get(mask_url)
mask_image = Image.open(BytesIO(response.content)).convert("RGB")

prompt = "a mecha robot sitting on a bench"
image = pipe(prompt, image=input_image, mask_image=mask_image, strength=0.75,).images[0]
image.save('tensorrt_inpaint_mecha_robot.png')
Stable Diffusion Mixture Canvas
This pipeline uses the Mixture. Refer to the Mixture paper for more details.
from PIL import Image
from diffusers import LMSDiscreteScheduler, DiffusionPipeline
from diffusers.pipelines.pipeline_utils import Image2ImageRegion, Text2ImageRegion, preprocess_image


# Load and preprocess guide image
iic_image = preprocess_image(Image.open("input_image.png").convert("RGB"))

# Creater scheduler and model (similar to StableDiffusionPipeline)
scheduler = LMSDiscreteScheduler(beta_start=0.00085, beta_end=0.012, beta_schedule="scaled_linear", num_train_timesteps=1000)
pipeline = DiffusionPipeline.from_pretrained("CompVis/stable-diffusion-v1-4", scheduler=scheduler).to("cuda:0", custom_pipeline="mixture_canvas")
pipeline.to("cuda")

# Mixture of Diffusers generation
output = pipeline(
    canvas_height=800,
    canvas_width=352,
    regions=[
        Text2ImageRegion(0, 800, 0, 352, guidance_scale=8,
            prompt=f"best quality, masterpiece, WLOP, sakimichan, art contest winner on pixiv, 8K, intricate details, wet effects, rain drops, ethereal, mysterious, futuristic, UHD, HDR, cinematic lighting, in a beautiful forest, rainy day, award winning, trending on artstation, beautiful confident cheerful young woman, wearing a futuristic sleeveless dress, ultra beautiful detailed  eyes, hyper-detailed face, complex,  perfect, model,  textured,  chiaroscuro, professional make-up, realistic, figure in frame, "),
        Image2ImageRegion(352-800, 352, 0, 352, reference_image=iic_image, strength=1.0),
    ],
    num_inference_steps=100,
    seed=5525475061,
)["images"][0]


IADB pipeline
This pipeline is the implementation of the α-(de)Blending: a Minimalist Deterministic Diffusion Model paper. It is a simple and minimalist diffusion model.
The following code shows how to use the IADB pipeline to generate images using a pretrained celebahq-256 model.
pipeline_iadb = DiffusionPipeline.from_pretrained("thomasc4/iadb-celebahq-256", custom_pipeline='iadb')

pipeline_iadb = pipeline_iadb.to('cuda')

output = pipeline_iadb(batch_size=4,num_inference_steps=128)
for i in range(len(output[0])):
    plt.imshow(output[0][i])
    plt.show()
Sampling with the IADB formulation is easy, and can be done in a few lines (the pipeline already implements it):
def sample_iadb(model, x0, nb_step):
    x_alpha = x0
    for t in range(nb_step):
        alpha = (t/nb_step)
        alpha_next =((t+1)/nb_step)

        d = model(x_alpha, torch.tensor(alpha, device=x_alpha.device))['sample']
        x_alpha = x_alpha + (alpha_next-alpha)*d

    return x_alpha
The training loop is also straightforward:
# Training loop
while True:
    x0 = sample_noise()
    x1 = sample_dataset()

    alpha = torch.rand(batch_size)

    # Blend
    x_alpha = (1-alpha) * x0 + alpha * x1

    # Loss
    loss = torch.sum((D(x_alpha, alpha)- (x1-x0))**2)
    optimizer.zero_grad()
    loss.backward()
    optimizer.step()
Zero1to3 pipeline
This pipeline is the implementation of the Zero-1-to-3: Zero-shot One Image to 3D Object paper. The original pytorch-lightning repo and a diffusers repo.
The following code shows how to use the Zero1to3 pipeline to generate novel view synthesis images using a pretrained stable diffusion model.
import os
import torch
from pipeline_zero1to3 import Zero1to3StableDiffusionPipeline
from diffusers.utils import load_image

model_id = "kxic/zero123-165000" # zero123-105000, zero123-165000, zero123-xl

pipe = Zero1to3StableDiffusionPipeline.from_pretrained(model_id, torch_dtype=torch.float16)

pipe.enable_xformers_memory_efficient_attention()
pipe.enable_vae_tiling()
pipe.enable_attention_slicing()
pipe = pipe.to("cuda")

num_images_per_prompt = 4

# test inference pipeline
# x y z, Polar angle (vertical rotation in degrees) 	Azimuth angle (horizontal rotation in degrees) 	Zoom (relative distance from center)
query_pose1 = [-75.0, 100.0, 0.0]
query_pose2 = [-20.0, 125.0, 0.0]
query_pose3 = [-55.0, 90.0, 0.0]

# load image
# H, W = (256, 256) # H, W = (512, 512)   # zero123 training is 256,256

# for batch input
input_image1 = load_image("./demo/4_blackarm.png") #load_image("https://cvlab-zero123-live.hf.space/file=/home/user/app/configs/4_blackarm.png")
input_image2 = load_image("./demo/8_motor.png") #load_image("https://cvlab-zero123-live.hf.space/file=/home/user/app/configs/8_motor.png")
input_image3 = load_image("./demo/7_london.png") #load_image("https://cvlab-zero123-live.hf.space/file=/home/user/app/configs/7_london.png")
input_images = [input_image1, input_image2, input_image3]
query_poses = [query_pose1, query_pose2, query_pose3]

# # for single input
# H, W = (256, 256)
# input_images = [input_image2.resize((H, W), PIL.Image.NEAREST)]
# query_poses = [query_pose2]


# better do preprocessing
from gradio_new import preprocess_image, create_carvekit_interface
import numpy as np
import PIL.Image as Image

pre_images = []
models = dict()
print('Instantiating Carvekit HiInterface...')
models['carvekit'] = create_carvekit_interface()
if not isinstance(input_images, list):
    input_images = [input_images]
for raw_im in input_images:
    input_im = preprocess_image(models, raw_im, True)
    H, W = input_im.shape[:2]
    pre_images.append(Image.fromarray((input_im * 255.0).astype(np.uint8)))
input_images = pre_images

# infer pipeline, in original zero123 num_inference_steps=76
images = pipe(input_imgs=input_images, prompt_imgs=input_images, poses=query_poses, height=H, width=W,
              guidance_scale=3.0, num_images_per_prompt=num_images_per_prompt, num_inference_steps=50).images


# save imgs
log_dir = "logs"
os.makedirs(log_dir, exist_ok=True)
bs = len(input_images)
i = 0
for obj in range(bs):
    for idx in range(num_images_per_prompt):
        images[i].save(os.path.join(log_dir,f"obj{obj}_{idx}.jpg"))
        i += 1
Stable Diffusion XL Reference
This pipeline uses the Reference . Refer to the stable_diffusion_reference.
import torch
from PIL import Image
from diffusers.utils import load_image
from diffusers import DiffusionPipeline
from diffusers.schedulers import UniPCMultistepScheduler
input_image = load_image("https://hf.co/datasets/huggingface/documentation-images/resolve/main/diffusers/input_image_vermeer.png")

# pipe = DiffusionPipeline.from_pretrained(
#     "stabilityai/stable-diffusion-xl-base-1.0",
#     custom_pipeline="stable_diffusion_xl_reference",
#     torch_dtype=torch.float16,
#     use_safetensors=True,
#     variant="fp16").to('cuda:0')

pipe = StableDiffusionXLReferencePipeline.from_pretrained(
    "stabilityai/stable-diffusion-xl-base-1.0",
    torch_dtype=torch.float16,
    use_safetensors=True,
    variant="fp16").to('cuda:0')

pipe.scheduler = UniPCMultistepScheduler.from_config(pipe.scheduler.config)

result_img = pipe(ref_image=input_image,
      prompt="1girl",
      num_inference_steps=20,
      reference_attn=True,
      reference_adain=True).images[0]
Reference Image
Output Image
prompt: 1 girl
reference_attn=True, reference_adain=True, num_inference_steps=20
Reference Image
Output Image
prompt: A dog
reference_attn=True, reference_adain=False, num_inference_steps=20
Reference Image
Output Image
prompt: An astronaut riding a lion
reference_attn=True, reference_adain=True, num_inference_steps=20
Stable diffusion fabric pipeline
FABRIC approach applicable to a wide range of popular diffusion models, which exploits the self-attention layer present in the most widely used architectures to condition the diffusion process on a set of feedback images.
import requests
import torch
from PIL import Image
from io import BytesIO

from diffusers import Diffusionpipeline

# load the pipeline
# make sure you're logged in with `huggingface-cli login`
model_id_or_path = "runwayml/stable-diffusion-v1-5"
#can also be used with dreamlike-art/dreamlike-photoreal-2.0
pipe = DiffusionPipeline.from_pretrained(model_id_or_path, torch_dtype=torch.float16, custom_pipeline="pipeline_fabric").to("cuda")

# let's specify a prompt
prompt = "An astronaut riding an elephant"
negative_prompt = "lowres, cropped"

# call the pipeline
image = pipe(
    prompt=prompt,
    negative_prompt=negative_prompt,
    num_inference_steps=20,
    generator=torch.manual_seed(12)
).images[0]

image.save("horse_to_elephant.jpg")

# let's try another example with feedback
url = "https://raw.githubusercontent.com/ChenWu98/cycle-diffusion/main/data/dalle2/A%20black%20colored%20car.png"
response = requests.get(url)
init_image = Image.open(BytesIO(response.content)).convert("RGB")

prompt = "photo, A blue colored car, fish eye"
liked = [init_image]
## same goes with disliked

# call the pipeline
torch.manual_seed(0)
image = pipe(
    prompt=prompt,
    negative_prompt=negative_prompt,
    liked = liked,
    num_inference_steps=20,
).images[0]

image.save("black_to_blue.png")
With enough feedbacks you can create very similar high quality images.
The original codebase can be found at sd-fabric/fabric, and available checkpoints are dreamlike-art/dreamlike-photoreal-2.0, runwayml/stable-diffusion-v1-5, and stabilityai/stable-diffusion-2-1 (may give unexpected results).
Let's have a look at the images (512X512)
| Without Feedback | With Feedback (1st image) |
|---|---|
 |
 |
Masked Im2Im Stable Diffusion Pipeline
This pipeline reimplements sketch inpaint feature from A1111 for non-inpaint models. The following code reads two images, original and one with mask painted over it. It computes mask as a difference of two images and does the inpainting in the area defined by the mask.
img = PIL.Image.open("./mech.png")
# read image with mask painted over
img_paint = PIL.Image.open("./mech_painted.png")
neq = numpy.any(numpy.array(img) != numpy.array(img_paint), axis=-1)
mask = neq / neq.max()

pipeline = MaskedStableDiffusionImg2ImgPipeline.from_pretrained("frankjoshua/icbinpICantBelieveIts_v8")

# works best with EulerAncestralDiscreteScheduler
pipeline.scheduler = EulerAncestralDiscreteScheduler.from_config(pipeline.scheduler.config)
generator = torch.Generator(device="cpu").manual_seed(4)

prompt = "a man wearing a mask"
result = pipeline(prompt=prompt, image=img_paint, mask=mask, strength=0.75,
                  generator=generator)
result.images[0].save("result.png")
original image mech.png
image with mask mech_painted.png
result:
Prompt2Prompt Pipeline
Prompt2Prompt allows the following edits:
- ReplaceEdit (change words in prompt)
- ReplaceEdit with local blend (change words in prompt, keep image part unrelated to changes constant)
- RefineEdit (add words to prompt)
- RefineEdit with local blend (add words to prompt, keep image part unrelated to changes constant)
- ReweightEdit (modulate importance of words)
Here's a full example for `ReplaceEdit``:
import torch
import numpy as np
import matplotlib.pyplot as plt
from diffusers.pipelines import Prompt2PromptPipeline

pipe = Prompt2PromptPipeline.from_pretrained("CompVis/stable-diffusion-v1-4").to("cuda")

prompts = ["A turtle playing with a ball",
           "A monkey playing with a ball"]

cross_attention_kwargs = {
    "edit_type": "replace",
    "cross_replace_steps": 0.4,
    "self_replace_steps": 0.4
}

outputs = pipe(prompt=prompts, height=512, width=512, num_inference_steps=50, cross_attention_kwargs=cross_attention_kwargs)
And abbreviated examples for the other edits:
ReplaceEdit with local blend
prompts = ["A turtle playing with a ball",
           "A monkey playing with a ball"]

cross_attention_kwargs = {
    "edit_type": "replace",
    "cross_replace_steps": 0.4,
    "self_replace_steps": 0.4,
    "local_blend_words": ["turtle", "monkey"]
}
RefineEdit
prompts = ["A turtle",
           "A turtle in a forest"]

cross_attention_kwargs = {
    "edit_type": "refine",
    "cross_replace_steps": 0.4,
    "self_replace_steps": 0.4,
}
RefineEdit with local blend
prompts = ["A turtle",
           "A turtle in a forest"]

cross_attention_kwargs = {
    "edit_type": "refine",
    "cross_replace_steps": 0.4,
    "self_replace_steps": 0.4,
    "local_blend_words": ["in", "a" , "forest"]
}
ReweightEdit
prompts = ["A smiling turtle"] * 2

edit_kcross_attention_kwargswargs = {
    "edit_type": "reweight",
    "cross_replace_steps": 0.4,
    "self_replace_steps": 0.4,
    "equalizer_words": ["smiling"],
    "equalizer_strengths": [5]
}
Side note: See this GitHub gist if you want to visualize the attention maps.
Latent Consistency Pipeline
Latent Consistency Models was proposed in Latent Consistency Models: Synthesizing High-Resolution Images with Few-Step Inference by Simian Luo, Yiqin Tan, Longbo Huang, Jian Li, Hang Zhao from Tsinghua University.
The abstract of the paper reads as follows:
Latent Diffusion models (LDMs) have achieved remarkable results in synthesizing high-resolution images. However, the iterative sampling process is computationally intensive and leads to slow generation. Inspired by Consistency Models (song et al.), we propose Latent Consistency Models (LCMs), enabling swift inference with minimal steps on any pre-trained LDMs, including Stable Diffusion (rombach et al). Viewing the guided reverse diffusion process as solving an augmented probability flow ODE (PF-ODE), LCMs are designed to directly predict the solution of such ODE in latent space, mitigating the need for numerous iterations and allowing rapid, high-fidelity sampling. Efficiently distilled from pre-trained classifier-free guided diffusion models, a high-quality 768 x 768 2~4-step LCM takes only 32 A100 GPU hours for training. Furthermore, we introduce Latent Consistency Fine-tuning (LCF), a novel method that is tailored for fine-tuning LCMs on customized image datasets. Evaluation on the LAION-5B-Aesthetics dataset demonstrates that LCMs achieve state-of-the-art text-to-image generation performance with few-step inference. Project Page: this https URL
The model can be used with diffusers as follows:
- 1. Load the model from the community pipeline.
from diffusers import DiffusionPipeline
import torch

pipe = DiffusionPipeline.from_pretrained("SimianLuo/LCM_Dreamshaper_v7", custom_pipeline="latent_consistency_txt2img", custom_revision="main")

# To save GPU memory, torch.float16 can be used, but it may compromise image quality.
pipe.to(torch_device="cuda", torch_dtype=torch.float32)
- Run inference with as little as 4 steps:
prompt = "Self-portrait oil painting, a beautiful cyborg with golden hair, 8k"

# Can be set to 1~50 steps. LCM support fast inference even <= 4 steps. Recommend: 1~8 steps.
num_inference_steps = 4

images = pipe(prompt=prompt, num_inference_steps=num_inference_steps, guidance_scale=8.0, lcm_origin_steps=50, output_type="pil").images
For any questions or feedback, feel free to reach out to Simian Luo.
You can also try this pipeline directly in the 🚀 official spaces.
Latent Consistency Img2img Pipeline
This pipeline extends the Latent Consistency Pipeline to allow it to take an input image.
from diffusers import DiffusionPipeline
import torch

pipe = DiffusionPipeline.from_pretrained("SimianLuo/LCM_Dreamshaper_v7", custom_pipeline="latent_consistency_img2img")

# To save GPU memory, torch.float16 can be used, but it may compromise image quality.
pipe.to(torch_device="cuda", torch_dtype=torch.float32)
- Run inference with as little as 4 steps:
prompt = "Self-portrait oil painting, a beautiful cyborg with golden hair, 8k"


input_image=Image.open("myimg.png")

strength = 0.5 #strength =0 (no change) strength=1 (completely overwrite image)

# Can be set to 1~50 steps. LCM support fast inference even <= 4 steps. Recommend: 1~8 steps.
num_inference_steps = 4

images = pipe(prompt=prompt, image=input_image, strength=strength, num_inference_steps=num_inference_steps, guidance_scale=8.0, lcm_origin_steps=50, output_type="pil").images