Distributed Training: Train BART/T5 for Summarization using 🤗 Transformers and Amazon SageMaker


In case you missed it: on March 25th we announced a collaboration with Amazon SageMaker to make it easier to create State-of-the-Art Machine Learning models, and ship cutting-edge NLP features faster.
Together with the SageMaker team, we built 🤗 Transformers optimized Deep Learning Containers to accelerate training of Transformers-based models. Thanks AWS friends!🤗 🚀
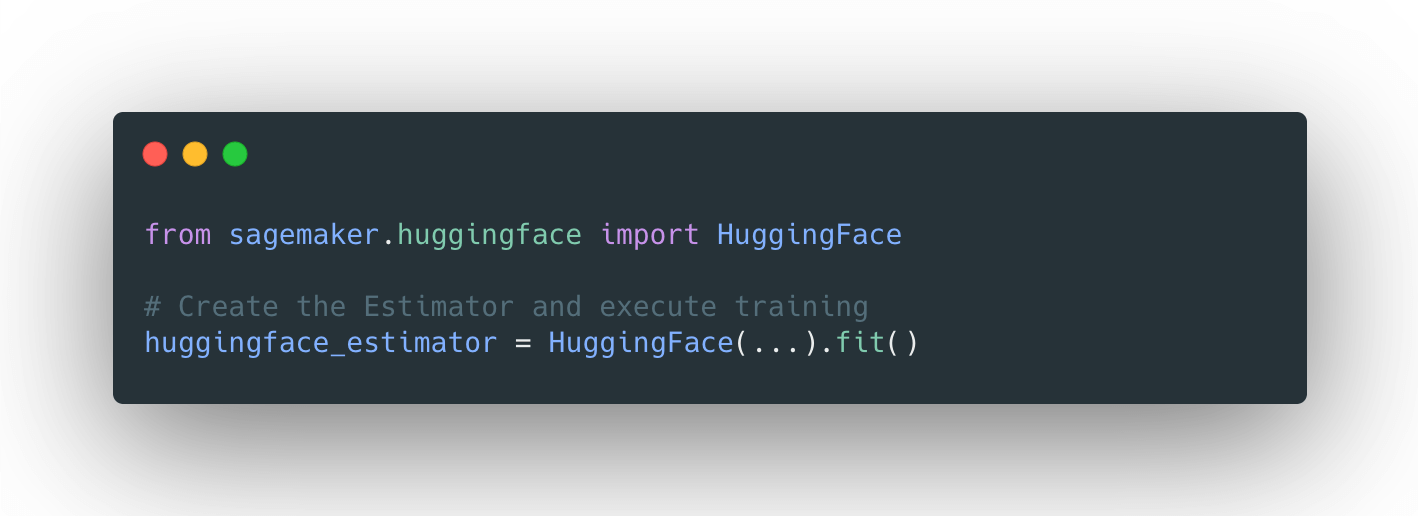
With the new HuggingFace estimator in the SageMaker Python SDK, you can start training with a single line of code.
The announcement blog post provides all the information you need to know about the integration, including a "Getting Started" example and links to documentation, examples, and features.
listed again here:
- 🤗 Transformers Documentation: Amazon SageMaker
- Example Notebooks
- Amazon SageMaker documentation for Hugging Face
- Python SDK SageMaker documentation for Hugging Face
- Deep Learning Container
If you're not familiar with Amazon SageMaker: "Amazon SageMaker is a fully managed service that provides every developer and data scientist with the ability to build, train, and deploy machine learning (ML) models quickly. SageMaker removes the heavy lifting from each step of the machine learning process to make it easier to develop high quality models." [REF]
Tutorial
We will use the new Hugging Face DLCs and Amazon SageMaker extension to train a distributed Seq2Seq-transformer model on the summarization task using the transformers and datasets libraries, and then upload the model to huggingface.co and test it.
As distributed training strategy we are going to use SageMaker Data Parallelism, which has been built into the Trainer API. To use data-parallelism we only have to define the distribution parameter in our HuggingFace estimator.
# configuration for running training on smdistributed Data Parallel
distribution = {'smdistributed':{'dataparallel':{ 'enabled': True }}}
In this tutorial, we will use an Amazon SageMaker Notebook Instance for running our training job. You can learn here how to set up a Notebook Instance.
What are we going to do:
- Set up a development environment and install sagemaker
- Choose 🤗 Transformers
examples/script - Configure distributed training and hyperparameters
- Create a
HuggingFaceestimator and start training - Upload the fine-tuned model to huggingface.co
- Test inference
Model and Dataset
We are going to fine-tune facebook/bart-large-cnn on the samsum dataset. "BART is sequence-to-sequence model trained with denoising as pretraining objective." [REF]
The samsum dataset contains about 16k messenger-like conversations with summaries.
{"id": "13818513",
 "summary": "Amanda baked cookies and will bring Jerry some tomorrow.",
 "dialogue": "Amanda: I baked cookies. Do you want some?\r\nJerry: Sure!\r\nAmanda: I'll bring you tomorrow :-)"}
Set up a development environment and install sagemaker
After our SageMaker Notebook Instance is running we can select either Jupyer Notebook or JupyterLab and create a new Notebook with the conda_pytorch_p36 kernel.
Note: The use of Jupyter is optional: We could also launch SageMaker Training jobs from anywhere we have an SDK installed, connectivity to the cloud and appropriate permissions, such as a Laptop, another IDE or a task scheduler like Airflow or AWS Step Functions.
After that we can install the required dependencies
!pip install transformers "datasets[s3]" sagemaker --upgrade
install git-lfs for model upload.
!curl -s https://packagecloud.io/install/repositories/github/git-lfs/script.rpm.sh | sudo bash
!sudo yum install git-lfs -y
!git lfs install
To run training on SageMaker we need to create a sagemaker Session and provide an IAM role with the right permission. This IAM role will be later attached to the TrainingJob enabling it to download data, e.g. from Amazon S3.
import sagemaker

sess = sagemaker.Session()
role = sagemaker.get_execution_role()

print(f"IAM role arn used for running training: {role}")
print(f"S3 bucket used for storing artifacts: {sess.default_bucket()}")
Choose 🤗 Transformers examples/ script
The 🤗 Transformers repository contains several examples/scripts for fine-tuning models on tasks from language-modeling to token-classification. In our case, we are using the run_summarization.py from the seq2seq/ examples.
Note: you can use this tutorial as-is to train your model on a different examples script.
Since the HuggingFace Estimator has git support built-in, we can specify a training script stored in a GitHub repository as entry_point and source_dir.
We are going to use the transformers 4.4.2 DLC which means we need to configure the v4.4.2 as the branch to pull the compatible example scripts.
#git_config = {'repo': 'https://github.com/huggingface/transformers.git','branch': 'v4.4.2'} # v4.4.2 is referring to the `transformers_version you use in the estimator.
# used due an missing package in v4.4.2
git_config = {'repo': 'https://github.com/philschmid/transformers.git','branch': 'master'} # v4.4.2 is referring to the `transformers_version you use in the estimator.
Configure distributed training and hyperparameters
Next, we will define our hyperparameters and configure our distributed training strategy. As hyperparameter, we can define any Seq2SeqTrainingArguments and the ones defined in run_summarization.py.
# hyperparameters, which are passed into the training job
hyperparameters={
    'per_device_train_batch_size': 4,
    'per_device_eval_batch_size': 4,
    'model_name_or_path':'facebook/bart-large-cnn',
    'dataset_name':'samsum',
    'do_train':True,
    'do_predict': True,
    'predict_with_generate': True,
    'output_dir':'/opt/ml/model',
    'num_train_epochs': 3,
    'learning_rate': 5e-5,
    'seed': 7,
    'fp16': True,
}

# configuration for running training on smdistributed Data Parallel
distribution = {'smdistributed':{'dataparallel':{ 'enabled': True }}}
Since, we are using SageMaker Data Parallelism our total_batch_size will be per_device_train_batch_size * n_gpus.
Create a HuggingFace estimator and start training
The last step before training is creating a HuggingFace estimator. The Estimator handles the end-to-end Amazon SageMaker training. We define which fine-tuning script should be used as entry_point, which instance_type should be used, and which hyperparameters are passed in.
from sagemaker.huggingface import HuggingFace

# create the Estimator
huggingface_estimator = HuggingFace(
      entry_point='run_summarization.py', # script
      source_dir='./examples/seq2seq', # relative path to example
      git_config=git_config,
      instance_type='ml.p3dn.24xlarge',
      instance_count=2,
      transformers_version='4.4.2',
      pytorch_version='1.6.0',
      py_version='py36',
      role=role,
      hyperparameters = hyperparameters,
      distribution = distribution
)
As instance_type we are using ml.p3dn.24xlarge, which contains 8x NVIDIA A100 with an instance_count of 2. This means we are going to run training on 16 GPUs and a total_batch_size of 16*4=64. We are going to train a 400 Million Parameter model with a total_batch_size of 64, which is just wow.
To start our training we call the .fit() method.
# starting the training job
huggingface_estimator.fit()
2021-04-01 13:00:35 Starting - Starting the training job...
2021-04-01 13:01:03 Starting - Launching requested ML instancesProfilerReport-1617282031: InProgress
2021-04-01 13:02:23 Starting - Preparing the instances for training......
2021-04-01 13:03:25 Downloading - Downloading input data...
2021-04-01 13:04:04 Training - Downloading the training image...............
2021-04-01 13:06:33 Training - Training image download completed. Training in progress
....
....
2021-04-01 13:16:47 Uploading - Uploading generated training model
2021-04-01 13:27:49 Completed - Training job completed
Training seconds: 2882
Billable seconds: 2882
The training seconds are 2882 because they are multiplied by the number of instances. If we calculate 2882/2=1441 is it the duration from "Downloading the training image" to "Training job completed". Converted to real money, our training on 16 NVIDIA Tesla V100-GPU for a State-of-the-Art summarization model comes down to ~28$.
Upload the fine-tuned model to huggingface.co
Since our model achieved a pretty good score we are going to upload it to huggingface.co, create a model_card and test it with the Hosted Inference widget. To upload a model you need to create an account here.
We can download our model from Amazon S3 and unzip it using the following snippet.
import os
import tarfile
from sagemaker.s3 import S3Downloader

local_path = 'my_bart_model'

os.makedirs(local_path, exist_ok = True)

# download model from S3
S3Downloader.download(
    s3_uri=huggingface_estimator.model_data, # s3 uri where the trained model is located
    local_path=local_path, # local path where *.tar.gz will be saved
    sagemaker_session=sess # sagemaker session used for training the model
)

# unzip model
tar = tarfile.open(f"{local_path}/model.tar.gz", "r:gz")
tar.extractall(path=local_path)
tar.close()
os.remove(f"{local_path}/model.tar.gz")
Before we are going to upload our model to huggingface.co we need to create a model_card. The model_card describes the model and includes hyperparameters, results, and specifies which dataset was used for training. To create a model_card we create a README.md in our local_path
# read eval and test results
with open(f"{local_path}/eval_results.json") as f:
    eval_results_raw = json.load(f)
    eval_results={}
    eval_results["eval_rouge1"] = eval_results_raw["eval_rouge1"]
    eval_results["eval_rouge2"] = eval_results_raw["eval_rouge2"]
    eval_results["eval_rougeL"] = eval_results_raw["eval_rougeL"]
    eval_results["eval_rougeLsum"] = eval_results_raw["eval_rougeLsum"]

with open(f"{local_path}/test_results.json") as f:
    test_results_raw = json.load(f)
    test_results={}
    test_results["test_rouge1"] = test_results_raw["test_rouge1"]
    test_results["test_rouge2"] = test_results_raw["test_rouge2"]
    test_results["test_rougeL"] = test_results_raw["test_rougeL"]
    test_results["test_rougeLsum"] = test_results_raw["test_rougeLsum"]
After we extract all the metrics we want to include we are going to create our README.md. Additionally to the automated generation of the results table we add the metrics manually to the metadata of our model card under model-index
import json

MODEL_CARD_TEMPLATE = """
---
language: en
tags:
- sagemaker
- bart
- summarization
license: apache-2.0
datasets:
- samsum
model-index:
- name: {model_name}
  results:
  - task:
      name: Abstractive Text Summarization
      type: abstractive-text-summarization
    dataset:
      name: "SAMSum Corpus: A Human-annotated Dialogue Dataset for Abstractive Summarization"
      type: samsum
    metrics:
       - name: Validation ROGUE-1
         type: rogue-1
         value: 42.621
       - name: Validation ROGUE-2
         type: rogue-2
         value: 21.9825
       - name: Validation ROGUE-L
         type: rogue-l
         value: 33.034
       - name: Test ROGUE-1
         type: rogue-1
         value: 41.3174
       - name: Test ROGUE-2
         type: rogue-2
         value: 20.8716
       - name: Test ROGUE-L
         type: rogue-l
         value: 32.1337
widget:
- text: |
    Jeff: Can I train a 🤗 Transformers model on Amazon SageMaker?
    Philipp: Sure you can use the new Hugging Face Deep Learning Container.
    Jeff: ok.
    Jeff: and how can I get started?
    Jeff: where can I find documentation?
    Philipp: ok, ok you can find everything here. https://huggingface.co/blog/the-partnership-amazon-sagemaker-and-hugging-face
---

## `{model_name}`

This model was trained using Amazon SageMaker and the new Hugging Face Deep Learning container.

For more information look at:
- [🤗 Transformers Documentation: Amazon SageMaker](https://huggingface.co/transformers/sagemaker.html)
- [Example Notebooks](https://github.com/huggingface/notebooks/tree/master/sagemaker)
- [Amazon SageMaker documentation for Hugging Face](https://docs.aws.amazon.com/sagemaker/latest/dg/hugging-face.html)
- [Python SDK SageMaker documentation for Hugging Face](https://sagemaker.readthedocs.io/en/stable/frameworks/huggingface/index.html)
- [Deep Learning Container](https://github.com/aws/deep-learning-containers/blob/master/available_images.md#huggingface-training-containers)

## Hyperparameters

    {hyperparameters}


## Usage
    from transformers import pipeline
    summarizer = pipeline("summarization", model="philschmid/{model_name}")

    conversation = '''Jeff: Can I train a 🤗 Transformers model on Amazon SageMaker?
    Philipp: Sure you can use the new Hugging Face Deep Learning Container.
    Jeff: ok.
    Jeff: and how can I get started?
    Jeff: where can I find documentation?
    Philipp: ok, ok you can find everything here. https://huggingface.co/blog/the-partnership-amazon-sagemaker-and-hugging-face
    '''
    nlp(conversation)

## Results

| key | value |
| --- | ----- |
{eval_table}
{test_table}


"""

# Generate model card (todo: add more data from Trainer)
model_card = MODEL_CARD_TEMPLATE.format(
    model_name=f"{hyperparameters['model_name_or_path'].split('/')[1]}-{hyperparameters['dataset_name']}",
    hyperparameters=json.dumps(hyperparameters, indent=4, sort_keys=True),
    eval_table="\n".join(f"| {k} | {v} |" for k, v in eval_results.items()),
    test_table="\n".join(f"| {k} | {v} |" for k, v in test_results.items()),
)

with open(f"{local_path}/README.md", "w") as f:
    f.write(model_card)
After we have our unzipped model and model card located in my_bart_model we can use the either huggingface_hub SDK to create a repository and upload it to huggingface.co – or just to https://huggingface.co/new an create a new repository and upload it.
from getpass import getpass
from huggingface_hub import HfApi, Repository

hf_username = "philschmid" # your username on huggingface.co
hf_email = "philipp@huggingface.co" # email used for commit
repository_name = f"{hyperparameters['model_name_or_path'].split('/')[1]}-{hyperparameters['dataset_name']}" # repository name on huggingface.co
password = getpass("Enter your password:") # creates a prompt for entering password

# get hf token
token = HfApi().login(username=hf_username, password=password)

# create repository
repo_url = HfApi().create_repo(token=token, name=repository_name, exist_ok=True)

# create a Repository instance
model_repo = Repository(use_auth_token=token,
                        clone_from=repo_url,
                        local_dir=local_path,
                        git_user=hf_username,
                        git_email=hf_email)

# push model to the hub
model_repo.push_to_hub()
Test inference
After we uploaded our model we can access it at https://huggingface.co/{hf_username}/{repository_name}
print(f"https://huggingface.co/{hf_username}/{repository_name}")
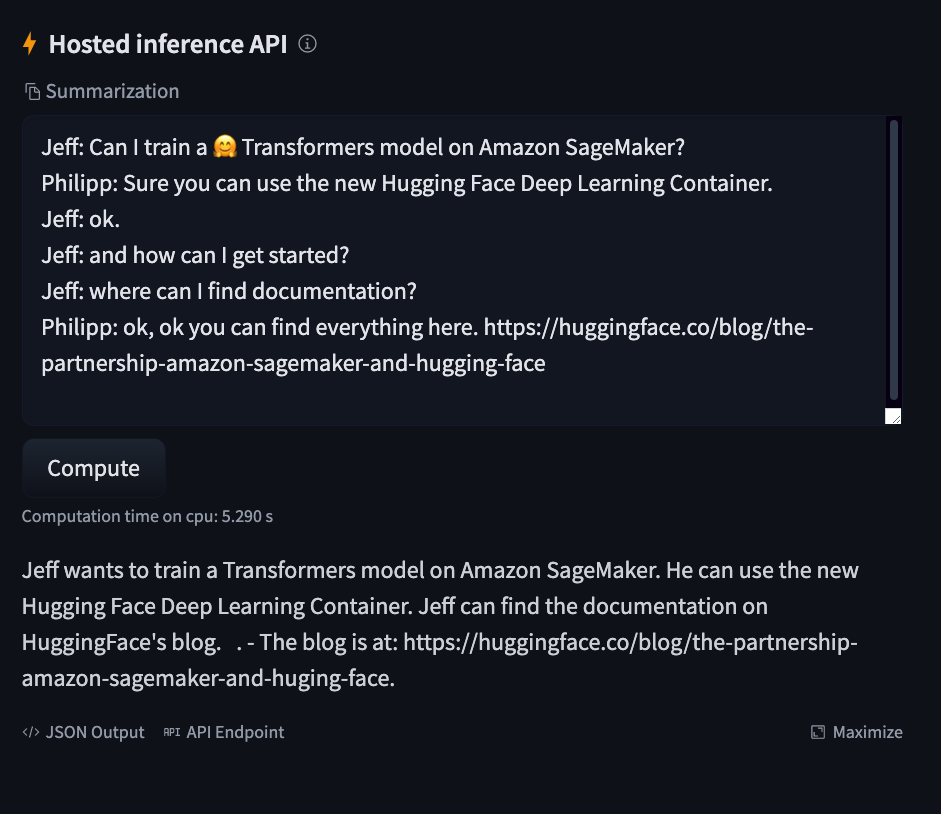
And use the "Hosted Inference API" widget to test it.
https://huggingface.co/philschmid/bart-large-cnn-samsum