Spaces:
Runtime error

A newer version of the Streamlit SDK is available:
1.37.1
title: Csgy6613 Project Rk2546
emoji: 🌍
colorFrom: pink
colorTo: yellow
sdk: streamlit
sdk_version: 1.17.0
app_file: src/main.py
pinned: false
cs-gy-6613-project-rk2546
Milestone 4
Landing Page
Code Breakdown
The USPTO application is divided into several directories. Overall, the important files are present in the application as such:
- data/
    - train.json
    - val.json
- src/
    - main.py
    - train.ipynb
    - val.ipynb
Both train.json and val.json contain the original USPTO data, sized down to contain only the relevant data from each recorded patent and split between training and validation data. The validation data val.json is used in the online USPTO application as a set of pre-set patents that a user can select when using the USPTO patent prediction function. That, and the val.ipynb file was used to validate the model's accuracy.
The primary code back-end is stored in main.py, which runs the application on the HuggingFace space UI. The application uses Streamlit to render UI elements on the screen. All models run off of Transformers and Tokenizers from HuggingFace.
The application has two features: Sentiment Analysis (for Milestone #2) and USPTO Patent Acceptance Prediction (Milestone #3). Both run on main.py. Sentiment Analysis relies on pre-trained models from HuggingFace's public datasets - particularly 4 models:
- cardiffnlp/twitter-roberta-base-sentiment
- finiteautomata/beto-sentiment-analysis
- bhadresh-savani/distilbert-base-uncased-emotion
- siebert/sentiment-roberta-large-english
The Patent Acceptance Prediction uses two fine-tuned models, which are built off of a pre-existing model named distilbert-base-uncased and fine-tuned off of the USPTO dataset. The tokenizer used to parse text uses the same distilbert-base-uncased model but is left unmodified.
Shared Code
In this section, I describe some code back-end used universally across both the Sentiment Analysis and Patent Accceptance Prediction functions.
Starting from main.py, we load in the necessary tokenizers and pipelines needed to run the model.
import streamlit as st
from transformers import TextClassificationPipeline, pipeline
from transformers import AutoTokenizer, AutoModelForSequenceClassification, DistilBertTokenizerFast, DistilBertForSequenceClassification
These transformers are crucial to the functionality of both Sentiment Analysis and Patent Acceptance Prediction. Particularly, Sentiment Analysis uses AutoModelForSequenceClassification as our model class, AutoTokenizer as our string pre-processor, and pipeline to combine the two. Patent Acceptance Prediction uses DistilBertForSequenceClassification as our model class, DistilBertTokenizerFast as our string pre-processor, and TextClassificationPipeline to combine the two.
Because everything runs on one main.py page and both the Sentiment Analysis and Patent Acceptance Prediction function similarly, I developed a custom python class called ModelImplementation that's used by both and allows for switching between different models:
class ModelImplementation(object):
    def __init__(
            self,
            transformer_model_name,
            model_transformer,
            tokenizer_model_name,
            tokenizer_func,
            pipeline_func,
            parser_func,
            classifier_args={},
            placeholders=[""]
    ):
        self.transformer_model_name = transformer_model_name
        self.tokenizer_model_name = tokenizer_model_name
        self.placeholders = placeholders

        self.model = model_transformer.from_pretrained(self.transformer_model_name)
        self.tokenizer = tokenizer_func.from_pretrained(self.tokenizer_model_name)
        self.classifier = pipeline_func(model=self.model, tokenizer=self.tokenizer, padding=True, truncation=True, **classifier_args)
        self.parser = parser_func

        self.history = []

    def predict(self, val):
        result = self.classifier(val)
        return self.parser(self, result)
The main idea is that for every model that's needed, we create a new instance of this class. In each case, we can store a reference to the tokenizer, model, and pipeline; the model will then use that tokenizer, model, and pipeline in the predict() call. If the output of a model needs to be curated in some way (ex. we need to post-process the output of a model so that it's more human-readable), we can also pass a custom method alongside the other parameters too. This is useful when we are switching between models in the Sentiment Analysis page or between the Sentiment Analysis and Patent Acceptance Prediction page - we merely have to create or modify an instance of the ModelImplementation class with the proper tokenizer, model, pipeline, and post-process method (if needed). Placeholder text for any inputs can also be stored as well in an array.
The Sentiment Analysis and Patent Acceptance Prediction pages are both stored on one interface, with a tab menu allowing a user to switch between the two.
# Title
st.title("CSGY-6613 Project")
# Subtitle
st.markdown("_**Ryan Kim (rk2546)**_")
sentimentTab, patentTab = st.tabs([
"Emotion Analysis [Milestone #2]",
"Patent Prediction [Milestone #3]"
])
with sentimentTab:
st.subheader("Sentiment Analysis")
// ...
with patentTab:
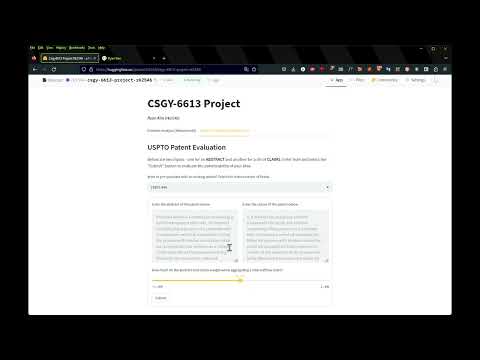
st.subheader("USPTO Patent Evaluation")
// ...
Sentiment Analysis
Sentiment Analysis is relatively simple. It uses the ModelImplementation class detailed above to switch between four pre-existing HuggingFace models for the sentiment analysis:
- cardiffnlp/twitter-roberta-base-sentiment
- finiteautomata/beto-sentiment-analysis
- bhadresh-savani/distilbert-base-uncased-emotion
- siebert/sentiment-roberta-large-english
A method called ParseEmotionOutput() is used to process labels outputted by the cardiffnlp/twitter-roberta-base-sentiment model in particular. Upon loading, if a model hasn't been instantiated yet, the page will create a new model with a pre-set model name and cache it for later use:
def emotion_model_change():
    st.session_state.emotion_model = ModelImplementation(
        st.session_state.emotion_model_name,
        AutoModelForSequenceClassification,
        st.session_state.emotion_model_name,
        AutoTokenizer,
        pipeline,
        ParseEmotionOutput,
        classifier_args={ "task" : "sentiment-analysis" },
        placeholders=["@AmericanAir just landed - 3hours Late Flight - and now we need to wait TWENTY MORE MINUTES for a gate! I have patience but none for incompetence."]
    )

if "emotion_model_name" not in st.session_state:
    st.session_state.emotion_model_name = "cardiffnlp/twitter-roberta-base-sentiment"
    emotion_model_change()
The method emotion_model_change() can be called to switch between different models, based on the session-saved emotion_model_name value. By default, the cardiffnlp/twitter-roberta-base-sentiment model is used. To switch between models, we use a Streamlit selectbox module:
model_option = st.selectbox(
    "What sentiment analysis model do you want to use? NOTE: Lag may occur when loading a new model!",
    emotion_model_names,
    on_change=emotion_model_change,
    key="emotion_model_name"
)

form = st.form(key='sentiment-analysis-form')
text_input = form.text_area(
    "Enter some text for sentiment analysis! If you just want to test it out without entering anything, just press the \"Submit\" button and the model will look at the placeholder.",
    placeholder=st.session_state.emotion_model.placeholders[0]
)
submit = form.form_submit_button('Submit')
When the page loads, a placeholder from the current model is printed inside a Streamlit text_area module. When the user clicks on the form_submit_button button, the app will use whatever model is currently cached to generate output predictions. If no user input was provided, the placeholder value is passed as the input instead.
if submit:
    if text_input is None or len(text_input.strip()) == 0:
        to_eval = st.session_state.emotion_model.placeholders[0]
    else:
        to_eval = text_input.strip()
    label, score, output_func = st.session_state.emotion_model.predict(to_eval)
    output_func("**{}**: {}".format(label,score))
USPTO Patent Acceptance Prediction
The back-end for the USPTO Patent Acceptance Prediction is similar to that of Sentiment Analysis, but with some major differences.
Instead of switching between for pre-trained HuggingFace models, we use two fine-tuned models. These models are available online:
and are built off of a pre-existing model named distilbert-base-uncased. They are fine-tuned off of the USPTO dataset. The tokenizer used to parse text uses the same distilbert-base-uncased model but is left unmodified.
if "patent_data" not in st.session_state:
    f = open('./data/val.json')
    valData = json.load(f)
    f.close()

    patent_data = {}
    for num, label, abstract, claim in zip(valData["patent_numbers"],valData["labels"], valData["abstracts"], valData["claims"]):
        patent_data[num] = {"patent_number":num,"label":label,"abstract":abstract,"claim":claim}

    st.session_state.patent_data = patent_data
    st.session_state.patent_num = list(patent_data.keys())[0]
    st.session_state.weight = 0.5
    st.session_state.patent_abstract_model = ModelImplementation(
        'rk2546/uspto-patents-abstracts',
        DistilBertForSequenceClassification,
        'distilbert-base-uncased',
        DistilBertTokenizerFast,
        TextClassificationPipeline,
        ParsePatentOutput,
        classifier_args={"return_all_scores":True},
    )
    print("Patent abstracts model initialized")
    st.session_state.patent_claim_model = ModelImplementation(
        'rk2546/uspto-patents-claims',
        DistilBertForSequenceClassification,
        'distilbert-base-uncased',
        DistilBertTokenizerFast,
        TextClassificationPipeline,
        ParsePatentOutput,
        classifier_args={"return_all_scores":True},
    )
    print("Patent claims model initialized")
In addition, instead of the user selecting a particular model to use, instead the interface allows for two separate inputs - one for an Abstract draft and another for a Claims draft. These fields can be pre-populated using an st.selectbox that, when selected, pre-fills the two inputs with examples from val.json:
patent_select_list = list(st.session_state.patent_data.keys())
patent_index_option = st.selectbox(
    "Want to pre-populate with an existing patent? Select the index number of  below.",
    patent_select_list,
    key="patent_num",
)

//...

with st.form(key='patent-form'):
    col1, col2 = st.columns(2)
    with col1:
        abstract_input = st.text_area(
            "Enter the abstract of the patent below",
            placeholder=st.session_state.patent_data[st.session_state.patent_num]["abstract"],
            height=400
        )
    with col2:
        claim_input = st.text_area(
            "Enter the claims of the patent below",
            placeholder=st.session_state.patent_data[st.session_state.patent_num]["claim"],
            height=400
        )
    weight_val = st.slider(
        "How much do the abstract and claims weight when aggregating a total softmax score?",
        min_value=-1.0,
        max_value=1.0,
        value=0.5,
    )
    submit = st.form_submit_button('Submit')
One unique addition is a slider st.slider that lets the user tune how much the two models' softmax outputs are combined. This way, some customizability is allowed - if the user wants only an Abstract to be used, then the weight can be adjusted to bias the Abstract model's output completely.
Training the USPTO Patent Acceptance Predictor
While the Sentiment Analysis function does not need to be trained, the model for the patent prediction needs to be fine-tuned from an existing model. The scripts that do so are available in both src/train.py and src/patent_train.ipynb, with the latter being a more user-readable option. NOTE: the src/train.py implementation is a tad outdated. Please rely on src/patent_train.ipynb if you want to try for yourself.
The general idea was to divide the training into steps:
- Parse only the necessary data out from the raw USPTO data,
- Separate the data into training and validation data
- Fine-tune an existing HuggingFace model into two separate models, each of which separately perform predictions onto abstracts and claims respectively.
- Publish the two models onto HuggingFace to make the models easily accessible.
The only data columns parsed from the original USPTO data were:
- "patent_number" <- Unique identifier
- "abstract" <- Input #1
- "claims" <- Input #2
- "decision" <- Output Labels
We also filter rows such that the values in the "decision" column only consist of "ACCEPTED" or "REJECTED"; these values are then coded into 1 and 0 respectively for easier data processing. Beyond splitting the data into training and validation data, we also split each into two sub-datasets - one consisting of Abstracts, and another for Claims. No pre-processing was performed further.
During fine-tuning, we use a custom class that will be used by HuggingFace's various transformers:
class USPTODataset(Dataset):
    def __init__(self, encodings, labels):
        self.encodings = encodings
        self.labels = labels
    def __getitem__(self, idx):
        item = {key: torch.tensor(val[idx]) for key, val in self.encodings.items()}
        item['labels'] = torch.tensor(self.labels[idx])
        return item
    def __len__(self):
        return len(self.labels)
The training data is fitted into an instance of this class, and that instance is fed into the training algorithm. First, all input strings are tokenized. The tokenized data is then fed into instances of USPTODataset.
train_abstracts_encodings = tokenizer(trainData["abstracts"], truncation=True, padding=True)
train_claims_encodings = tokenizer(trainData["claims"], truncation=True, padding=True)

train_abstracts_dataset = USPTODataset(train_abstracts_encodings, trainData["labels"])
train_claims_dataset = USPTODataset(train_claims_encodings, trainData["labels"])
When initializing the model that we'll fine-tune, we also add an additional step to run the training on the GPU rather than the CPU. This is a time optimization measure.
device = torch.device('cuda') if torch.cuda.is_available() else torch.device('cpu')
model = DistilBertForSequenceClassification.from_pretrained(model_name)
model.to(device)
model.train()
Finally, we load the datasets into wrapper classes that are used during the training. We then train for 10 epochs.
train_abstracts_loader = DataLoader(train_abstracts_dataset, batch_size=32, shuffle=True)
train_claims_loader = DataLoader(train_claims_dataset, batch_size=32, shuffle=True)
optim = AdamW(model.parameters(), lr=5e-5)

def Train(loader, save_path, num_train_epochs=2):
  batch_num = len(loader)
  for epoch in range(num_train_epochs):
    print(f'\t- Training epoch {epoch+1}/{num_train_epochs}')
    batch_count = 0
    for batch in loader:
      print(f'{batch_count}|{batch_num} - {round((batch_count/batch_num)*100)}%', end="")
      #print('\t\t- optim zero grad')
      optim.zero_grad()
      #print('\t\t- input_ids')
      input_ids = batch['input_ids'].to(device)
      #print('\t\t- attention_mask')
      attention_mask = batch['attention_mask'].to(device)
      #print('\t\t- labels0')
      labels = batch['labels'].to(device)
      #print('\t\t- outputs')
      outputs = model(input_ids, attention_mask=attention_mask, labels=labels)

      #print('\t\t- loss')
      loss = outputs[0]
      #print('\t\t- backwards')
      loss.backward()
      #print('\t\t- step')
      optim.step()

      batch_count += 1
      print("\r", end="")

    model.save_pretrained(save_path, from_pt=True)
    print(f'Saved model in {save_path}!\n')

print("=== TRAINING ABSTRACTS ===")
Train(train_abstracts_loader,upsto_abstracts_model_path, num_train_epochs=10)
print("----")
print("=== TRAINING CLAIMS ===")
Train(train_claims_loader,upsto_claims_model_path, num_train_epochs=10)
Evaluating the Models
Sentiment Analysis
There isn't an effective way to validate the sentiment analysis models, as they are publicly available models and it is unknown what data they were explicitly trained on. Therefore, evaluation will rely on anecdotal testing.
The sentiment models that appear to work the best are the cardiffnlp/twitter-roberta-base-sentiment and siebert/sentiment-roberta-large-english models, with few caveats. These two models generally perform very well at detecting sentiment in mid to long expressions. However the siebert/sentiment-roberta-large-english model tends to suffer when expressions are shorter and less complex in lexicon. Even the cardiffnlp/twitter-roberta-base-sentiment model suffers from time to time if not enough context has been provided.
The model that performed the worst is the finiteautomata/beto-sentiment-analysis. This model seems to have the worst time trying to interpret meaning from sentences, even with strongly worded language such as "hate". For example, the expression "I hate you" returns a NEUTRAL response with 99.6% confidence, which differs from the cardiffnlp/twitter-roberta-base-sentiment and siebert/sentiment-roberta-large-english models (NEGATIVE: ~96.5% - ~99.9% accuracy respectively). It appears that the finiteautomata/beto-sentiment-analysis gets confused when not enough context is provided. The expression "I hate you because you hurt my family" manages to return a NEGATIVE label, but with a mere 87.7% confidence. NOTE: These expressions are purely meant for experimentation purposes, to convey model inaccuracies!
The unique model is the bhadresh-savani/distilbert-base-uncased-emotion model, which instead gives 6 general emotions as opposed to a binary NEGATIVE or POSITIVE rating:
- Sadness
- Joy
- Love
- Anger
- Fear
- Surprise
This one offers more nuance to each evaluation, but while the general distinction between "positive" and "negative" emotions is often accurate, the specific emotion applied to the statement is sometimes confusing. For example, the expression "I love you because you saved my family" is labeled as JOY instead of LOVE.
Overall, all models are able to perform to some level of success, but the context of each input needs to be made clear in the wording for the models to produce accurate responses. These models seem to suffer when not enough context is provided, sometimes blatantly giving incorrect responses to situations that are too simple.
Patent Acceptance Prediction
With access to labeled validation data, the fine-tuned models can be ranked in accuracy. Sample code that does so is provided in src/val.ipynb and evaluates 1000 random data samples out of 4000+ samples.
Overall, both the fine-tuned Abstract model and the Claims model seem to perform very similarly, producing accuracy rates of 72.89% and 72.8% accuracy respectively out of 1000 random samples. The aggregated softmax labeling, assuming equal weighting between the two models, produces 76.2% accuracy. Depending on who you ask, this performance can be discouraging or encouraging.
The 76% accuracy rating being higher than the individual fine-tuned models is interesting, as it implies that the accuracy between the two models is not consistent; there are times when one of the models might outperform the other in certain situations. If the accuracy remained the same across all 1000 random samples, then the aggregated prediction accuracy rate would be within the same range as the individual fine-tuned models.
Milestone 3
Click the link to access the HuggingFace Streamlit application: Project webpage.
The HuggingFace page includes the ability to check Milestone #2 as well.
The fine-tuned models have been uploaded as HuggingFace models, public and open for anyone to use. You can find and use them here:
- https://huggingface.co/rk2546/uspto-patents-abstracts
- Purpose: Primary purpose is to evaluate whether a patent will be accepted or rejected. Trained from patent abstracts from the USPTO database.
- Model Name:
rk2546/uspto-patents-abstracts
- https://huggingface.co/rk2546/uspto-patents-claims/tree/main
- Purpose: Primary purpose is to evaluate whether a patent will be accepted or rejected. Trained from patent claims from the USPTO database.
- Model Name:
rk2546/uspto-patents-claims
Milestone #3's implementation performs a softmax evaluation using both models, then combines the responses based on a weight parameter. The weight parameter is adjustable in the HuggingFace application interface. By default, the output from the Claims model is weighed heavier (75%) over the Abstracts model (25%).
Milestone 2
Click the link to access the HuggingFace Streamlit application: Project webpage
Milestone 1
Installing Necessary Prerequisites
I already have Docker installed on my system from prior projects. I recall following these specific steps:
- Install Docker Desktop, provided via the official Docker Website
- Installed WSL2. Unknown source.
- Restarted PC to initialize and complete install of WSL2.
Proof of installs for both are provided in the following screenshot:

Visual Studio Code is already installed on my PC. The VS Code version was provided via the official website. VS Code has the recommended extensions for Docker installed for ease-of-use:

There's another list of extensions I added to my VS Code:
- Remote - SSH
- Remote Development
- Dev Containers <-- The REAL important one
- Remote - Tunnels
The third one, Dev Containers, will be useful for opening up folders inside the container.
The steps to get the Docker instance ready for this project follow the attached video, provided in the instructions of the milestone writeup on the course website.

Example: Creating a Docker Image
While this isn't necessarily related to setting up Docker for python development, this is here for posterity and to show how to create customized Docker images that can be used later. This example is creating a Node.JS-based image that executes a simple
The steps are as follows:
- I created a
misc_example/directory that will contain a sample application to run. Inside, I created anexample.jsfile that has some basic code to run (ex.console.log("Hellow World")) - I created a
Dockerfilefile with the following code:
FROM node:alpine
COPY . /misc_example
WORKDIR /misc_example
CMD node example.js
The code above uses the "apline" linux distribution and node. It tells to copy everything in this root directory over to the misc_example folder, changes the working directory to the misc_example folder, then executes the command to run example.js.
To buld the docker image, we execute the following command in the CMD:
docker build -t csgy6613proj-rk2546 ./misc_example
To prove that the build was created successfully, the following command was used to list all images that Docker has access to:
docker image ls
To see if it works, we execute the following command:
docker run csgy6613proj-rk2546
We can see that the very simple console logs we wrote in example.js were successfully printed. Refer to the screenshot below for a full understanding of the commands executed and logs created:

Initializing a Docker Development Environment for Python
A part of this milestone will probably involve a lot of dev work in python and Docker. We will save time by having our project code open in a pre-existing Docker Container specifically designed for python work.
To that end, I have a basic src directory that will be used to store all dev work in the repo. Inside is a app.py file that does some basic operations and prints them to console. We will open this repo inside of a python-specific Docker container and see if we can work from there.
Here are the steps to follow:
- Generate a
requirements.txtfile. We will palce this inside of the root of this repo. I generated it using the following a single command (shown below). This was inspired by this article that describes how to generate the newrequirements.txtfile. This file contains all important packages that are key for python development in modern use cases.
pip freeze > requirements.txt
- Have the project open in VS Code.
- Make sure that the Dev Containers extension is installed.
- In the bottom-left corner, there is a
><button. Click it, and select the optionReopen in Container. - In the popup window, type
Pythonand selectPython 3, whichever version you want (I go with the default, 3.11). - No need to add any additional features. Simply click "OK".
You will have VS Code reopen a new window, this time with the folder opened inside a new Python 3 container. You can confirm this by looking at the bottom-left corner of the window and checking if it says "Dev Container: Python 3". You should also see an additional new .devcontainer directory that was added. This is a very convenient step that actually makes the process simpler the next go around - instead of designating which container to open the folder in and all that, this directory caches our selections and simply skips a lot of the above steps.
One last step is to install some key packages that will be helpful for dev work in Python. These are recorded in requirements.txt, and we can install them all using a one-line command in the terminal:
pip install -r requirements.txt
Example: Hello World Python Test
For example, we'll create a new src folder. The new src folder will contain a simple python script app.py that spits out some lists of numbers of varying dimensionalities.
We can simply run this command by clicking the "Play" button on the top-right corner of the window, assuming you have src/app.py open in the window.
An example of the output is provided below as proof that we have this working:

The main benefit is that any changes we make to these files will be automatically saved to our local files as well, speeding up any logistics behind how the Docker container is interacting with our original files.