Transformers documentation
단일 영상 기반 깊이 추정
단일 영상 기반 깊이 추정
단일 영상 기반 깊이 추정은 한 장면의 단일 이미지에서 장면의 깊이 정보를 예측하는 컴퓨터 비전 작업입니다. 즉, 단일 카메라 시점의 장면에 있는 물체의 거리를 예측하는 과정입니다.
단일 영상 기반 깊이 추정은 3D 재구성, 증강 현실, 자율 주행, 로봇 공학 등 다양한 분야에서 응용됩니다. 조명 조건, 가려짐, 텍스처와 같은 요소의 영향을 받을 수 있는 장면 내 물체와 해당 깊이 정보 간의 복잡한 관계를 모델이 이해해야 하므로 까다로운 작업입니다.
이 작업과 호환되는 모든 아키텍처와 체크포인트를 보려면 작업 페이지를 확인하는 것이 좋습니다.
이번 가이드에서 배울 내용은 다음과 같습니다:
- 깊이 추정 파이프라인 만들기
- 직접 깊이 추정 추론하기
시작하기 전에, 필요한 모든 라이브러리가 설치되어 있는지 확인하세요:
pip install -q transformers
깊이 추정 파이프라인
깊이 추정을 추론하는 가장 간단한 방법은 해당 기능을 제공하는 pipeline()을 사용하는 것입니다.
Hugging Face Hub 체크포인트에서 파이프라인을 초기화합니다:
>>> from transformers import pipeline

>>> checkpoint = "vinvino02/glpn-nyu"
>>> depth_estimator = pipeline("depth-estimation", model=checkpoint)
다음으로, 분석할 이미지를 한 장 선택하세요:
>>> from PIL import Image
>>> import requests

>>> url = "https://unsplash.com/photos/HwBAsSbPBDU/download?ixid=MnwxMjA3fDB8MXxzZWFyY2h8MzR8fGNhciUyMGluJTIwdGhlJTIwc3RyZWV0fGVufDB8MHx8fDE2Nzg5MDEwODg&force=true&w=640"
>>> image = Image.open(requests.get(url, stream=True).raw)
>>> image
이미지를 파이프라인으로 전달합니다.
>>> predictions = depth_estimator(image)파이프라인은 두 개의 항목을 가지는 딕셔너리를 반환합니다.
첫 번째는 predicted_depth로 각 픽셀의 깊이를 미터로 표현한 값을 가지는 텐서입니다.
두 번째는 depth로 깊이 추정 결과를 시각화하는 PIL 이미지입니다.
이제 시각화한 결과를 살펴보겠습니다:
>>> predictions["depth"]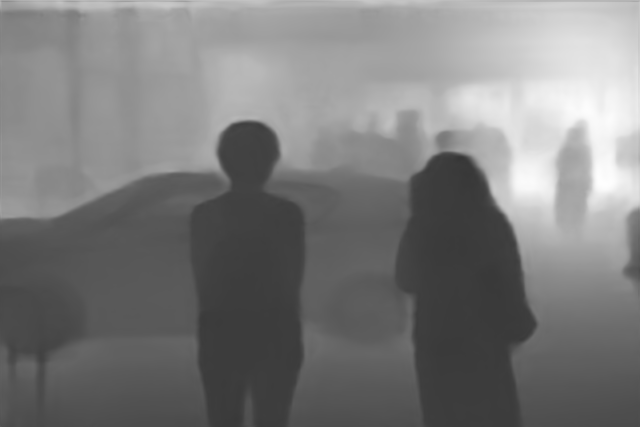
직접 깊이 추정 추론하기
이제 깊이 추정 파이프라인 사용법을 살펴보았으니 동일한 결과를 복제하는 방법을 살펴보겠습니다. Hugging Face Hub 체크포인트에서 모델과 관련 프로세서를 가져오는 것부터 시작합니다. 여기서 이전에 사용한 체크포인트와 동일한 것을 사용합니다:
>>> from transformers import AutoImageProcessor, AutoModelForDepthEstimation

>>> checkpoint = "vinvino02/glpn-nyu"

>>> image_processor = AutoImageProcessor.from_pretrained(checkpoint)
>>> model = AutoModelForDepthEstimation.from_pretrained(checkpoint)
필요한 이미지 변환을 처리하는 image_processor를 사용하여 모델에 대한 이미지 입력을 준비합니다.
image_processor는 크기 조정 및 정규화 등 필요한 이미지 변환을 처리합니다:
>>> pixel_values = image_processor(image, return_tensors="pt").pixel_values준비한 입력을 모델로 전달합니다:
>>> import torch

>>> with torch.no_grad():
...     outputs = model(pixel_values)
...     predicted_depth = outputs.predicted_depth
결과를 시각화합니다:
>>> import numpy as np

>>> # 원본 사이즈로 복원
>>> prediction = torch.nn.functional.interpolate(
...     predicted_depth.unsqueeze(1),
...     size=image.size[::-1],
...     mode="bicubic",
...     align_corners=False,
... ).squeeze()
>>> output = prediction.numpy()

>>> formatted = (output * 255 / np.max(output)).astype("uint8")
>>> depth = Image.fromarray(formatted)
>>> depth