Inference Endpoints (dedicated) documentation
Build an embedding pipeline with datasets
Build an embedding pipeline with datasets
This tutorial will guide you through deploying an embedding endpoint and building a Python script to efficiently process datasets with embeddings. We’ll use the powerful Qwen/Qwen3-Embedding-4B model to create high-quality embeddings for your data.
This tutorial focuses on creating a production-ready script that can process any dataset and add embeddings using the Text Embeddings Inference (TEI) engine for optimized performance.
Create your embedding Endpoint
First, we need to create an Inference Endpoint optimized for embeddings.
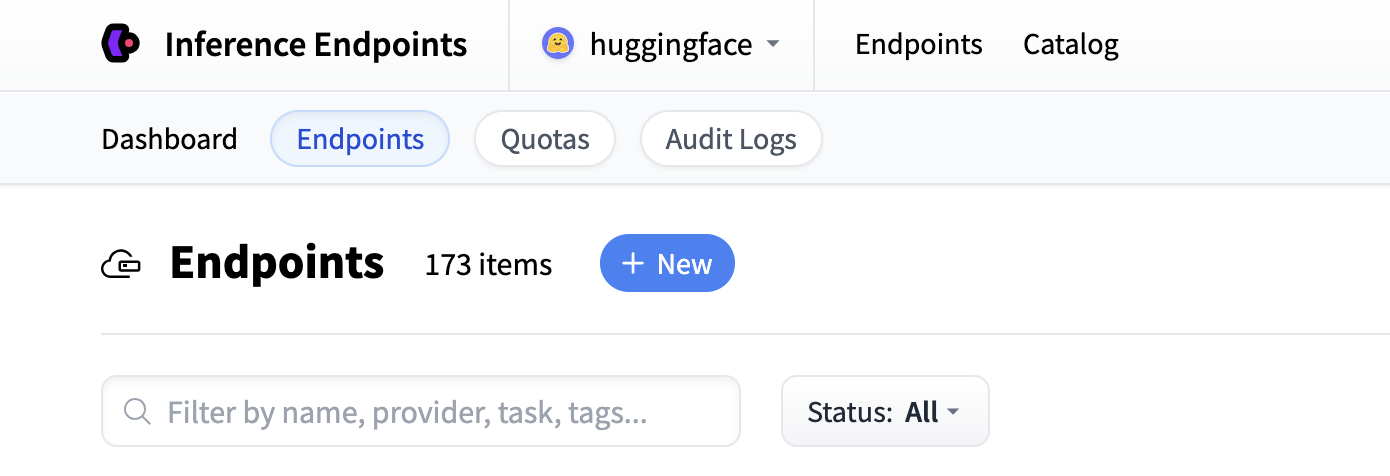
Start by navigating to the Inference Endpoints UI, and once you have logged in you should see a button for creating a new Inference Endpoint. Click the “New” button.
From there you’ll be directed to the catalog. The Model Catalog consists of popular models which have tuned configurations to work as one-click deploys. You can search for embedding models or create a custom endpoint.
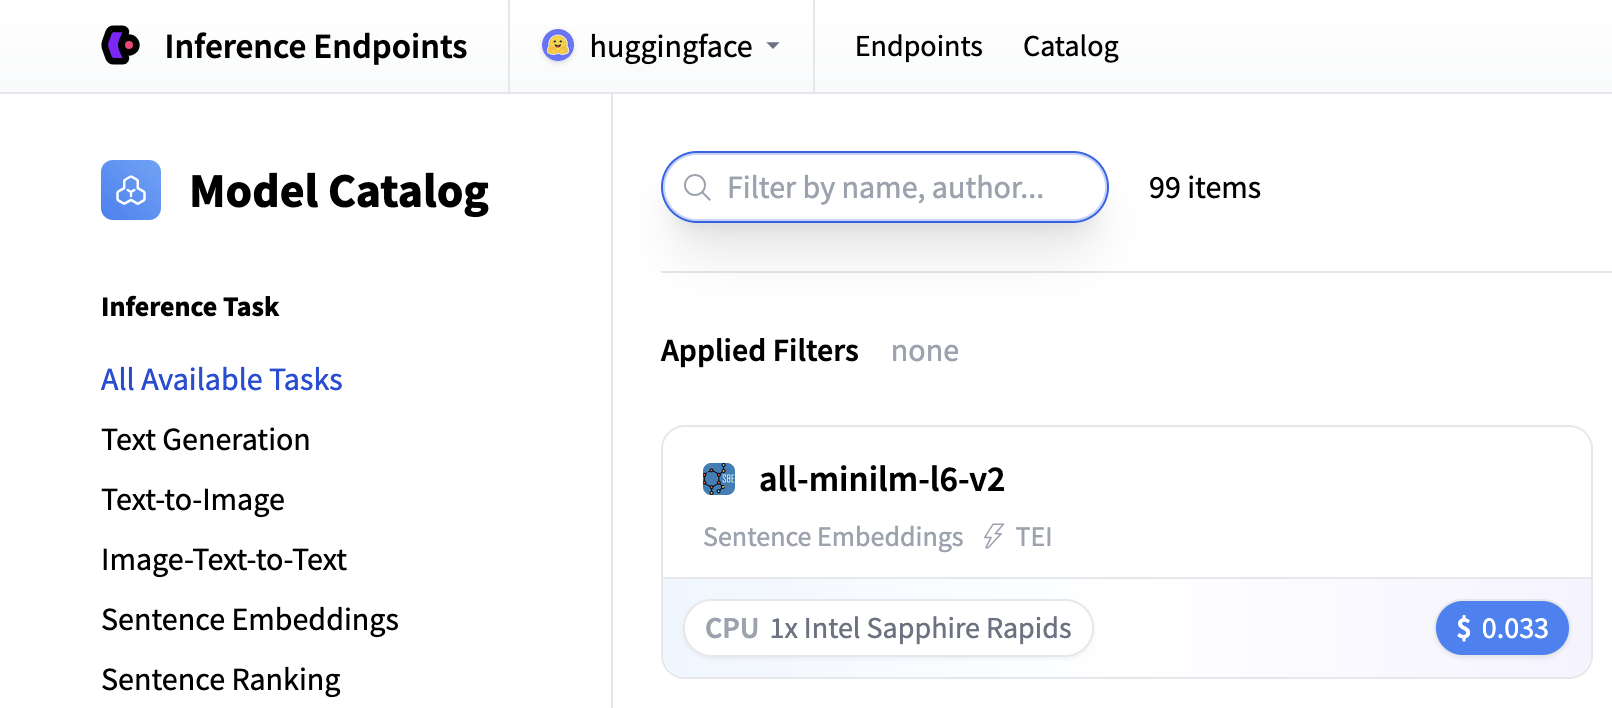
For this tutorial, we’ll use the Qwen3-Embedding-4B model available in the Inference Endpoints Model Catalog. Note if it’s ever not in the catalog, you can deploy a model as a custom Endpoint from the Hugging Face Hub by entering the model repository ID Qwen/Qwen3-Embedding-4B.
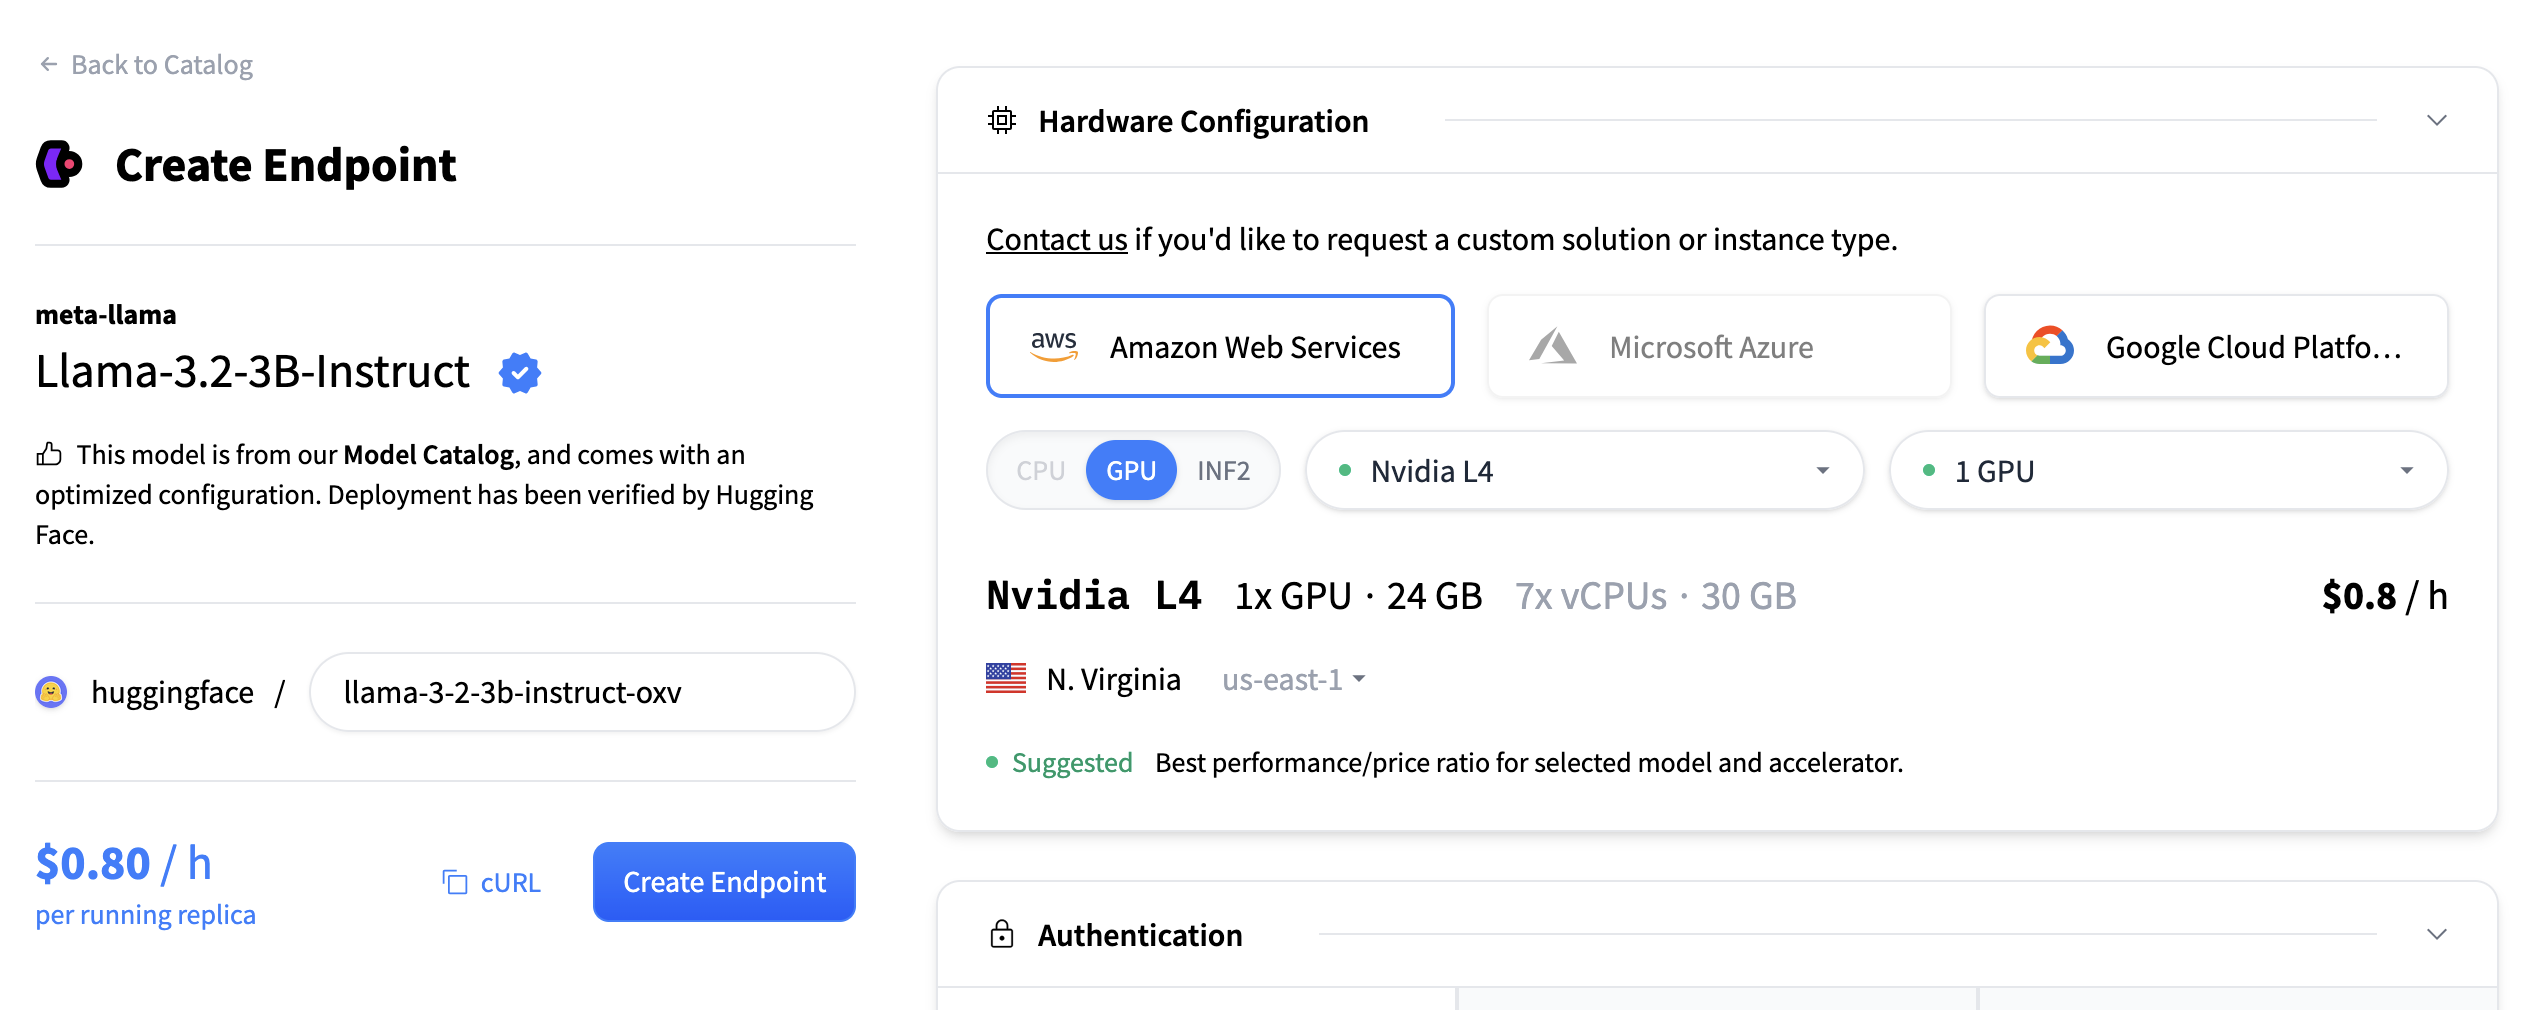
For embedding models, we recommend:
- GPU: NVIDIA, T4, L4 or A10G for good performance.
- Instance Size: x1 (sufficient for most embedding workloads)
- Auto-scaling: Enable scale-to-zero to save costs by switching the endpoint to a paused state when it’s not in use.
- Timeout: Set a timeout of 10 minutes to avoid long-running requests. You should define a timeout based on how you expect your endpoint to be used.
If you’re looking for a model with less compute requirements, you can use the sentence-transformers/all-MiniLM-L6-v2 model.
The Qwen3-Embedding-4B model will automatically use the Text Embeddings Inference (TEI) engine, which provides optimized inference and automatic batching.
Click “Create Endpoint” to deploy your embedding service.
This may take about 5 minutes to initialize.
Test your Endpoint
Once your Inference Endpoint is running, you can test it directly in the playground. It accepts text input and returns high-dimensional vectors.
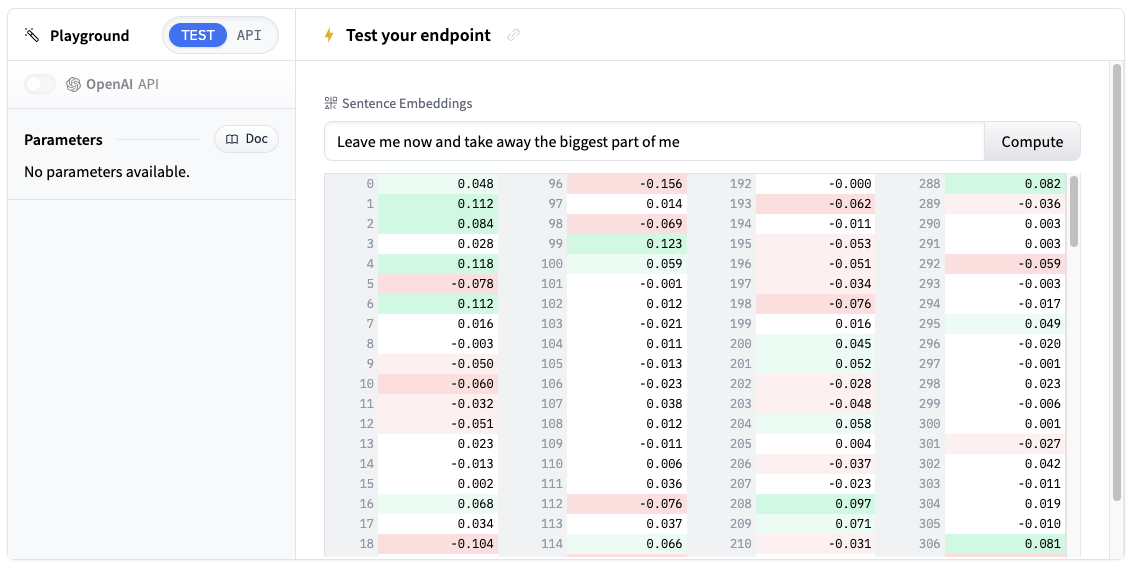
Try entering some sample text like “Machine learning is transforming how we process data” and see the embedding output.
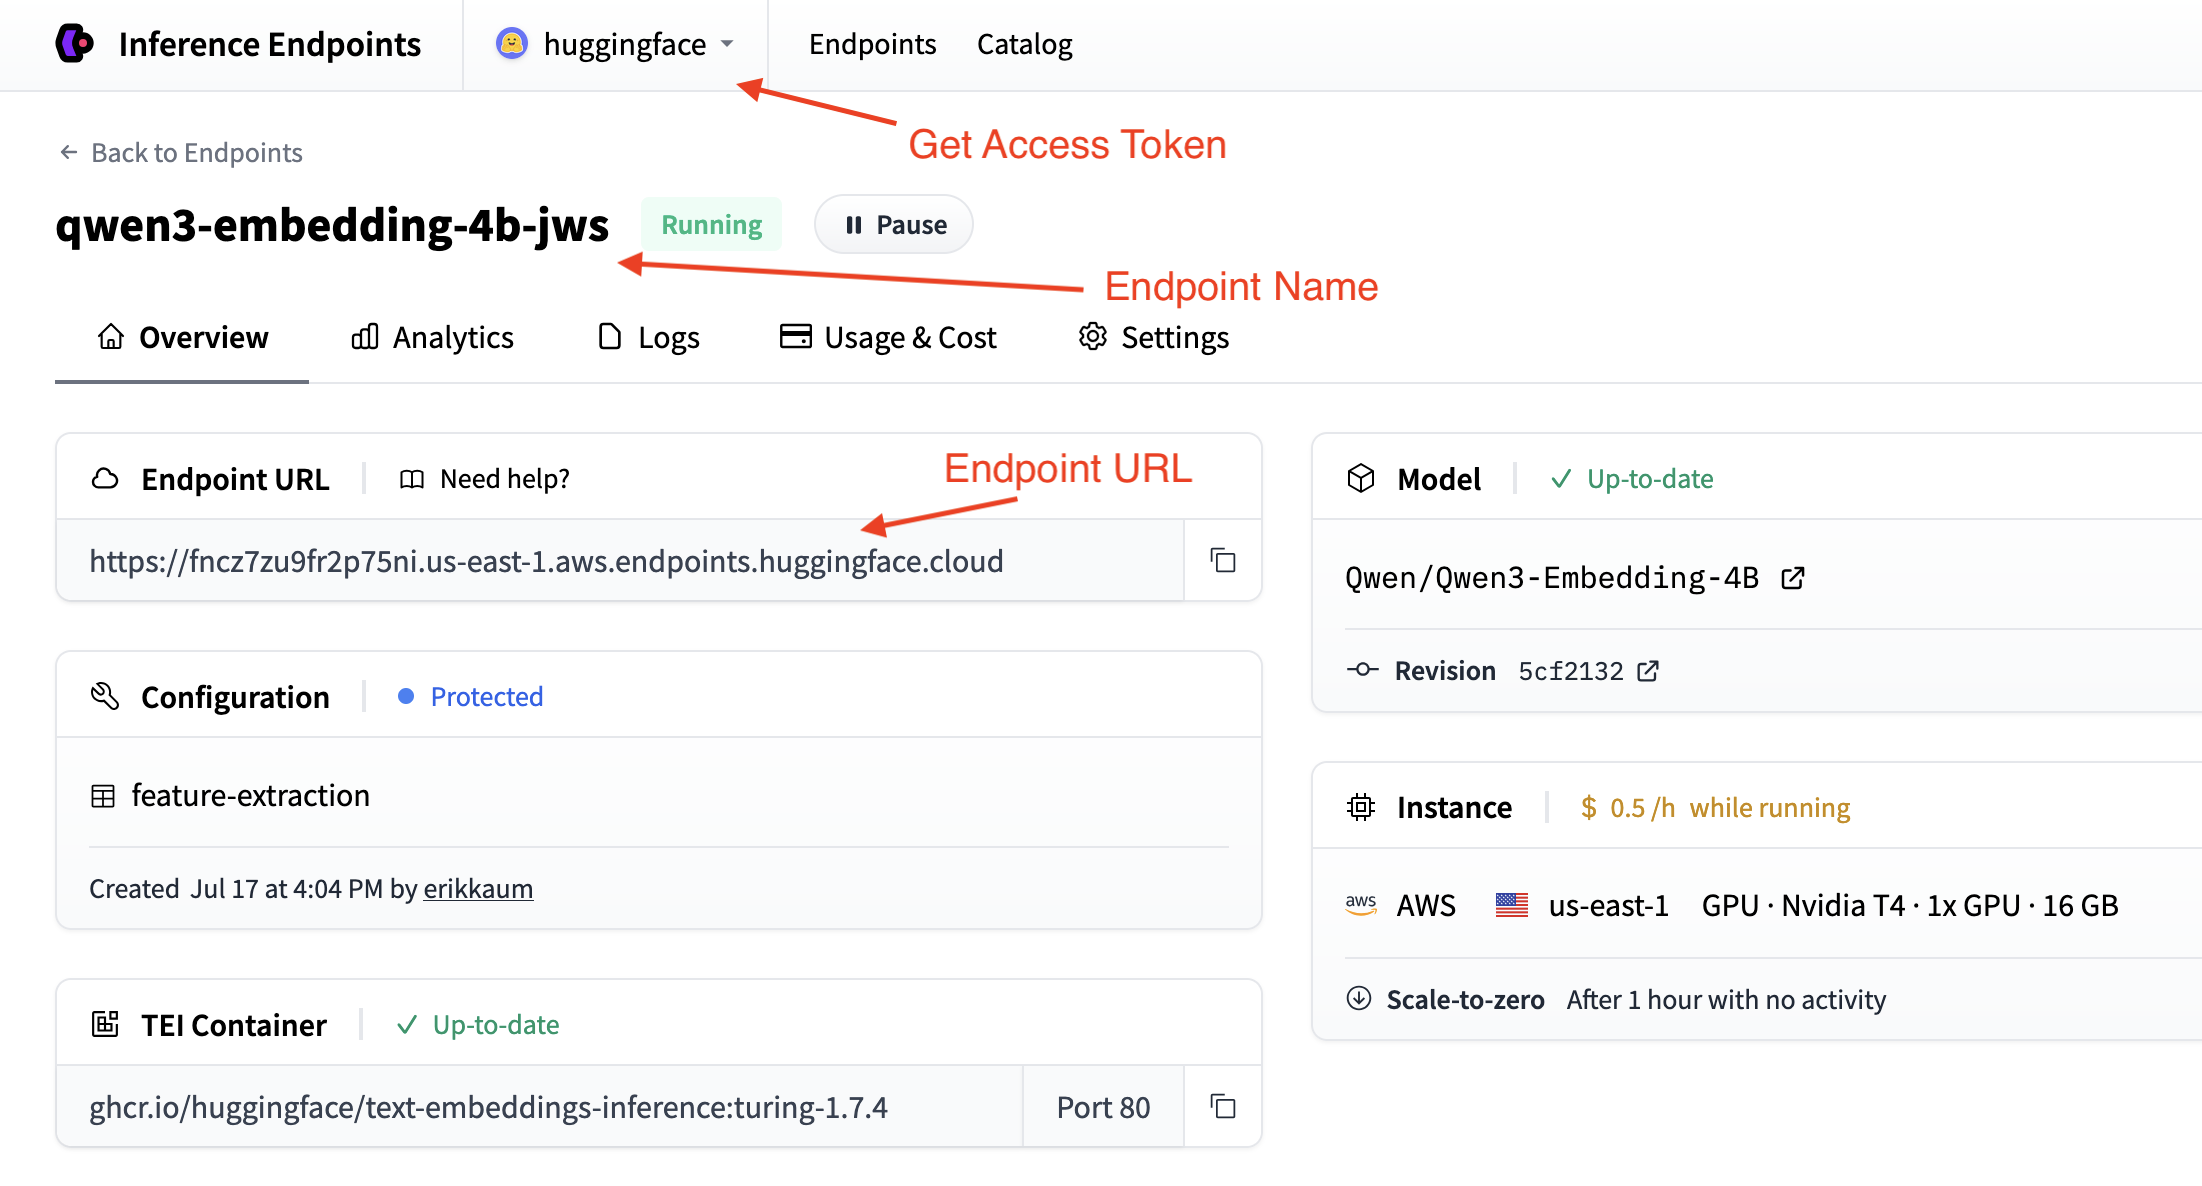
Get your Endpoint’s details
To use your endpoint programmatically, you’ll need these details from the Endpoint’s Overview:
- Base URL:
https://<endpoint-name>.endpoints.huggingface.cloud/v1/ - Model name: The name of your endpoint
- Token: Your HF token from settings
Building the embedding script
Now let’s build a script step by step to process datasets with embeddings. We’ll break it down into logical blocks.
Step 1: Set up dependencies and imports
We’ll use the OpenAI client to connect to the endpoint and the datasets library to load and process the dataset. So let’s install the required packages:
pip install datasets openai
Then, set up your imports in a new Python file:
import os
from datasets import load_dataset
from openai import OpenAI
Step 2: Configure the connection
Set up the configuration to connect to your Inference Endpoint based on the details you collected in the previous step.
# Configuration
ENDPOINT_URL = "https://your-endpoint-name.endpoints.huggingface.cloud/v1/" # Endpoint URL + version
HF_TOKEN = os.getenv("HF_TOKEN") # Your Hugging Face Hub token from hf.co/settings/tokens

# Initialize OpenAI client for your endpoint
client = OpenAI(
    base_url=ENDPOINT_URL,
    api_key=HF_TOKEN,
)
Your OpenAI client is now configured to connect to your Inference Endpoint. For further reading you can check out the client documentation on text embeddings here.
Step 3: Create the embedding function
Next, we’ll create a function to process batches of text and return embeddings.
def get_embeddings(examples):
    """Get embeddings for a batch of texts."""
    response = client.embeddings.create(
        model="your-endpoint-name",  # Replace with your actual endpoint name
        input=examples["context"], # In the squad dataset, the text is in the "context" column
    )

    # Extract embeddings from response objects
    embeddings = [sample.embedding for sample in response.data]

    return {"embeddings": embeddings} # datasets expects a dictionary with a key "embeddings" and a value of a list of embeddings
The datasets library will pass our function a batch of examples from the dataset, as a dictionary of batch values. The key will be the name of the column we want to embed, and the value will be a list of values from that column.
Step 4: Load and process your dataset
Load your dataset and apply the embedding function:
# Load a sample dataset (you can replace this with your own)
dataset = load_dataset("squad", split="train[:100]")  # Using first 100 examples for demo

# Process the dataset with embeddings
dataset_with_embeddings = dataset.map(
    get_embeddings,
    batched=True,
    batch_size=10,  # Process in small batches to avoid timeouts
    desc="Adding embeddings",
)
The datasets library’s map function is optimized for performance and will automatically batch the rows for us. Inference Endpoints can also scale to meet the demand of the batch size, so to get the best performance, you should calibrate the batch size with your Inference Endpoints’s configuration.
For example, select the highest possible batch size for you model and synchronize the batch size with your Inference Endpoint’s configuration in max_concurrent_requests.
Step 5: Save and Share your results
Finally, let’s save our embedded dataset locally or push it to the Hugging Face Hub:
# Save the processed dataset locally
dataset_with_embeddings.save_to_disk("./embedded_dataset")

# Or push directly to Hugging Face Hub
dataset_with_embeddings.push_to_hub("your-username/squad-embeddings")
Next steps
Nice work! You’ve now built an embedding pipeline that can process any dataset. Here’s the complete script:
Click to view the complete script
import os
from datasets import load_dataset
from dotenv import load_dotenv
from openai import OpenAI

load_dotenv()

# Configuration
ENDPOINT_URL = "https://your-endpoint-name.endpoints.huggingface.cloud/v1/"
HF_TOKEN = os.getenv("HF_TOKEN")

# Initialize OpenAI client for your endpoint
client = OpenAI(
    base_url=ENDPOINT_URL,
    api_key=HF_TOKEN,
)

def get_embeddings(examples):
    """Get embeddings for a batch of texts."""
    response = client.embeddings.create(
        model="your-endpoint-name",  # Replace with your actual endpoint name
        input=examples["context"],
    )

    # Extract embeddings from response
    embeddings = [sample.embedding for sample in response.data]

    return {"embeddings": embeddings}

# Load a sample dataset (you can replace this with your own)
print("Loading dataset...")
dataset = load_dataset("squad", split="train[:1000]")  # Using first 1000 examples for demo

# Process the dataset with embeddings
print("Processing dataset with embeddings...")
dataset_with_embeddings = dataset.map(
    get_embeddings,
    batched=True,
    batch_size=10,  # Process in small batches to avoid timeouts
    desc="Adding embeddings",
)

# Save the processed dataset locally
print("Saving processed dataset...")
dataset_with_embeddings.save_to_disk("./embedded_dataset")

# Or push directly to Hugging Face Hub
print("Pushing to Hugging Face Hub...")
dataset_with_embeddings.push_to_hub("your-username/squad-embeddings")

print("Dataset processing complete!")
Here are some ways to extend your script:
- Process multiple datasets: Modify the script to handle different dataset sources
- Add error handling: Implement retry logic for failed API calls
- Optimize batch sizes: Experiment with different batch sizes for better performance
- Add validation: Check embedding quality and dimensions
- Custom preprocessing: Add text cleaning or normalization steps
- Build a Semantic Search Application: Use the embeddings to build a semantic search application.
Your embedded datasets are now ready for downstream tasks like semantic search, recommendation systems, or RAG applications!
< > Update on GitHub