Spaces:
Running
on
A10G

Running
on
A10G
File size: 12,307 Bytes
f1069cc |
1 2 3 4 5 6 7 8 9 10 11 12 13 14 15 16 17 18 19 20 21 22 23 24 25 26 27 28 29 30 31 32 33 34 35 36 37 38 39 40 41 42 43 44 45 46 47 48 49 50 51 52 53 54 55 56 57 58 59 60 61 62 63 64 65 66 67 68 69 70 71 72 73 74 75 76 77 78 79 80 81 82 83 84 85 86 87 88 89 90 91 92 93 94 95 96 97 98 99 100 101 102 103 104 105 106 107 108 109 110 111 112 113 114 115 116 117 118 119 120 121 122 123 124 125 126 127 128 129 130 131 132 133 134 135 136 137 138 139 140 141 142 143 144 145 146 147 148 149 150 151 152 153 154 155 156 157 158 159 160 161 162 163 164 165 166 167 168 169 170 171 172 173 174 175 176 177 178 179 180 181 182 183 184 185 186 187 188 189 190 191 192 193 194 195 196 197 198 199 200 201 202 203 204 205 206 207 208 209 210 211 212 213 214 215 216 217 218 219 220 221 222 223 224 225 226 227 228 229 230 231 232 233 234 235 236 237 238 239 240 241 242 243 244 245 246 247 248 249 250 251 252 253 254 255 256 257 258 259 260 261 262 263 264 265 266 267 268 269 270 271 272 273 274 275 276 277 278 279 280 281 282 283 284 285 286 287 288 289 290 291 |
<!--Copyright 2023 The HuggingFace Team. All rights reserved.
Licensed under the Apache License, Version 2.0 (the "License"); you may not use this file except in compliance with
the License. You may obtain a copy of the License at
http://www.apache.org/licenses/LICENSE-2.0
Unless required by applicable law or agreed to in writing, software distributed under the License is distributed on
an "AS IS" BASIS, WITHOUT WARRANTIES OR CONDITIONS OF ANY KIND, either express or implied. See the License for the
specific language governing permissions and limitations under the License.
-->
# ControlNet
[Adding Conditional Control to Text-to-Image Diffusion Models](https://arxiv.org/abs/2302.05543) (ControlNet) by Lvmin Zhang and Maneesh Agrawala.
This example is based on the [training example in the original ControlNet repository](https://github.com/lllyasviel/ControlNet/blob/main/docs/train.md). It trains a ControlNet to fill circles using a [small synthetic dataset](https://huggingface.co/datasets/fusing/fill50k).
## Installing the dependencies
Before running the scripts, make sure to install the library's training dependencies.
<Tip warning={true}>
To successfully run the latest versions of the example scripts, we highly recommend **installing from source** and keeping the installation up to date. We update the example scripts frequently and install example-specific requirements.
</Tip>
To do this, execute the following steps in a new virtual environment:
```bash
git clone https://github.com/huggingface/diffusers
cd diffusers
pip install -e .
```
Then navigate into the example folder and run:
```bash
pip install -r requirements.txt
```
And initialize an [🤗Accelerate](https://github.com/huggingface/accelerate/) environment with:
```bash
accelerate config
```
Or for a default 🤗Accelerate configuration without answering questions about your environment:
```bash
accelerate config default
```
Or if your environment doesn't support an interactive shell like a notebook:
```python
from accelerate.utils import write_basic_config
write_basic_config()
```
## Circle filling dataset
The original dataset is hosted in the ControlNet [repo](https://huggingface.co/lllyasviel/ControlNet/blob/main/training/fill50k.zip), but we re-uploaded it [here](https://huggingface.co/datasets/fusing/fill50k) to be compatible with 🤗 Datasets so that it can handle the data loading within the training script.
Our training examples use [`runwayml/stable-diffusion-v1-5`](https://huggingface.co/runwayml/stable-diffusion-v1-5) because that is what the original set of ControlNet models was trained on. However, ControlNet can be trained to augment any compatible Stable Diffusion model (such as [`CompVis/stable-diffusion-v1-4`](https://huggingface.co/CompVis/stable-diffusion-v1-4)) or [`stabilityai/stable-diffusion-2-1`](https://huggingface.co/stabilityai/stable-diffusion-2-1).
## Training
Download the following images to condition our training with:
```sh
wget https://huggingface.co/datasets/huggingface/documentation-images/resolve/main/diffusers/controlnet_training/conditioning_image_1.png
wget https://huggingface.co/datasets/huggingface/documentation-images/resolve/main/diffusers/controlnet_training/conditioning_image_2.png
```
```bash
export MODEL_DIR="runwayml/stable-diffusion-v1-5"
export OUTPUT_DIR="path to save model"
accelerate launch train_controlnet.py \
--pretrained_model_name_or_path=$MODEL_DIR \
--output_dir=$OUTPUT_DIR \
--dataset_name=fusing/fill50k \
--resolution=512 \
--learning_rate=1e-5 \
--validation_image "./conditioning_image_1.png" "./conditioning_image_2.png" \
--validation_prompt "red circle with blue background" "cyan circle with brown floral background" \
--train_batch_size=4
```
This default configuration requires ~38GB VRAM.
By default, the training script logs outputs to tensorboard. Pass `--report_to wandb` to use Weights &
Biases.
Gradient accumulation with a smaller batch size can be used to reduce training requirements to ~20 GB VRAM.
```bash
export MODEL_DIR="runwayml/stable-diffusion-v1-5"
export OUTPUT_DIR="path to save model"
accelerate launch train_controlnet.py \
--pretrained_model_name_or_path=$MODEL_DIR \
--output_dir=$OUTPUT_DIR \
--dataset_name=fusing/fill50k \
--resolution=512 \
--learning_rate=1e-5 \
--validation_image "./conditioning_image_1.png" "./conditioning_image_2.png" \
--validation_prompt "red circle with blue background" "cyan circle with brown floral background" \
--train_batch_size=1 \
--gradient_accumulation_steps=4
```
## Example results
#### After 300 steps with batch size 8
| | |
|-------------------|:-------------------------:|
| | red circle with blue background |
 | 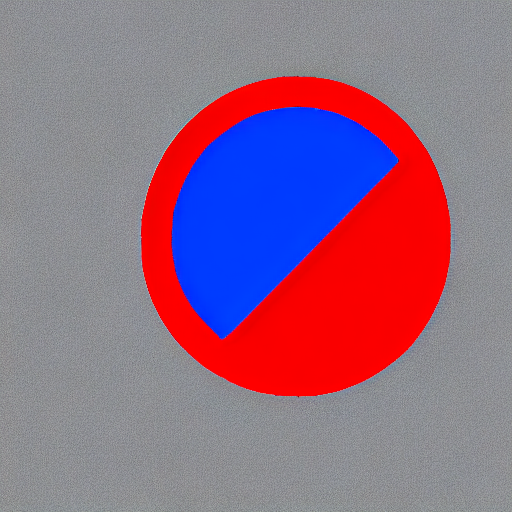 |
| | cyan circle with brown floral background |
 | 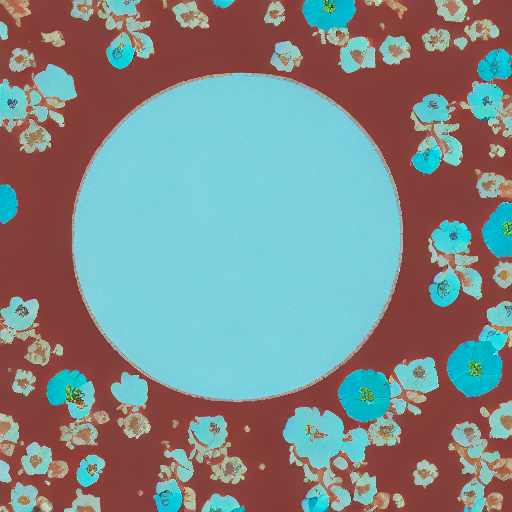 |
#### After 6000 steps with batch size 8:
| | |
|-------------------|:-------------------------:|
| | red circle with blue background |
 |  |
| | cyan circle with brown floral background |
 | 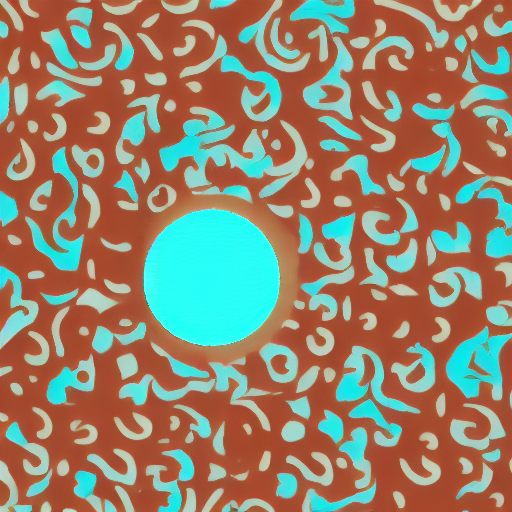 |
## Training on a 16 GB GPU
Enable the following optimizations to train on a 16GB GPU:
- Gradient checkpointing
- bitsandbyte's 8-bit optimizer (take a look at the [installation]((https://github.com/TimDettmers/bitsandbytes#requirements--installation) instructions if you don't already have it installed)
Now you can launch the training script:
```bash
export MODEL_DIR="runwayml/stable-diffusion-v1-5"
export OUTPUT_DIR="path to save model"
accelerate launch train_controlnet.py \
--pretrained_model_name_or_path=$MODEL_DIR \
--output_dir=$OUTPUT_DIR \
--dataset_name=fusing/fill50k \
--resolution=512 \
--learning_rate=1e-5 \
--validation_image "./conditioning_image_1.png" "./conditioning_image_2.png" \
--validation_prompt "red circle with blue background" "cyan circle with brown floral background" \
--train_batch_size=1 \
--gradient_accumulation_steps=4 \
--gradient_checkpointing \
--use_8bit_adam
```
## Training on a 12 GB GPU
Enable the following optimizations to train on a 12GB GPU:
- Gradient checkpointing
- bitsandbyte's 8-bit optimizer (take a look at the [installation]((https://github.com/TimDettmers/bitsandbytes#requirements--installation) instructions if you don't already have it installed)
- xFormers (take a look at the [installation](https://huggingface.co/docs/diffusers/training/optimization/xformers) instructions if you don't already have it installed)
- set gradients to `None`
```bash
export MODEL_DIR="runwayml/stable-diffusion-v1-5"
export OUTPUT_DIR="path to save model"
accelerate launch train_controlnet.py \
--pretrained_model_name_or_path=$MODEL_DIR \
--output_dir=$OUTPUT_DIR \
--dataset_name=fusing/fill50k \
--resolution=512 \
--learning_rate=1e-5 \
--validation_image "./conditioning_image_1.png" "./conditioning_image_2.png" \
--validation_prompt "red circle with blue background" "cyan circle with brown floral background" \
--train_batch_size=1 \
--gradient_accumulation_steps=4 \
--gradient_checkpointing \
--use_8bit_adam \
--enable_xformers_memory_efficient_attention \
--set_grads_to_none
```
When using `enable_xformers_memory_efficient_attention`, please make sure to install `xformers` by `pip install xformers`.
## Training on an 8 GB GPU
We have not exhaustively tested DeepSpeed support for ControlNet. While the configuration does
save memory, we have not confirmed whether the configuration trains successfully. You will very likely
have to make changes to the config to have a successful training run.
Enable the following optimizations to train on a 8GB GPU:
- Gradient checkpointing
- bitsandbyte's 8-bit optimizer (take a look at the [installation]((https://github.com/TimDettmers/bitsandbytes#requirements--installation) instructions if you don't already have it installed)
- xFormers (take a look at the [installation](https://huggingface.co/docs/diffusers/training/optimization/xformers) instructions if you don't already have it installed)
- set gradients to `None`
- DeepSpeed stage 2 with parameter and optimizer offloading
- fp16 mixed precision
[DeepSpeed](https://www.deepspeed.ai/) can offload tensors from VRAM to either
CPU or NVME. This requires significantly more RAM (about 25 GB).
You'll have to configure your environment with `accelerate config` to enable DeepSpeed stage 2.
The configuration file should look like this:
```yaml
compute_environment: LOCAL_MACHINE
deepspeed_config:
gradient_accumulation_steps: 4
offload_optimizer_device: cpu
offload_param_device: cpu
zero3_init_flag: false
zero_stage: 2
distributed_type: DEEPSPEED
```
<Tip>
See [documentation](https://huggingface.co/docs/accelerate/usage_guides/deepspeed) for more DeepSpeed configuration options.
<Tip>
Changing the default Adam optimizer to DeepSpeed's Adam
`deepspeed.ops.adam.DeepSpeedCPUAdam` gives a substantial speedup but
it requires a CUDA toolchain with the same version as PyTorch. 8-bit optimizer
does not seem to be compatible with DeepSpeed at the moment.
```bash
export MODEL_DIR="runwayml/stable-diffusion-v1-5"
export OUTPUT_DIR="path to save model"
accelerate launch train_controlnet.py \
--pretrained_model_name_or_path=$MODEL_DIR \
--output_dir=$OUTPUT_DIR \
--dataset_name=fusing/fill50k \
--resolution=512 \
--validation_image "./conditioning_image_1.png" "./conditioning_image_2.png" \
--validation_prompt "red circle with blue background" "cyan circle with brown floral background" \
--train_batch_size=1 \
--gradient_accumulation_steps=4 \
--gradient_checkpointing \
--enable_xformers_memory_efficient_attention \
--set_grads_to_none \
--mixed_precision fp16
```
## Inference
The trained model can be run with the [`StableDiffusionControlNetPipeline`].
Set `base_model_path` and `controlnet_path` to the values `--pretrained_model_name_or_path` and
`--output_dir` were respectively set to in the training script.
```py
from diffusers import StableDiffusionControlNetPipeline, ControlNetModel, UniPCMultistepScheduler
from diffusers.utils import load_image
import torch
base_model_path = "path to model"
controlnet_path = "path to controlnet"
controlnet = ControlNetModel.from_pretrained(controlnet_path, torch_dtype=torch.float16)
pipe = StableDiffusionControlNetPipeline.from_pretrained(
base_model_path, controlnet=controlnet, torch_dtype=torch.float16
)
# speed up diffusion process with faster scheduler and memory optimization
pipe.scheduler = UniPCMultistepScheduler.from_config(pipe.scheduler.config)
# remove following line if xformers is not installed
pipe.enable_xformers_memory_efficient_attention()
pipe.enable_model_cpu_offload()
control_image = load_image("./conditioning_image_1.png")
prompt = "pale golden rod circle with old lace background"
# generate image
generator = torch.manual_seed(0)
image = pipe(prompt, num_inference_steps=20, generator=generator, image=control_image).images[0]
image.save("./output.png")
```
|