Diffusers documentation
Shap-E
Shap-E
Shap-E is a conditional model for generating 3D assets which could be used for video game development, interior design, and architecture. It is trained on a large dataset of 3D assets, and post-processed to render more views of each object and produce 16K instead of 4K point clouds. The Shap-E model is trained in two steps:
- a encoder accepts the point clouds and rendered views of a 3D asset and outputs the parameters of implicit functions that represent the asset
- a diffusion model is trained on the latents produced by the encoder to generate either neural radiance fields (NeRFs) or a textured 3D mesh, making it easier to render and use the 3D asset in downstream applications
This guide will show you how to use Shap-E to start generating your own 3D assets!
Before you begin, make sure you have the following libraries installed:
# uncomment to install the necessary libraries in Colab
#!pip install diffusers transformers accelerate safetensors trimesh
Text-to-3D
To generate a gif of a 3D object, pass a text prompt to the ShapEPipeline. The pipeline generates a list of image frames which are used to create the 3D object.
import torch
from diffusers import ShapEPipeline

device = torch.device("cuda" if torch.cuda.is_available() else "cpu")

pipe = ShapEPipeline.from_pretrained("openai/shap-e", torch_dtype=torch.float16, variant="fp16", use_safetensors=True)
pipe = pipe.to(device)

guidance_scale = 15.0
prompt = ["A firecracker", "A birthday cupcake"]

images = pipe(
    prompt,
    guidance_scale=guidance_scale,
    num_inference_steps=64,
    frame_size=256,
).images
Now use the export_to_gif() function to turn the list of image frames into a gif of the 3D object.
from diffusers.utils import export_to_gif

export_to_gif(images[0], "firecracker_3d.gif")
export_to_gif(images[1], "cake_3d.gif")

Image-to-3D
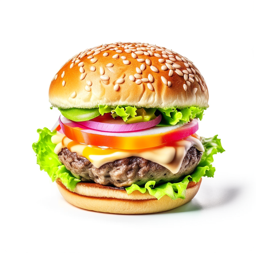
To generate a 3D object from another image, use the ShapEImg2ImgPipeline. You can use an existing image or generate an entirely new one. Let’s use the Kandinsky 2.1 model to generate a new image.
from diffusers import DiffusionPipeline
import torch

prior_pipeline = DiffusionPipeline.from_pretrained("kandinsky-community/kandinsky-2-1-prior", torch_dtype=torch.float16, use_safetensors=True).to("cuda")
pipeline = DiffusionPipeline.from_pretrained("kandinsky-community/kandinsky-2-1", torch_dtype=torch.float16, use_safetensors=True).to("cuda")

prompt = "A cheeseburger, white background"

image_embeds, negative_image_embeds = prior_pipeline(prompt, guidance_scale=1.0).to_tuple()
image = pipeline(
    prompt,
    image_embeds=image_embeds,
    negative_image_embeds=negative_image_embeds,
).images[0]

image.save("burger.png")
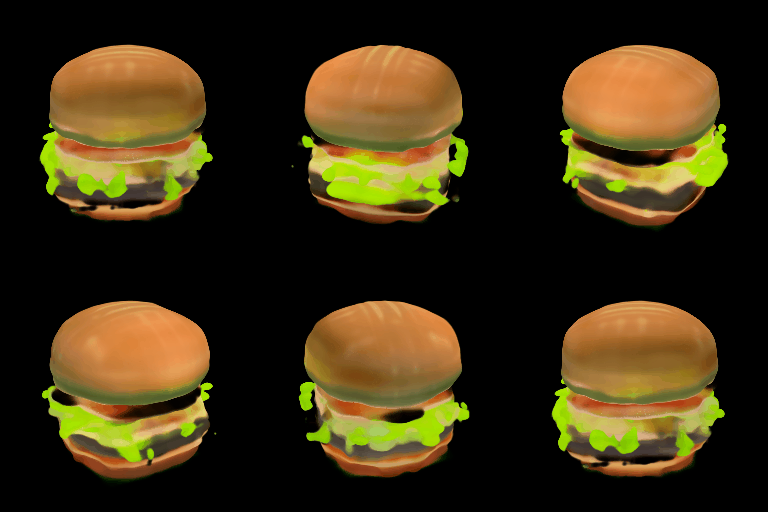
Pass the cheeseburger to the ShapEImg2ImgPipeline to generate a 3D representation of it.
from PIL import Image
from diffusers.utils import export_to_gif

pipe = ShapEImg2ImgPipeline.from_pretrained("openai/shap-e-img2img", torch_dtype=torch.float16, variant="fp16").to("cuda")

guidance_scale = 3.0
image = Image.open("burger.png").resize((256, 256))

images = pipe(
    image,
    guidance_scale=guidance_scale,
    num_inference_steps=64,
    frame_size=256,
).images

gif_path = export_to_gif(images[0], "burger_3d.gif")

Generate mesh
Shap-E is a flexible model that can also generate textured mesh outputs to be rendered for downstream applications. In this example, you’ll convert the output into a glb file because the 🤗 Datasets library supports mesh visualization of glb files which can be rendered by the Dataset viewer.
You can generate mesh outputs for both the ShapEPipeline and ShapEImg2ImgPipeline by specifying the output_type parameter as "mesh":
import torch
from diffusers import ShapEPipeline

device = torch.device("cuda" if torch.cuda.is_available() else "cpu")

pipe = ShapEPipeline.from_pretrained("openai/shap-e", torch_dtype=torch.float16, variant="fp16", use_safetensors=True)
pipe = pipe.to(device)

guidance_scale = 15.0
prompt = "A birthday cupcake"

images = pipe(prompt, guidance_scale=guidance_scale, num_inference_steps=64, frame_size=256, output_type="mesh").images
Use the export_to_ply() function to save the mesh output as a ply file:
You can optionally save the mesh output as an obj file with the export_to_obj() function. The ability to save the mesh output in a variety of formats makes it more flexible for downstream usage!
from diffusers.utils import export_to_ply

ply_path = export_to_ply(images[0], "3d_cake.ply")
print(f"saved to folder: {ply_path}")
Then you can convert the ply file to a glb file with the trimesh library:
import trimesh

mesh = trimesh.load("3d_cake.ply")
mesh.export("3d_cake.glb", file_type="glb")
By default, the mesh output is focused from the bottom viewpoint but you can change the default viewpoint by applying a rotation transform:
import trimesh
import numpy as np

mesh = trimesh.load("3d_cake.ply")
rot = trimesh.transformations.rotation_matrix(-np.pi / 2, [1, 0, 0])
mesh = mesh.apply_transform(rot)
mesh.export("3d_cake.glb", file_type="glb")
Upload the mesh file to your dataset repository to visualize it with the Dataset viewer!
