Diffusers documentation
파이프라인, 모델 및 스케줄러 이해하기
파이프라인, 모델 및 스케줄러 이해하기
🧨 Diffusers는 사용자 친화적이며 유연한 도구 상자로, 사용사례에 맞게 diffusion 시스템을 구축 할 수 있도록 설계되었습니다. 이 도구 상자의 핵심은 모델과 스케줄러입니다. DiffusionPipeline은 편의를 위해 이러한 구성 요소를 번들로 제공하지만, 파이프라인을 분리하고 모델과 스케줄러를 개별적으로 사용해 새로운 diffusion 시스템을 만들 수도 있습니다.
이 튜토리얼에서는 기본 파이프라인부터 시작해 Stable Diffusion 파이프라인까지 진행하며 모델과 스케줄러를 사용해 추론을 위한 diffusion 시스템을 조립하는 방법을 배웁니다.
기본 파이프라인 해체하기
파이프라인은 추론을 위해 모델을 실행하는 빠르고 쉬운 방법으로, 이미지를 생성하는 데 코드가 4줄 이상 필요하지 않습니다:
>>> from diffusers import DDPMPipeline

>>> ddpm = DDPMPipeline.from_pretrained("google/ddpm-cat-256").to("cuda")
>>> image = ddpm(num_inference_steps=25).images[0]
>>> image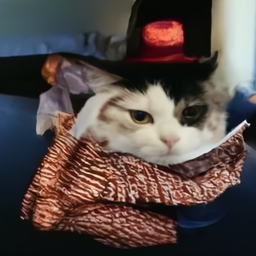
정말 쉽습니다. 그런데 파이프라인은 어떻게 이렇게 할 수 있었을까요? 파이프라인을 세분화하여 내부에서 어떤 일이 일어나고 있는지 살펴보겠습니다.
위 예시에서 파이프라인에는 UNet2DModel 모델과 DDPMScheduler가 포함되어 있습니다. 파이프라인은 원하는 출력 크기의 랜덤 노이즈를 받아 모델을 여러번 통과시켜 이미지의 노이즈를 제거합니다. 각 timestep에서 모델은 noise residual을 예측하고 스케줄러는 이를 사용하여 노이즈가 적은 이미지를 예측합니다. 파이프라인은 지정된 추론 스텝수에 도달할 때까지 이 과정을 반복합니다.
모델과 스케줄러를 별도로 사용하여 파이프라인을 다시 생성하기 위해 자체적인 노이즈 제거 프로세스를 작성해 보겠습니다.
모델과 스케줄러를 불러옵니다:
>>> from diffusers import DDPMScheduler, UNet2DModel

>>> scheduler = DDPMScheduler.from_pretrained("google/ddpm-cat-256")
>>> model = UNet2DModel.from_pretrained("google/ddpm-cat-256").to("cuda")
노이즈 제거 프로세스를 실행할 timestep 수를 설정합니다:
>>> scheduler.set_timesteps(50)스케줄러의 timestep을 설정하면 균등한 간격의 구성 요소를 가진 텐서가 생성됩니다.(이 예시에서는 50개) 각 요소는 모델이 이미지의 노이즈를 제거하는 시간 간격에 해당합니다. 나중에 노이즈 제거 루프를 만들 때 이 텐서를 반복하여 이미지의 노이즈를 제거합니다:
>>> scheduler.timesteps
tensor([980, 960, 940, 920, 900, 880, 860, 840, 820, 800, 780, 760, 740, 720,
    700, 680, 660, 640, 620, 600, 580, 560, 540, 520, 500, 480, 460, 440,
    420, 400, 380, 360, 340, 320, 300, 280, 260, 240, 220, 200, 180, 160,
    140, 120, 100,  80,  60,  40,  20,   0])
원하는 출력과 같은 모양을 가진 랜덤 노이즈를 생성합니다:
>>> import torch

>>> sample_size = model.config.sample_size
>>> noise = torch.randn((1, 3, sample_size, sample_size), device="cuda")
이제 timestep을 반복하는 루프를 작성합니다. 각 timestep에서 모델은
UNet2DModel.forward()를 통해 noisy residual을 반환합니다. 스케줄러의step()메서드는 noisy residual, timestep, 그리고 입력을 받아 이전 timestep에서 이미지를 예측합니다. 이 출력은 노이즈 제거 루프의 모델에 대한 다음 입력이 되며,timesteps배열의 끝에 도달할 때까지 반복됩니다.>>> input = noise >>> for t in scheduler.timesteps: ... with torch.no_grad(): ... noisy_residual = model(input, t).sample ... previous_noisy_sample = scheduler.step(noisy_residual, t, input).prev_sample ... input = previous_noisy_sample이것이 전체 노이즈 제거 프로세스이며, 동일한 패턴을 사용해 모든 diffusion 시스템을 작성할 수 있습니다.
마지막 단계는 노이즈가 제거된 출력을 이미지로 변환하는 것입니다:
>>> from PIL import Image
>>> import numpy as np

>>> image = (input / 2 + 0.5).clamp(0, 1)
>>> image = image.cpu().permute(0, 2, 3, 1).numpy()[0]
>>> image = Image.fromarray((image * 255).round().astype("uint8"))
>>> image
다음 섹션에서는 여러분의 기술을 시험해보고 좀 더 복잡한 Stable Diffusion 파이프라인을 분석해 보겠습니다. 방법은 거의 동일합니다. 필요한 구성요소들을 초기화하고 timestep수를 설정하여 timestep 배열을 생성합니다. 노이즈 제거 루프에서 timestep 배열이 사용되며, 이 배열의 각 요소에 대해 모델은 노이즈가 적은 이미지를 예측합니다. 노이즈 제거 루프는 timestep을 반복하고 각 timestep에서 noise residual을 출력하고 스케줄러는 이를 사용하여 이전 timestep에서 노이즈가 덜한 이미지를 예측합니다. 이 프로세스는 timestep 배열의 끝에 도달할 때까지 반복됩니다.
한번 사용해 봅시다!
Stable Diffusion 파이프라인 해체하기
Stable Diffusion 은 text-to-image latent diffusion 모델입니다. latent diffusion 모델이라고 불리는 이유는 실제 픽셀 공간 대신 이미지의 저차원의 표현으로 작업하기 때문이고, 메모리 효율이 더 높습니다. 인코더는 이미지를 더 작은 표현으로 압축하고, 디코더는 압축된 표현을 다시 이미지로 변환합니다. text-to-image 모델의 경우 텍스트 임베딩을 생성하기 위해 tokenizer와 인코더가 필요합니다. 이전 예제에서 이미 UNet 모델과 스케줄러가 필요하다는 것은 알고 계셨을 것입니다.
보시다시피, 이것은 UNet 모델만 포함된 DDPM 파이프라인보다 더 복잡합니다. Stable Diffusion 모델에는 세 개의 개별 사전학습된 모델이 있습니다.
💡 VAE, UNet 및 텍스트 인코더 모델의 작동방식에 대한 자세한 내용은 How does Stable Diffusion work? 블로그를 참조하세요.
이제 Stable Diffusion 파이프라인에 필요한 구성요소들이 무엇인지 알았으니, from_pretrained() 메서드를 사용해 모든 구성요소를 불러옵니다. 사전학습된 체크포인트 stable-diffusion-v1-5/stable-diffusion-v1-5에서 찾을 수 있으며, 각 구성요소들은 별도의 하위 폴더에 저장되어 있습니다:
>>> from PIL import Image
>>> import torch
>>> from transformers import CLIPTextModel, CLIPTokenizer
>>> from diffusers import AutoencoderKL, UNet2DConditionModel, PNDMScheduler

>>> vae = AutoencoderKL.from_pretrained("CompVis/stable-diffusion-v1-4", subfolder="vae")
>>> tokenizer = CLIPTokenizer.from_pretrained("CompVis/stable-diffusion-v1-4", subfolder="tokenizer")
>>> text_encoder = CLIPTextModel.from_pretrained("CompVis/stable-diffusion-v1-4", subfolder="text_encoder")
>>> unet = UNet2DConditionModel.from_pretrained("CompVis/stable-diffusion-v1-4", subfolder="unet")
기본 PNDMScheduler 대신, UniPCMultistepScheduler로 교체하여 다른 스케줄러를 얼마나 쉽게 연결할 수 있는지 확인합니다:
>>> from diffusers import UniPCMultistepScheduler

>>> scheduler = UniPCMultistepScheduler.from_pretrained("CompVis/stable-diffusion-v1-4", subfolder="scheduler")
추론 속도를 높이려면 스케줄러와 달리 학습 가능한 가중치가 있으므로 모델을 GPU로 옮기세요:
>>> torch_device = "cuda"
>>> vae.to(torch_device)
>>> text_encoder.to(torch_device)
>>> unet.to(torch_device)
텍스트 임베딩 생성하기
다음 단계는 임베딩을 생성하기 위해 텍스트를 토큰화하는 것입니다. 이 텍스트는 UNet 모델에서 condition으로 사용되고 입력 프롬프트와 유사한 방향으로 diffusion 프로세스를 조정하는 데 사용됩니다.
💡
guidance_scale매개변수는 이미지를 생성할 때 프롬프트에 얼마나 많은 가중치를 부여할지 결정합니다.
다른 프롬프트를 생성하고 싶다면 원하는 프롬프트를 자유롭게 선택하세요!
>>> prompt = ["a photograph of an astronaut riding a horse"]
>>> height = 512  # Stable Diffusion의 기본 높이
>>> width = 512  # Stable Diffusion의 기본 너비
>>> num_inference_steps = 25  # 노이즈 제거 스텝 수
>>> guidance_scale = 7.5  # classifier-free guidance를 위한 scale
>>> generator = torch.manual_seed(0)  # 초기 잠재 노이즈를 생성하는 seed generator
>>> batch_size = len(prompt)
텍스트를 토큰화하고 프롬프트에서 임베딩을 생성합니다:
>>> text_input = tokenizer(
...     prompt, padding="max_length", max_length=tokenizer.model_max_length, truncation=True, return_tensors="pt"
... )

>>> with torch.no_grad():
...     text_embeddings = text_encoder(text_input.input_ids.to(torch_device))[0]
또한 패딩 토큰의 임베딩인 unconditional 텍스트 임베딩을 생성해야 합니다. 이 임베딩은 조건부 text_embeddings과 동일한 shape(batch_size 그리고 seq_length)을 가져야 합니다:
>>> max_length = text_input.input_ids.shape[-1]
>>> uncond_input = tokenizer([""] * batch_size, padding="max_length", max_length=max_length, return_tensors="pt")
>>> uncond_embeddings = text_encoder(uncond_input.input_ids.to(torch_device))[0]
두번의 forward pass를 피하기 위해 conditional 임베딩과 unconditional 임베딩을 배치(batch)로 연결하겠습니다:
>>> text_embeddings = torch.cat([uncond_embeddings, text_embeddings])랜덤 노이즈 생성
그다음 diffusion 프로세스의 시작점으로 초기 랜덤 노이즈를 생성합니다. 이것이 이미지의 잠재적 표현이며 점차적으로 노이즈가 제거됩니다. 이 시점에서 latent 이미지는 최종 이미지 크기보다 작지만 나중에 모델이 이를 512x512 이미지 크기로 변환하므로 괜찮습니다.
💡
vae모델에는 3개의 다운 샘플링 레이어가 있기 때문에 높이와 너비가 8로 나뉩니다. 다음을 실행하여 확인할 수 있습니다:2 ** (len(vae.config.block_out_channels) - 1) == 8
>>> latents = torch.randn(
...     (batch_size, unet.config.in_channels, height // 8, width // 8),
...     generator=generator,
...     device=torch_device,
... )
이미지 노이즈 제거
먼저 UniPCMultistepScheduler와 같은 향상된 스케줄러에 필요한 노이즈 스케일 값인 초기 노이즈 분포 sigma 로 입력을 스케일링 하는 것부터 시작합니다:
>>> latents = latents * scheduler.init_noise_sigma마지막 단계는 latent의 순수한 노이즈를 점진적으로 프롬프트에 설명된 이미지로 변환하는 노이즈 제거 루프를 생성하는 것입니다. 노이즈 제거 루프는 세 가지 작업을 수행해야 한다는 점을 기억하세요:
- 노이즈 제거 중에 사용할 스케줄러의 timesteps를 설정합니다.
- timestep을 따라 반복합니다.
- 각 timestep에서 UNet 모델을 호출하여 noise residual을 예측하고 스케줄러에 전달하여 이전 노이즈 샘플을 계산합니다.
>>> from tqdm.auto import tqdm

>>> scheduler.set_timesteps(num_inference_steps)

>>> for t in tqdm(scheduler.timesteps):
...     # classifier-free guidance를 수행하는 경우 두번의 forward pass를 수행하지 않도록 latent를 확장.
...     latent_model_input = torch.cat([latents] * 2)

...     latent_model_input = scheduler.scale_model_input(latent_model_input, timestep=t)

...     # noise residual 예측
...     with torch.no_grad():
...         noise_pred = unet(latent_model_input, t, encoder_hidden_states=text_embeddings).sample

...     # guidance 수행
...     noise_pred_uncond, noise_pred_text = noise_pred.chunk(2)
...     noise_pred = noise_pred_uncond + guidance_scale * (noise_pred_text - noise_pred_uncond)

...     # 이전 노이즈 샘플을 계산 x_t -> x_t-1
...     latents = scheduler.step(noise_pred, t, latents).prev_sample
이미지 디코딩
마지막 단계는 vae를 이용하여 잠재 표현을 이미지로 디코딩하고 sample과 함께 디코딩된 출력을 얻는 것입니다:
# latent를 스케일링하고 vae로 이미지 디코딩
latents = 1 / 0.18215 * latents
with torch.no_grad():
    image = vae.decode(latents).sample
마지막으로 이미지를 PIL.Image로 변환하면 생성된 이미지를 확인할 수 있습니다!
>>> image = (image / 2 + 0.5).clamp(0, 1)
>>> image = image.detach().cpu().permute(0, 2, 3, 1).numpy()
>>> images = (image * 255).round().astype("uint8")
>>> pil_images = [Image.fromarray(image) for image in images]
>>> pil_images[0]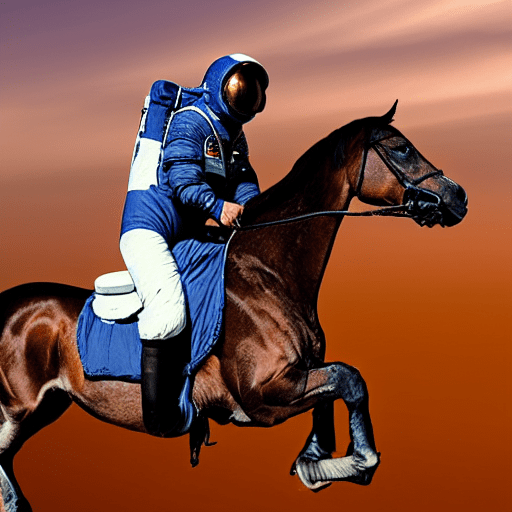
다음 단계
기본 파이프라인부터 복잡한 파이프라인까지, 자신만의 diffusion 시스템을 작성하는 데 필요한 것은 노이즈 제거 루프뿐이라는 것을 알 수 있었습니다. 이 루프는 스케줄러의 timesteps를 설정하고, 이를 반복하며, UNet 모델을 호출하여 noise residual을 예측하고 스케줄러에 전달하여 이전 노이즈 샘플을 계산하는 과정을 번갈아 가며 수행해야 합니다.
이것이 바로 🧨 Diffusers가 설계된 목적입니다: 모델과 스케줄러를 사용해 자신만의 diffusion 시스템을 직관적이고 쉽게 작성할 수 있도록 하기 위해서입니다.
다음 단계를 자유롭게 진행하세요:
- 🧨 Diffusers에 파이프라인 구축 및 기여하는 방법을 알아보세요. 여러분이 어떤 아이디어를 내놓을지 기대됩니다!
- 라이브러리에서 기본 파이프라인을 살펴보고, 모델과 스케줄러를 별도로 사용하여 파이프라인을 처음부터 해체하고 빌드할 수 있는지 확인해 보세요.