Diffusers documentation
텍스트 기반 image-to-image 생성
You are viewing main version, which requires installation from source. If you'd like
regular pip install, checkout the latest stable version (v0.35.1).
텍스트 기반 image-to-image 생성
StableDiffusionImg2ImgPipeline을 사용하면 텍스트 프롬프트와 시작 이미지를 전달하여 새 이미지 생성의 조건을 지정할 수 있습니다.
시작하기 전에 필요한 라이브러리가 모두 설치되어 있는지 확인하세요:
!pip install diffusers transformers ftfy accelerate
nitrosocke/Ghibli-Diffusion과 같은 사전학습된 stable diffusion 모델로 StableDiffusionImg2ImgPipeline을 생성하여 시작하세요.
import torch
import requests
from PIL import Image
from io import BytesIO
from diffusers import StableDiffusionImg2ImgPipeline

device = "cuda"
pipe = StableDiffusionImg2ImgPipeline.from_pretrained("nitrosocke/Ghibli-Diffusion", torch_dtype=torch.float16).to(
    device
)
초기 이미지를 다운로드하고 사전 처리하여 파이프라인에 전달할 수 있습니다:
url = "https://raw.githubusercontent.com/CompVis/stable-diffusion/main/assets/stable-samples/img2img/sketch-mountains-input.jpg"

response = requests.get(url)
init_image = Image.open(BytesIO(response.content)).convert("RGB")
init_image.thumbnail((768, 768))
init_image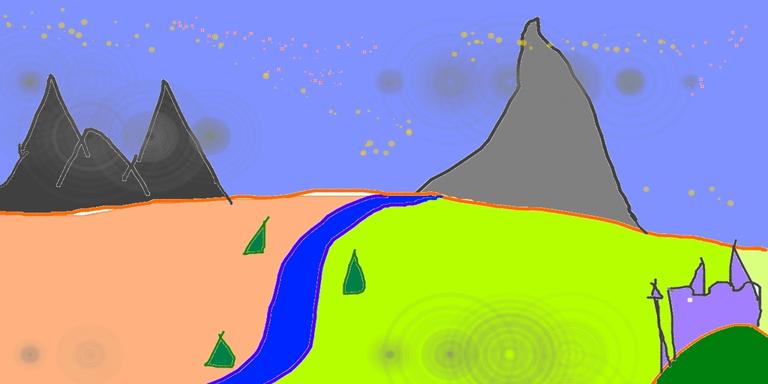
💡
strength는 입력 이미지에 추가되는 노이즈의 양을 제어하는 0.0에서 1.0 사이의 값입니다. 1.0에 가까운 값은 다양한 변형을 허용하지만 입력 이미지와 의미적으로 일치하지 않는 이미지를 생성합니다.
프롬프트를 정의하고(지브리 스타일(Ghibli-style)에 맞게 조정된 이 체크포인트의 경우 프롬프트 앞에 ghibli style 토큰을 붙여야 합니다) 파이프라인을 실행합니다:
prompt = "ghibli style, a fantasy landscape with castles"
generator = torch.Generator(device=device).manual_seed(1024)
image = pipe(prompt=prompt, image=init_image, strength=0.75, guidance_scale=7.5, generator=generator).images[0]
image
다른 스케줄러로 실험하여 출력에 어떤 영향을 미치는지 확인할 수도 있습니다:
from diffusers import LMSDiscreteScheduler

lms = LMSDiscreteScheduler.from_config(pipe.scheduler.config)
pipe.scheduler = lms
generator = torch.Generator(device=device).manual_seed(1024)
image = pipe(prompt=prompt, image=init_image, strength=0.75, guidance_scale=7.5, generator=generator).images[0]
image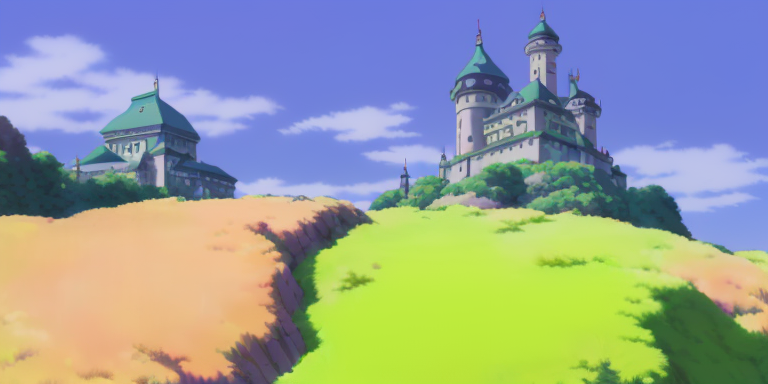
아래 공백을 확인하고 strength 값을 다르게 설정하여 이미지를 생성해 보세요. strength를 낮게 설정하면 원본 이미지와 더 유사한 이미지가 생성되는 것을 확인할 수 있습니다.
자유롭게 스케줄러를 LMSDiscreteScheduler로 전환하여 출력에 어떤 영향을 미치는지 확인해 보세요.