Diffusers documentation
効果的で効率的な拡散モデル
効果的で効率的な拡散モデル
DiffusionPipelineを使って特定のスタイルで画像を生成したり、希望する画像を生成したりするのは難しいことです。多くの場合、DiffusionPipelineを何度か実行してからでないと満足のいく画像は得られません。しかし、何もないところから何かを生成するにはたくさんの計算が必要です。生成を何度も何度も実行する場合、特にたくさんの計算量が必要になります。
そのため、パイプラインから計算(速度)とメモリ(GPU RAM)の効率を最大限に引き出し、生成サイクル間の時間を短縮することで、より高速な反復処理を行えるようにすることが重要です。
このチュートリアルでは、DiffusionPipelineを用いて、より速く、より良い計算を行う方法を説明します。
まず、stable-diffusion-v1-5/stable-diffusion-v1-5モデルをロードします:
from diffusers import DiffusionPipeline

model_id = "stable-diffusion-v1-5/stable-diffusion-v1-5"
pipeline = DiffusionPipeline.from_pretrained(model_id, use_safetensors=True)
ここで使用するプロンプトの例は年老いた戦士の長の肖像画ですが、ご自由に変更してください:
prompt = "portrait photo of a old warrior chief"Speed
💡 GPUを利用できない場合は、ColabのようなGPUプロバイダーから無料で利用できます!
画像生成を高速化する最も簡単な方法の1つは、PyTorchモジュールと同じようにGPU上にパイプラインを配置することです:
pipeline = pipeline.to("cuda")同じイメージを使って改良できるようにするには、Generatorを使い、reproducibilityの種を設定します:
import torch

generator = torch.Generator("cuda").manual_seed(0)
これで画像を生成できます:
image = pipeline(prompt, generator=generator).images[0]
image
この処理にはT4 GPUで~30秒かかりました(割り当てられているGPUがT4より優れている場合はもっと速いかもしれません)。デフォルトでは、DiffusionPipelineは完全なfloat32精度で生成を50ステップ実行します。float16`のような低い精度に変更するか、推論ステップ数を減らすことで高速化することができます。
まずは float16 でモデルをロードして画像を生成してみましょう:
import torch

pipeline = DiffusionPipeline.from_pretrained(model_id, torch_dtype=torch.float16, use_safetensors=True)
pipeline = pipeline.to("cuda")
generator = torch.Generator("cuda").manual_seed(0)
image = pipeline(prompt, generator=generator).images[0]
image
今回、画像生成にかかった時間はわずか11秒で、以前より3倍近く速くなりました!
💡 パイプラインは常に
float16で実行することを強くお勧めします。
生成ステップ数を減らすという方法もあります。より効率的なスケジューラを選択することで、出力品質を犠牲にすることなくステップ数を減らすことができます。compatiblesメソッドを呼び出すことで、DiffusionPipelineの現在のモデルと互換性のあるスケジューラを見つけることができます:
pipeline.scheduler.compatibles
[
    diffusers.schedulers.scheduling_lms_discrete.LMSDiscreteScheduler,
    diffusers.schedulers.scheduling_unipc_multistep.UniPCMultistepScheduler,
    diffusers.schedulers.scheduling_k_dpm_2_discrete.KDPM2DiscreteScheduler,
    diffusers.schedulers.scheduling_deis_multistep.DEISMultistepScheduler,
    diffusers.schedulers.scheduling_euler_discrete.EulerDiscreteScheduler,
    diffusers.schedulers.scheduling_dpmsolver_multistep.DPMSolverMultistepScheduler,
    diffusers.schedulers.scheduling_ddpm.DDPMScheduler,
    diffusers.schedulers.scheduling_dpmsolver_singlestep.DPMSolverSinglestepScheduler,
    diffusers.schedulers.scheduling_k_dpm_2_ancestral_discrete.KDPM2AncestralDiscreteScheduler,
    diffusers.schedulers.scheduling_heun_discrete.HeunDiscreteScheduler,
    diffusers.schedulers.scheduling_pndm.PNDMScheduler,
    diffusers.schedulers.scheduling_euler_ancestral_discrete.EulerAncestralDiscreteScheduler,
    diffusers.schedulers.scheduling_ddim.DDIMScheduler,
]
Stable DiffusionモデルはデフォルトでPNDMSchedulerを使用します。このスケジューラは通常~50の推論ステップを必要としますが、DPMSolverMultistepSchedulerのような高性能なスケジューラでは~20または25の推論ステップで済みます。ConfigMixin.from_config()メソッドを使用すると、新しいスケジューラをロードすることができます:
from diffusers import DPMSolverMultistepScheduler

pipeline.scheduler = DPMSolverMultistepScheduler.from_config(pipeline.scheduler.config)
ここで num_inference_steps を20に設定します:
generator = torch.Generator("cuda").manual_seed(0)
image = pipeline(prompt, generator=generator, num_inference_steps=20).images[0]
image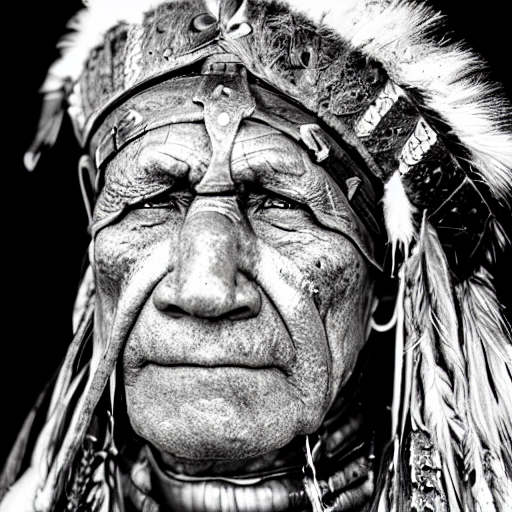
推論時間をわずか4秒に短縮することに成功した!⚡️
メモリー
パイプラインのパフォーマンスを向上させるもう1つの鍵は、消費メモリを少なくすることです。一度に生成できる画像の数を確認する最も簡単な方法は、OutOfMemoryError(OOM)が発生するまで、さまざまなバッチサイズを試してみることです。
文章と Generators のリストから画像のバッチを生成する関数を作成します。各 Generator にシードを割り当てて、良い結果が得られた場合に再利用できるようにします。
def get_inputs(batch_size=1):
    generator = [torch.Generator("cuda").manual_seed(i) for i in range(batch_size)]
    prompts = batch_size * [prompt]
    num_inference_steps = 20

return {"prompt": prompts, "generator": generator, "num_inference_steps": num_inference_steps}batch_size=4で開始し、どれだけメモリを消費したかを確認します:
from diffusers.utils import make_image_grid

images = pipeline(**get_inputs(batch_size=4)).images
make_image_grid(images, 2, 2)大容量のRAMを搭載したGPUでない限り、上記のコードはおそらくOOMエラーを返したはずです!メモリの大半はクロスアテンションレイヤーが占めています。この処理をバッチで実行する代わりに、逐次実行することでメモリを大幅に節約できます。必要なのは、enable_attention_slicing()関数を使用することだけです:
pipeline.enable_attention_slicing()
今度はbatch_sizeを8にしてみてください!
images = pipeline(**get_inputs(batch_size=8)).images
make_image_grid(images, rows=2, cols=4)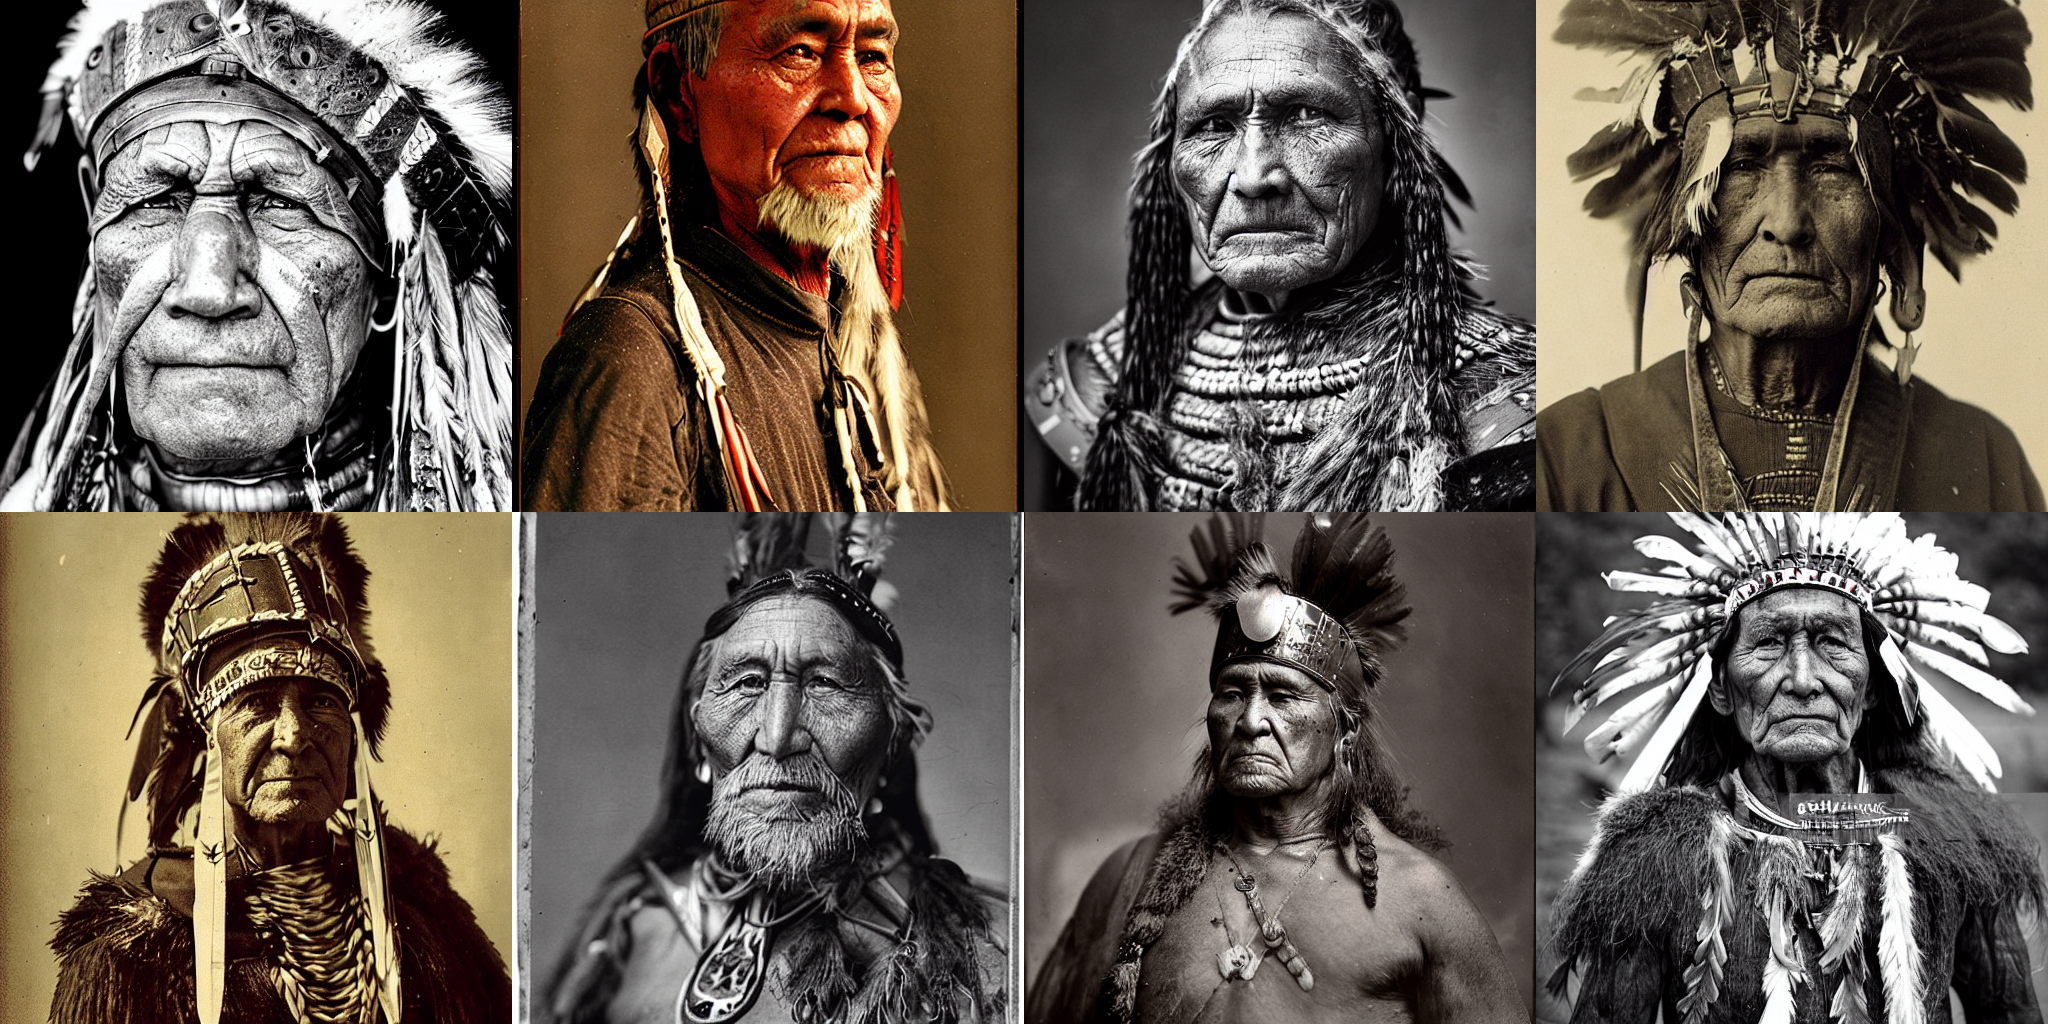
以前は4枚の画像のバッチを生成することさえできませんでしたが、今では8枚の画像のバッチを1枚あたり~3.5秒で生成できます!これはおそらく、品質を犠牲にすることなくT4 GPUでできる最速の処理速度です。
品質
前の2つのセクションでは、fp16 を使ってパイプラインの速度を最適化する方法、よりパフォーマン スなスケジューラーを使って生成ステップ数を減らす方法、アテンションスライスを有効 にしてメモリ消費量を減らす方法について学びました。今度は、生成される画像の品質を向上させる方法に焦点を当てます。
より良いチェックポイント
最も単純なステップは、より良いチェックポイントを使うことです。Stable Diffusionモデルは良い出発点であり、公式発表以来、いくつかの改良版もリリースされています。しかし、新しいバージョンを使ったからといって、自動的に良い結果が得られるわけではありません。最良の結果を得るためには、自分でさまざまなチェックポイントを試してみたり、ちょっとした研究(ネガティブプロンプトの使用など)をしたりする必要があります。
この分野が成長するにつれて、特定のスタイルを生み出すために微調整された、より質の高いチェックポイントが増えています。HubやDiffusers Galleryを探索して、興味のあるものを見つけてみてください!
より良いパイプラインコンポーネント
現在のパイプラインコンポーネントを新しいバージョンに置き換えてみることもできます。Stability AIが提供する最新のautodecoderをパイプラインにロードし、画像を生成してみましょう:
from diffusers import AutoencoderKL

vae = AutoencoderKL.from_pretrained("stabilityai/sd-vae-ft-mse", torch_dtype=torch.float16).to("cuda")
pipeline.vae = vae
images = pipeline(**get_inputs(batch_size=8)).images
make_image_grid(images, rows=2, cols=4)
より良いプロンプト・エンジニアリング
画像を生成するために使用する文章は、プロンプトエンジニアリングと呼ばれる分野を作られるほど、非常に重要です。プロンプト・エンジニアリングで考慮すべき点は以下の通りです:
- 生成したい画像やその類似画像は、インターネット上にどのように保存されているか?
- 私が望むスタイルにモデルを誘導するために、どのような追加詳細を与えるべきか?
このことを念頭に置いて、プロンプトに色やより質の高いディテールを含めるように改良してみましょう:
prompt += ", tribal panther make up, blue on red, side profile, looking away, serious eyes"
prompt += " 50mm portrait photography, hard rim lighting photography--beta --ar 2:3  --beta --upbeta"
新しいプロンプトで画像のバッチを生成しましょう:
images = pipeline(**get_inputs(batch_size=8)).images
make_image_grid(images, rows=2, cols=4)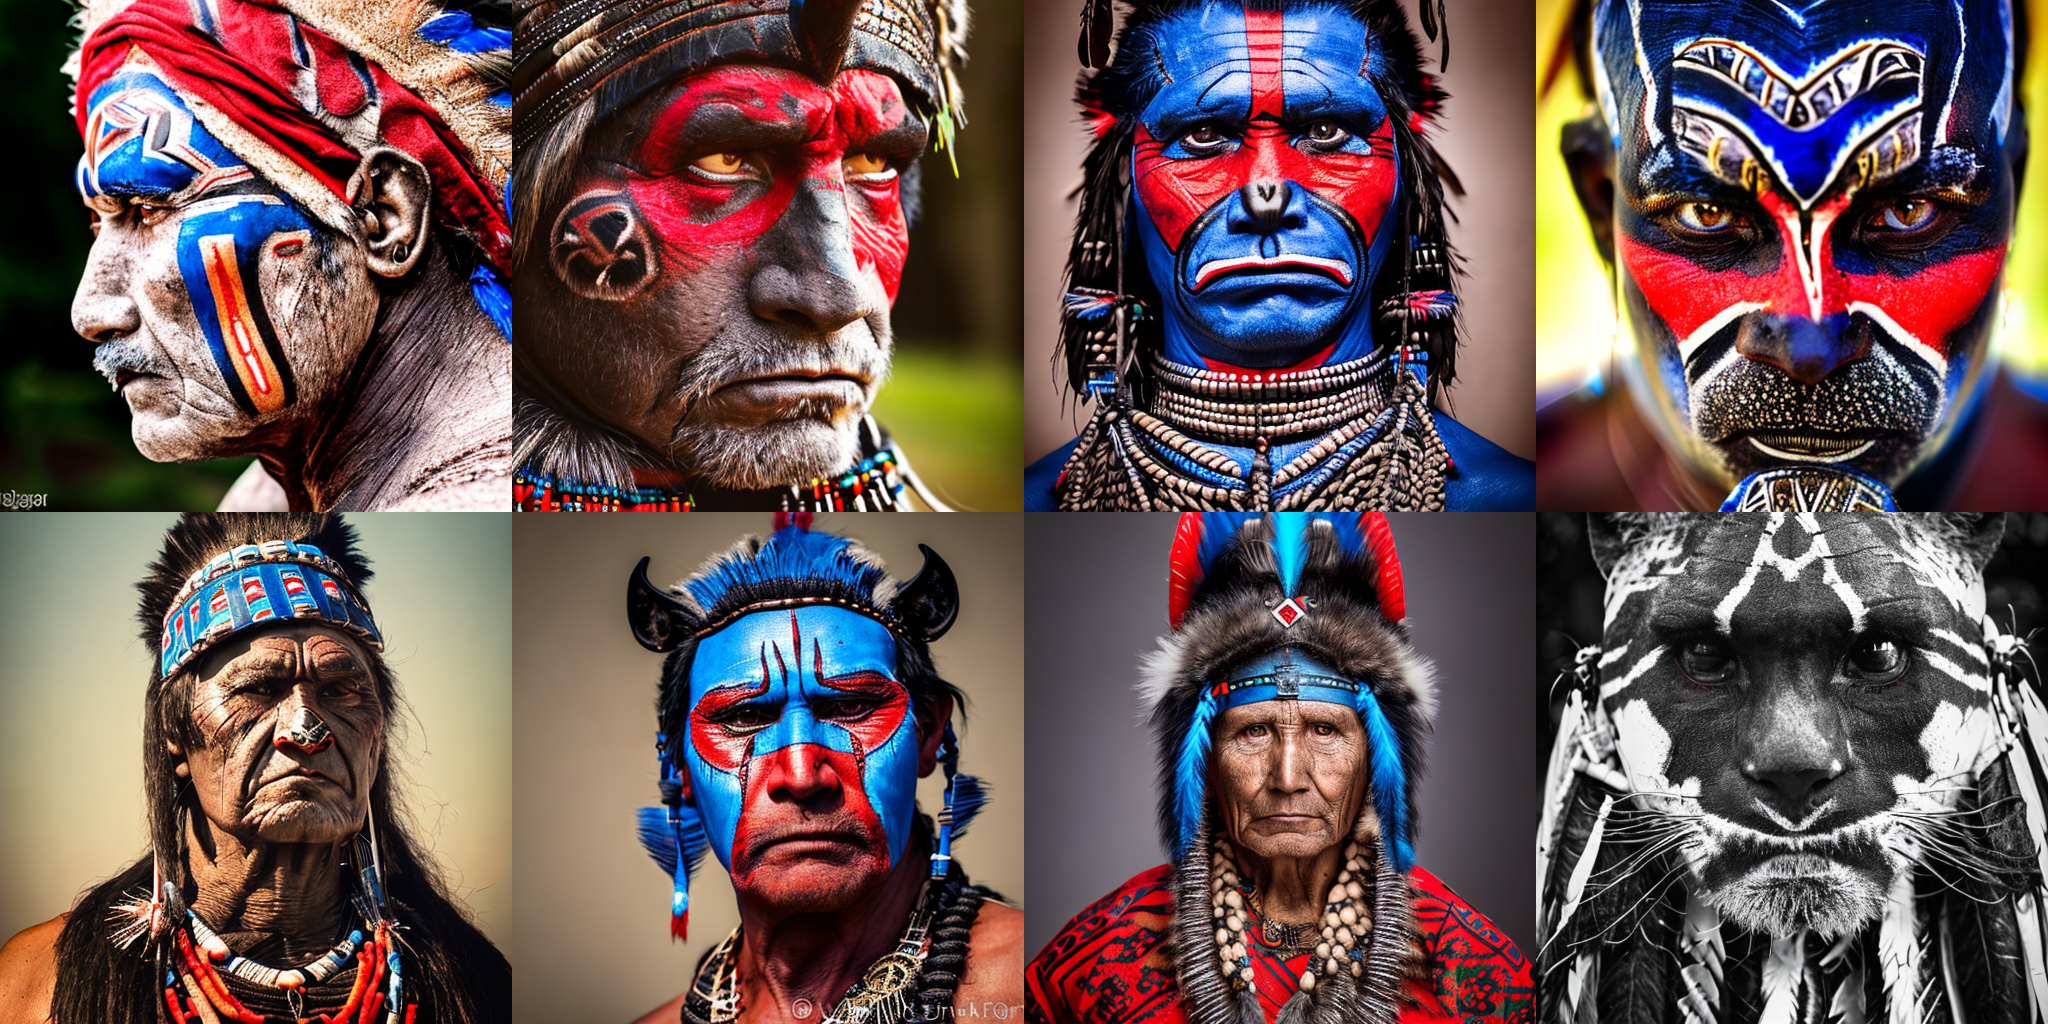
かなりいいです!種が1のGeneratorに対応する2番目の画像に、被写体の年齢に関するテキストを追加して、もう少し手を加えてみましょう:
prompts = [
    "portrait photo of the oldest warrior chief, tribal panther make up, blue on red, side profile, looking away, serious eyes 50mm portrait photography, hard rim lighting photography--beta --ar 2:3  --beta --upbeta",
    "portrait photo of a old warrior chief, tribal panther make up, blue on red, side profile, looking away, serious eyes 50mm portrait photography, hard rim lighting photography--beta --ar 2:3  --beta --upbeta",
    "portrait photo of a warrior chief, tribal panther make up, blue on red, side profile, looking away, serious eyes 50mm portrait photography, hard rim lighting photography--beta --ar 2:3  --beta --upbeta",
    "portrait photo of a young warrior chief, tribal panther make up, blue on red, side profile, looking away, serious eyes 50mm portrait photography, hard rim lighting photography--beta --ar 2:3  --beta --upbeta",
]

generator = [torch.Generator("cuda").manual_seed(1) for _ in range(len(prompts))]
images = pipeline(prompt=prompts, generator=generator, num_inference_steps=25).images
make_image_grid(images, 2, 2)
次のステップ
このチュートリアルでは、DiffusionPipelineを最適化して計算効率とメモリ効率を向上させ、生成される出力の品質を向上させる方法を学びました。パイプラインをさらに高速化することに興味があれば、以下のリソースを参照してください:
- PyTorch 2.0と
torch.compileがどのように生成速度を5-300%高速化できるかを学んでください。A100 GPUの場合、画像生成は最大50%速くなります! - PyTorch 2が使えない場合は、xFormersをインストールすることをお勧めします。このライブラリのメモリ効率の良いアテンションメカニズムは PyTorch 1.13.1 と相性が良く、高速化とメモリ消費量の削減を同時に実現します。
- モデルのオフロードなど、その他の最適化テクニックは this guide でカバーされています。