How to Set Up and Run Ollama on a GPU-Powered VM (vast.ai)

In this tutorial, we'll walk you through the process of setting up and using Ollama for private model inference on a VM with GPU, either on your local machine or a rented VM from Vast.aior Runpod.io. Ollama allows you to run models privately, ensuring data security and faster inference times thanks to the power of GPUs. By leveraging a GPU-powered VM, you can significantly improve the performance and efficiency of your model inference tasks.
Outline
- Set up a VM with GPU on Vast.ai
- Start Jupyter Terminal
- Install Ollama
- Run Ollama Serve
- Test Ollama with a model
- (Optional) using your own model
Setting Up a VM with GPU on Vast.ai
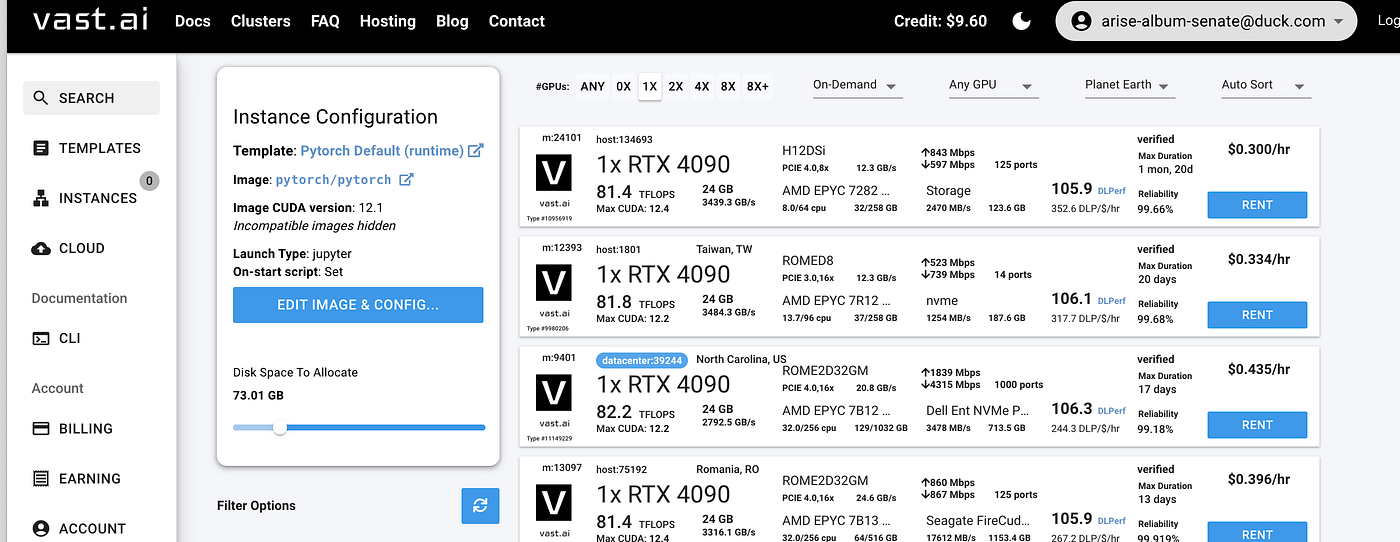
1. Create a VM with GPU: --- Visit Vast.ai to create your VM. --- Choose a VM with at least 30 GB of storage to accommodate the models. This ensures you have enough space for installation and model storage. --- Select a VM that costs less than $0.30 per hour to keep the setup cost-effective.
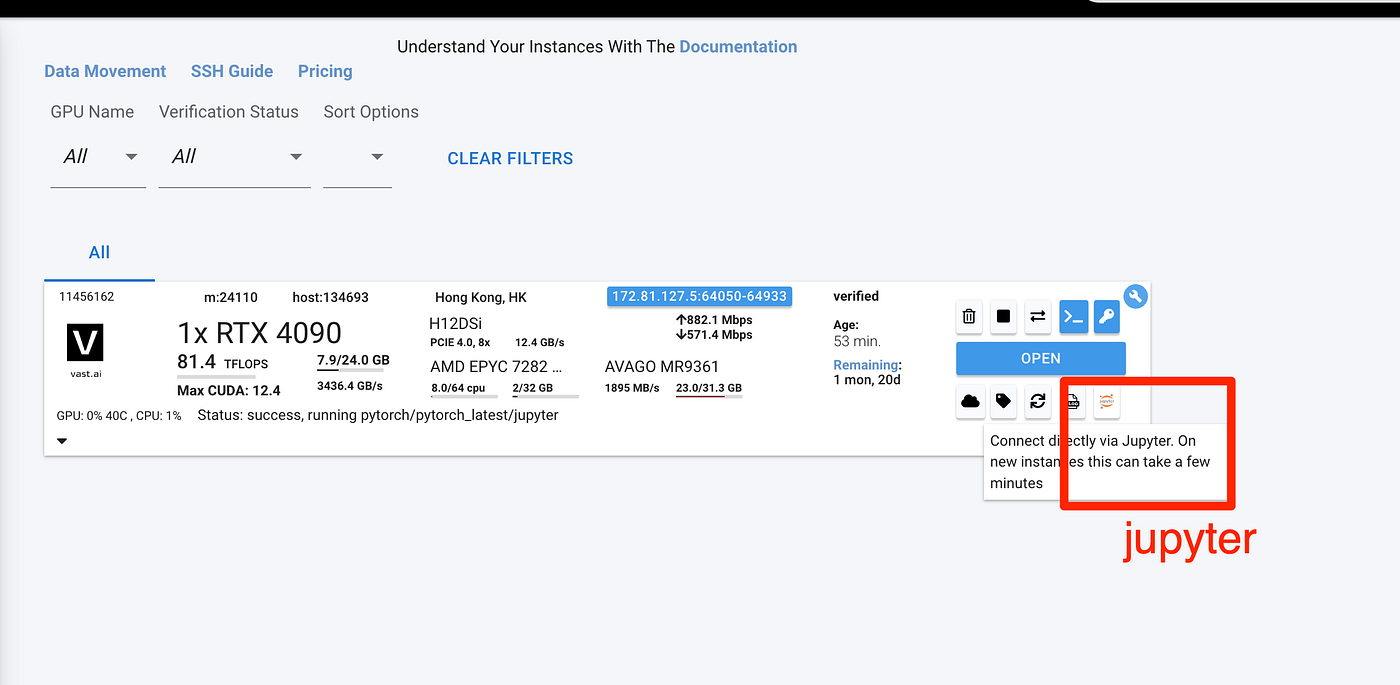
2. Start Jupyter Terminal: --- Once your VM is up and running, start Jupyter and open a terminal within it.
Downloading and Running Ollama
- Start Jupyter Terminal: --- Once your VM is up and running, start Jupyter and open a terminal within it. This is the easiest method to get started. --- Alternatively, you can use SSH on your local VM, for example with VSCode, but you will need to create an SSH key to use it.

- Install Ollama: --- Open the terminal in Jupyter and run the following command to install Ollama:
bash curl -fsSL https://ollama.com/install.sh | sh
2. Run Ollama Serve: --- After installation, start the Ollama service by running:
bash ollama serve &
Ensure there are no GPU errors. If there are issues, the response will be slow when interacting with the model.
3. Test Ollama with a Model: --- Test the setup by running a sample model like Mistral:
bash ollama run mistral
You can now start chatting with the model to ensure everything is working correctly.
Optional (Check GPU usage)
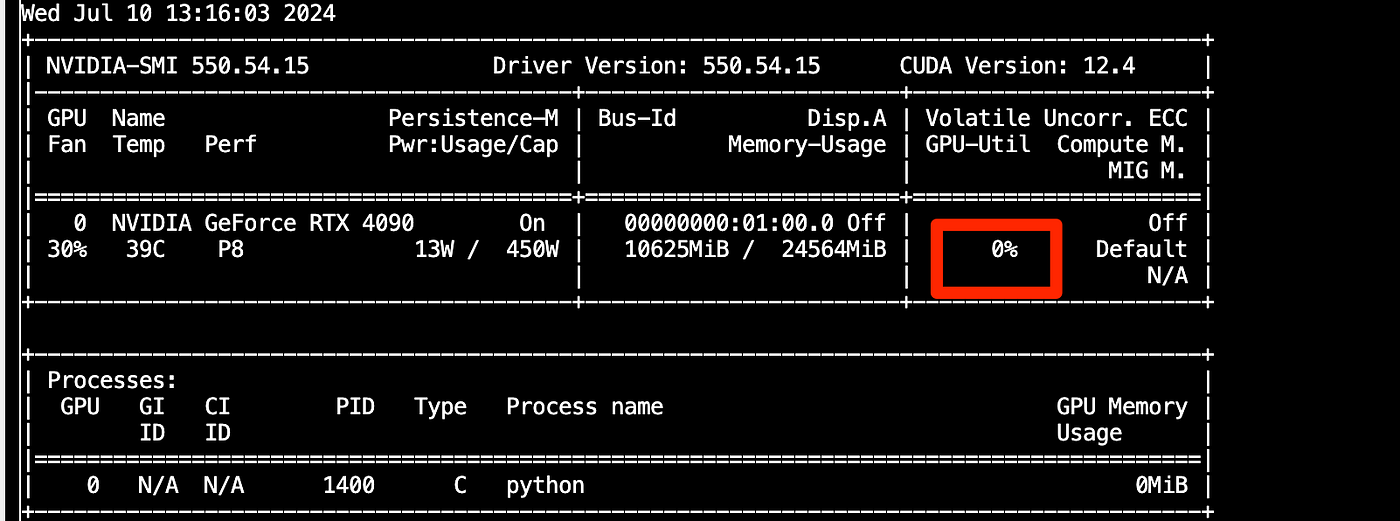
Check GPU Utilization: --- During the inference (last step), check if the GPU is being utilized by running the following command:bash nvidia-smi - Ensure that the memory utilization is greater than 0%. This indicates that the GPU is being used for the inference process.
Using Your Own Hugging Face Model with Ollama
1. Install Hugging Face CLI: --- If you want to use your own model from Hugging Face, first install the Hugging Face CLI. Here we will use an example of a fine tuned Mistral model TheBloke/em_german_mistral_v01-GGUF em_german_mistral_v01.Q4_K_M.gguf
2. Download Your Model: --- Download your desired model from Hugging Face. For example, to download a fine-tuned Mistral model:
pip3 install huggingface-hub# Try with my custom model for fine tuned Mistral
huggingface-cli download TheBloke/em_german_mistral_v01-GGUF em_german_mistral_v01.Q4_K_M.gguf --local-dir . --local-dir-use-symlinks False
3. Create a Model File: --- Create a model config file ***Modelfile ***with the following content:
FROM em_german_mistral_v01.Q4_K_M.gguf

# set the temperature to 1 [higher is more creative, lower is more coherent]
PARAMETER temperature 0

# # set the system message
# SYSTEM """
# You are Mario from Super Mario Bros. Answer as Mario, the assistant, only.
# """
4. Instruct Ollama to Create the Model: --- Create the custom model using Ollama with the command:
ollama create -f mymodel Modelfile
5. Run Your Custom Model: --- Run your custom model using:
ollama run mymodel
By following these steps, you can effectively utilize Ollama for private model inference on a VM with GPU, ensuring secure and efficient operations for your machine learning projects.
Happy prompting!