Spaces:
Runtime error

A newer version of the Gradio SDK is available:
4.42.0
title: MtCNN Sysu
emoji: 📈
colorFrom: gray
colorTo: pink
sdk: gradio
sdk_version: 3.12.0
app_file: app.py
pinned: false
license: openrail
Joint Face Detection and Alignment using Multi-task Cascaded Convolutional Networks
This repo contains the code, data and trained models for the paper Joint Face Detection and Alignment using Multi-task Cascaded Convolutional Networks.
Overview
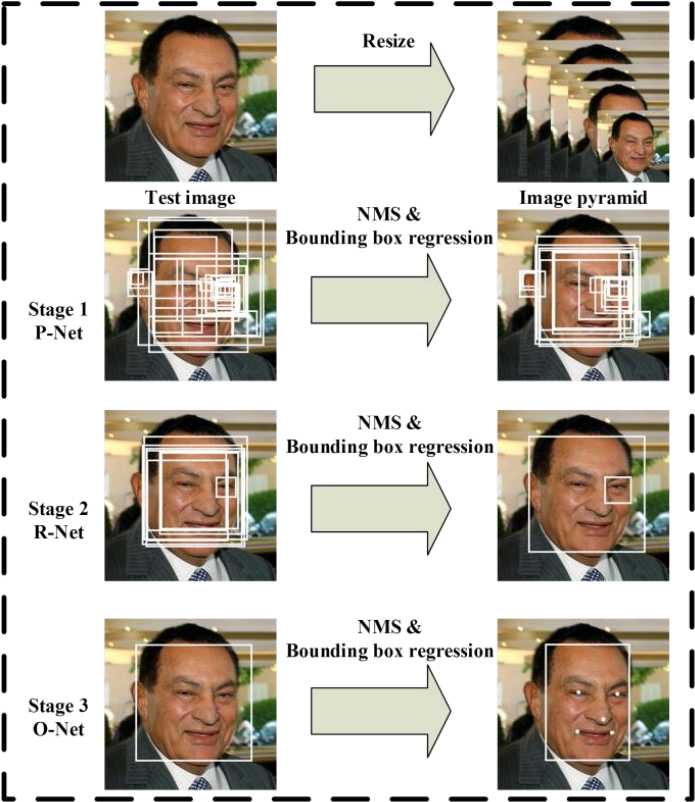
MTCNN is a popular algorithm for face detection that uses multiple neural networks to detect faces in images. It is capable of detecting faces under various lighting and pose conditions and can detect multiple faces in an image.
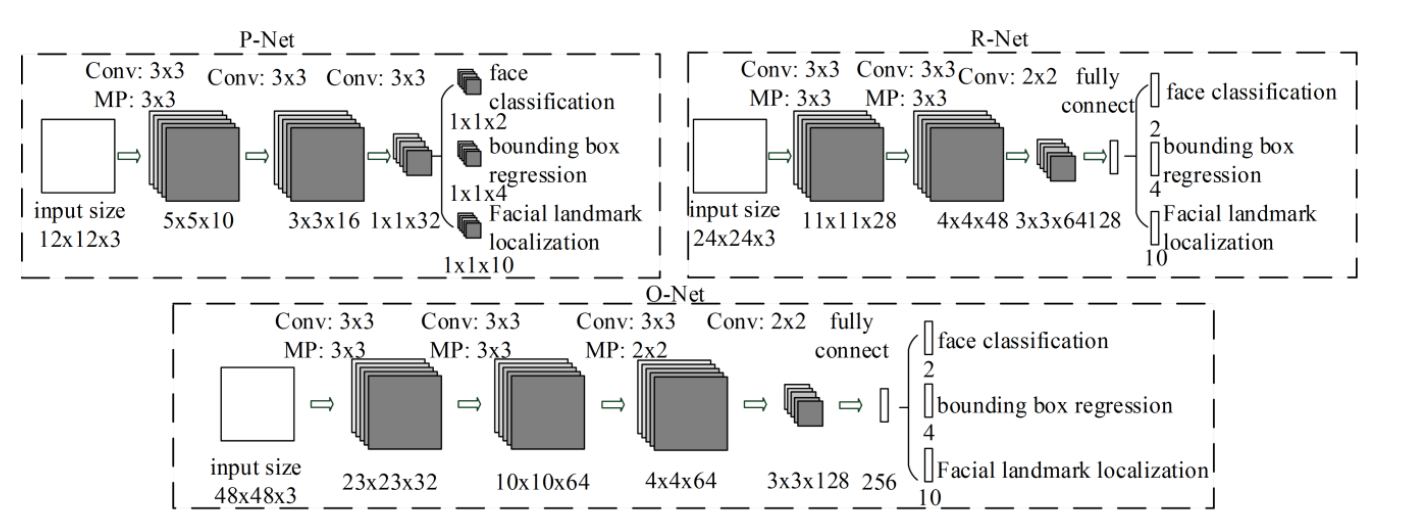
We have implemented MTCNN using the pytorch framework. Pytorch is a popular deep learning framework that provides tools for building and training neural networks.
Description of file
├── README.md                      # explanatory document
├── get_data.py                    # Generate corresponding training data depending on the input “--net”
├── img                            # mid.png is used for testing visualization effects,other images are the corresponding results.
│   ├── mid.png
│   ├── onet.png
│   ├── pnet.png
│   ├── rnet.png
│   ├── result.png
│   └── result.jpg
├── model_store                    # Our pre-trained model
│   ├── onet_epoch_20.pt
│   ├── pnet_epoch_20.pt
│   └── rnet_epoch_20.pt
├── requirements.txt               # Environmental version requirements
├── test.py                        # Specify different "--net" to get the corresponding visualization results
├── test.sh                        # Used to test mid.png, which will test the output visualization of three networks
├── train.out                      # Our complete training log for this experiment
├── train.py                       # Specify different "--net" for the training of the corresponding network
├── train.sh                       # Generate data from start to finish and train
└── utils                          # Some common tool functions and modules
    ├── config.py
    ├── dataloader.py
    ├── detect.py
    ├── models.py
    ├── tool.py
    └── vision.py
Requirements
- numpy==1.21.4
- matplotlib==3.5.0
- opencv-python==4.4.0.42
- torch==1.13.0+cu116
How to Install
conda create -n env python=3.8 -y
conda activate env
pip install -r requirements.txt
Preprocessing
- download WIDER_FACE face detection data then store it into ./data_set/face_detection
- download CNN_FacePoint face detection and landmark data then store it into ./data_set/face_landmark
Preprocessed Data
# Before training Pnet
python get_data.py --net=pnet
# Before training Rnet, please use your trained model path
python get_data.py --net=rnet --pnet_path=./model_store/pnet_epoch_20.pt
# Before training Onet, please use your trained model path
python get_data.py --net=onet --pnet_path=./model_store/pnet_epoch_20.pt --rnet_path=./model_store/rnet_epoch_20.pt
How to Run
Train
python train.py --net=pnet/rnet/onet #Specify the corresponding network to start training
bash train.sh                        #Alternatively, use the sh file to train in order
The checkpoints will be saved in a subfolder of ./model_store/*.
Finetuning from an existing checkpoint
python train.py --net=pnet/rnet/onet --load=[model path]
model path should be a subdirectory in the ./model_store/ directory, e.g. --load=./model_store/pnet_epoch_20.pt
Evaluate
Use the sh file to test in order
bash test.sh
To detect a single image
python test.py --net=pnet/rnet/onet --path=test.jpg
To detect a video stream from a camera
python test.py --input_mode=0
The result of "--net=pnet"

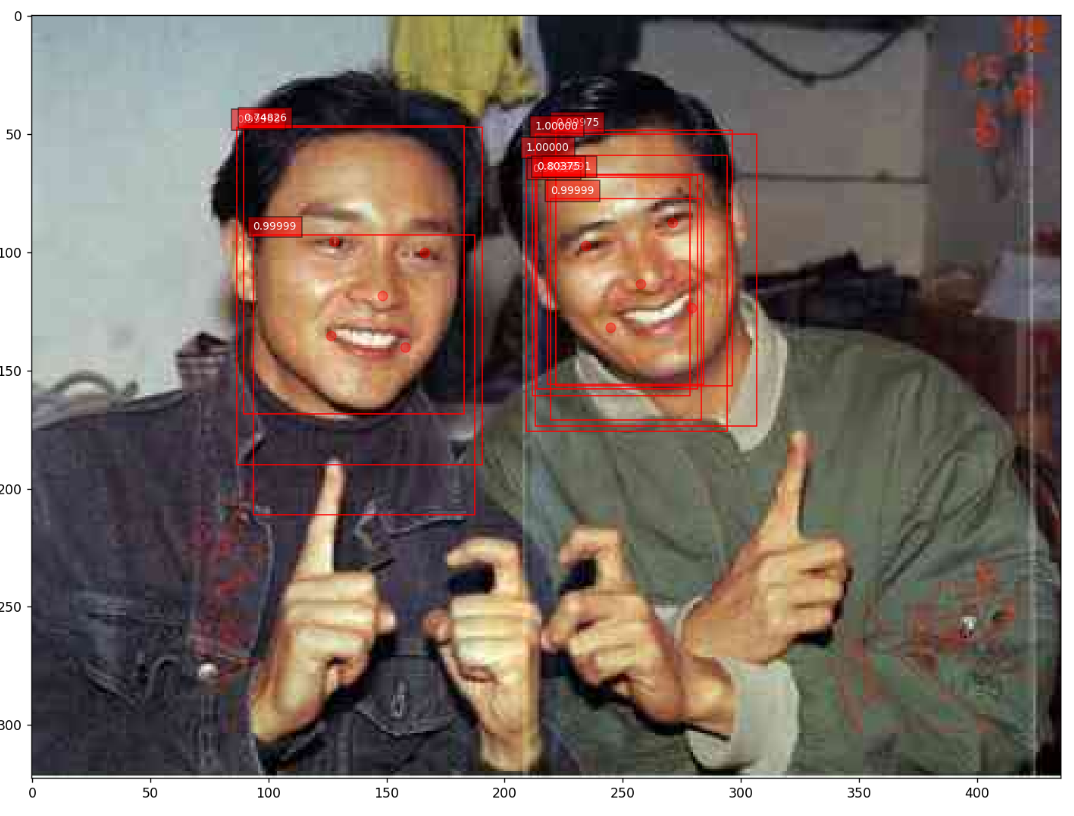
The result of "--net=rnet"
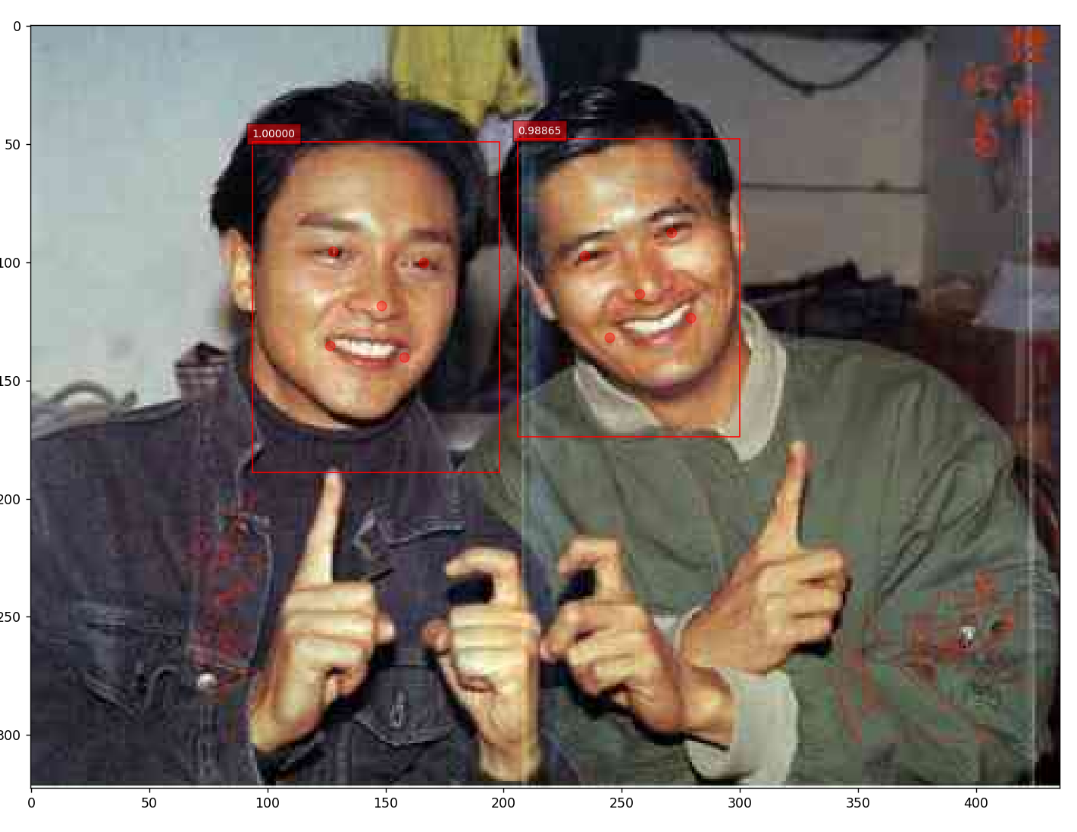
The result of "--net=onet"