Transformers.js documentation
Building a Vanilla JavaScript Application
Building a Vanilla JavaScript Application
In this tutorial, you’ll build a simple web application that detects objects in images using Transformers.js! To follow along, all you need is a code editor, a browser, and a simple server (e.g., VS Code Live Server).
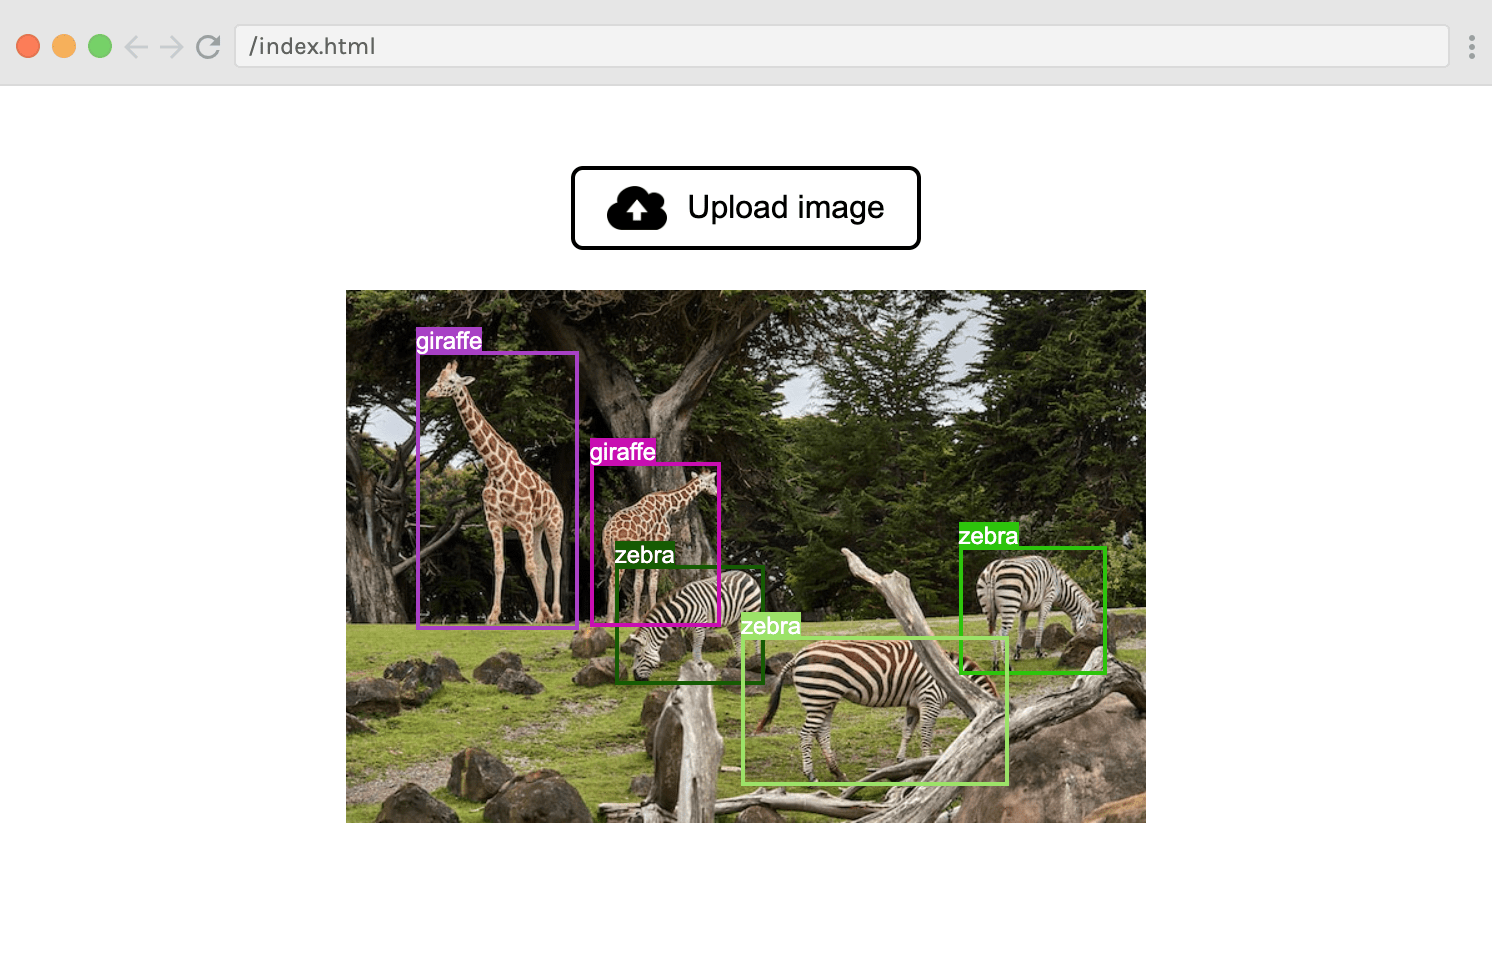
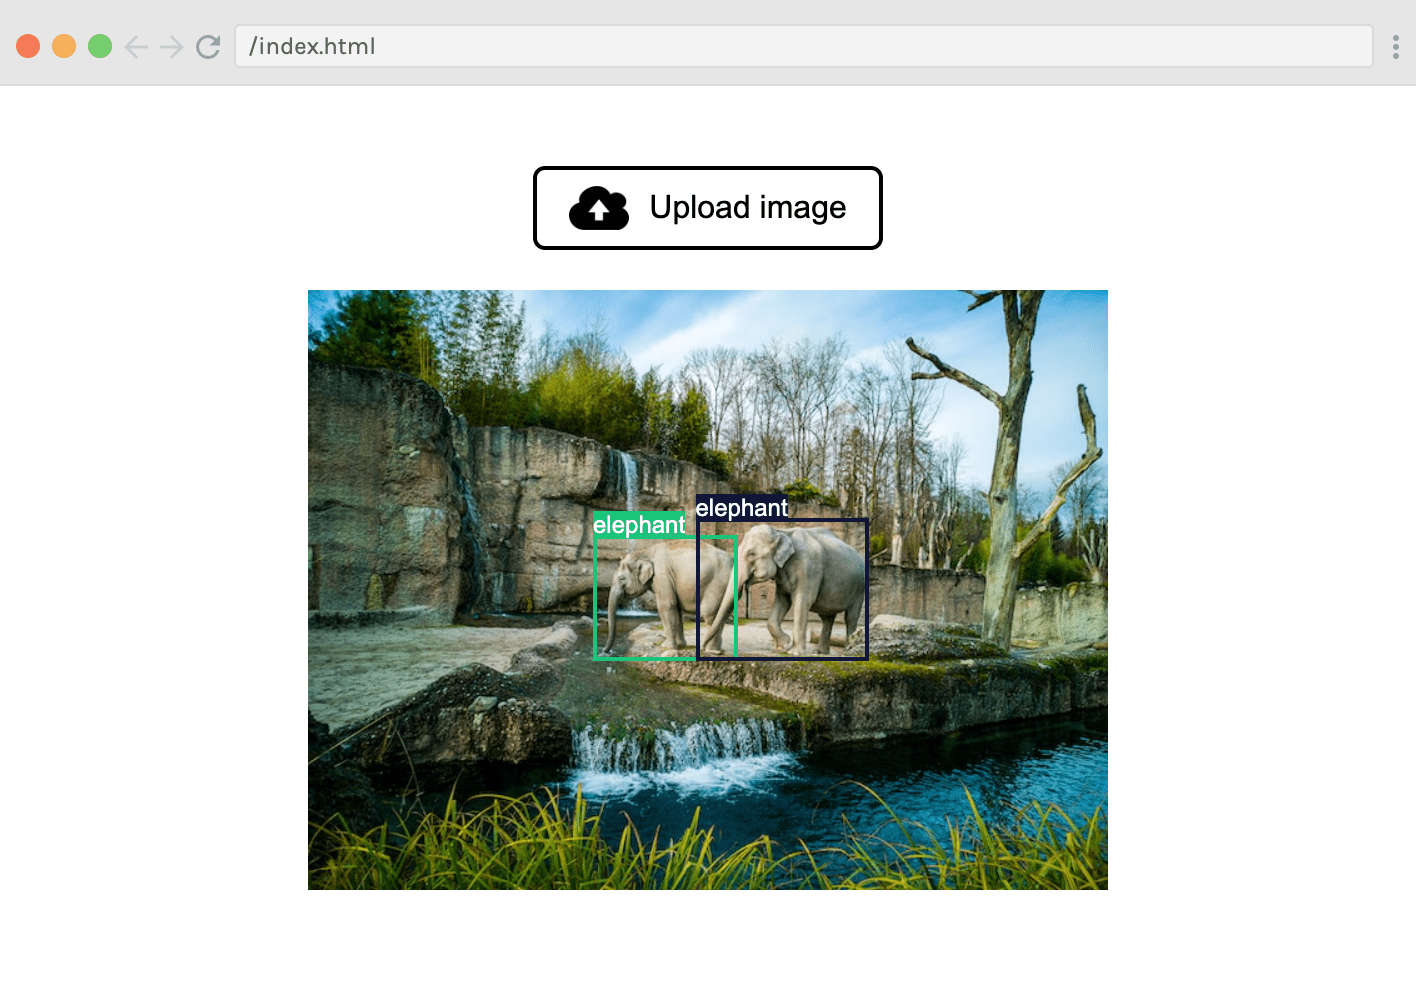
Here’s how it works: the user clicks “Upload image” and selects an image using an input dialog. After analysing the image with an object detection model, the predicted bounding boxes are overlaid on top of the image, like this:
Useful links:
Step 1: HTML and CSS setup
Before we start building with Transformers.js, we first need to lay the groundwork with some markup and styling. Create an index.html file with a basic HTML skeleton, and add the following <main> tag to the <body>:
<main class="container">
  <label class="custom-file-upload">
    <input id="file-upload" type="file" accept="image/*" />
    <img class="upload-icon" src="https://huggingface.co/datasets/Xenova/transformers.js-docs/resolve/main/upload-icon.png" />
    Upload image
  </label>
  <div id="image-container"></div>
  <p id="status"></p>
</main>
Click here to see a breakdown of this markup.
We’re adding an <input> element with type="file" that accepts images. This allows the user to select an image from their local file system using a popup dialog. The default styling for this element looks quite bad, so let’s add some styling. The easiest way to achieve this is to wrap the <input> element in a <label>, hide the input, and then style the label as a button.
We’re also adding an empty <div> container for displaying the image, plus an empty <p> tag that we’ll use to give status updates to the user while we download and run the model, since both of these operations take some time.
Next, add the following CSS rules in a style.css file and link it to the HTML:
html,
body {
font-family: Arial, Helvetica, sans-serif;
}
.container {
margin: 40px auto;
width: max(50vw, 400px);
display: flex;
flex-direction: column;
align-items: center;
}
.custom-file-upload {
display: flex;
align-items: center;
gap: 10px;
border: 2px solid black;
padding: 8px 16px;
cursor: pointer;
border-radius: 6px;
}
#file-upload {
display: none;
}
.upload-icon {
width: 30px;
}
#image-container {
width: 100%;
margin-top: 20px;
position: relative;
}
#image-container>img {
width: 100%;
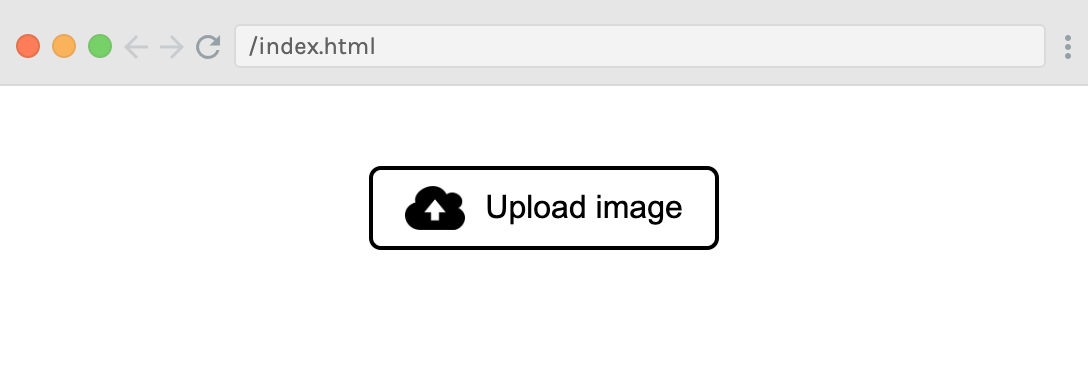
}Here’s how the UI looks at this point:
Step 2: JavaScript setup
With the boring part out of the way, let’s start writing some JavaScript code! Create a file called index.js and link to it in index.html by adding the following to the end of the <body>:
<script src="./index.js" type="module"></script>The
type="module"attribute is important, as it turns our file into a JavaScript module, meaning that we’ll be able to use imports and exports.
Moving into index.js, let’s import Transformers.js by adding the following line to the top of the file:
import { pipeline, env } from "https://cdn.jsdelivr.net/npm/@huggingface/transformers";Since we will be downloading the model from the Hugging Face Hub, we can skip the local model check by setting:
env.allowLocalModels = false;Next, let’s create references to the various DOM elements we will access later:
const fileUpload = document.getElementById("file-upload");
const imageContainer = document.getElementById("image-container");
const status = document.getElementById("status");
Step 3: Create an object detection pipeline
We’re finally ready to create our object detection pipeline! As a reminder, a pipeline. is a high-level interface provided by the library to perform a specific task. In our case, we will instantiate an object detection pipeline with the pipeline() helper function.
Since this can take some time (especially the first time when we have to download the ~40MB model), we first update the status paragraph so that the user knows that we’re about to load the model.
status.textContent = "Loading model...";To keep this tutorial simple, we’ll be loading and running the model in the main (UI) thread. This is not recommended for production applications, since the UI will freeze when we’re performing these actions. This is because JavaScript is a single-threaded language. To overcome this, you can use a web worker to download and run the model in the background. However, we’re not going to do cover that in this tutorial…
We can now call the pipeline() function that we imported at the top of our file, to create our object detection pipeline:
const detector = await pipeline("object-detection", "Xenova/detr-resnet-50");We’re passing two arguments into the pipeline() function: (1) task and (2) model.
The first tells Transformers.js what kind of task we want to perform. In our case, that is
object-detection, but there are many other tasks that the library supports, includingtext-generation,sentiment-analysis,summarization, orautomatic-speech-recognition. See here for the full list.The second argument specifies which model we would like to use to solve the given task. We will use
Xenova/detr-resnet-50, as it is a relatively small (~40MB) but powerful model for detecting objects in an image.
Once the function returns, we’ll tell the user that the app is ready to be used.
status.textContent = "Ready";Step 4: Create the image uploader
The next step is to support uploading/selection of images. To achieve this, we will listen for “change” events from the fileUpload element. In the callback function, we use a FileReader() to read the contents of the image if one is selected (and nothing otherwise).
fileUpload.addEventListener("change", function (e) {
  const file = e.target.files[0];
  if (!file) {
    return;
  }

  const reader = new FileReader();

  // Set up a callback when the file is loaded
  reader.onload = function (e2) {
    imageContainer.innerHTML = "";
    const image = document.createElement("img");
    image.src = e2.target.result;
    imageContainer.appendChild(image);
    // detect(image); // Uncomment this line to run the model
  };
  reader.readAsDataURL(file);
});
Once the image has been loaded into the browser, the reader.onload callback function will be invoked. In it, we append the new <img> element to the imageContainer to be displayed to the user.
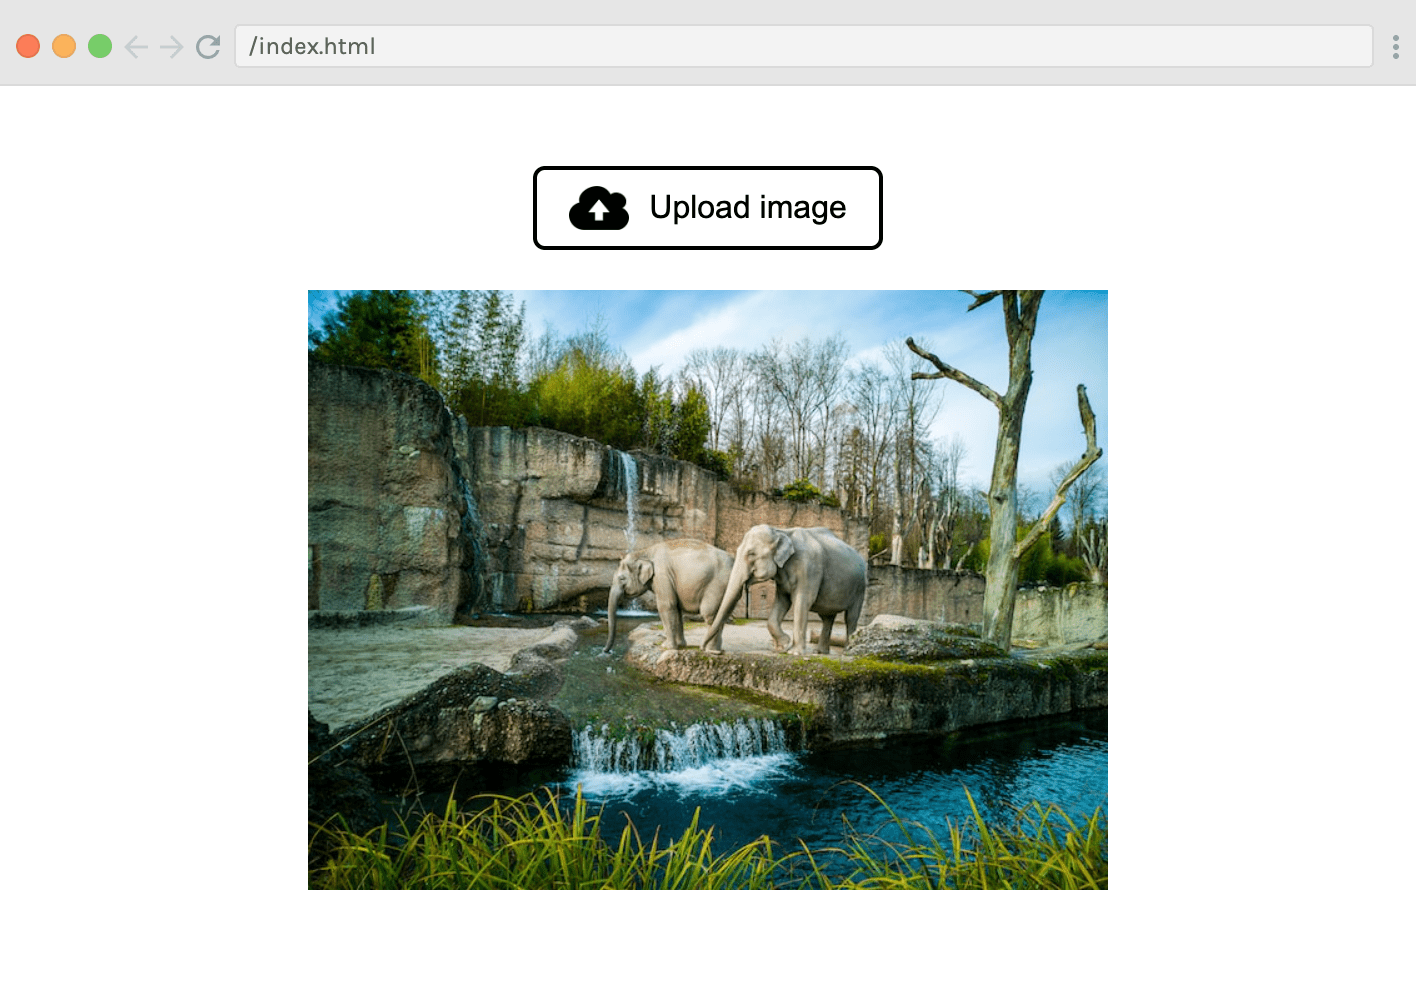
Don’t worry about the detect(image) function call (which is commented out) - we will explain it later! For now, try to run the app and upload an image to the browser. You should see your image displayed under the button like this:
Step 5: Run the model
We’re finally ready to start interacting with Transformers.js! Let’s uncomment the detect(image) function call from the snippet above. Then we’ll define the function itself:
async function detect(img) {
  status.textContent = "Analysing...";
  const output = await detector(img.src, {
    threshold: 0.5,
    percentage: true,
  });
  status.textContent = "";
  console.log("output", output);
  // ...
}
NOTE: The
detectfunction needs to be asynchronous, since we’llawaitthe result of the the model.
Once we’ve updated the status to “Analysing”, we’re ready to perform inference, which simply means to run the model with some data. This is done via the detector() function that was returned from pipeline(). The first argument we’re passing is the image data (img.src).
The second argument is an options object:
- We set the
thresholdproperty to0.5. This means that we want the model to be at least 50% confident before claiming it has detected an object in the image. The lower the threshold, the more objects it’ll detect (but may misidentify objects); the higher the threshold, the fewer objects it’ll detect (but may miss objects in the scene). - We also specify
percentage: true, which means that we want the bounding box for the objects to be returned as percentages (instead of pixels).
If you now try to run the app and upload an image, you should see the following output logged to the console:
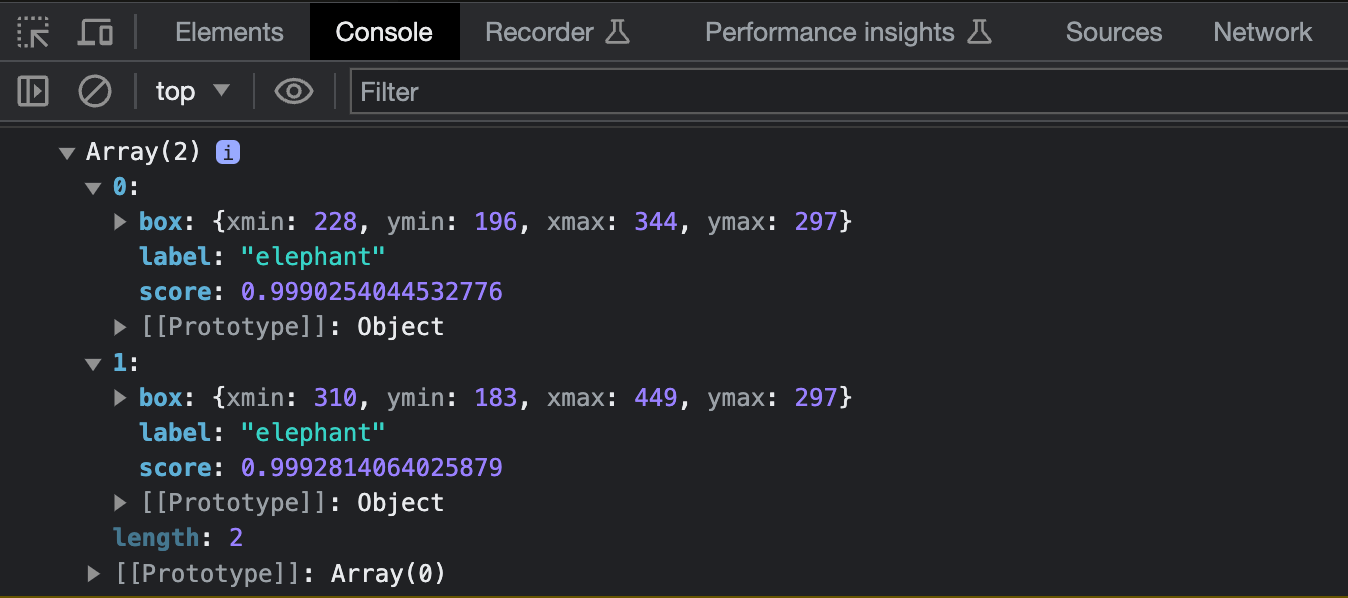
In the example above, we uploaded an image of two elephants, so the output variable holds an array with two objects, each containing a label (the string “elephant”), a score (indicating the model’s confidence in its prediction) and a box object (representing the bounding box of the detected entity).
Step 6: Render the boxes
The final step is to display the box coordinates as rectangles around each of the elephants.
At the end of our detect() function, we’ll run the renderBox function on each object in the output array, using .forEach().
output.forEach(renderBox);Here’s the code for the renderBox() function with comments to help you understand what’s going on:
// Render a bounding box and label on the image
function renderBox({ box, label }) {
  const { xmax, xmin, ymax, ymin } = box;

  // Generate a random color for the box
  const color = "#" + Math.floor(Math.random() * 0xffffff).toString(16).padStart(6, 0);

  // Draw the box
  const boxElement = document.createElement("div");
  boxElement.className = "bounding-box";
  Object.assign(boxElement.style, {
    borderColor: color,
    left: 100 * xmin + "%",
    top: 100 * ymin + "%",
    width: 100 * (xmax - xmin) + "%",
    height: 100 * (ymax - ymin) + "%",
  });

  // Draw the label
  const labelElement = document.createElement("span");
  labelElement.textContent = label;
  labelElement.className = "bounding-box-label";
  labelElement.style.backgroundColor = color;

  boxElement.appendChild(labelElement);
  imageContainer.appendChild(boxElement);
}
The bounding box and label span also need some styling, so add the following to the style.css file:
.bounding-box {
    position: absolute;
    box-sizing: border-box;
    border-width: 2px;
    border-style: solid;
}

.bounding-box-label {
    color: white;
    position: absolute;
    font-size: 12px;
    margin-top: -16px;
    margin-left: -2px;
    padding: 1px;
}
And that’s it!
You’ve now built your own fully-functional AI application that detects objects in images, which runns completely in your browser: no external server, APIs, or build tools. Pretty cool! 🥳
The app is live at the following URL: https://huggingface.co/spaces/Scrimba/vanilla-js-object-detector
Update on GitHub