Diffusers documentation
DiffEdit
DiffEdit
이미지 편집을 하려면 일반적으로 편집할 영역의 마스크를 제공해야 합니다. DiffEdit는 텍스트 쿼리를 기반으로 마스크를 자동으로 생성하므로 이미지 편집 소프트웨어 없이도 마스크를 만들기가 전반적으로 더 쉬워집니다. DiffEdit 알고리즘은 세 단계로 작동합니다:
- Diffusion 모델이 일부 쿼리 텍스트와 참조 텍스트를 조건부로 이미지의 노이즈를 제거하여 이미지의 여러 영역에 대해 서로 다른 노이즈 추정치를 생성하고, 그 차이를 사용하여 쿼리 텍스트와 일치하도록 이미지의 어느 영역을 변경해야 하는지 식별하기 위한 마스크를 추론합니다.
- 입력 이미지가 DDIM을 사용하여 잠재 공간으로 인코딩됩니다.
- 마스크 외부의 픽셀이 입력 이미지와 동일하게 유지되도록 마스크를 가이드로 사용하여 텍스트 쿼리에 조건이 지정된 diffusion 모델로 latents를 디코딩합니다.
이 가이드에서는 마스크를 수동으로 만들지 않고 DiffEdit를 사용하여 이미지를 편집하는 방법을 설명합니다.
시작하기 전에 다음 라이브러리가 설치되어 있는지 확인하세요:
# Colab에서 필요한 라이브러리를 설치하기 위해 주석을 제외하세요
#!pip install -q diffusers transformers accelerateStableDiffusionDiffEditPipeline에는 이미지 마스크와 부분적으로 반전된 latents 집합이 필요합니다. 이미지 마스크는 generate_mask() 함수에서 생성되며, 두 개의 파라미터인 source_prompt와 target_prompt가 포함됩니다. 이 매개변수는 이미지에서 무엇을 편집할지 결정합니다. 예를 들어, 과일 한 그릇을 배 한 그릇으로 변경하려면 다음과 같이 하세요:
source_prompt = "a bowl of fruits"
target_prompt = "a bowl of pears"
부분적으로 반전된 latents는 invert() 함수에서 생성되며, 일반적으로 이미지를 설명하는 prompt 또는 캡션을 포함하는 것이 inverse latent sampling 프로세스를 가이드하는 데 도움이 됩니다. 캡션은 종종 source_prompt가 될 수 있지만, 다른 텍스트 설명으로 자유롭게 실험해 보세요!
파이프라인, 스케줄러, 역 스케줄러를 불러오고 메모리 사용량을 줄이기 위해 몇 가지 최적화를 활성화해 보겠습니다:
import torch
from diffusers import DDIMScheduler, DDIMInverseScheduler, StableDiffusionDiffEditPipeline
pipeline = StableDiffusionDiffEditPipeline.from_pretrained(
"stabilityai/stable-diffusion-2-1",
torch_dtype=torch.float16,
safety_checker=None,
use_safetensors=True,
)
pipeline.scheduler = DDIMScheduler.from_config(pipeline.scheduler.config)
pipeline.inverse_scheduler = DDIMInverseScheduler.from_config(pipeline.scheduler.config)
pipeline.enable_model_cpu_offload()
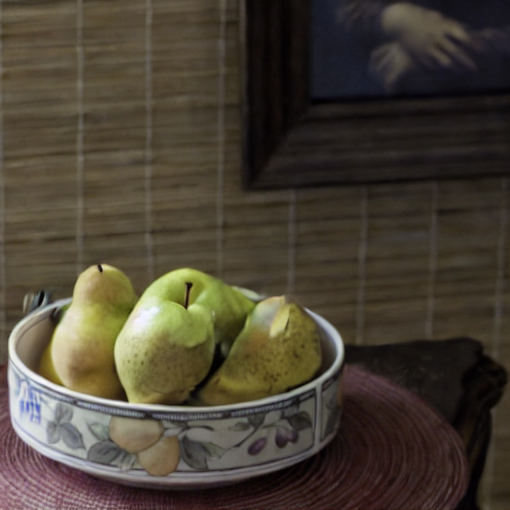
pipeline.enable_vae_slicing()수정하기 위한 이미지를 불러옵니다:
from diffusers.utils import load_image, make_image_grid

img_url = "https://github.com/Xiang-cd/DiffEdit-stable-diffusion/raw/main/assets/origin.png"
raw_image = load_image(img_url).resize((768, 768))
raw_image
이미지 마스크를 생성하기 위해 generate_mask() 함수를 사용합니다. 이미지에서 편집할 내용을 지정하기 위해 source_prompt와 target_prompt를 전달해야 합니다:
from PIL import Image

source_prompt = "a bowl of fruits"
target_prompt = "a basket of pears"
mask_image = pipeline.generate_mask(
    image=raw_image,
    source_prompt=source_prompt,
    target_prompt=target_prompt,
)
Image.fromarray((mask_image.squeeze()*255).astype("uint8"), "L").resize((768, 768))
다음으로, 반전된 latents를 생성하고 이미지를 묘사하는 캡션에 전달합니다:
inv_latents = pipeline.invert(prompt=source_prompt, image=raw_image).latents
마지막으로, 이미지 마스크와 반전된 latents를 파이프라인에 전달합니다. target_prompt는 이제 prompt가 되며, source_prompt는 negative_prompt로 사용됩니다.
output_image = pipeline(
    prompt=target_prompt,
    mask_image=mask_image,
    image_latents=inv_latents,
    negative_prompt=source_prompt,
).images[0]
mask_image = Image.fromarray((mask_image.squeeze()*255).astype("uint8"), "L").resize((768, 768))
make_image_grid([raw_image, mask_image, output_image], rows=1, cols=3)
Source와 target 임베딩 생성하기
Source와 target 임베딩은 수동으로 생성하는 대신 Flan-T5 모델을 사용하여 자동으로 생성할 수 있습니다.
Flan-T5 모델과 토크나이저를 🤗 Transformers 라이브러리에서 불러옵니다:
import torch
from transformers import AutoTokenizer, T5ForConditionalGeneration

tokenizer = AutoTokenizer.from_pretrained("google/flan-t5-large")
model = T5ForConditionalGeneration.from_pretrained("google/flan-t5-large", device_map="auto", torch_dtype=torch.float16)
모델에 프롬프트할 source와 target 프롬프트를 생성하기 위해 초기 텍스트들을 제공합니다.
source_concept = "bowl"
target_concept = "basket"

source_text = f"Provide a caption for images containing a {source_concept}. "
"The captions should be in English and should be no longer than 150 characters."

target_text = f"Provide a caption for images containing a {target_concept}. "
"The captions should be in English and should be no longer than 150 characters."
다음으로, 프롬프트들을 생성하기 위해 유틸리티 함수를 생성합니다.
@torch.no_grad()
def generate_prompts(input_prompt):
    input_ids = tokenizer(input_prompt, return_tensors="pt").input_ids.to("cuda")

    outputs = model.generate(
        input_ids, temperature=0.8, num_return_sequences=16, do_sample=True, max_new_tokens=128, top_k=10
    )
    return tokenizer.batch_decode(outputs, skip_special_tokens=True)

source_prompts = generate_prompts(source_text)
target_prompts = generate_prompts(target_text)
print(source_prompts)
print(target_prompts)
다양한 품질의 텍스트를 생성하는 전략에 대해 자세히 알아보려면 생성 전략 가이드를 참조하세요.
텍스트 인코딩을 위해 StableDiffusionDiffEditPipeline에서 사용하는 텍스트 인코더 모델을 불러옵니다. 텍스트 인코더를 사용하여 텍스트 임베딩을 계산합니다:
import torch
from diffusers import StableDiffusionDiffEditPipeline

pipeline = StableDiffusionDiffEditPipeline.from_pretrained(
    "stabilityai/stable-diffusion-2-1", torch_dtype=torch.float16, use_safetensors=True
)
pipeline.enable_model_cpu_offload()
pipeline.enable_vae_slicing()

@torch.no_grad()
def embed_prompts(sentences, tokenizer, text_encoder, device="cuda"):
    embeddings = []
    for sent in sentences:
        text_inputs = tokenizer(
            sent,
            padding="max_length",
            max_length=tokenizer.model_max_length,
            truncation=True,
            return_tensors="pt",
        )
        text_input_ids = text_inputs.input_ids
        prompt_embeds = text_encoder(text_input_ids.to(device), attention_mask=None)[0]
        embeddings.append(prompt_embeds)
    return torch.concatenate(embeddings, dim=0).mean(dim=0).unsqueeze(0)

source_embeds = embed_prompts(source_prompts, pipeline.tokenizer, pipeline.text_encoder)
target_embeds = embed_prompts(target_prompts, pipeline.tokenizer, pipeline.text_encoder)
마지막으로, 임베딩을 generate_mask() 및 invert() 함수와 파이프라인에 전달하여 이미지를 생성합니다:
  from diffusers import DDIMInverseScheduler, DDIMScheduler
  from diffusers.utils import load_image, make_image_grid
  from PIL import Image

  pipeline.scheduler = DDIMScheduler.from_config(pipeline.scheduler.config)
  pipeline.inverse_scheduler = DDIMInverseScheduler.from_config(pipeline.scheduler.config)

  img_url = "https://github.com/Xiang-cd/DiffEdit-stable-diffusion/raw/main/assets/origin.png"
  raw_image = load_image(img_url).resize((768, 768))

  mask_image = pipeline.generate_mask(
      image=raw_image,
-     source_prompt=source_prompt,
-     target_prompt=target_prompt,
+     source_prompt_embeds=source_embeds,
+     target_prompt_embeds=target_embeds,
  )

  inv_latents = pipeline.invert(
-     prompt=source_prompt,
+     prompt_embeds=source_embeds,
      image=raw_image,
  ).latents

  output_image = pipeline(
      mask_image=mask_image,
      image_latents=inv_latents,
-     prompt=target_prompt,
-     negative_prompt=source_prompt,
+     prompt_embeds=target_embeds,
+     negative_prompt_embeds=source_embeds,
  ).images[0]
  mask_image = Image.fromarray((mask_image.squeeze()*255).astype("uint8"), "L")
  make_image_grid([raw_image, mask_image, output_image], rows=1, cols=3)
반전을 위한 캡션 생성하기
source_prompt를 캡션으로 사용하여 부분적으로 반전된 latents를 생성할 수 있지만, BLIP 모델을 사용하여 캡션을 자동으로 생성할 수도 있습니다.
🤗 Transformers 라이브러리에서 BLIP 모델과 프로세서를 불러옵니다:
import torch
from transformers import BlipForConditionalGeneration, BlipProcessor

processor = BlipProcessor.from_pretrained("Salesforce/blip-image-captioning-base")
model = BlipForConditionalGeneration.from_pretrained("Salesforce/blip-image-captioning-base", torch_dtype=torch.float16, low_cpu_mem_usage=True)
입력 이미지에서 캡션을 생성하는 유틸리티 함수를 만듭니다:
@torch.no_grad()
def generate_caption(images, caption_generator, caption_processor):
    text = "a photograph of"

    inputs = caption_processor(images, text, return_tensors="pt").to(device="cuda", dtype=caption_generator.dtype)
    caption_generator.to("cuda")
    outputs = caption_generator.generate(**inputs, max_new_tokens=128)

    # 캡션 generator 오프로드
    caption_generator.to("cpu")

    caption = caption_processor.batch_decode(outputs, skip_special_tokens=True)[0]
    return caption
입력 이미지를 불러오고 generate_caption 함수를 사용하여 해당 이미지에 대한 캡션을 생성합니다:
from diffusers.utils import load_image

img_url = "https://github.com/Xiang-cd/DiffEdit-stable-diffusion/raw/main/assets/origin.png"
raw_image = load_image(img_url).resize((768, 768))
caption = generate_caption(raw_image, model, processor) 이제 캡션을 invert() 함수에 놓아 부분적으로 반전된 latents를 생성할 수 있습니다!