Diffusers documentation
有效且高效的扩散
有效且高效的扩散
让 DiffusionPipeline 生成特定风格或包含你所想要的内容的图像可能会有些棘手。 通常情况下,你需要多次运行 DiffusionPipeline 才能得到满意的图像。但是从无到有生成图像是一个计算密集的过程,特别是如果你要一遍又一遍地进行推理运算。
这就是为什么从pipeline中获得最高的 computational (speed) 和 memory (GPU RAM) 非常重要 ,以减少推理周期之间的时间,从而使迭代速度更快。
本教程将指导您如何通过 DiffusionPipeline 更快、更好地生成图像。
首先,加载 stable-diffusion-v1-5/stable-diffusion-v1-5 模型:
from diffusers import DiffusionPipeline

model_id = "stable-diffusion-v1-5/stable-diffusion-v1-5"
pipeline = DiffusionPipeline.from_pretrained(model_id, use_safetensors=True)
本教程将使用的提示词是 portrait photo of a old warrior chief ,但是你可以随心所欲的想象和构造自己的提示词:
prompt = "portrait photo of a old warrior chief"速度
💡 如果你没有 GPU, 你可以从像 Colab 这样的 GPU 提供商获取免费的 GPU !
加速推理的最简单方法之一是将 pipeline 放在 GPU 上 ,就像使用任何 PyTorch 模块一样:
pipeline = pipeline.to("cuda")为了确保您可以使用相同的图像并对其进行改进,使用 Generator 方法,然后设置一个随机数种子 以确保其 复现性:
import torch

generator = torch.Generator("cuda").manual_seed(0)
现在,你可以生成一个图像:
image = pipeline(prompt, generator=generator).images[0]
image
在 T4 GPU 上,这个过程大概要30秒(如果你的 GPU 比 T4 好,可能会更快)。在默认情况下,DiffusionPipeline 使用完整的 float32 精度进行 50 步推理。你可以通过降低精度(如 float16 )或者减少推理步数来加速整个过程
让我们把模型的精度降低至 float16 ,然后生成一张图像:
import torch

pipeline = DiffusionPipeline.from_pretrained(model_id, torch_dtype=torch.float16, use_safetensors=True)
pipeline = pipeline.to("cuda")
generator = torch.Generator("cuda").manual_seed(0)
image = pipeline(prompt, generator=generator).images[0]
image
这一次,生成图像只花了约 11 秒,比之前快了近 3 倍!
💡 我们强烈建议把 pipeline 精度降低至
float16, 到目前为止, 我们很少看到输出质量有任何下降。
另一个选择是减少推理步数。 你可以选择一个更高效的调度器 (scheduler) 可以减少推理步数同时保证输出质量。您可以在 [DiffusionPipeline] 中通过调用compatibles方法找到与当前模型兼容的调度器 (scheduler)。
pipeline.scheduler.compatibles
[
    diffusers.schedulers.scheduling_lms_discrete.LMSDiscreteScheduler,
    diffusers.schedulers.scheduling_unipc_multistep.UniPCMultistepScheduler,
    diffusers.schedulers.scheduling_k_dpm_2_discrete.KDPM2DiscreteScheduler,
    diffusers.schedulers.scheduling_deis_multistep.DEISMultistepScheduler,
    diffusers.schedulers.scheduling_euler_discrete.EulerDiscreteScheduler,
    diffusers.schedulers.scheduling_dpmsolver_multistep.DPMSolverMultistepScheduler,
    diffusers.schedulers.scheduling_ddpm.DDPMScheduler,
    diffusers.schedulers.scheduling_dpmsolver_singlestep.DPMSolverSinglestepScheduler,
    diffusers.schedulers.scheduling_k_dpm_2_ancestral_discrete.KDPM2AncestralDiscreteScheduler,
    diffusers.schedulers.scheduling_heun_discrete.HeunDiscreteScheduler,
    diffusers.schedulers.scheduling_pndm.PNDMScheduler,
    diffusers.schedulers.scheduling_euler_ancestral_discrete.EulerAncestralDiscreteScheduler,
    diffusers.schedulers.scheduling_ddim.DDIMScheduler,
]
Stable Diffusion 模型默认使用的是 PNDMScheduler ,通常要大概50步推理, 但是像 DPMSolverMultistepScheduler 这样更高效的调度器只要大概 20 或 25 步推理. 使用 ConfigMixin.from_config() 方法加载新的调度器:
from diffusers import DPMSolverMultistepScheduler

pipeline.scheduler = DPMSolverMultistepScheduler.from_config(pipeline.scheduler.config)
现在将 num_inference_steps 设置为 20:
generator = torch.Generator("cuda").manual_seed(0)
image = pipeline(prompt, generator=generator, num_inference_steps=20).images[0]
image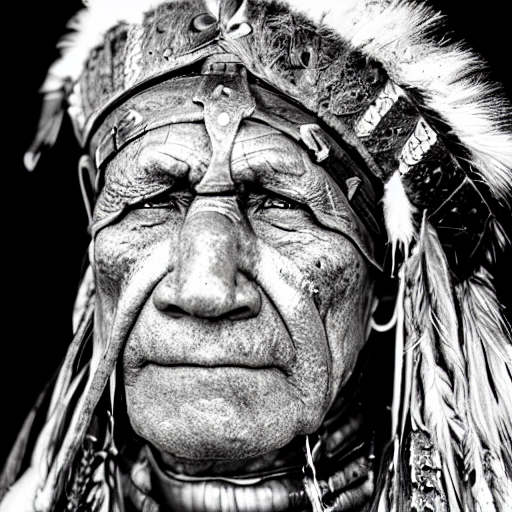
太棒了!你成功把推理时间缩短到 4 秒!⚡️
内存
改善 pipeline 性能的另一个关键是减少内存的使用量,这间接意味着速度更快,因为你经常试图最大化每秒生成的图像数量。要想知道你一次可以生成多少张图片,最简单的方法是尝试不同的batch size,直到出现OutOfMemoryError (OOM)。
创建一个函数,为每一批要生成的图像分配提示词和 Generators 。请务必为每个Generator 分配一个种子,以便于复现良好的结果。
def get_inputs(batch_size=1):
    generator = [torch.Generator("cuda").manual_seed(i) for i in range(batch_size)]
    prompts = batch_size * [prompt]
    num_inference_steps = 20

    return {"prompt": prompts, "generator": generator, "num_inference_steps": num_inference_steps}
设置 batch_size=4 ,然后看一看我们消耗了多少内存:
from diffusers.utils import make_image_grid

images = pipeline(**get_inputs(batch_size=4)).images
make_image_grid(images, 2, 2)
除非你有一个更大内存的GPU, 否则上述代码会返回 OOM 错误! 大部分内存被 cross-attention 层使用。按顺序运行可以节省大量内存,而不是在批处理中进行。你可以为 pipeline 配置 enable_attention_slicing() 函数:
pipeline.enable_attention_slicing()
现在尝试把 batch_size 增加到 8!
images = pipeline(**get_inputs(batch_size=8)).images
make_image_grid(images, rows=2, cols=4)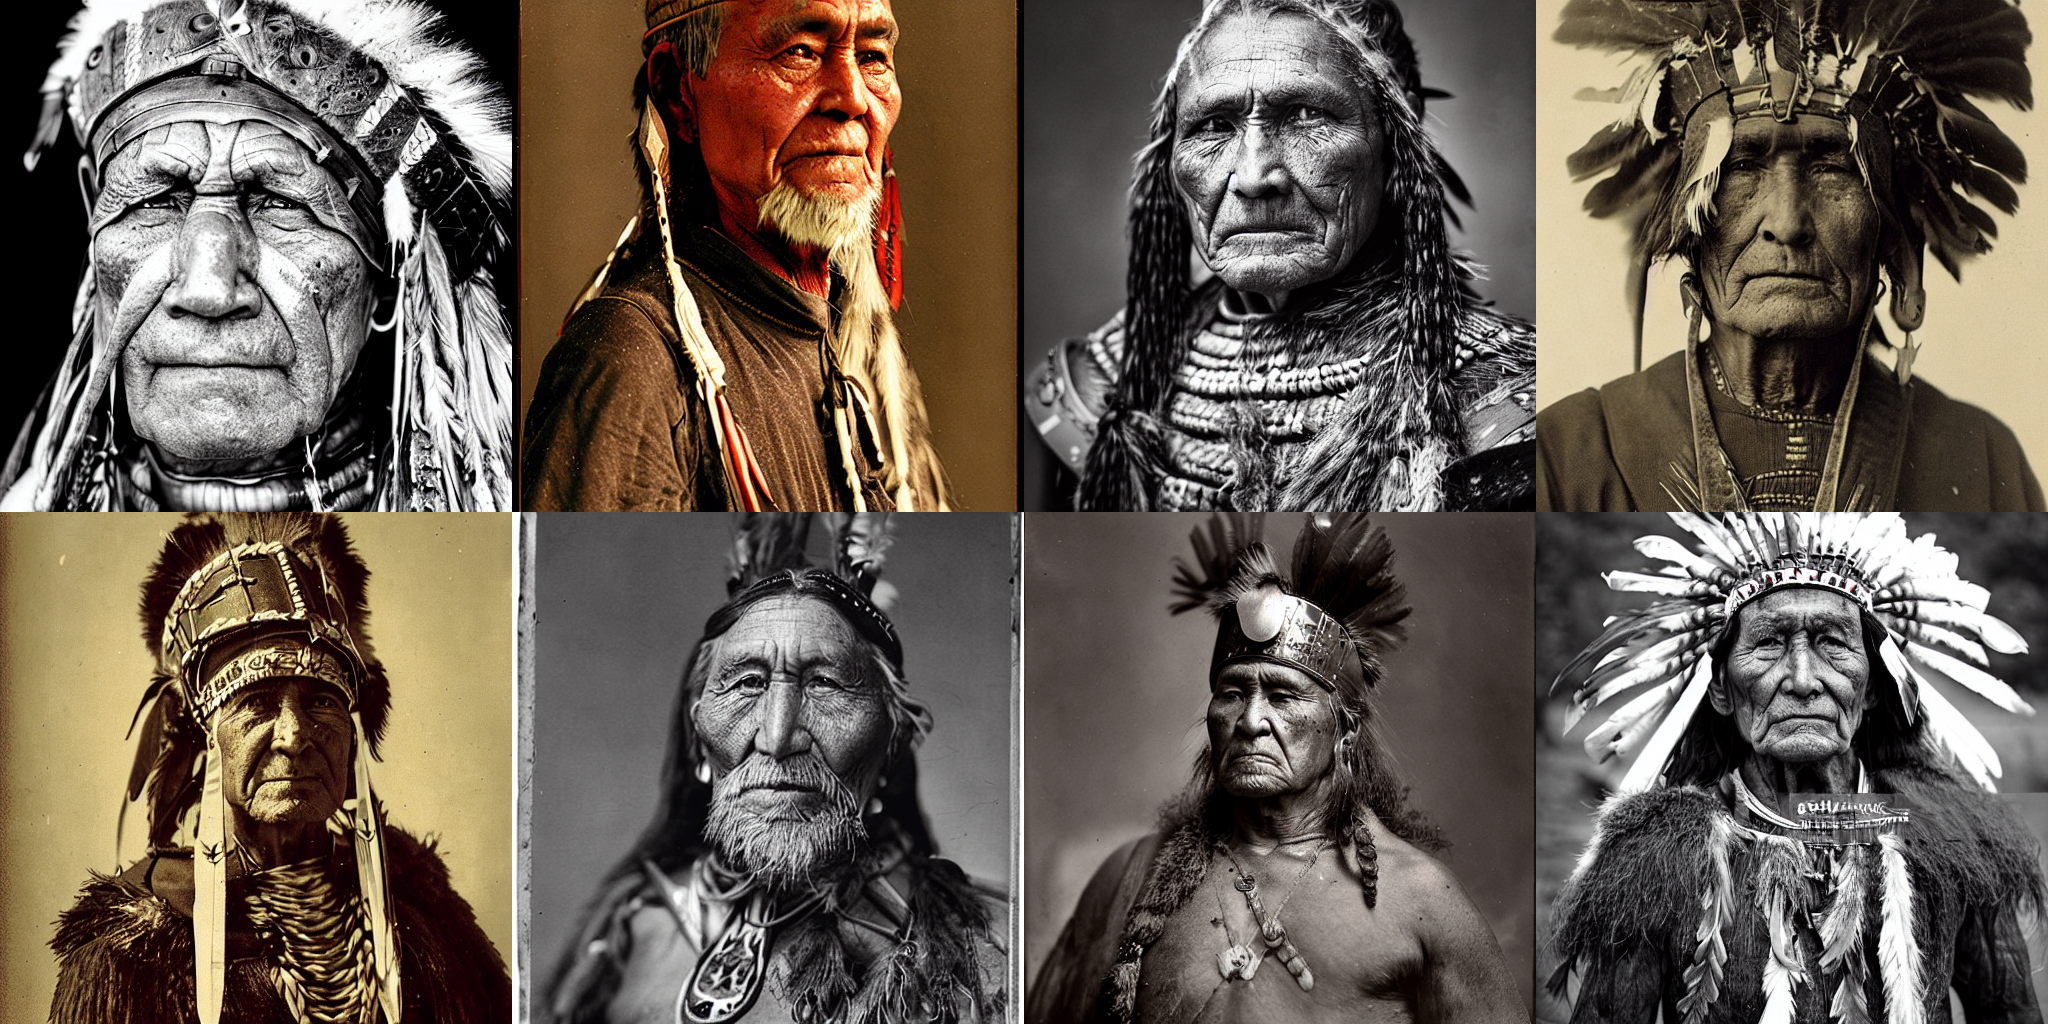
以前你不能一批生成 4 张图片,而现在你可以在一张图片里面生成八张图片而只需要大概3.5秒!这可能是 T4 GPU 在不牺牲质量的情况运行速度最快的一种方法。
质量
在最后两节中, 你要学习如何通过 fp16 来优化 pipeline 的速度, 通过使用性能更高的调度器来减少推理步数, 使用注意力切片(enabling attention slicing)方法来节省内存。现在,你将关注的是如何提高图像的质量。
更好的 checkpoints
有个显而易见的方法是使用更好的 checkpoints。 Stable Diffusion 模型是一个很好的起点, 自正式发布以来,还发布了几个改进版本。然而, 使用更新的版本并不意味着你会得到更好的结果。你仍然需要尝试不同的 checkpoints ,并做一些研究 (例如使用 negative prompts) 来获得更好的结果。
随着该领域的发展, 有越来越多经过微调的高质量的 checkpoints 用来生成不一样的风格. 在 Hub 和 Diffusers Gallery 寻找你感兴趣的一种!
更好的 pipeline 组件
也可以尝试用新版本替换当前 pipeline 组件。让我们加载最新的 autodecoder 从 Stability AI 加载到 pipeline, 并生成一些图像:
from diffusers import AutoencoderKL

vae = AutoencoderKL.from_pretrained("stabilityai/sd-vae-ft-mse", torch_dtype=torch.float16).to("cuda")
pipeline.vae = vae
images = pipeline(**get_inputs(batch_size=8)).images
make_image_grid(images, rows=2, cols=4)
更好的提示词工程
用于生成图像的文本非常重要, 因此被称为 提示词工程。 在设计提示词工程应注意如下事项:
- 我想生成的图像或类似图像如何存储在互联网上?
- 我可以提供哪些额外的细节来引导模型朝着我想要的风格生成?
考虑到这一点,让我们改进提示词,以包含颜色和更高质量的细节:
prompt += ", tribal panther make up, blue on red, side profile, looking away, serious eyes"
prompt += " 50mm portrait photography, hard rim lighting photography--beta --ar 2:3  --beta --upbeta"
使用新的提示词生成一批图像:
images = pipeline(**get_inputs(batch_size=8)).images
make_image_grid(images, rows=2, cols=4)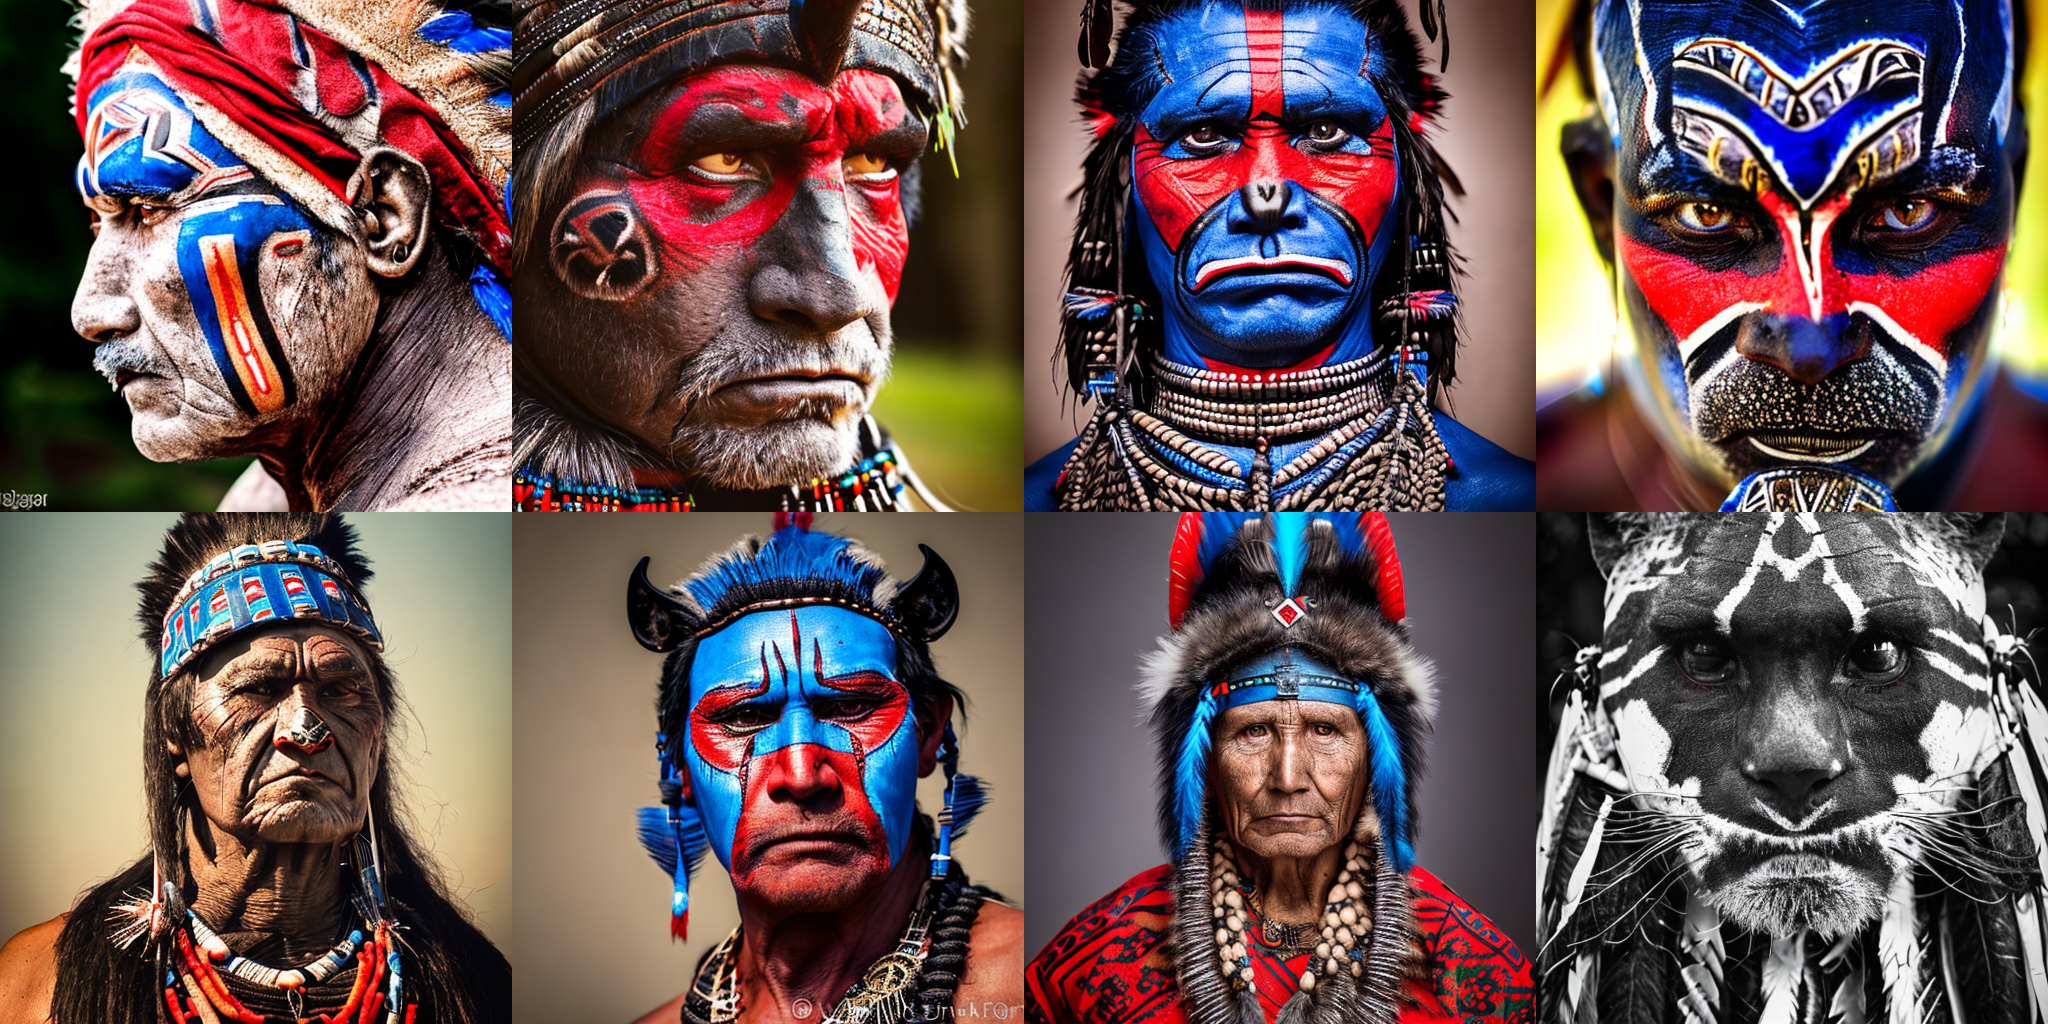
非常的令人印象深刻! Let’s tweak the second image - 把 Generator 的种子设置为 1 - 添加一些关于年龄的主题文本:
prompts = [
    "portrait photo of the oldest warrior chief, tribal panther make up, blue on red, side profile, looking away, serious eyes 50mm portrait photography, hard rim lighting photography--beta --ar 2:3  --beta --upbeta",
    "portrait photo of a old warrior chief, tribal panther make up, blue on red, side profile, looking away, serious eyes 50mm portrait photography, hard rim lighting photography--beta --ar 2:3  --beta --upbeta",
    "portrait photo of a warrior chief, tribal panther make up, blue on red, side profile, looking away, serious eyes 50mm portrait photography, hard rim lighting photography--beta --ar 2:3  --beta --upbeta",
    "portrait photo of a young warrior chief, tribal panther make up, blue on red, side profile, looking away, serious eyes 50mm portrait photography, hard rim lighting photography--beta --ar 2:3  --beta --upbeta",
]

generator = [torch.Generator("cuda").manual_seed(1) for _ in range(len(prompts))]
images = pipeline(prompt=prompts, generator=generator, num_inference_steps=25).images
make_image_grid(images, 2, 2)
最后
在本教程中, 您学习了如何优化DiffusionPipeline以提高计算和内存效率,以及提高生成输出的质量. 如果你有兴趣让你的 pipeline 更快, 可以看一看以下资源:
- 学习 PyTorch 2.0 和
torch.compile可以让推理速度提高 5 - 300% . 在 A100 GPU 上, 推理速度可以提高 50% ! - 如果你没法用 PyTorch 2, 我们建议你安装 xFormers。它的内存高效注意力机制(memory-efficient attention mechanism)与PyTorch 1.13.1配合使用,速度更快,内存消耗更少。
- 其他的优化技术, 如:模型卸载(model offloading), 包含在 这份指南.