Datasets documentation
Process image data
Process image data
🤗 Datasets support loading and processing images with the Image feature. This guide will show you how to:
- Load an image dataset.
- Load a generic image dataset with
ImageFolder. - Use Dataset.map() to quickly apply transforms to an entire dataset.
- Add data augmentations to your images with Dataset.set_transform().
Installation
The Image feature should be installed as an extra dependency in 🤗 Datasets. Install the Image feature (and its dependencies) with pip:
pip install datasets[vision]
Image datasets
The images in an image dataset are typically either a:
- PIL
image. - Path to an image file you can load.
For example, load the Food-101 dataset and take a look:
>>> from datasets import load_dataset, Image

>>> dataset = load_dataset("food101", split="train[:100]")
>>> dataset[0]
{'image': <PIL.JpegImagePlugin.JpegImageFile image mode=RGB size=384x512 at 0x7FC45AB5C590>,
 'label': 6}
The Image feature automatically decodes the data from the image column to return an image object. Now try and call the image column to see what the image is:
>>> from datasets import load_dataset, Image

>>> dataset = load_dataset("food101", split="train[100:200]")
>>> dataset[0]["image"]
<PIL.JpegImagePlugin.JpegImageFile image mode=RGB size=384x512 at 0x16289FBE0>
To load an image from its path, use the Dataset.cast_column() method. The Image feature will decode the data at the path to return an image object:
>>> from datasets import load_dataset, Image

>>> dataset = Dataset.from_dict({"image": ["path/to/image_1", "path/to/image_2", ..., "path/to/image_n"]}).cast_column("image", Image())
>>> dataset[0]["image"]
<PIL.PngImagePlugin.PngImageFile image mode=RGBA size=1200x215 at 0x15E6D7160>]
You can also access the path and bytes of an image file by setting decode=False when you load a dataset. In this case, you will need to cast the image column:
>>> dataset = load_dataset("food101", split="train[:100]").cast_column('image', Image(decode=False))ImageFolder
You can also load your image dataset with a ImageFolder dataset builder without writing a custom dataloader. Your image dataset structure should look like this:
folder/train/dog/golden_retriever.png
folder/train/dog/german_shepherd.png
folder/train/dog/chihuahua.png

folder/train/cat/maine_coon.png
folder/train/cat/bengal.png
folder/train/cat/birman.png
Then load your dataset by specifying imagefolder and the directory of your dataset in data_dir:
>>> from datasets import load_dataset
>>> dataset = load_dataset("imagefolder", data_dir="/path/to/folder")
>>> dataset["train"][0]["image"]
<PIL.PngImagePlugin.PngImageFile image mode=RGBA size=1200x215 at 0x15E6D7160>]
Load remote datasets from their URLs with the data_files parameter:
>>> dataset = load_dataset("imagefolder", data_files="https://download.microsoft.com/download/3/E/1/3E1C3F21-ECDB-4869-8368-6DEBA77B919F/kagglecatsanddogs_3367a.zip", split="train")ImageFolder will create a label column, and the label name is based on the directory name.
You can pass drop_labels=False to ignore the label column, as defined in ImageFolderConfig.
ImageFolder with metadata
If your image dataset comes with metadata, they will be also loaded. First, make sure your dataset has a metadata.jsonl:
folder/train/metadata.jsonl
folder/train/0001.png
folder/train/0002.png
folder/train/0003.png
You can link the metadata in metadata.jsonl file to the images using the “file_path” field.
Image captioning
Here is an example of metadata.jsonl for image captioning:
{"file_name": "0001.png", "text": "This is a golden retriever playing with a ball"}
{"file_name": "0002.png", "text": "A german shepherd"}
{"file_name": "0003.png", "text": "One chihuahua"}
ImageFolder will create a text column for the image captions:
>>> dataset = load_dataset("imagefolder", data_dir="/path/to/folder", split="train")
>>> dataset[0]["text"]
This is a golden retriever playing with a ball
Object detection
Here is an example of metadata.jsonl for object detection:
{"file_name": "0001.png", "objects": {"bbox": [[302.0, 109.0, 73.0, 52.0]], "categories": [0]}}
{"file_name": "0002.png", "objects": {"bbox": [[810.0, 100.0, 57.0, 28.0]], "categories": [1]}}
{"file_name": "0003.png", "objects": {"bbox": [[160.0, 31.0, 248.0, 616.0], [741.0, 68.0, 202.0, 401.0]], "categories": [2, 2]}}
ImageFolder will create a objects column with the bounding boxes and the categories:
>>> dataset = load_dataset("imagefolder", data_dir="/path/to/folder", split="train")
>>> dataset[0]["objects"]
{"bbox": [[302.0, 109.0, 73.0, 52.0]], "categories": [0]}
Map
Dataset.map() can apply transforms over an entire dataset and it also generates a cache file.
Create a simple Resize function:
>>> def transforms(examples):
...     examples["pixel_values"] = [image.convert("RGB").resize((100,100)) for image in examples["image"]]
...     return examples
Now Dataset.map() the function over the entire dataset and set batched=True. The transform returns pixel_values as a cacheable PIL.Image object:
>>> dataset = dataset.map(transforms, remove_columns=["image"], batched=True)
>>> dataset[0]
{'label': 6,
 'pixel_values': <PIL.PngImagePlugin.PngImageFile image mode=RGB size=100x100 at 0x7F058237BB10>}
This saves time because you don’t have to execute the same transform twice. It is best to use Dataset.map() for operations you only run once per training - like resizing an image - instead of using it for operations executed for each epoch, like data augmentations.
Dataset.map() takes up some memory, but you can reduce its memory requirements with the following parameters:
batch_sizedetermines the number of examples that are processed in one call to the transform function.writer_batch_sizedetermines the number of processed examples that are kept in memory before they are stored away.
Both parameter values default to 1000, which can be expensive if you are storing images. Lower the value to use less memory when calling Dataset.map().
Data augmentation
Adding data augmentations to a dataset is common to prevent overfitting and achieve better performance. You can use any library or package you want to apply the augmentations. This guide will use the transforms from torchvision.
Feel free to use other data augmentation libraries like Albumentations. 🤗 Datasets can apply any custom function and transforms to an entire dataset!
Add the ColorJitter transform to change the color properties of the image randomly:
>>> from torchvision.transforms import Compose, ColorJitter, ToTensor

>>> jitter = Compose(
...     [
...          ColorJitter(brightness=0.25, contrast=0.25, saturation=0.25, hue=0.7),
...          ToTensor(),
...     ]
... )
Create a function to apply the ColorJitter transform to an image:
>>> def transforms(examples):
...     examples["pixel_values"] = [jitter(image.convert("RGB")) for image in examples["image"]]
...     return examples
Then you can use the Dataset.set_transform() function to apply the transform on-the-fly to consume less disk space. Use this function if you only need to access the examples once:
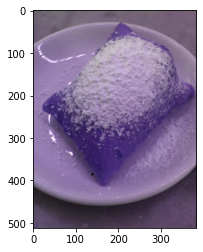
>>> dataset.set_transform(transforms)Now visualize the results of the ColorJitter transform:
>>> import numpy as np
>>> import matplotlib.pyplot as plt

>>> img = dataset[0]["pixel_values"]
>>> plt.imshow(img.permute(1, 2, 0))