

Train DCGAN on your custom data
This folder contains a script to train DCGAN for unconditional image generation, leveraging the Hugging Face ecosystem for processing your data and pushing the model to the Hub.
The script leverages 🤗 Datasets for loading and processing data, and 🤗 Accelerate for instantly running on CPU, single, multi-GPUs or TPU, also supporting fp16/mixed precision.
Launching the script
To train the model with the default parameters (5 epochs, 64x64 images, etc.) on MNIST, first run:
accelerate config
and answer the questions asked about your environment. Next, launch the script as follows:
accelerate launch train.py
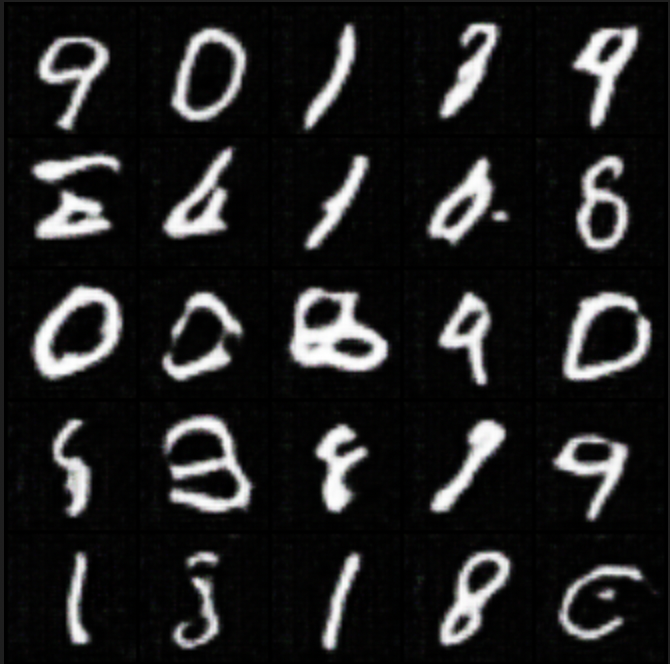
This will create a local "images" directory, containing generated images over the course of the training.
To train on another dataset available on the hub, simply do (for instance):
python train.py --dataset cifar-10
In case you'd like to tweak the script to your liking, first fork the "community-events" repo (see the button on the top right), then clone it locally:
git clone https://github.com/<your Github username>/community-events.git
and edit to your liking.
Training on your own data
You can of course also train on your own images. For this, one can leverage Datasets' ImageFolder. Make sure to authenticate with the hub first, by running the huggingface-cli login command in a terminal, or the following in case you're working in a notebook:
from huggingface_hub import notebook_login

notebook_login()
Next, run the following in a notebook/script:
from datasets import load_dataset

# first: load dataset
# option 1: from local folder
dataset = load_dataset("imagefolder", data_dir="path_to_folder")
# option 2: from remote URL (e.g. a zip file)
dataset = load_dataset("imagefolder", data_files="URL to .zip file")

# next: push to the hub (assuming git-LFS is installed)
dataset.push_to_hub("huggan/my-awesome-dataset")
You can then simply pass the name of the dataset to the script:
accelerate launch train.py --dataset huggan/my-awesome-dataset
Pushing model to the Hub
You can push your trained generator to the hub after training by specifying the push_to_hub flag, along with a model_name and pytorch_dump_folder_path.
accelerate launch train.py --push_to_hub --model_name dcgan-mnist
This is made possible by making the generator inherit from PyTorchModelHubMixinavailable in the huggingface_hub library.
This means that after training, generating a new image can be done as follows:
import torch
import torch.nn as nn
from torchvision.transforms import ToPILImage
from huggingface_hub import PyTorchModelHubMixin

class Generator(nn.Module, PyTorchModelHubMixin):
    def __init__(self, num_channels=3, latent_dim=100, hidden_size=64):
        super(Generator, self).__init__()
        self.model = nn.Sequential(
            # input is Z, going into a convolution
            nn.ConvTranspose2d(latent_dim, hidden_size * 8, 4, 1, 0, bias=False),
            nn.BatchNorm2d(hidden_size * 8),
            nn.ReLU(True),
            # state size. (hidden_size*8) x 4 x 4
            nn.ConvTranspose2d(hidden_size * 8, hidden_size * 4, 4, 2, 1, bias=False),
            nn.BatchNorm2d(hidden_size * 4),
            nn.ReLU(True),
            # state size. (hidden_size*4) x 8 x 8
            nn.ConvTranspose2d(hidden_size * 4, hidden_size * 2, 4, 2, 1, bias=False),
            nn.BatchNorm2d(hidden_size * 2),
            nn.ReLU(True),
            # state size. (hidden_size*2) x 16 x 16
            nn.ConvTranspose2d(hidden_size * 2, hidden_size, 4, 2, 1, bias=False),
            nn.BatchNorm2d(hidden_size),
            nn.ReLU(True),
            # state size. (hidden_size) x 32 x 32
            nn.ConvTranspose2d(hidden_size, num_channels, 4, 2, 1, bias=False),
            nn.Tanh()
            # state size. (num_channels) x 64 x 64
        )

    def forward(self, noise):
        pixel_values = self.model(noise)

        return pixel_values

model = Generator.from_pretrained("huggan/dcgan-mnist")

device = "cuda" if torch.cuda.is_available() else "cpu
model.to(device)

with torch.no_grad():
    z = torch.randn(1, 100, 1, 1, device=device)
    pixel_values = model(z)

# turn into actual image
image = pixel_values[0]
image = (image + 1) /2
image = ToPILImage()(image)
image.save("generated.png")
Weights and Biases integration
You can easily add logging to Weights and Biases by passing the --wandb flag:
accelerate launch train.py --wandb
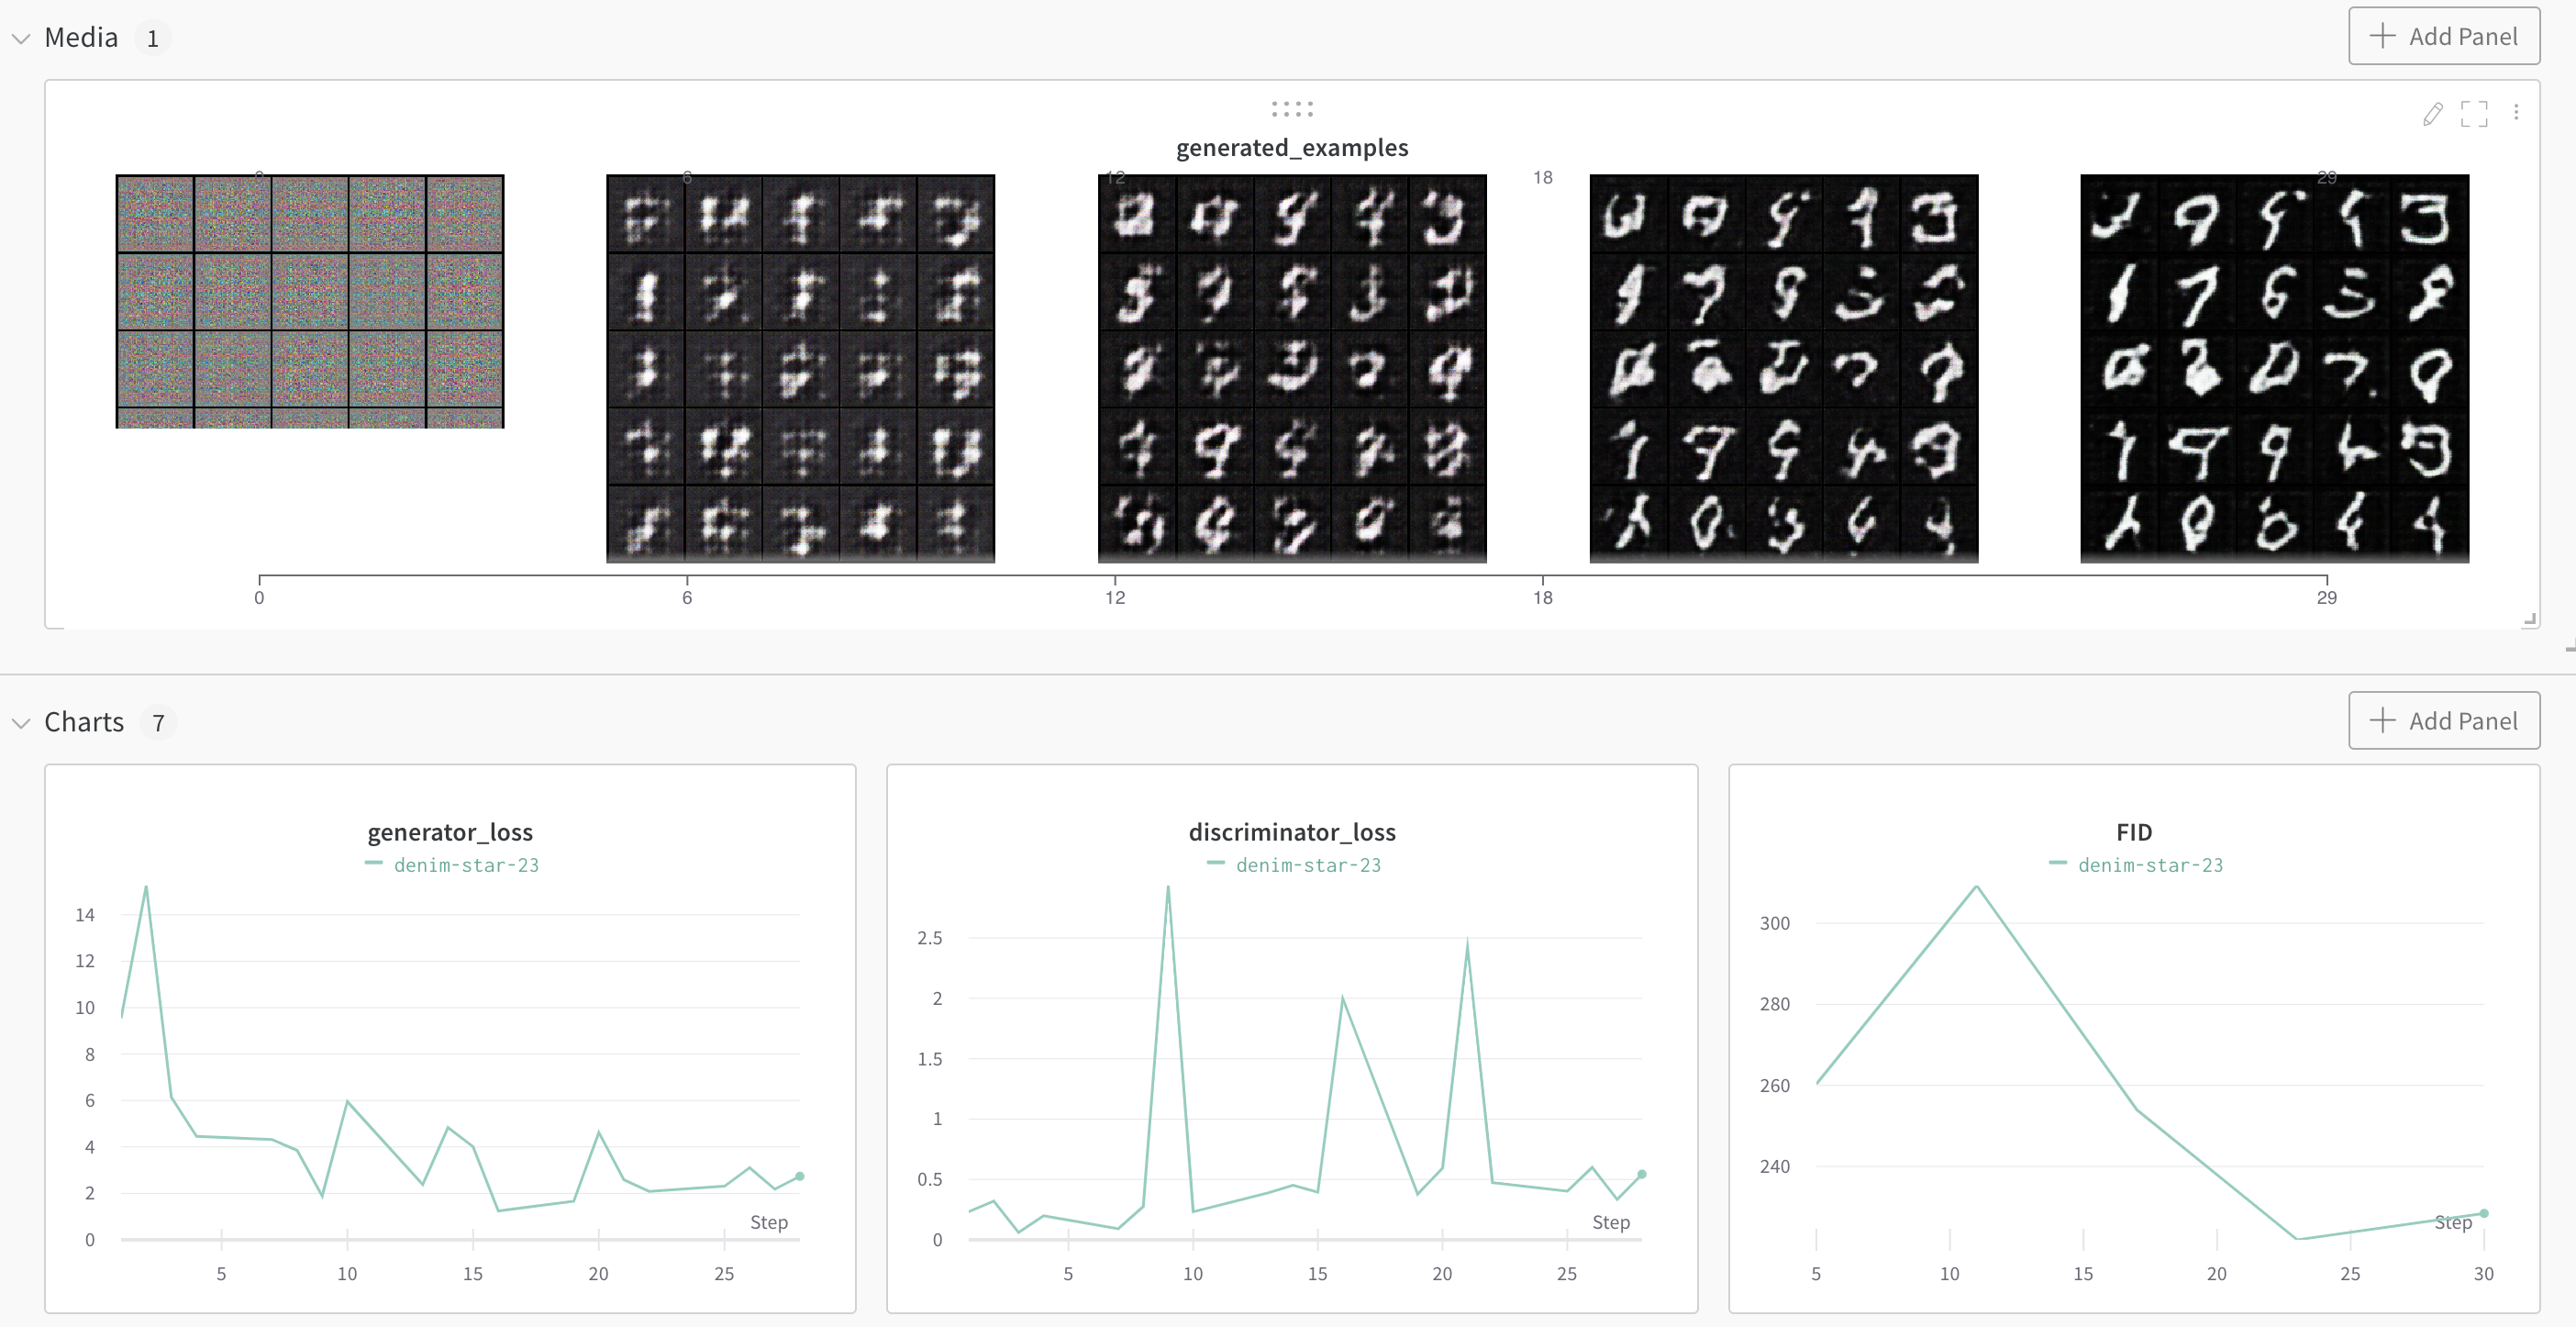
You can then follow the progress of your GAN in a browser:
Citation
This repo is entirely based on PyTorch's official DCGAN tutorial, but with added HuggingFace goodies.