创建自己的数据集

有时,不存在现有的合适的数据集适用于你构建 NLP 应用,因此你需要自己创建。在本节中,我们将向你展示如何创建一个由 GitHub issues 组成的的语料库,这些 issues 通常用于跟踪 GitHub 仓库中的错误或功能。该语料库可用于各种应用场景,包括:
- 探索解决 issue 或合并 pull 请求需要多长时间
- 训练一个
多标签分类器(multilabel classifier)可以根据 issue 的描述为 issue 标上元数据标签(例如,“bug”、“enhancement(增强功能)”或“question”) - 创建语义搜索引擎以查找与用户查询匹配的 issue
在这里,我们将关注如何创建语料库,在下一节中,我们将探索语义搜索。原汤化原食,我们将使用一个流行的开源项目的 GitHub issue:🤗 Datasets!接下来让我们看看如何获取数据并探索这些 issue 中包含的信息。
获取数据
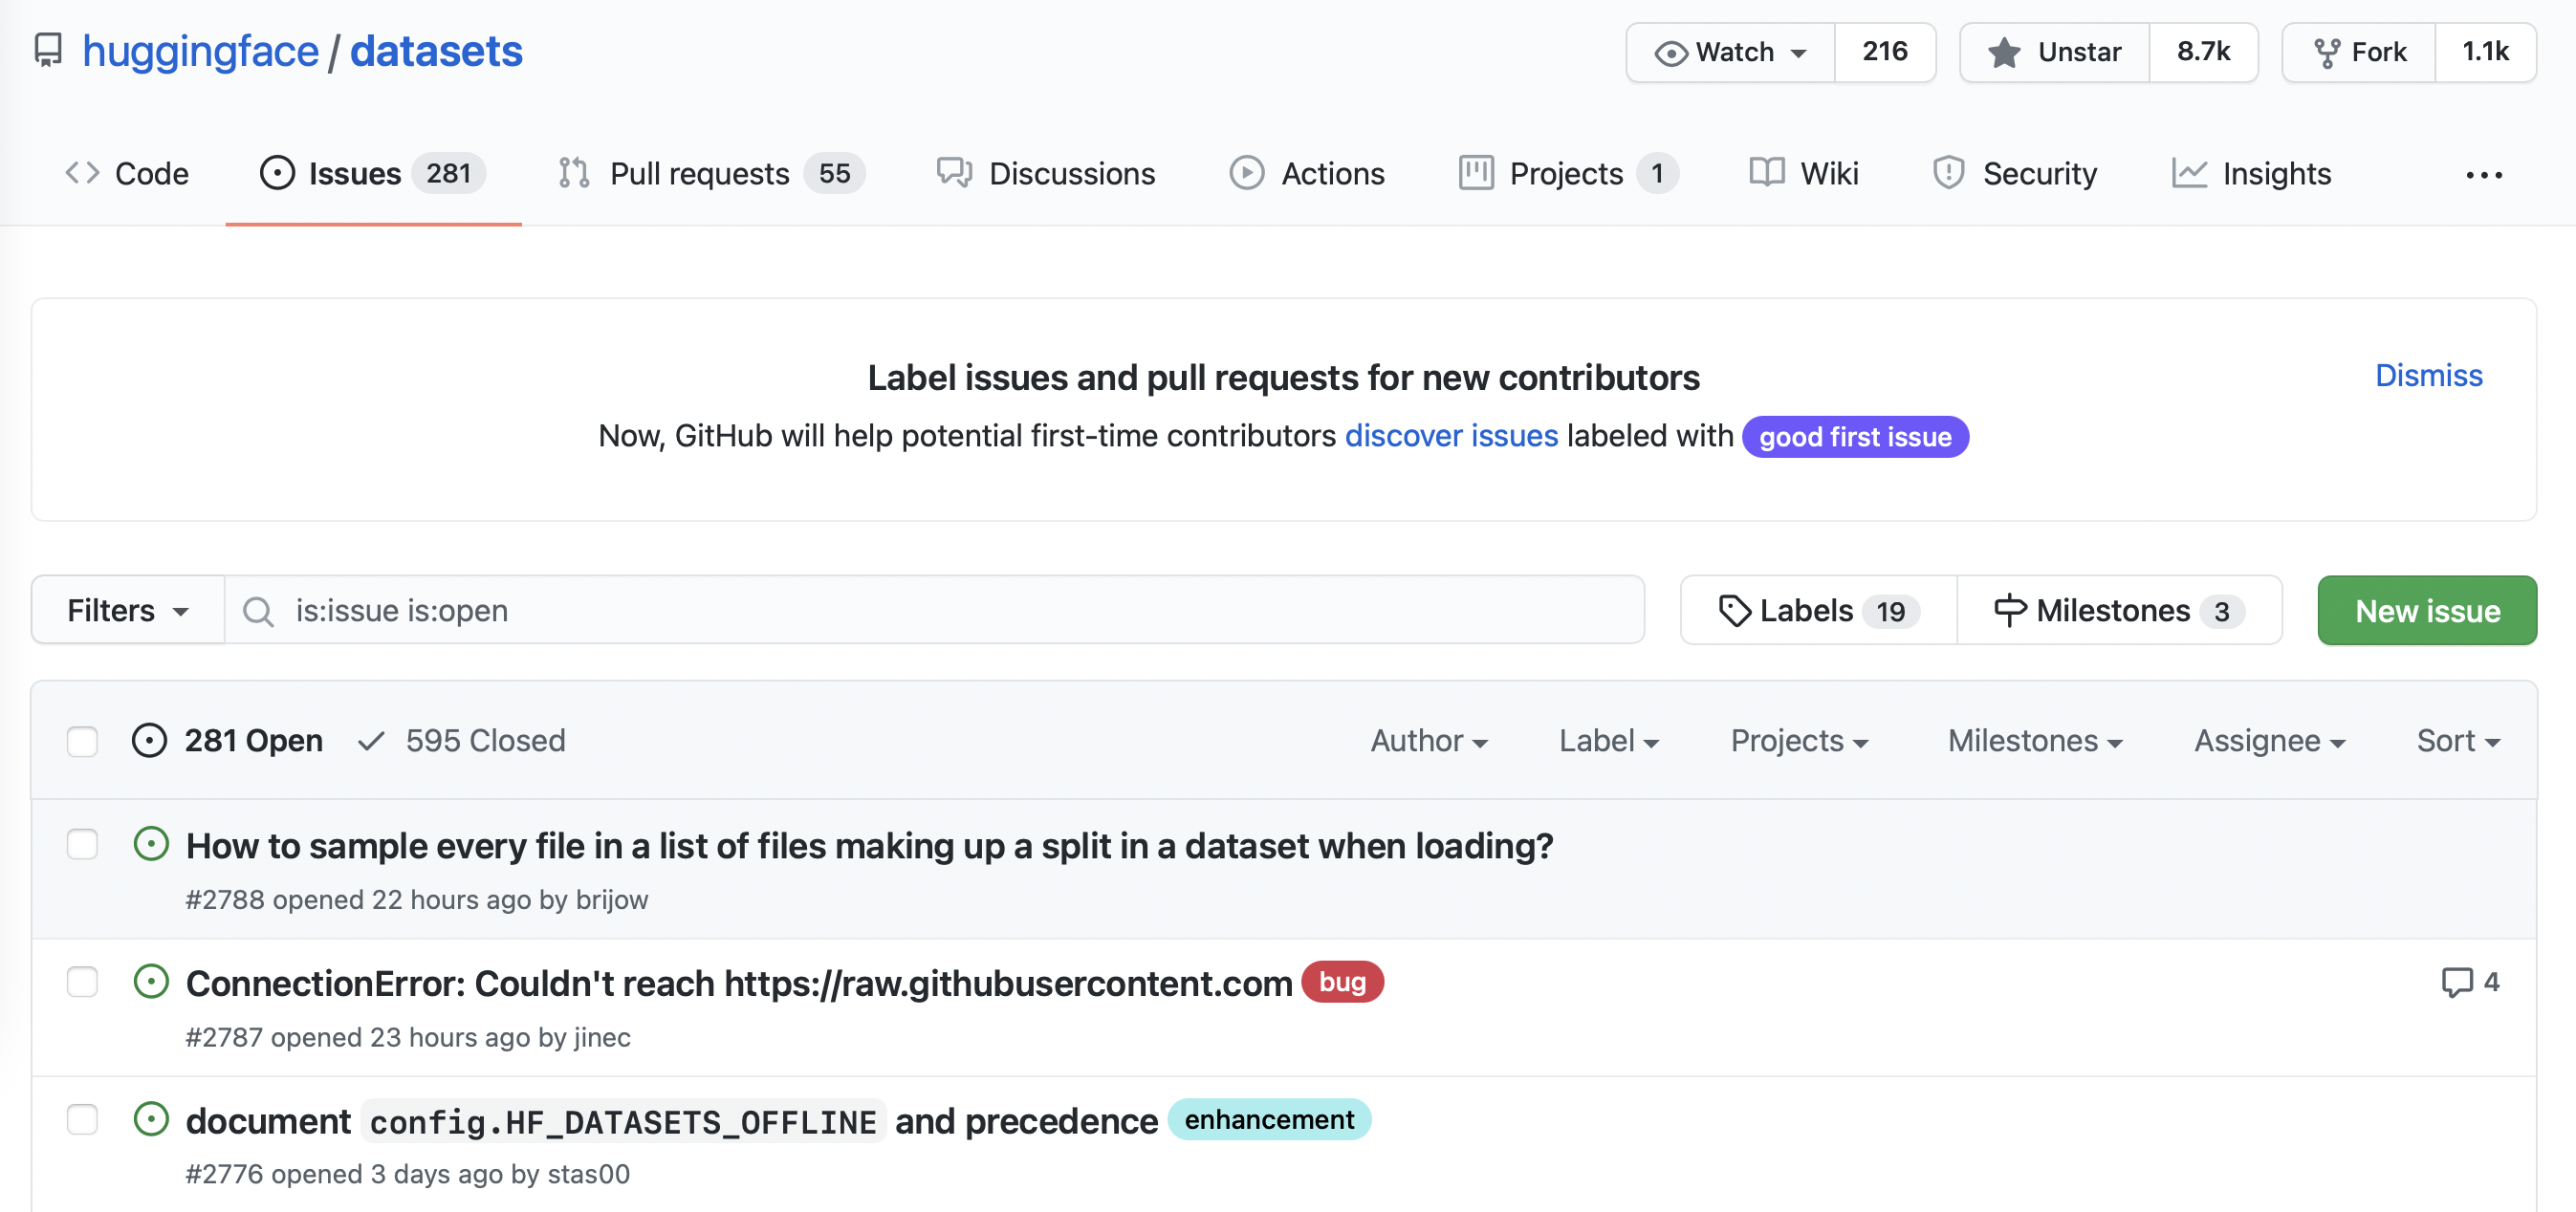
你可以点击 Issues 选项卡 浏览 🤗 Datasets 中的所有 issus。如以下屏幕截图所示,在撰写本文时,有 331 个未解决的 issue 和 668 个已关闭的 issue。
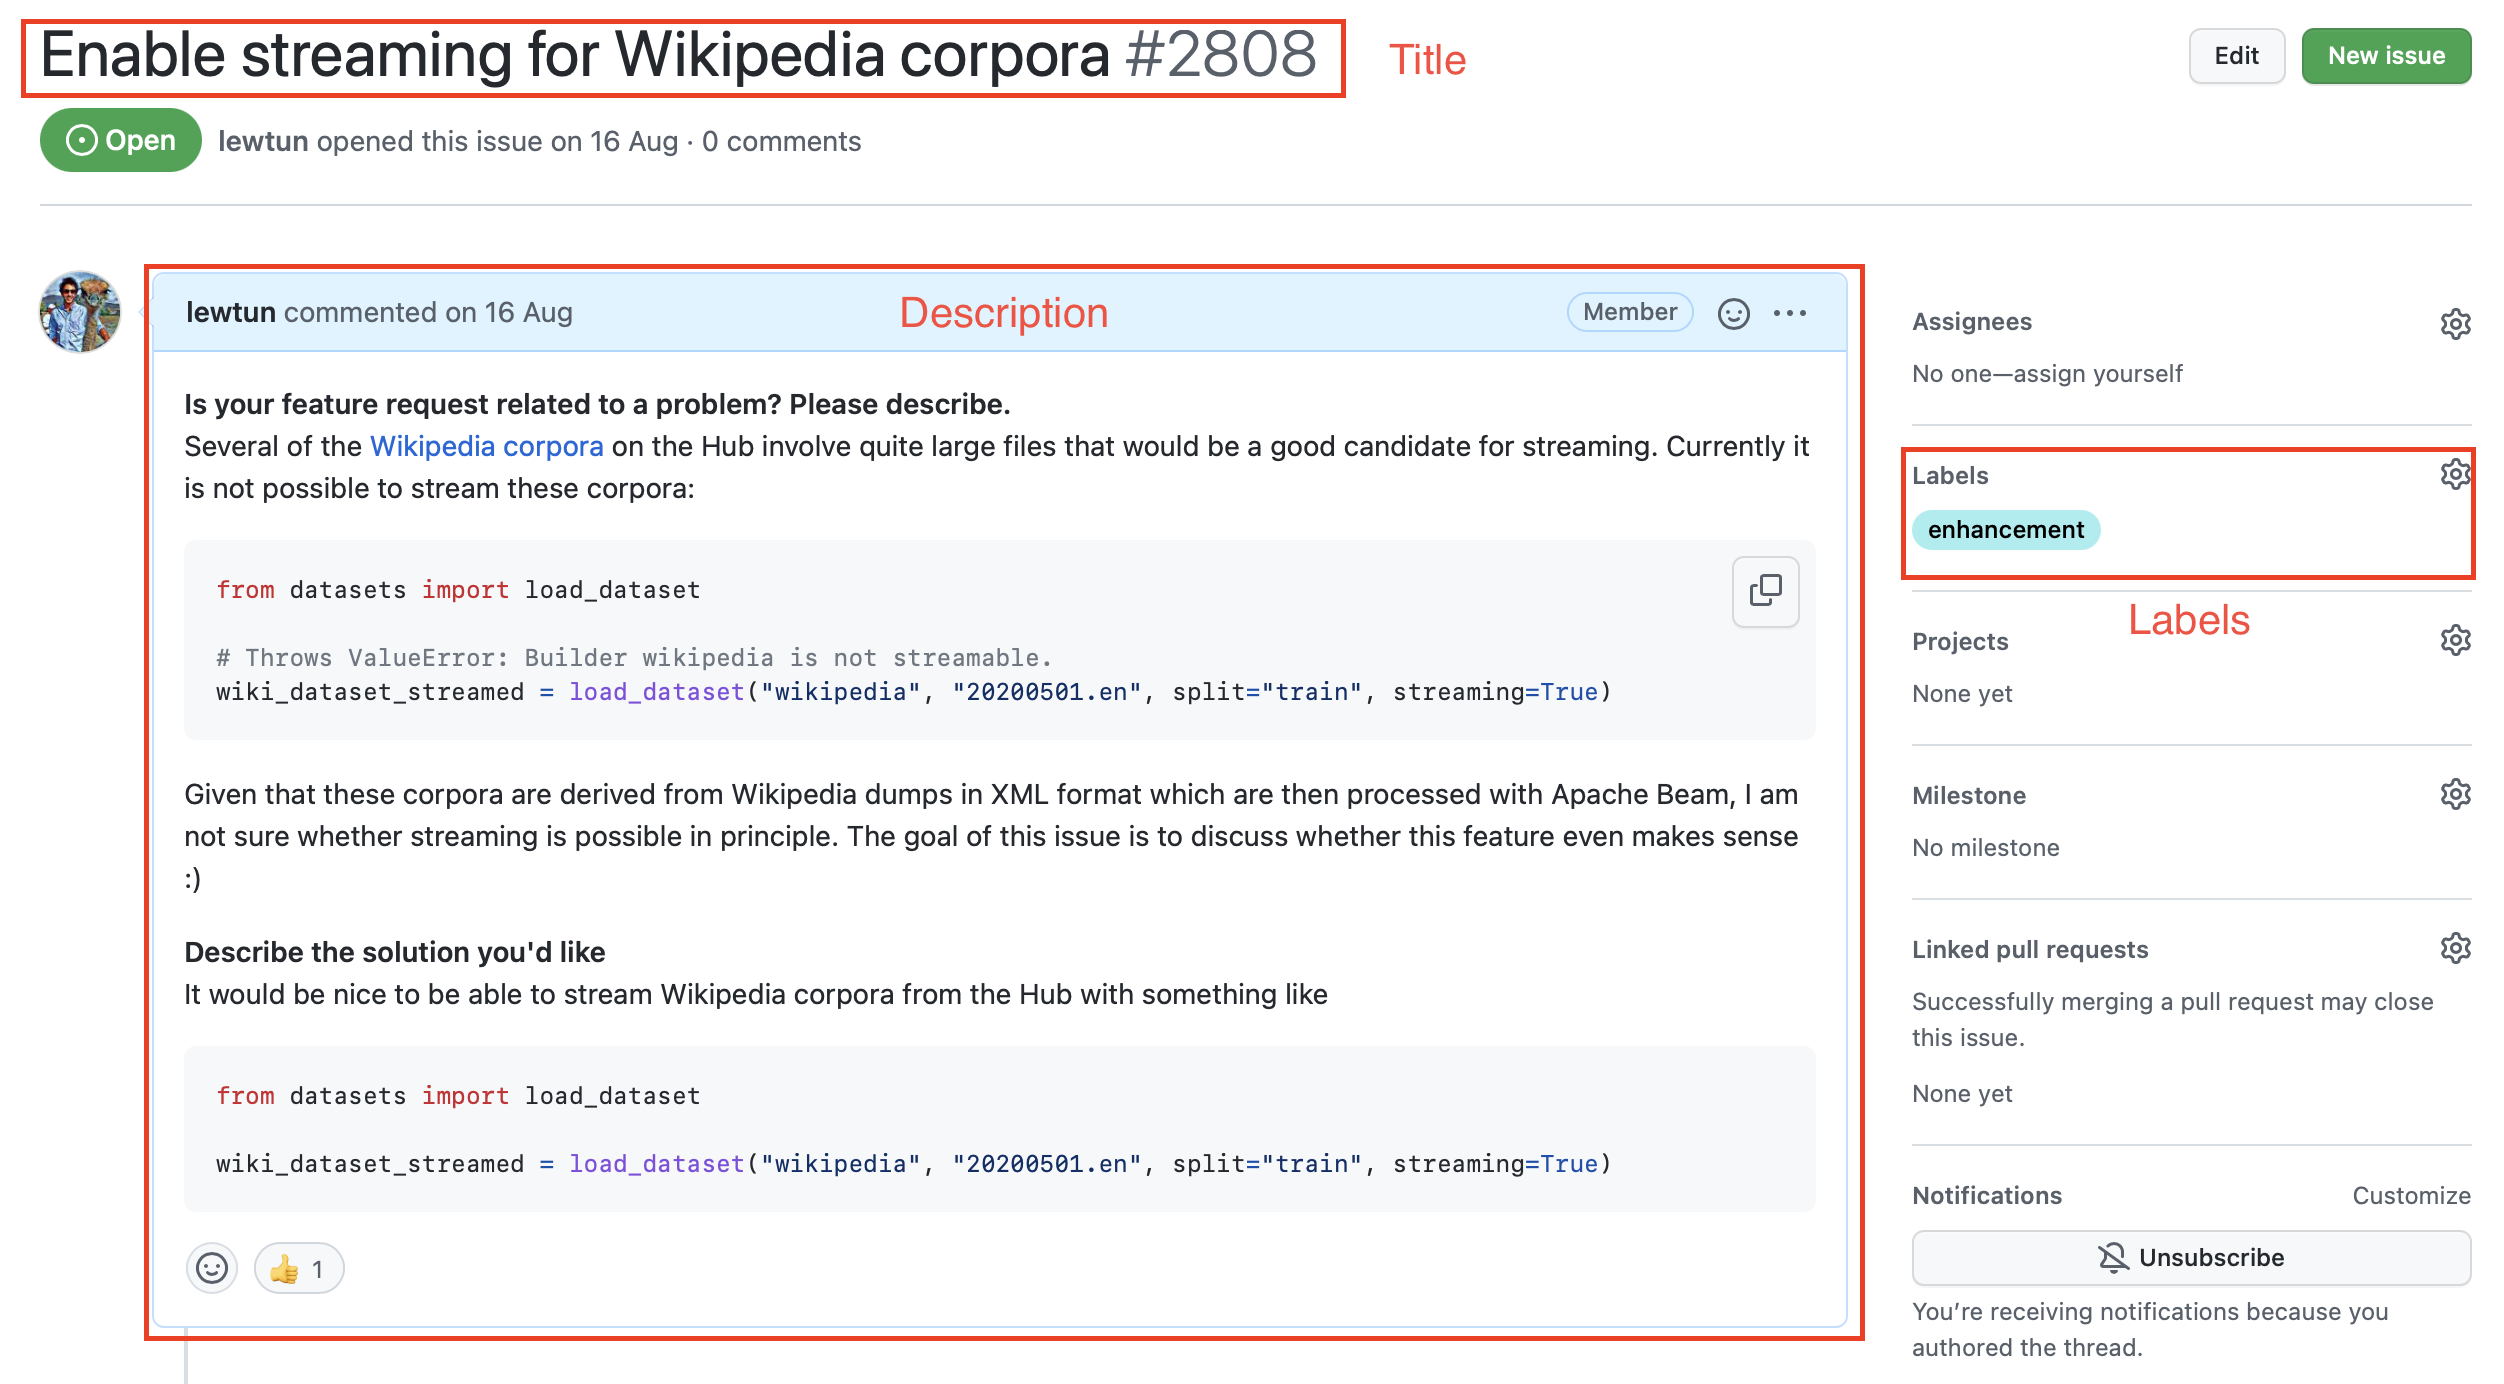
如果你单击其中一个 issue,你会发现它包含一个标题、一个描述和一组标签,这些标签是对 issue 的描述。下面的屏幕截图显示了一个示例:
我们可以使用 GitHub REST API 遍历 Issues 节点(endpoint) 下载所有仓库的 issue。节点(endpoint)将返回一个 JSON 对象列表,每个对象包含大量字段,其中包括标题和描述以及有关 issue 状态的元数据等。
我们将使用 requests 库来下载,这是用 Python 中发出 HTTP 请求的标准方式。你可以通过运行以下的代码来安装 requests 库:
!pip install requests
安装库后,你通过调用 requests.get() 功能来获取 Issues 节点(endpoint)。例如,你可以运行以下命令来获取第一页上的第一个 Issues:
import requests

url = "https://api.github.com/repos/huggingface/datasets/issues?page=1&per_page=1"
response = requests.get(url)
response 对象包含很多关于请求的有用信息,包括 HTTP 状态码:
response.status_code
200其中, 200 状态表示请求成功(你可以在 这里 找到所有可能的 HTTP 状态代码列表)。不过,我们真正感兴趣的是消息体中的有效信息,由于我们知道我们的 issues 是 JSON 格式,让我们按如下方式查看消息体的信息:
response.json()
[{'url': 'https://api.github.com/repos/huggingface/datasets/issues/2792',
  'repository_url': 'https://api.github.com/repos/huggingface/datasets',
  'labels_url': 'https://api.github.com/repos/huggingface/datasets/issues/2792/labels{/name}',
  'comments_url': 'https://api.github.com/repos/huggingface/datasets/issues/2792/comments',
  'events_url': 'https://api.github.com/repos/huggingface/datasets/issues/2792/events',
  'html_url': 'https://github.com/huggingface/datasets/pull/2792',
  'id': 968650274,
  'node_id': 'MDExOlB1bGxSZXF1ZXN0NzEwNzUyMjc0',
  'number': 2792,
  'title': 'Update GooAQ',
  'user': {'login': 'bhavitvyamalik',
   'id': 19718818,
   'node_id': 'MDQ6VXNlcjE5NzE4ODE4',
   'avatar_url': 'https://avatars.githubusercontent.com/u/19718818?v=4',
   'gravatar_id': '',
   'url': 'https://api.github.com/users/bhavitvyamalik',
   'html_url': 'https://github.com/bhavitvyamalik',
   'followers_url': 'https://api.github.com/users/bhavitvyamalik/followers',
   'following_url': 'https://api.github.com/users/bhavitvyamalik/following{/other_user}',
   'gists_url': 'https://api.github.com/users/bhavitvyamalik/gists{/gist_id}',
   'starred_url': 'https://api.github.com/users/bhavitvyamalik/starred{/owner}{/repo}',
   'subscriptions_url': 'https://api.github.com/users/bhavitvyamalik/subscriptions',
   'organizations_url': 'https://api.github.com/users/bhavitvyamalik/orgs',
   'repos_url': 'https://api.github.com/users/bhavitvyamalik/repos',
   'events_url': 'https://api.github.com/users/bhavitvyamalik/events{/privacy}',
   'received_events_url': 'https://api.github.com/users/bhavitvyamalik/received_events',
   'type': 'User',
   'site_admin': False},
  'labels': [],
  'state': 'open',
  'locked': False,
  'assignee': None,
  'assignees': [],
  'milestone': None,
  'comments': 1,
  'created_at': '2021-08-12T11:40:18Z',
  'updated_at': '2021-08-12T12:31:17Z',
  'closed_at': None,
  'author_association': 'CONTRIBUTOR',
  'active_lock_reason': None,
  'pull_request': {'url': 'https://api.github.com/repos/huggingface/datasets/pulls/2792',
   'html_url': 'https://github.com/huggingface/datasets/pull/2792',
   'diff_url': 'https://github.com/huggingface/datasets/pull/2792.diff',
   'patch_url': 'https://github.com/huggingface/datasets/pull/2792.patch'},
  'body': '[GooAQ](https://github.com/allenai/gooaq) dataset was recently updated after splits were added for the same. This PR contains new updated GooAQ with train/val/test splits and updated README as well.',
  'performed_via_github_app': None}]
哇,好大量的信息!我们可以看到有用的字段,我们可以看到诸如 title 、 body 和 number 等描述 issue 的有用字段,以及关于创建 issue 的 GitHub 用户的信息。
✏️ 试试看!打开上面 JSON 中的一些 URL,以了解每个 GitHub issue 中 url 所链接的信息类型。
如 GitHub 文档 中所述,未经身份验证的请求限制为每小时 60 个请求。虽然你可以增加 per_page 查询参数以减少你发出的请求次数,但你仍会在任何有几千个以上 issue 的仓库上触发速率限制。因此,你应该按照 GitHub 的 说明 ,创建一个 个人访问令牌(personal access token) 这样你就可以将速率限制提高到每小时 5,000 个请求。获得令牌后,你可以将其放在请求标头中:
GITHUB_TOKEN = xxx  #  将你的GitHub令牌复制到此处
headers = {"Authorization": f"token {GITHUB_TOKEN}"}
⚠️ 不要与陌生人共享存在 GITHUB令牌 的笔记本。我们建议你在使用完后将 GITHUB令牌 删除,以避免意外泄漏。一个更好的做法是,将令牌存储在.env 文件中,并使用 python-dotenv库 自动加载环境变量。
现在我们有了访问令牌,让我们创建一个可以从 GitHub 仓库下载所有 issue 的函数:
import time
import math
from pathlib import Path
import pandas as pd
from tqdm.notebook import tqdm


def fetch_issues(
    owner="huggingface",
    repo="datasets",
    num_issues=10_000,
    rate_limit=5_000,
    issues_path=Path("."),
):
    if not issues_path.is_dir():
        issues_path.mkdir(exist_ok=True)

    batch = []
    all_issues = []
    per_page = 100  ## 每页返回的 issue 的数量
    num_pages = math.ceil(num_issues / per_page)
    base_url = "https://api.github.com/repos"

    for page in tqdm(range(num_pages)):
        # 使用 state=all 进行查询来获取 open 和 closed 的issue
        query = f"issues?page={page}&per_page={per_page}&state=all"
        issues = requests.get(f"{base_url}/{owner}/{repo}/{query}", headers=headers)
        batch.extend(issues.json())

        if len(batch) > rate_limit and len(all_issues) < num_issues:
            all_issues.extend(batch)
            batch = []  # 重置batch
            print(f"Reached GitHub rate limit. Sleeping for one hour ...")
            time.sleep(60 * 60 + 1)

    all_issues.extend(batch)
    df = pd.DataFrame.from_records(all_issues)
    df.to_json(f"{issues_path}/{repo}-issues.jsonl", orient="records", lines=True)
    print(
        f"Downloaded all the issues for {repo}! Dataset stored at {issues_path}/{repo}-issues.jsonl"
    )
现在我们可以调用 fetch_issues() 它将按批次下载所有 issue,以避免超过 GitHub 每小时请求次数的限制;结果将存储在 repository_name-issues.jsonl 文件,其中每一行都是一个 JSON 对象,代表一个 issue。让我们使用这个函数从 🤗 Datasets 中抓取所有 issue:
# 取决于你的网络连接,这可能需要几分钟的时间来运行...
fetch_issues()
下载 issue 后,我们可以使用我们在 第二节 新学会的方法在本地加载它们:
issues_dataset = load_dataset("json", data_files="datasets-issues.jsonl", split="train")
issues_datasetDataset({
features: ['url', 'repository_url', 'labels_url', 'comments_url', 'events_url', 'html_url', 'id', 'node_id', 'number', 'title', 'user', 'labels', 'state', 'locked', 'assignee', 'assignees', 'milestone', 'comments', 'created_at', 'updated_at', 'closed_at', 'author_association', 'active_lock_reason', 'pull_request', 'body', 'timeline_url', 'performed_via_github_app'],
num_rows: 3019
})太好了,我们已经从头开始创建了我们的第一个数据集!但是为什么会有几千个 issue,而🤗 Datasets 仓库中的 Issues 选项卡 总共却只显示了大约 1,000 个 issue🤔?如 GitHub 文档 中所述,那是因为我们不加下载了 issue 还下载了所有的 pull 请求:
Git Hub 的 REST API v3 认为每个 pull 请求都是一个 issue,但事实上并不是每个 issue 都是一个 pull 请求。因此,“Issues”节点可能同时返回了 issue 和 pull 请求。你可以通过
pull_request的 key 来辨别 pull 请求。请注意,从“Issues”节点返回的 pull 请求的 id 将是一个 issue id。
由于 issue 和 pull request 的内容有很大的不同,我们先做一些小的预处理,让我们能够区分它们。
清洗数据
上面的 GitHub 文档告诉我们, pull_request 列可用于区分 issue 和 pull 请求。让我们随机挑选一些样本,看看有什么不同。我们将使用在 第三节 ,学习的方法,使用 Dataset.shuffle() 和 Dataset.select() 抽取一个随机样本,然后将 html_url 和 pull_request 列使用 zip 函数组合起来,以便我们可以比较各种 URL:
sample = issues_dataset.shuffle(seed=666).select(range(3))

# 打印出 URL 和 pull 请求
for url, pr in zip(sample["html_url"], sample["pull_request"]):
    print(f">> URL: {url}")
print(f">> Pull request: {pr}\n")>> URL: https://github.com/huggingface/datasets/pull/850
>> Pull request: {'url': 'https://api.github.com/repos/huggingface/datasets/pulls/850', 'html_url': 'https://github.com/huggingface/datasets/pull/850', 'diff_url': 'https://github.com/huggingface/datasets/pull/850.diff', 'patch_url': 'https://github.com/huggingface/datasets/pull/850.patch'}
>> URL: https://github.com/huggingface/datasets/issues/2773
>> Pull request: None
>> URL: https://github.com/huggingface/datasets/pull/783
>> Pull request: {'url': 'https://api.github.com/repos/huggingface/datasets/pulls/783', 'html_url': 'https://github.com/huggingface/datasets/pull/783', 'diff_url': 'https://github.com/huggingface/datasets/pull/783.diff', 'patch_url': 'https://github.com/huggingface/datasets/pull/783.patch'}这里我们可以看到,每个 pull 请求都与各种 url 相关联,而普通 issue 只有一个 None 条目。我们可以使用这一点不同来创建一个新的 is_pull_request 列,通过检查 pull_request 字段是否为 None 来区分它们:
issues_dataset = issues_dataset.map(
    lambda x: {"is_pull_request": False if x["pull_request"] is None else True}
)
✏️ 试试看!计算在 🤗 Datasets 中解决 issue 所需的平均时间。你可能会发现 Dataset.filter() 函数对于过滤 pull 请求和未解决的 issue 很有用,并且你可以使用 Dataset.set_format() 函数将数据集转换为 DataFrame ,以便你可以轻松地按照需求修改 创建(created_at) 和 关闭(closed_at) 的时间的格式(以时间戳格式)。
尽管我们可以通过删除或重命名某些列来进一步清理数据集,但在此阶段尽可能保持数据集“原始”状态通常是一个很好的做法,以便它可以在多个不同的项目中轻松使用。在我们将数据集推送到 Hugging Face Hub 之前,让我们再添加一些缺少的数据:每个 issue 和 pull 中的评论。我们接下来将添加它们——你猜对了——我们将依然使用 GitHub REST API!
扩充数据集
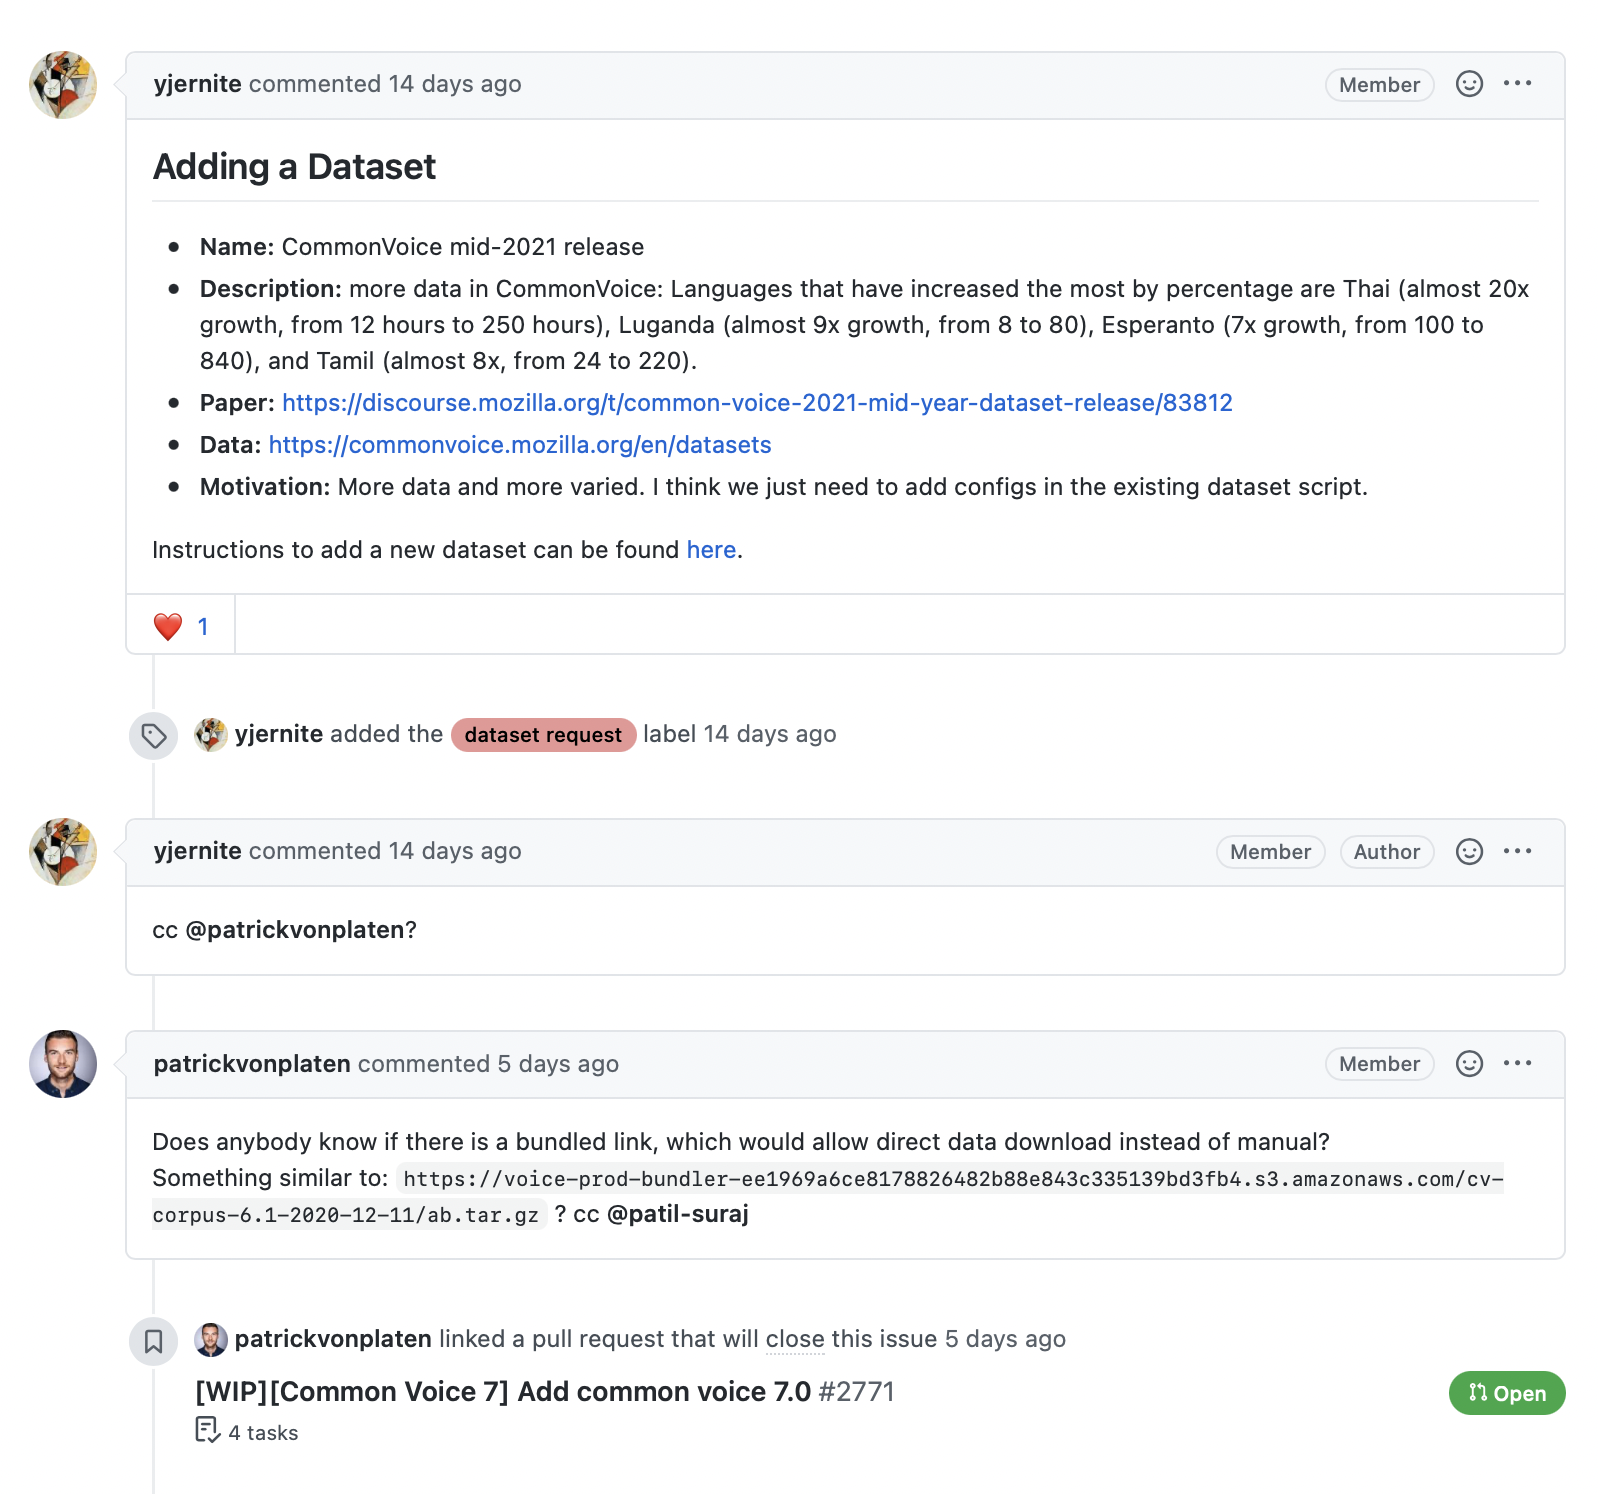
如以下截图所示,issue 或 pull 请求相关的评论提供了丰富的信息,特别是如果我们有兴趣构建搜索引擎来回答用户对这个仓库的疑问时,这些信息将非常有用。
GitHub REST API 提供了一个 Comments(评论)节点 返回与 issue 编号相关的所有评论。让我们测试一下该节点返回的内容:
issue_number = 2792
url = f"https://api.github.com/repos/huggingface/datasets/issues/{issue_number}/comments"
response = requests.get(url, headers=headers)
response.json()[{'url': 'https://api.github.com/repos/huggingface/datasets/issues/comments/897594128',
'html_url': 'https://github.com/huggingface/datasets/pull/2792#issuecomment-897594128',
'issue_url': 'https://api.github.com/repos/huggingface/datasets/issues/2792',
'id': 897594128,
'node_id': 'IC_kwDODunzps41gDMQ',
'user': {'login': 'bhavitvyamalik',
'id': 19718818,
'node_id': 'MDQ6VXNlcjE5NzE4ODE4',
'avatar_url': 'https://avatars.githubusercontent.com/u/19718818?v=4',
'gravatar_id': '',
'url': 'https://api.github.com/users/bhavitvyamalik',
'html_url': 'https://github.com/bhavitvyamalik',
'followers_url': 'https://api.github.com/users/bhavitvyamalik/followers',
'following_url': 'https://api.github.com/users/bhavitvyamalik/following{/other_user}',
'gists_url': 'https://api.github.com/users/bhavitvyamalik/gists{/gist_id}',
'starred_url': 'https://api.github.com/users/bhavitvyamalik/starred{/owner}{/repo}',
'subscriptions_url': 'https://api.github.com/users/bhavitvyamalik/subscriptions',
'organizations_url': 'https://api.github.com/users/bhavitvyamalik/orgs',
'repos_url': 'https://api.github.com/users/bhavitvyamalik/repos',
'events_url': 'https://api.github.com/users/bhavitvyamalik/events{/privacy}',
'received_events_url': 'https://api.github.com/users/bhavitvyamalik/received_events',
'type': 'User',
'site_admin': False},
'created_at': '2021-08-12T12:21:52Z',
'updated_at': '2021-08-12T12:31:17Z',
'author_association': 'CONTRIBUTOR',
'body': "@albertvillanova my tests are failing here:\r\n```\r\ndataset_name = 'gooaq'\r\n\r\n def test_load_dataset(self, dataset_name):r\n configs = self.dataset_tester.load_all_configs(dataset_name, is_local=True)[:1]\r\n> self.dataset_tester.check_load_dataset(dataset_name, configs, is_local=True, use_local_dummy_data=True)\r\n\r\ntests/test_dataset_common.py:234: \r\n_ _ _ _ _ _ _ _ _ _ _ _ _ _ _ _ _ _ _ _ _ _ _ _ _ _ _ _ _ _ _ _ _ _ _ _ _ _ _ _ \r\ntests/test_dataset_common.py:187: in check_load_dataset\r\n self.parent.assertTrue(len(dataset[split]) > 0)\r\nE AssertionError: False is not true\r\n```\r\nWhen I try loading dataset on local machine it works fine. Any suggestions on how can I avoid this error?",
'performed_via_github_app': None}]我们可以看到评论存储在 body 字段中,因此让我们编写一个简单的函数,通过挑选出 response.json() 中每个元素的 body 内容,返回与某个 issue 相关的所有评论:
def get_comments(issue_number):
    url = f"https://api.github.com/repos/huggingface/datasets/issues/{issue_number}/comments"
    response = requests.get(url, headers=headers)
    return [r["body"] for r in response.json()]


# 测试我们的函数是否按预期工作
get_comments(2792)["@albertvillanova my tests are failing here:\r\n```\r\ndataset_name = 'gooaq'\r\n\r\n def test_load_dataset(self, dataset_name):r\n configs = self.dataset_tester.load_all_configs(dataset_name, is_local=True)[:1]\r\n> self.dataset_tester.check_load_dataset(dataset_name, configs, is_local=True, use_local_dummy_data=True)\r\n\r\ntests/test_dataset_common.py:234: \r\n_ _ _ _ _ _ _ _ _ _ _ _ _ _ _ _ _ _ _ _ _ _ _ _ _ _ _ _ _ _ _ _ _ _ _ _ _ _ _ _ \r\ntests/test_dataset_common.py:187: in check_load_dataset\r\n self.parent.assertTrue(len(dataset[split]) > 0)\r\nE AssertionError: False is not true\r\n```\r\nWhen I try loading dataset on local machine it works fine. Any suggestions on how can I avoid this error?"]这看起来不错,所以让我们使用 Dataset.map() 方法,为我们数据集中每个 issue 的添加一个 comments 列:
# 取决于你的网络连接,这可能需要几分钟时间...
issues_with_comments_dataset = issues_dataset.map(
    lambda x: {"comments": get_comments(x["number"])}
)
最后一步是将我们的数据集推送到 Hub,让我们一起看看该怎么推送:
将数据集上传到 Hugging Face Hub
现在我们有了扩充后的数据集,是时候将它推送到 Hub 并与社区共享了!上传数据集非常简单:就像 🤗 Transformers 中的模型和 tokenizer 一样,我们可以使用 push_to_hub() 方法来推送数据集。为此,我们需要一个身份验证令牌,它可以通过首先使用 notebook_login() 函数登录到 Hugging Face Hub 来获得:
from huggingface_hub import notebook_login

notebook_login()
这将创建一个小部件,你可以在其中输入你的用户名和密码,API 令牌将保存在 ~/.huggingface/token 中。如果你在终端中运行代码,则可以改为使用命令行登录:
huggingface-cli login
完成此操作后,我们可以通过运行下面的代码上传我们的数据集:
issues_with_comments_dataset.push_to_hub("github-issues")之后,任何人都可以通过便捷地使用附带仓库 ID 作为 path 参数的 load_dataset() 函数 来下载数据集:
remote_dataset = load_dataset("lewtun/github-issues", split="train")
remote_datasetDataset({
features: ['url', 'repository_url', 'labels_url', 'comments_url', 'events_url', 'html_url', 'id', 'node_id', 'number', 'title', 'user', 'labels', 'state', 'locked', 'assignee', 'assignees', 'milestone', 'comments', 'created_at', 'updated_at', 'closed_at', 'author_association', 'active_lock_reason', 'pull_request', 'body', 'performed_via_github_app', 'is_pull_request'],
num_rows: 2855
})很酷,我们已经将我们的数据集推送到 Hub,其他人可以使用它!只剩下一件重要的事情要做:添加一个数据卡片,解释语料库是如何创建的,并为使用数据集的其他提供一些其他有用的信息。
💡 你还可以使用一些 Git 技巧和 huggingface-cli 直接从终端将数据集上传到 Hugging Face Hub。有关如何执行此操作的详细信息,请参阅 🤗 Datasets 指南 指南。
创建数据集卡片
有据可查的数据集更有可能对其他人(包括你未来的自己!)有用,因为它们提供了数据集相关的信息,使用户能够决定数据集是否与他们的任务相关,并评估任何潜在的偏见或与使用相关的风险。
在 Hugging Face Hub 上,此信息存储在每个数据集仓库的自述文件(README.md)。在创建此文件之前,你应该采取两个主要步骤:
- 使用
datasets-tagging应用程序 创建 YAML 格式的元数据标签。这些标签用于 Hugging Face Hub 上的各种搜索功能,并确保你的数据集可以很容易地被社区成员找到。由于我们已经在这里创建了一个自定义数据集,所以你需要克隆数据集标签仓库(datasets-tagging)并在本地运行应用程序。它的界面是这样的:

2.阅读 🤗 Datasets 指南 中关于创建完善的数据集卡片的指南,并将其作为模板使用。
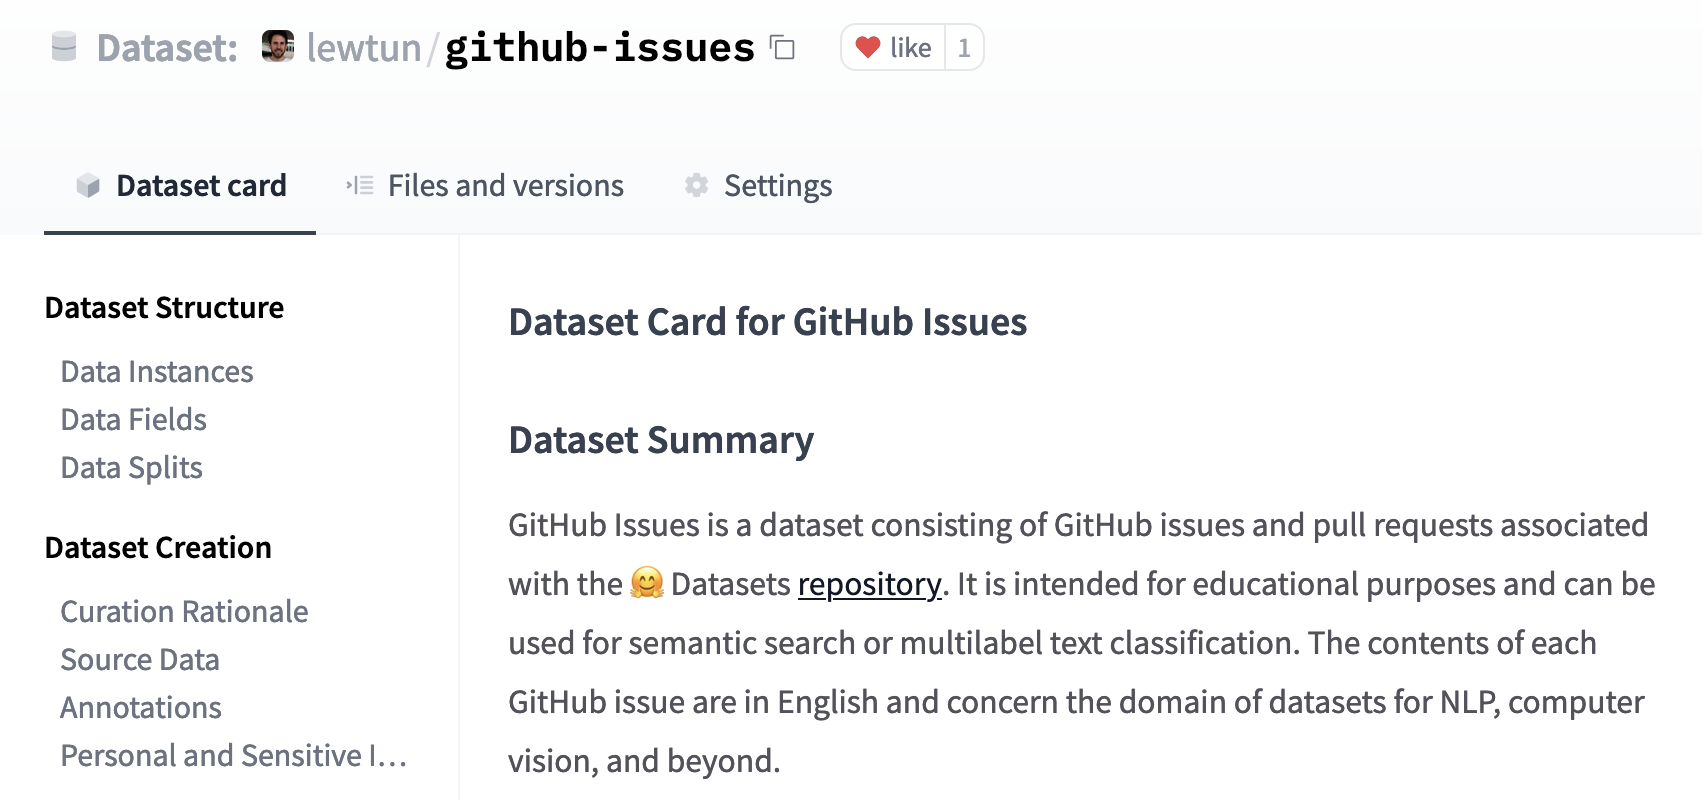
你可以直接在 Hub 上创建 README.md 文件,你可以在 lewtun/github-issues 数据集仓库中找到一个模板数据集卡片。下面显示了填写好的数据集卡片的截图。
✏️试试看!使用 dataset-tagging 应用程序和 🤗 Datasets 指南 指南来完成 GitHub issue 数据集的 README.md 文件。
很好!我们在本节中可以看到,创建一个好的数据集可能涉及相当多的工作,但幸运的是,将其上传并与社区共享会很容易实现。在下一节中,我们将使用我们的新数据集创建一个 🤗 Datasets 的语义搜索引擎,该引擎可以将输入匹配到最相关的 issue 和评论。
✏️ 试试看!按照我们在本节中采取的步骤为你最喜欢的开源库创建一个 GitHub issue 数据集(当然是除了 🤗 Datasets)。进阶的挑战:微调多标签分类器以预测在 labels 字段中出现的标签。