LLM Course documentation
Sharing pretrained models
Sharing pretrained models

In the steps below, we’ll take a look at the easiest ways to share pretrained models to the 🤗 Hub. There are tools and utilities available that make it simple to share and update models directly on the Hub, which we will explore below.
We encourage all users that train models to contribute by sharing them with the community — sharing models, even when trained on very specific datasets, will help others, saving them time and compute resources and providing access to useful trained artifacts. In turn, you can benefit from the work that others have done!
There are three ways to go about creating new model repositories:
- Using the
push_to_hubAPI - Using the
huggingface_hubPython library - Using the web interface
Once you’ve created a repository, you can upload files to it via git and git-lfs. We’ll walk you through creating model repositories and uploading files to them in the following sections.
Using the push_to_hub API
The simplest way to upload files to the Hub is by leveraging the push_to_hub API.
Before going further, you’ll need to generate an authentication token so that the huggingface_hub API knows who you are and what namespaces you have write access to. Make sure you are in an environment where you have transformers installed (see Setup). If you are in a notebook, you can use the following function to login:
from huggingface_hub import notebook_login

notebook_login()
In a terminal, you can run:
huggingface-cli login
In both cases, you should be prompted for your username and password, which are the same ones you use to log in to the Hub. If you do not have a Hub profile yet, you should create one here.
Great! You now have your authentication token stored in your cache folder. Let’s create some repositories!
If you have played around with the Trainer API to train a model, the easiest way to upload it to the Hub is to set push_to_hub=True when you define your TrainingArguments:
from transformers import TrainingArguments

training_args = TrainingArguments(
    "bert-finetuned-mrpc", save_strategy="epoch", push_to_hub=True
)
When you call trainer.train(), the Trainer will then upload your model to the Hub each time it is saved (here every epoch) in a repository in your namespace. That repository will be named like the output directory you picked (here bert-finetuned-mrpc) but you can choose a different name with hub_model_id = "a_different_name".
To upload your model to an organization you are a member of, just pass it with hub_model_id = "my_organization/my_repo_name".
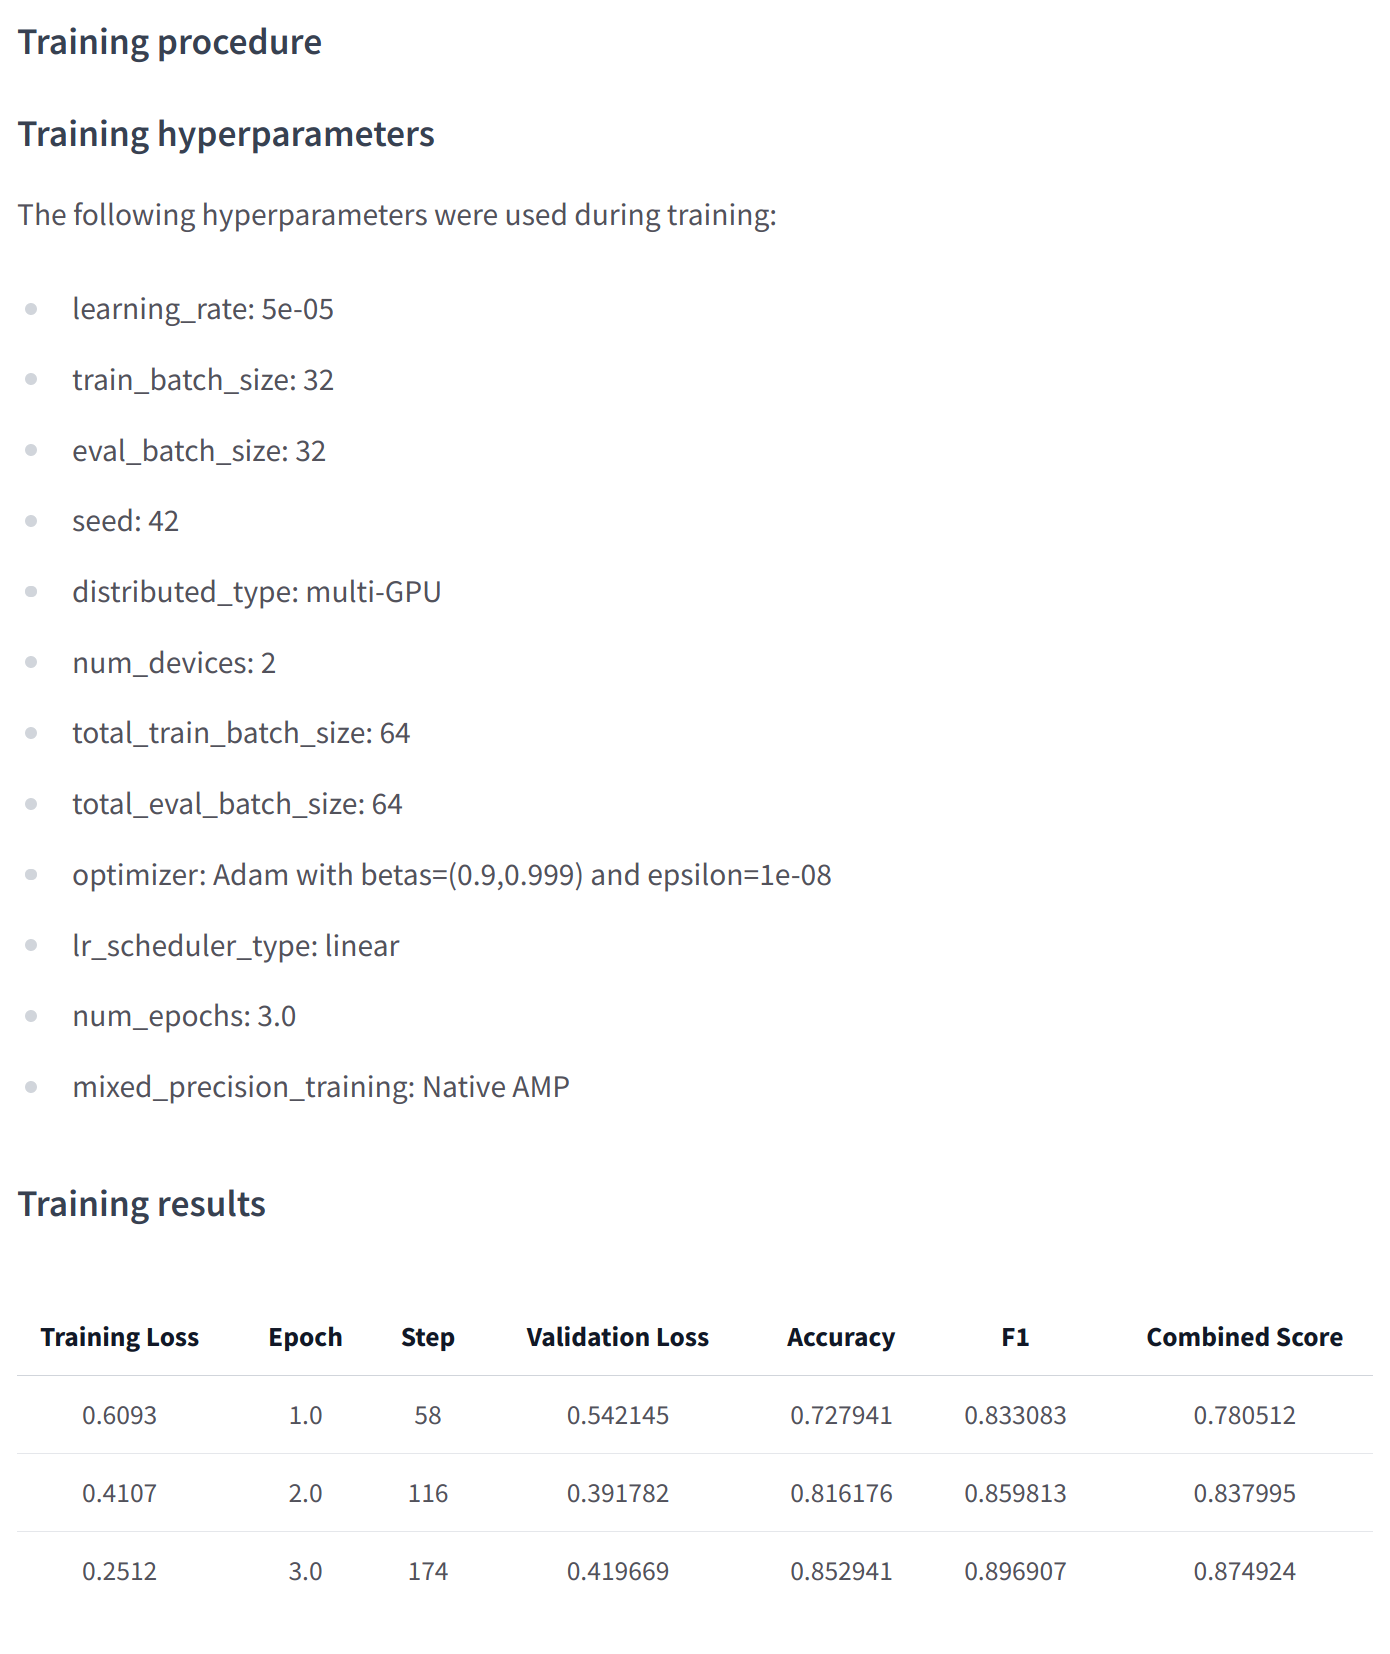
Once your training is finished, you should do a final trainer.push_to_hub() to upload the last version of your model. It will also generate a model card with all the relevant metadata, reporting the hyperparameters used and the evaluation results! Here is an example of the content you might find in a such a model card:
At a lower level, accessing the Model Hub can be done directly on models, tokenizers, and configuration objects via their push_to_hub() method. This method takes care of both the repository creation and pushing the model and tokenizer files directly to the repository. No manual handling is required, unlike with the API we’ll see below.
To get an idea of how it works, let’s first initialize a model and a tokenizer:
from transformers import AutoModelForMaskedLM, AutoTokenizer

checkpoint = "camembert-base"

model = AutoModelForMaskedLM.from_pretrained(checkpoint)
tokenizer = AutoTokenizer.from_pretrained(checkpoint)
You’re free to do whatever you want with these — add tokens to the tokenizer, train the model, fine-tune it. Once you’re happy with the resulting model, weights, and tokenizer, you can leverage the push_to_hub() method directly available on the model object:
model.push_to_hub("dummy-model")This will create the new repository dummy-model in your profile, and populate it with your model files.
Do the same with the tokenizer, so that all the files are now available in this repository:
tokenizer.push_to_hub("dummy-model")If you belong to an organization, simply specify the organization argument to upload to that organization’s namespace:
tokenizer.push_to_hub("dummy-model", organization="huggingface")If you wish to use a specific Hugging Face token, you’re free to specify it to the push_to_hub() method as well:
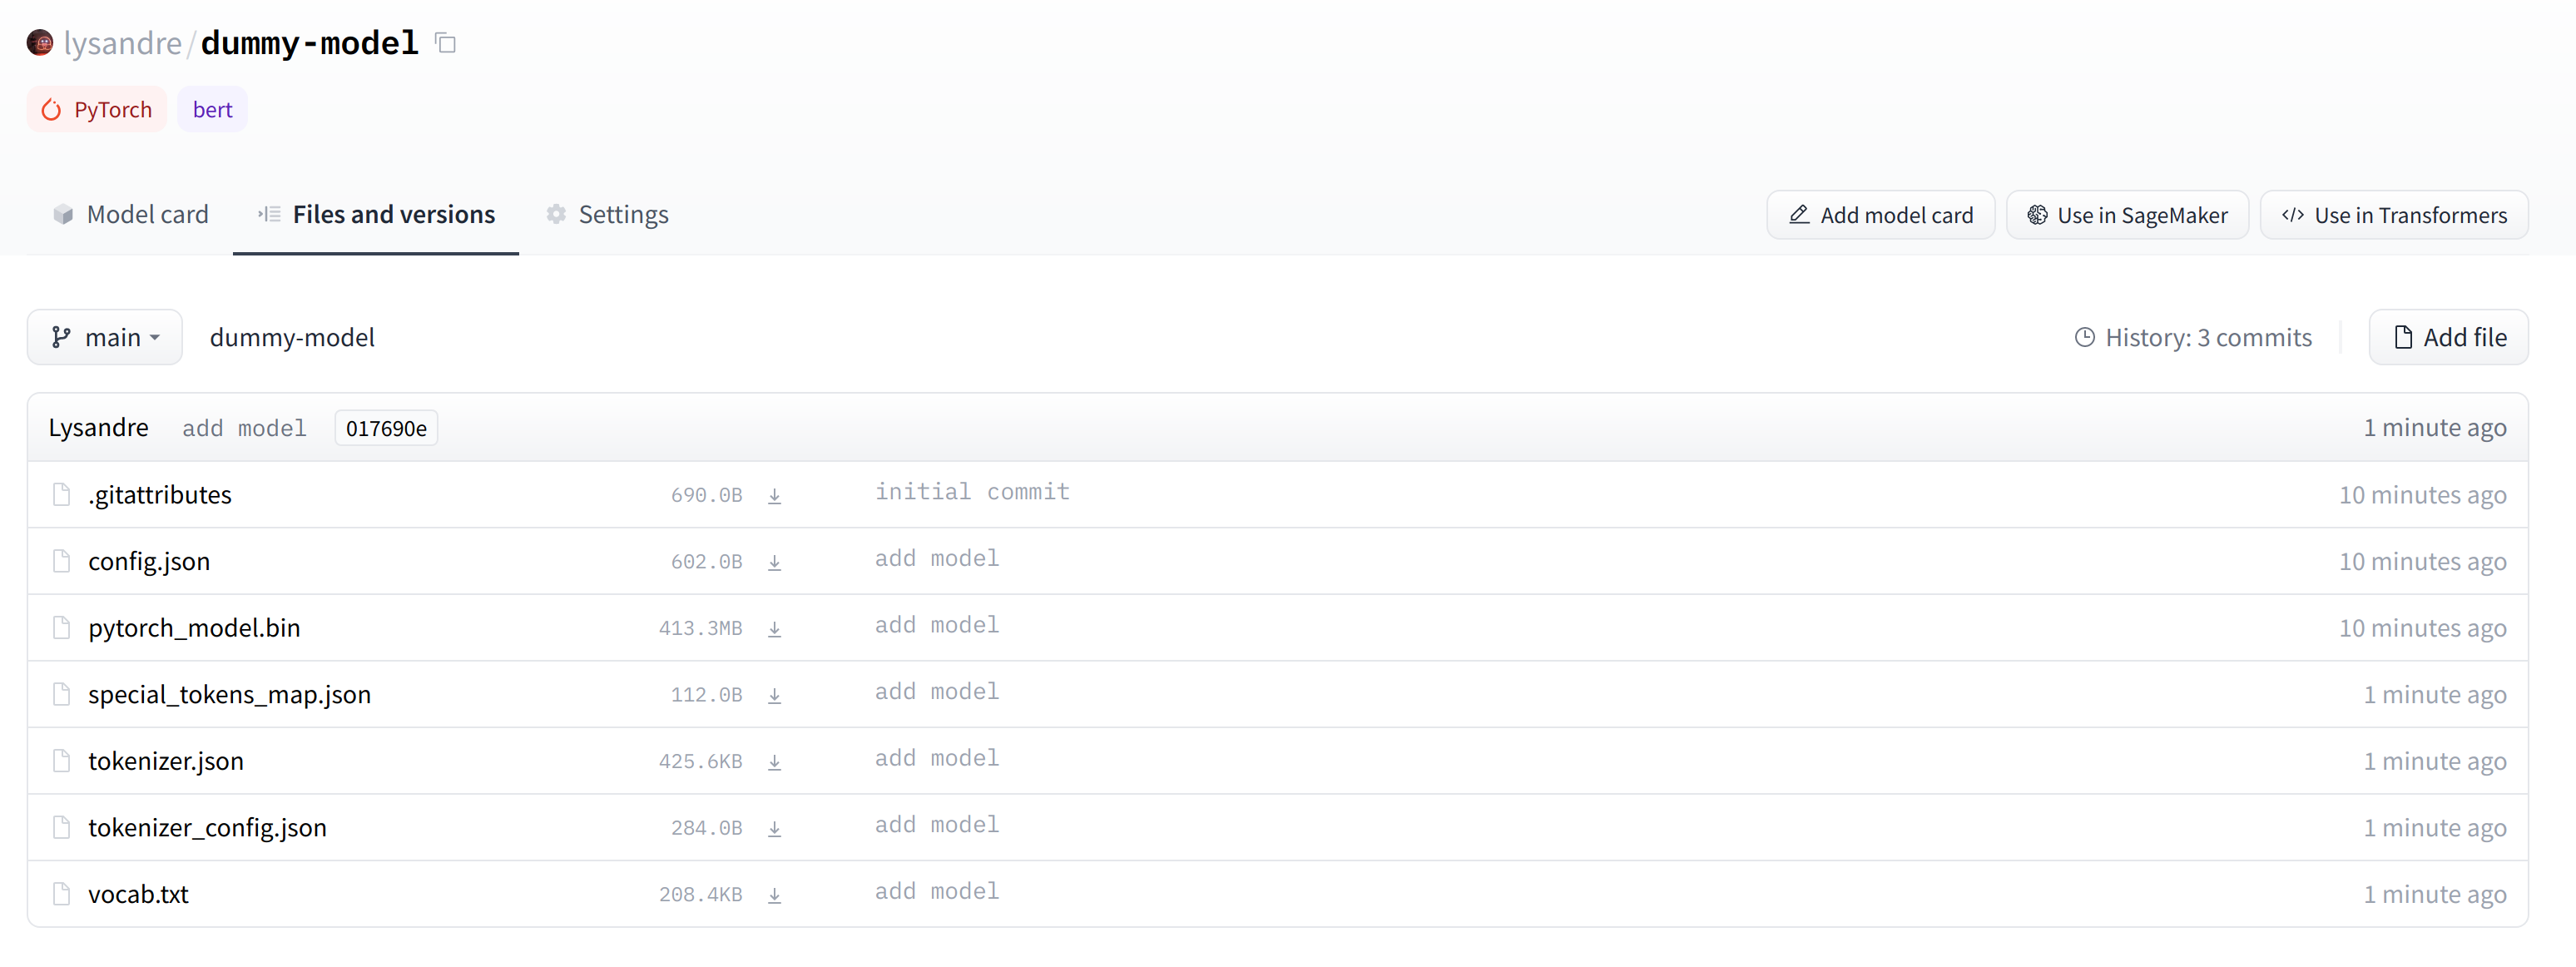
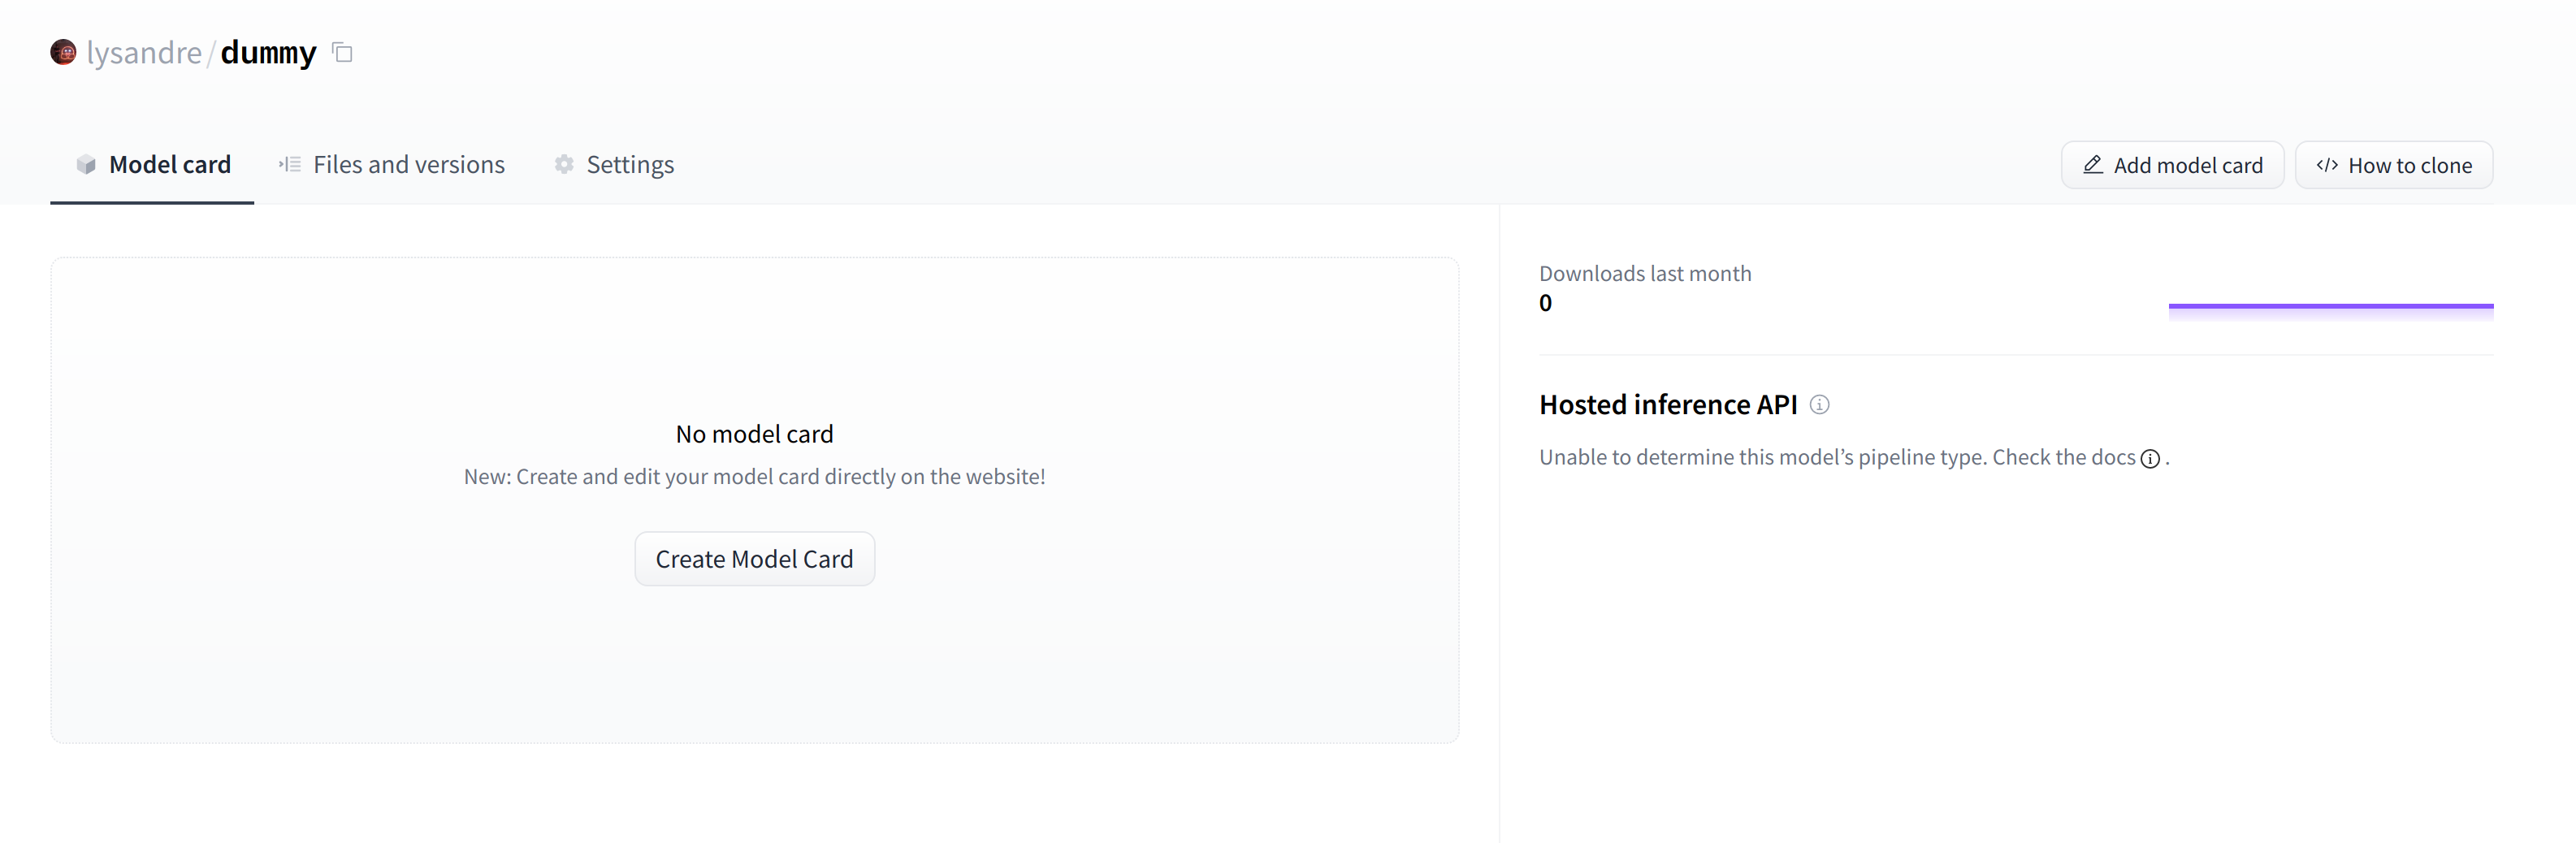
tokenizer.push_to_hub("dummy-model", organization="huggingface", use_auth_token="<TOKEN>")Now head to the Model Hub to find your newly uploaded model: https://huggingface.co/user-or-organization/dummy-model.
Click on the “Files and versions” tab, and you should see the files visible in the following screenshot:
✏️ Try it out! Take the model and tokenizer associated with the bert-base-cased checkpoint and upload them to a repo in your namespace using the push_to_hub() method. Double-check that the repo appears properly on your page before deleting it.
As you’ve seen, the push_to_hub() method accepts several arguments, making it possible to upload to a specific repository or organization namespace, or to use a different API token. We recommend you take a look at the method specification available directly in the 🤗 Transformers documentation to get an idea of what is possible.
The push_to_hub() method is backed by the huggingface_hub Python package, which offers a direct API to the Hugging Face Hub. It’s integrated within 🤗 Transformers and several other machine learning libraries, like allenlp. Although we focus on the 🤗 Transformers integration in this chapter, integrating it into your own code or library is simple.
Jump to the last section to see how to upload files to your newly created repository!
Using the huggingface_hub Python library
The huggingface_hub Python library is a package which offers a set of tools for the model and datasets hubs. It provides simple methods and classes for common tasks like
getting information about repositories on the hub and managing them. It provides simple APIs that work on top of git to manage those repositories’ content and to integrate the Hub
in your projects and libraries.
Similarly to using the push_to_hub API, this will require you to have your API token saved in your cache. In order to do this, you will need to use the login command from the CLI, as mentioned in the previous section (again, make sure to prepend these commands with the ! character if running in Google Colab):
huggingface-cli login
The huggingface_hub package offers several methods and classes which are useful for our purpose. Firstly, there are a few methods to manage repository creation, deletion, and others:
from huggingface_hub import (
    # User management
    login,
    logout,
    whoami,

    # Repository creation and management
    create_repo,
    delete_repo,
    update_repo_visibility,

    # And some methods to retrieve/change information about the content
    list_models,
    list_datasets,
    list_metrics,
    list_repo_files,
    upload_file,
    delete_file,
)
Additionally, it offers the very powerful Repository class to manage a local repository. We will explore these methods and that class in the next few section to understand how to leverage them.
The create_repo method can be used to create a new repository on the hub:
from huggingface_hub import create_repo

create_repo("dummy-model")
This will create the repository dummy-model in your namespace. If you like, you can specify which organization the repository should belong to using the organization argument:
from huggingface_hub import create_repo

create_repo("dummy-model", organization="huggingface")
This will create the dummy-model repository in the huggingface namespace, assuming you belong to that organization.
Other arguments which may be useful are:
private, in order to specify if the repository should be visible from others or not.token, if you would like to override the token stored in your cache by a given token.repo_type, if you would like to create adatasetor aspaceinstead of a model. Accepted values are"dataset"and"space".
Once the repository is created, we should add files to it! Jump to the next section to see the three ways this can be handled.
Using the web interface
The web interface offers tools to manage repositories directly in the Hub. Using the interface, you can easily create repositories, add files (even large ones!), explore models, visualize diffs, and much more.
To create a new repository, visit huggingface.co/new:
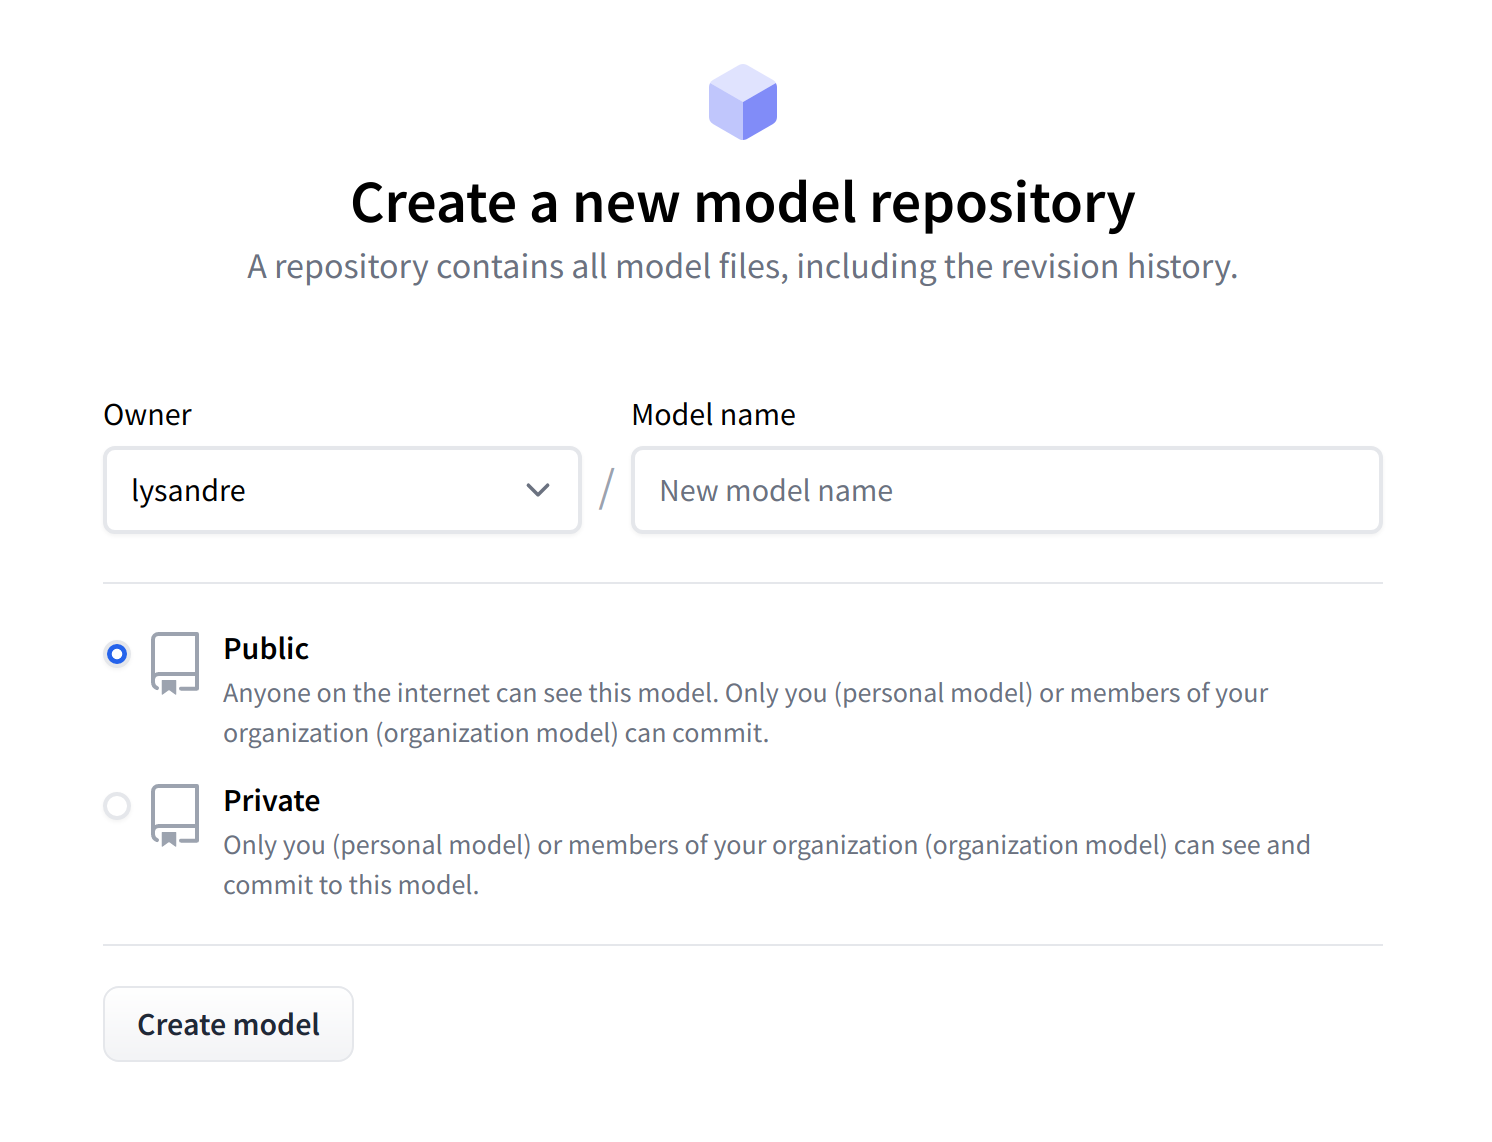
First, specify the owner of the repository: this can be either you or any of the organizations you’re affiliated with. If you choose an organization, the model will be featured on the organization’s page and every member of the organization will have the ability to contribute to the repository.
Next, enter your model’s name. This will also be the name of the repository. Finally, you can specify whether you want your model to be public or private. Private models are hidden from public view.
After creating your model repository, you should see a page like this:
This is where your model will be hosted. To start populating it, you can add a README file directly from the web interface.
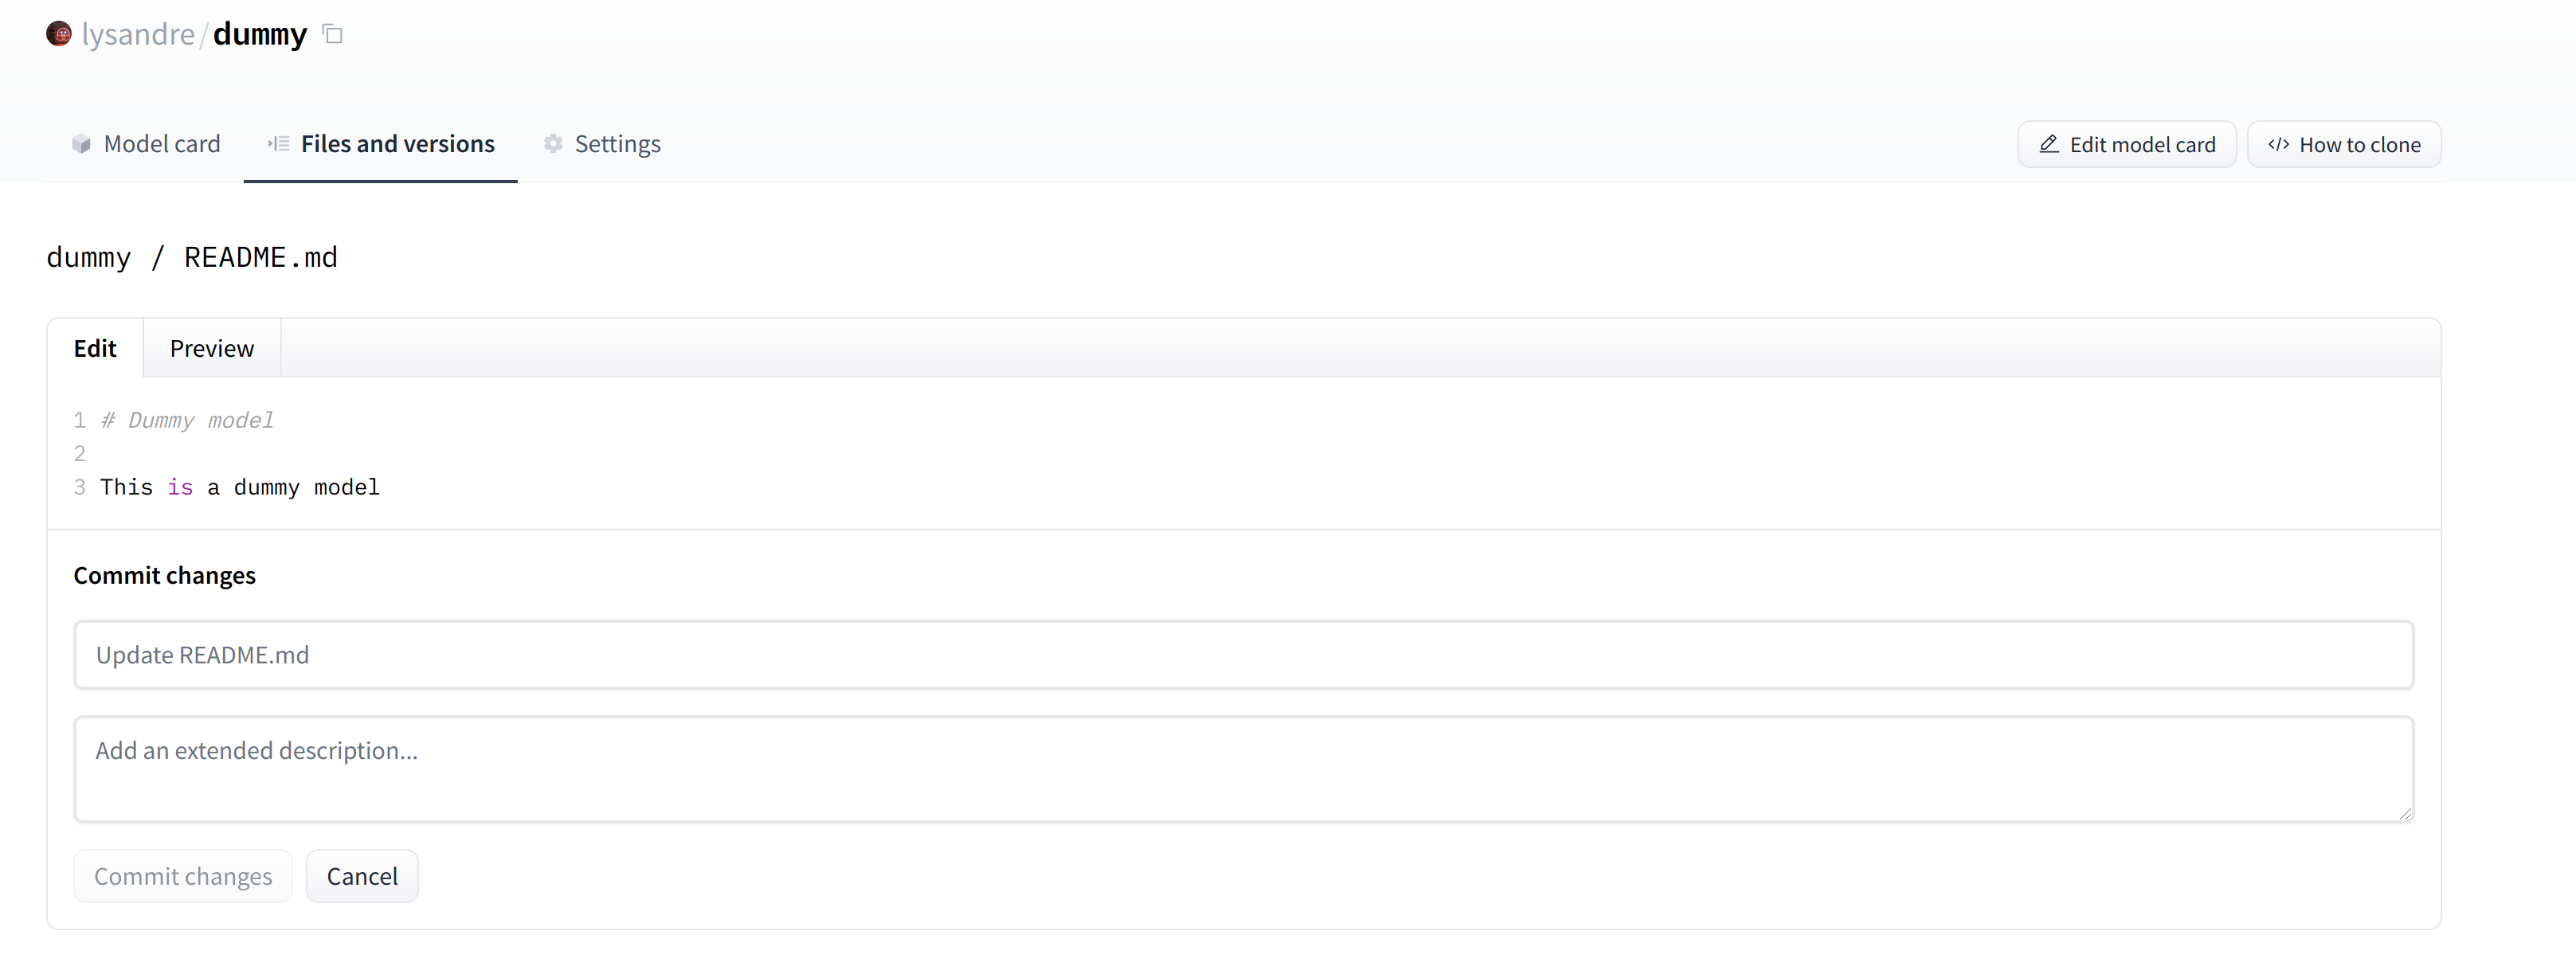
The README file is in Markdown — feel free to go wild with it! The third part of this chapter is dedicated to building a model card. These are of prime importance in bringing value to your model, as they’re where you tell others what it can do.
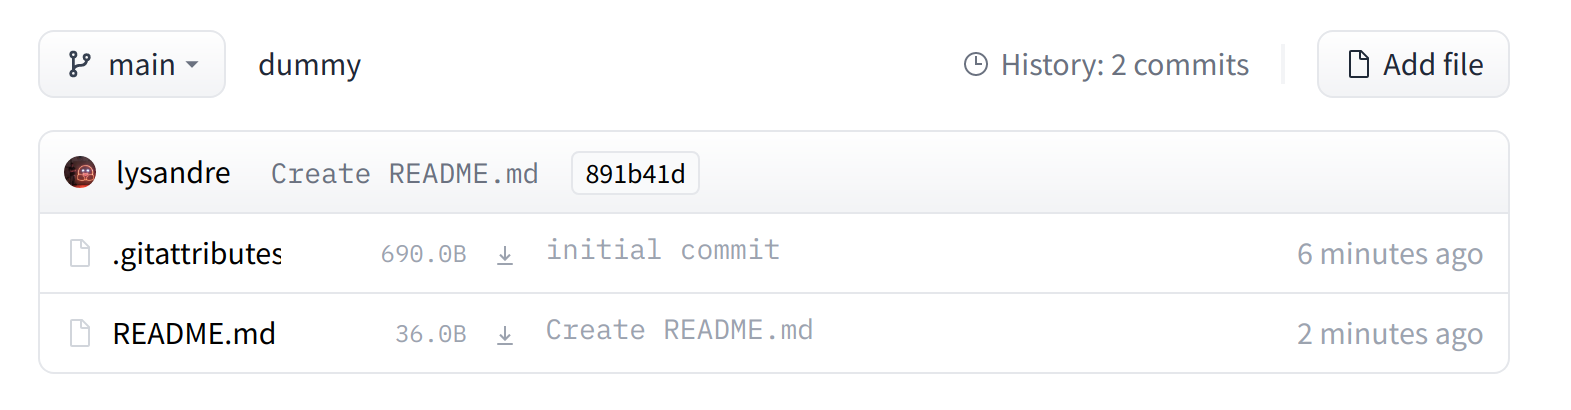
If you look at the “Files and versions” tab, you’ll see that there aren’t many files there yet — just the README.md you just created and the .gitattributes file that keeps track of large files.
We’ll take a look at how to add some new files next.
Uploading the model files
The system to manage files on the Hugging Face Hub is based on git for regular files, and git-lfs (which stands for Git Large File Storage) for larger files.
In the next section, we go over three different ways of uploading files to the Hub: through huggingface_hub and through git commands.
The upload_file approach
Using upload_file does not require git and git-lfs to be installed on your system. It pushes files directly to the 🤗 Hub using HTTP POST requests. A limitation of this approach is that it doesn’t handle files that are larger than 5GB in size.
If your files are larger than 5GB, please follow the two other methods detailed below.
The API may be used as follows:
from huggingface_hub import upload_file

upload_file(
    "<path_to_file>/config.json",
    path_in_repo="config.json",
    repo_id="<namespace>/dummy-model",
)
This will upload the file config.json available at <path_to_file> to the root of the repository as config.json, to the dummy-model repository.
Other arguments which may be useful are:
token, if you would like to override the token stored in your cache by a given token.repo_type, if you would like to upload to adatasetor aspaceinstead of a model. Accepted values are"dataset"and"space".
The Repository class
The Repository class manages a local repository in a git-like manner. It abstracts most of the pain points one may have with git to provide all features that we require.
Using this class requires having git and git-lfs installed, so make sure you have git-lfs installed (see here for installation instructions) and set up before you begin.
In order to start playing around with the repository we have just created, we can start by initialising it into a local folder by cloning the remote repository:
from huggingface_hub import Repository

repo = Repository("<path_to_dummy_folder>", clone_from="<namespace>/dummy-model")
This created the folder <path_to_dummy_folder> in our working directory. This folder only contains the .gitattributes file as that’s the only file created when instantiating the repository through create_repo.
From this point on, we may leverage several of the traditional git methods:
repo.git_pull()
repo.git_add()
repo.git_commit()
repo.git_push()
repo.git_tag()
And others! We recommend taking a look at the Repository documentation available here for an overview of all available methods.
At present, we have a model and a tokenizer that we would like to push to the hub. We have successfully cloned the repository, we can therefore save the files within that repository.
We first make sure that our local clone is up to date by pulling the latest changes:
repo.git_pull()
Once that is done, we save the model and tokenizer files:
model.save_pretrained("<path_to_dummy_folder>")
tokenizer.save_pretrained("<path_to_dummy_folder>")
The <path_to_dummy_folder> now contains all the model and tokenizer files. We follow the usual git workflow by adding files to the staging area, committing them and pushing them to the hub:
repo.git_add()
repo.git_commit("Add model and tokenizer files")
repo.git_push()
Congratulations! You just pushed your first files on the hub.
The git-based approach
This is the very barebones approach to uploading files: we’ll do so with git and git-lfs directly. Most of the difficulty is abstracted away by previous approaches, but there are a few caveats with the following method so we’ll follow a more complex use-case.
Using this class requires having git and git-lfs installed, so make sure you have git-lfs installed (see here for installation instructions) and set up before you begin.
First start by initializing git-lfs:
git lfs install
Updated git hooks.
Git LFS initialized.
Once that’s done, the first step is to clone your model repository:
git clone https://huggingface.co/<namespace>/<your-model-id>My username is lysandre and I’ve used the model name dummy, so for me the command ends up looking like the following:
git clone https://huggingface.co/lysandre/dummyI now have a folder named dummy in my working directory. I can cd into the folder and have a look at the contents:
cd dummy && lsREADME.md
If you just created your repository using Hugging Face Hub’s create_repo method, this folder should only contain a hidden .gitattributes file. If you followed the instructions in the previous section to create a repository using the web interface, the folder should contain a single README.md file alongside the hidden .gitattributes file, as shown here.
Adding a regular-sized file, such as a configuration file, a vocabulary file, or basically any file under a few megabytes, is done exactly as one would do it in any git-based system. However, bigger files must be registered through git-lfs in order to push them to huggingface.co.
Let’s go back to Python for a bit to generate a model and tokenizer that we’d like to commit to our dummy repository:
from transformers import AutoModelForMaskedLM, AutoTokenizer

checkpoint = "camembert-base"

model = AutoModelForMaskedLM.from_pretrained(checkpoint)
tokenizer = AutoTokenizer.from_pretrained(checkpoint)

# Do whatever with the model, train it, fine-tune it...

model.save_pretrained("<path_to_dummy_folder>")
tokenizer.save_pretrained("<path_to_dummy_folder>")
Now that we’ve saved some model and tokenizer artifacts, let’s take another look at the dummy folder:
lsconfig.json pytorch_model.bin README.md sentencepiece.bpe.model special_tokens_map.json tokenizer_config.json tokenizer.json
If you look at the file sizes (for example, with ls -lh), you should see that the model state dict file (pytorch_model.bin) is the only outlier, at more than 400 MB.
We can now go ahead and proceed like we would usually do with traditional Git repositories. We can add all the files to Git’s staging environment using the git add command:
git add .
We can then have a look at the files that are currently staged:
git status
On branch main
Your branch is up to date with 'origin/main'.

Changes to be committed:
  (use "git restore --staged <file>..." to unstage)
  modified:   .gitattributes
	new file:   config.json
	new file:   pytorch_model.bin
	new file:   sentencepiece.bpe.model
	new file:   special_tokens_map.json
	new file:   tokenizer.json
	new file:   tokenizer_config.json
Similarly, we can make sure that git-lfs is tracking the correct files by using its status command:
git lfs status
On branch main
Objects to be pushed to origin/main:


Objects to be committed:

	config.json (Git: bc20ff2)
	pytorch_model.bin (LFS: 35686c2)
	sentencepiece.bpe.model (LFS: 988bc5a)
	special_tokens_map.json (Git: cb23931)
	tokenizer.json (Git: 851ff3e)
	tokenizer_config.json (Git: f0f7783)

Objects not staged for commit:
We can see that all files have Git as a handler, except pytorch_model.bin and sentencepiece.bpe.model, which have LFS. Great!
Let’s proceed to the final steps, committing and pushing to the huggingface.co remote repository:
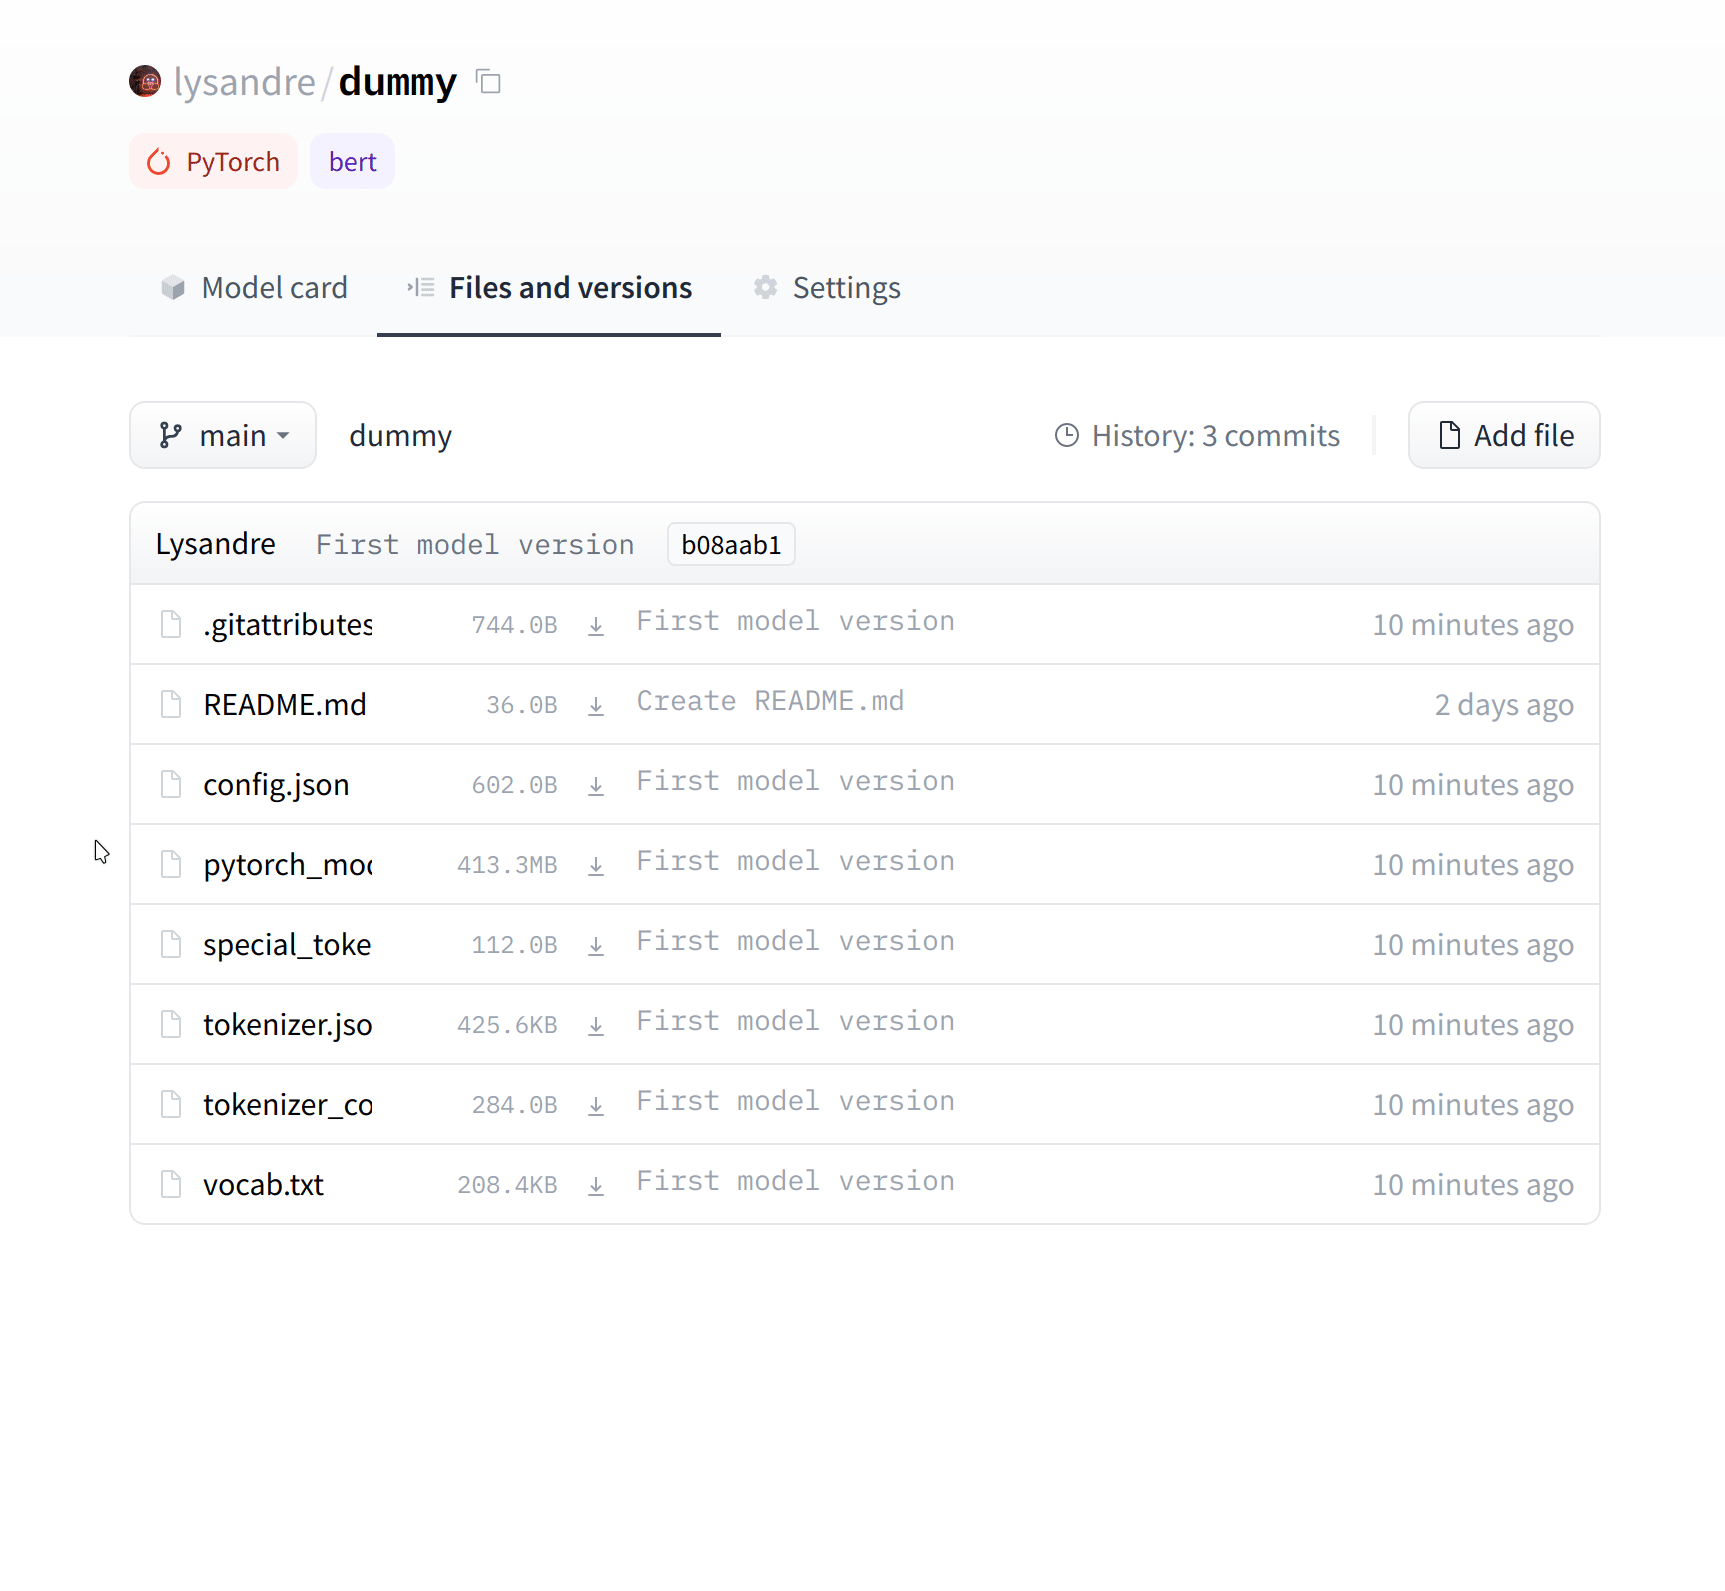
git commit -m "First model version"[main b08aab1] First model version 7 files changed, 29027 insertions(+) 6 files changed, 36 insertions(+) create mode 100644 config.json create mode 100644 pytorch_model.bin create mode 100644 sentencepiece.bpe.model create mode 100644 special_tokens_map.json create mode 100644 tokenizer.json create mode 100644 tokenizer_config.json
Pushing can take a bit of time, depending on the speed of your internet connection and the size of your files:
git push
Uploading LFS objects: 100% (1/1), 433 MB | 1.3 MB/s, done.
Enumerating objects: 11, done.
Counting objects: 100% (11/11), done.
Delta compression using up to 12 threads
Compressing objects: 100% (9/9), done.
Writing objects: 100% (9/9), 288.27 KiB | 6.27 MiB/s, done.
Total 9 (delta 1), reused 0 (delta 0), pack-reused 0
To https://huggingface.co/lysandre/dummy
   891b41d..b08aab1  main -> main
If we take a look at the model repository when this is finished, we can see all the recently added files:
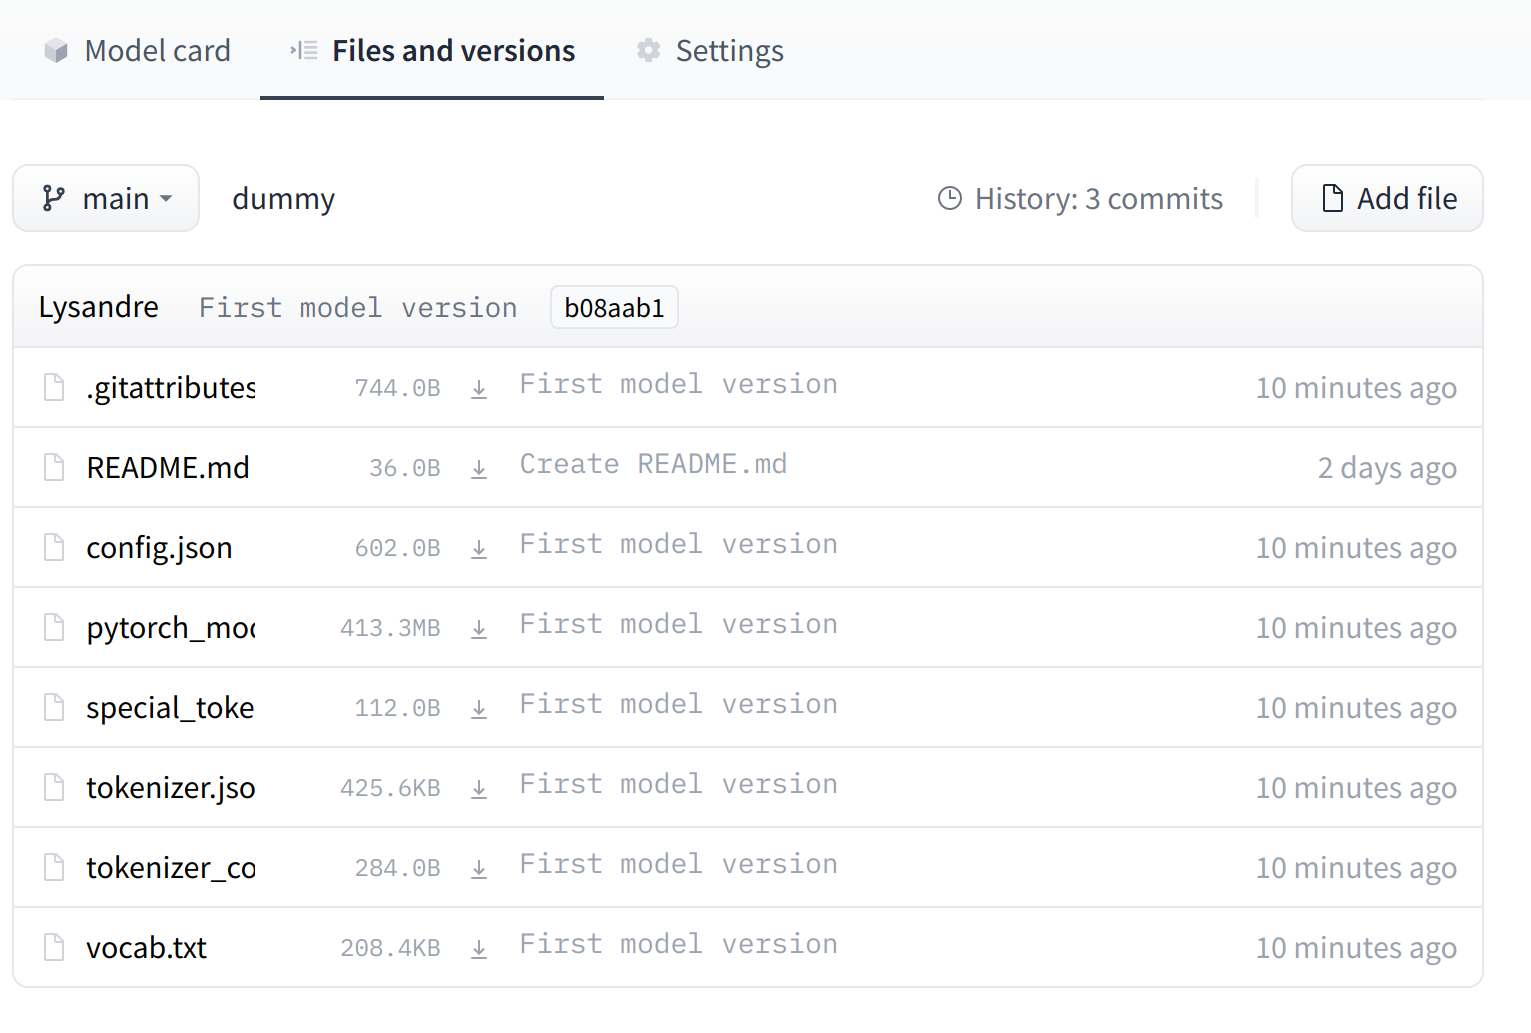
The UI allows you to explore the model files and commits and to see the diff introduced by each commit: