How to configure SAML SSO with Okta
In this guide, we will use Okta as the SSO provider and with the Security Assertion Markup Language (SAML) protocol as our preferred identity protocol.
We currently support SP-initiated and IdP-initiated authentication. User provisioning is not yet supported at this time.
Step 1: Create a new application in your Identity Provider
Open a new tab/window in your browser and sign in to your Okta account.
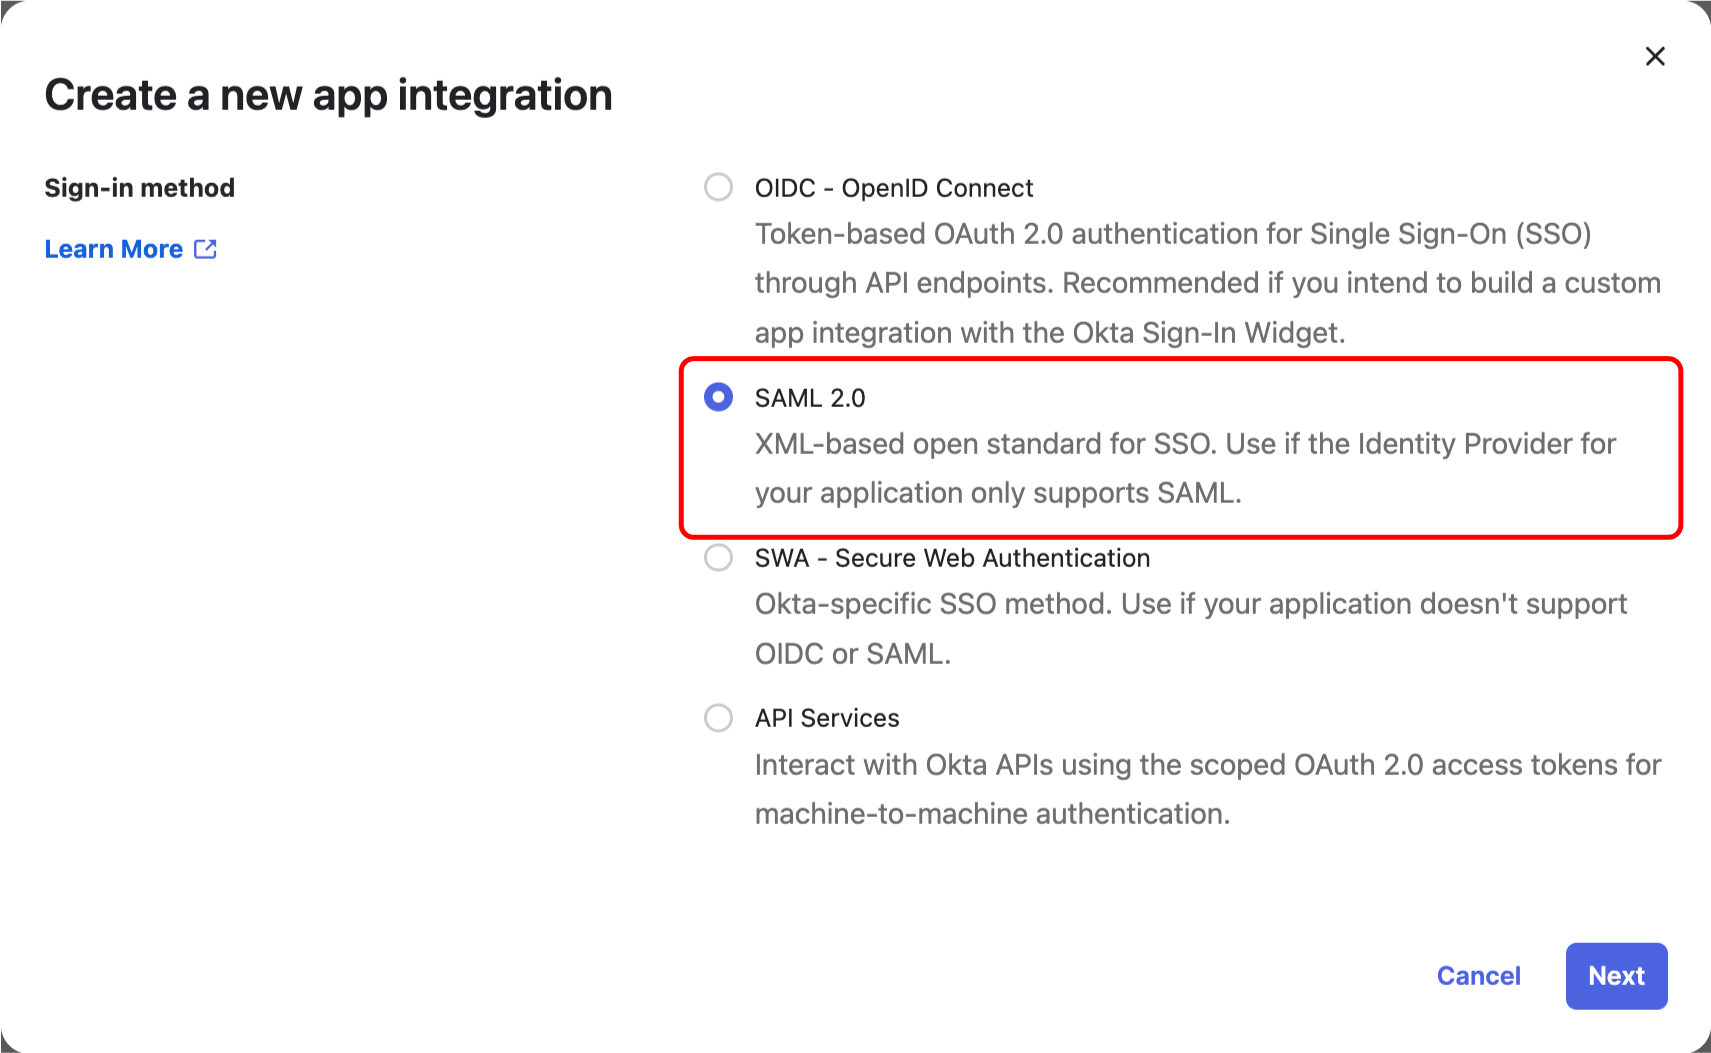
Navigate to “Admin/Applications” and click the “Create App Integration” button.

Then choose an “SAML 2.0” application and click “Create”.
Step 2: Configure your application on Okta
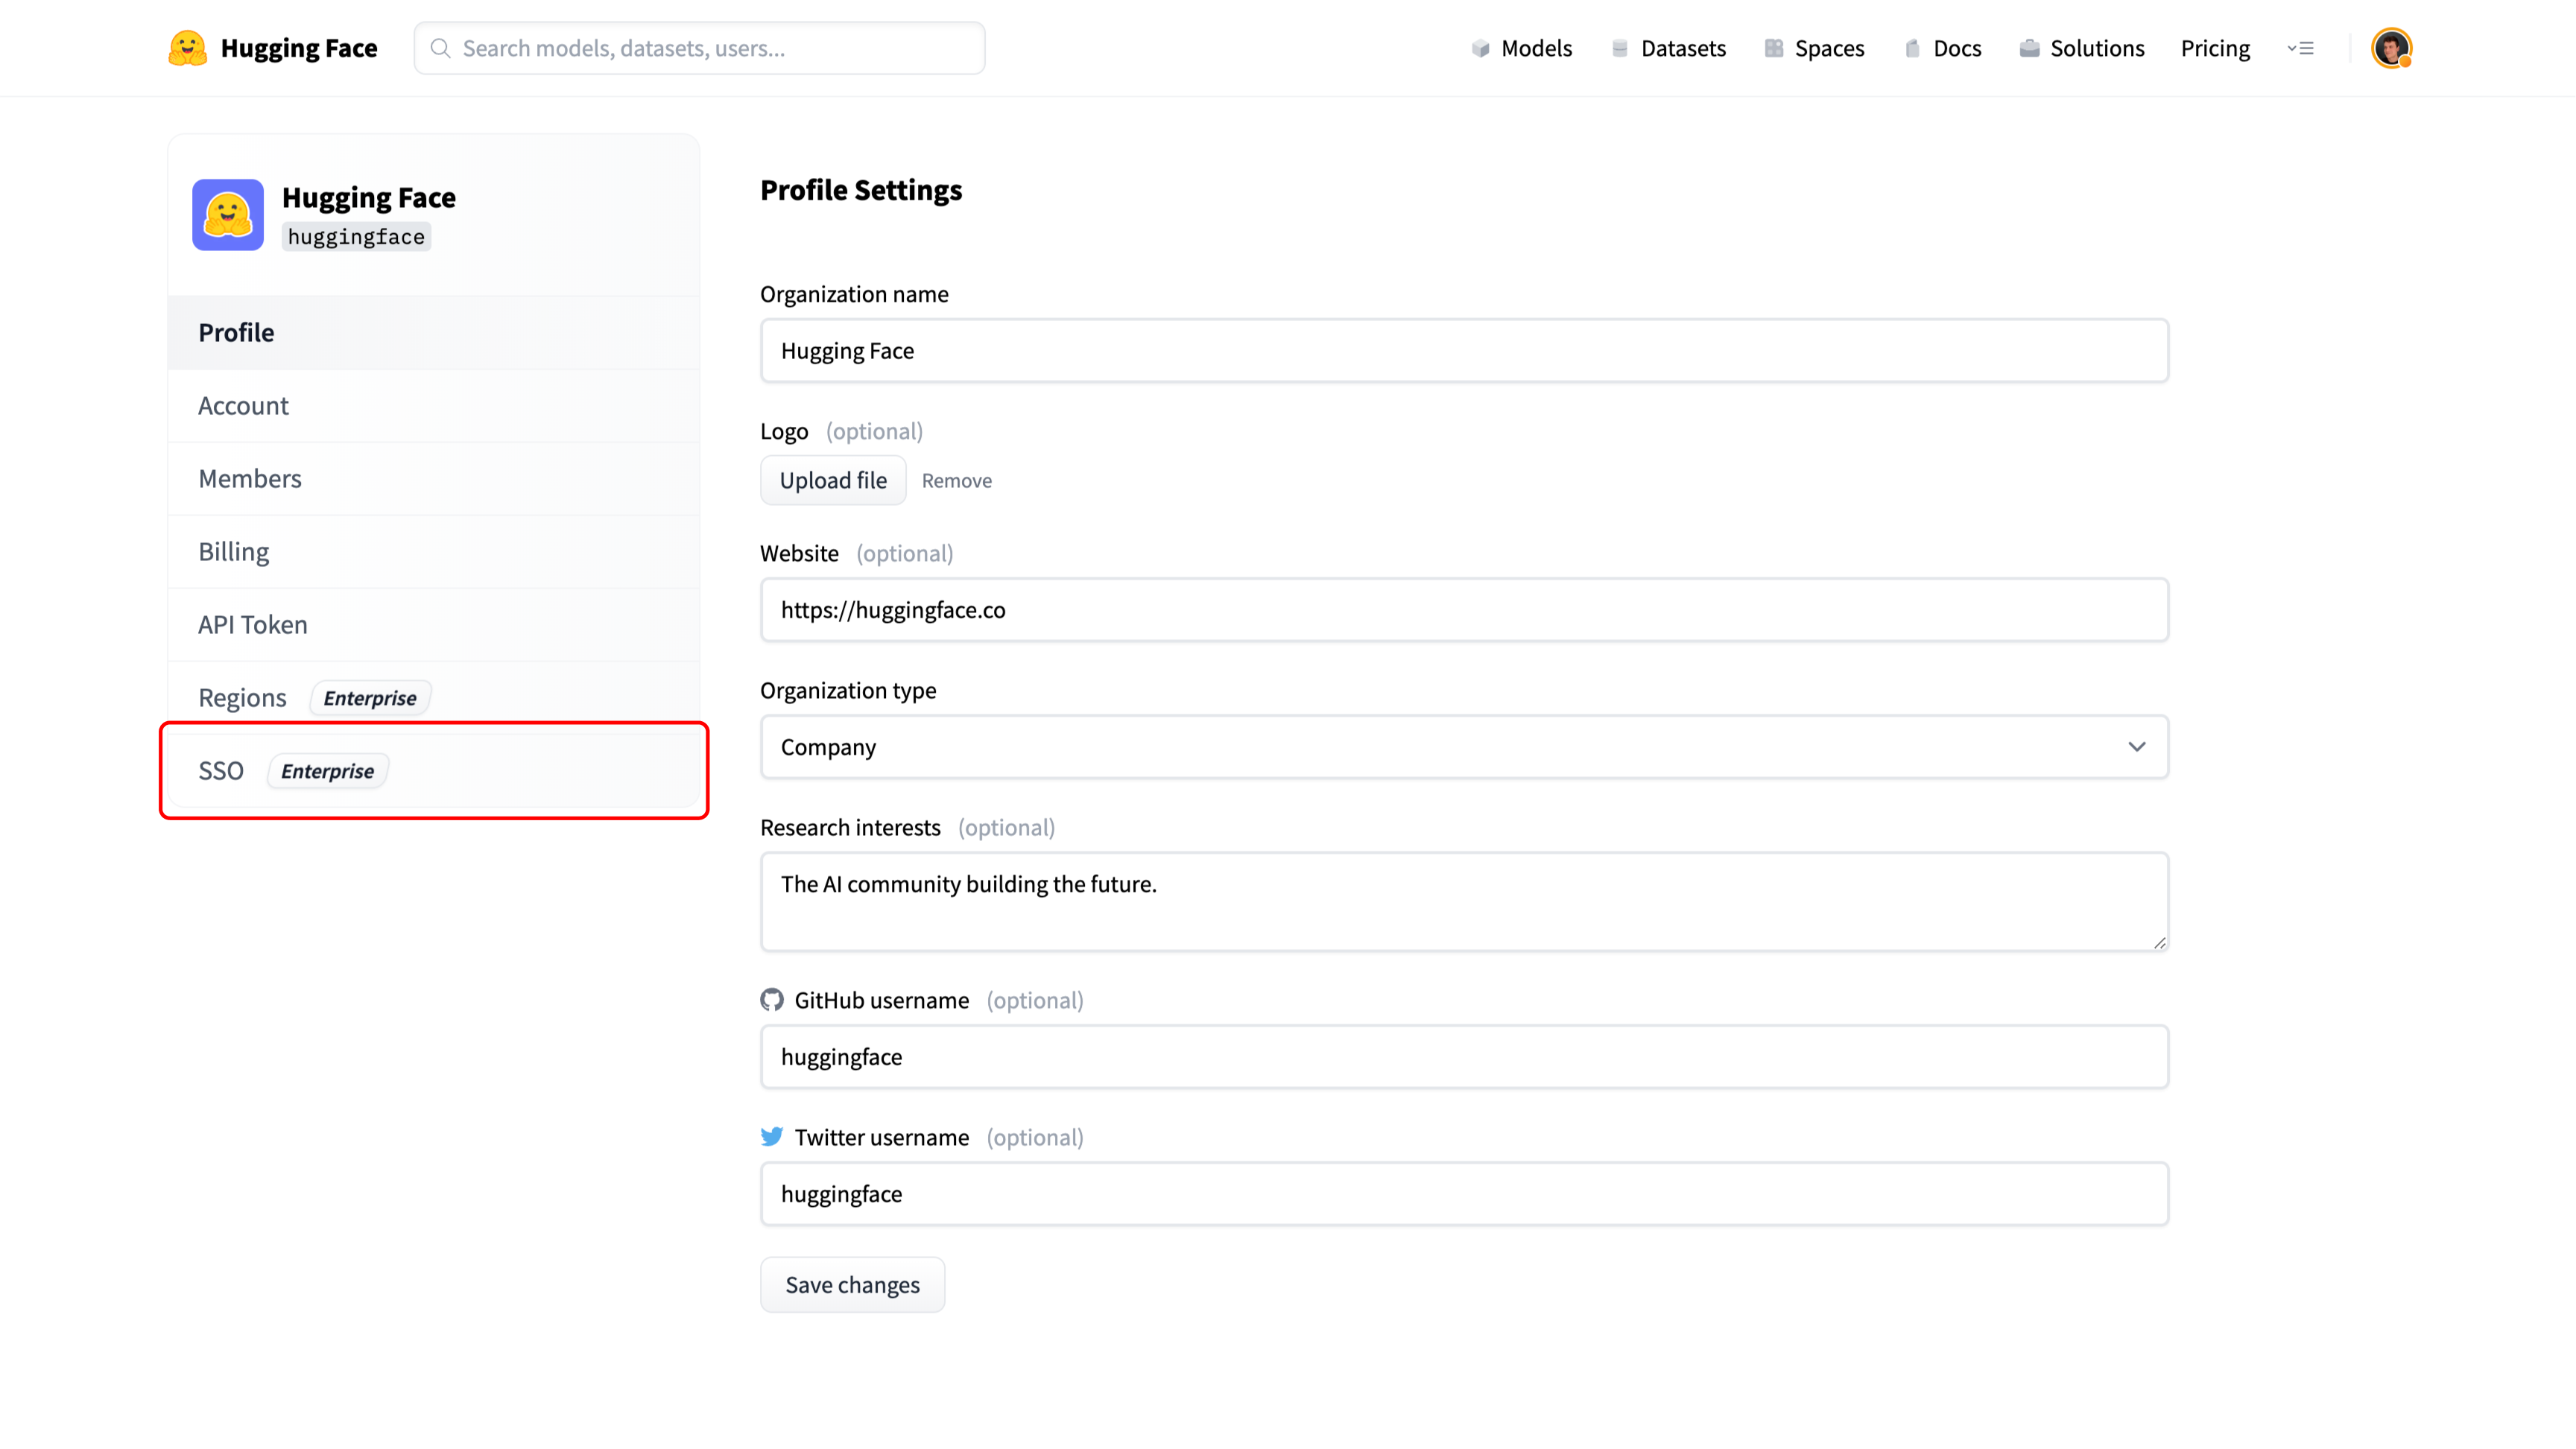
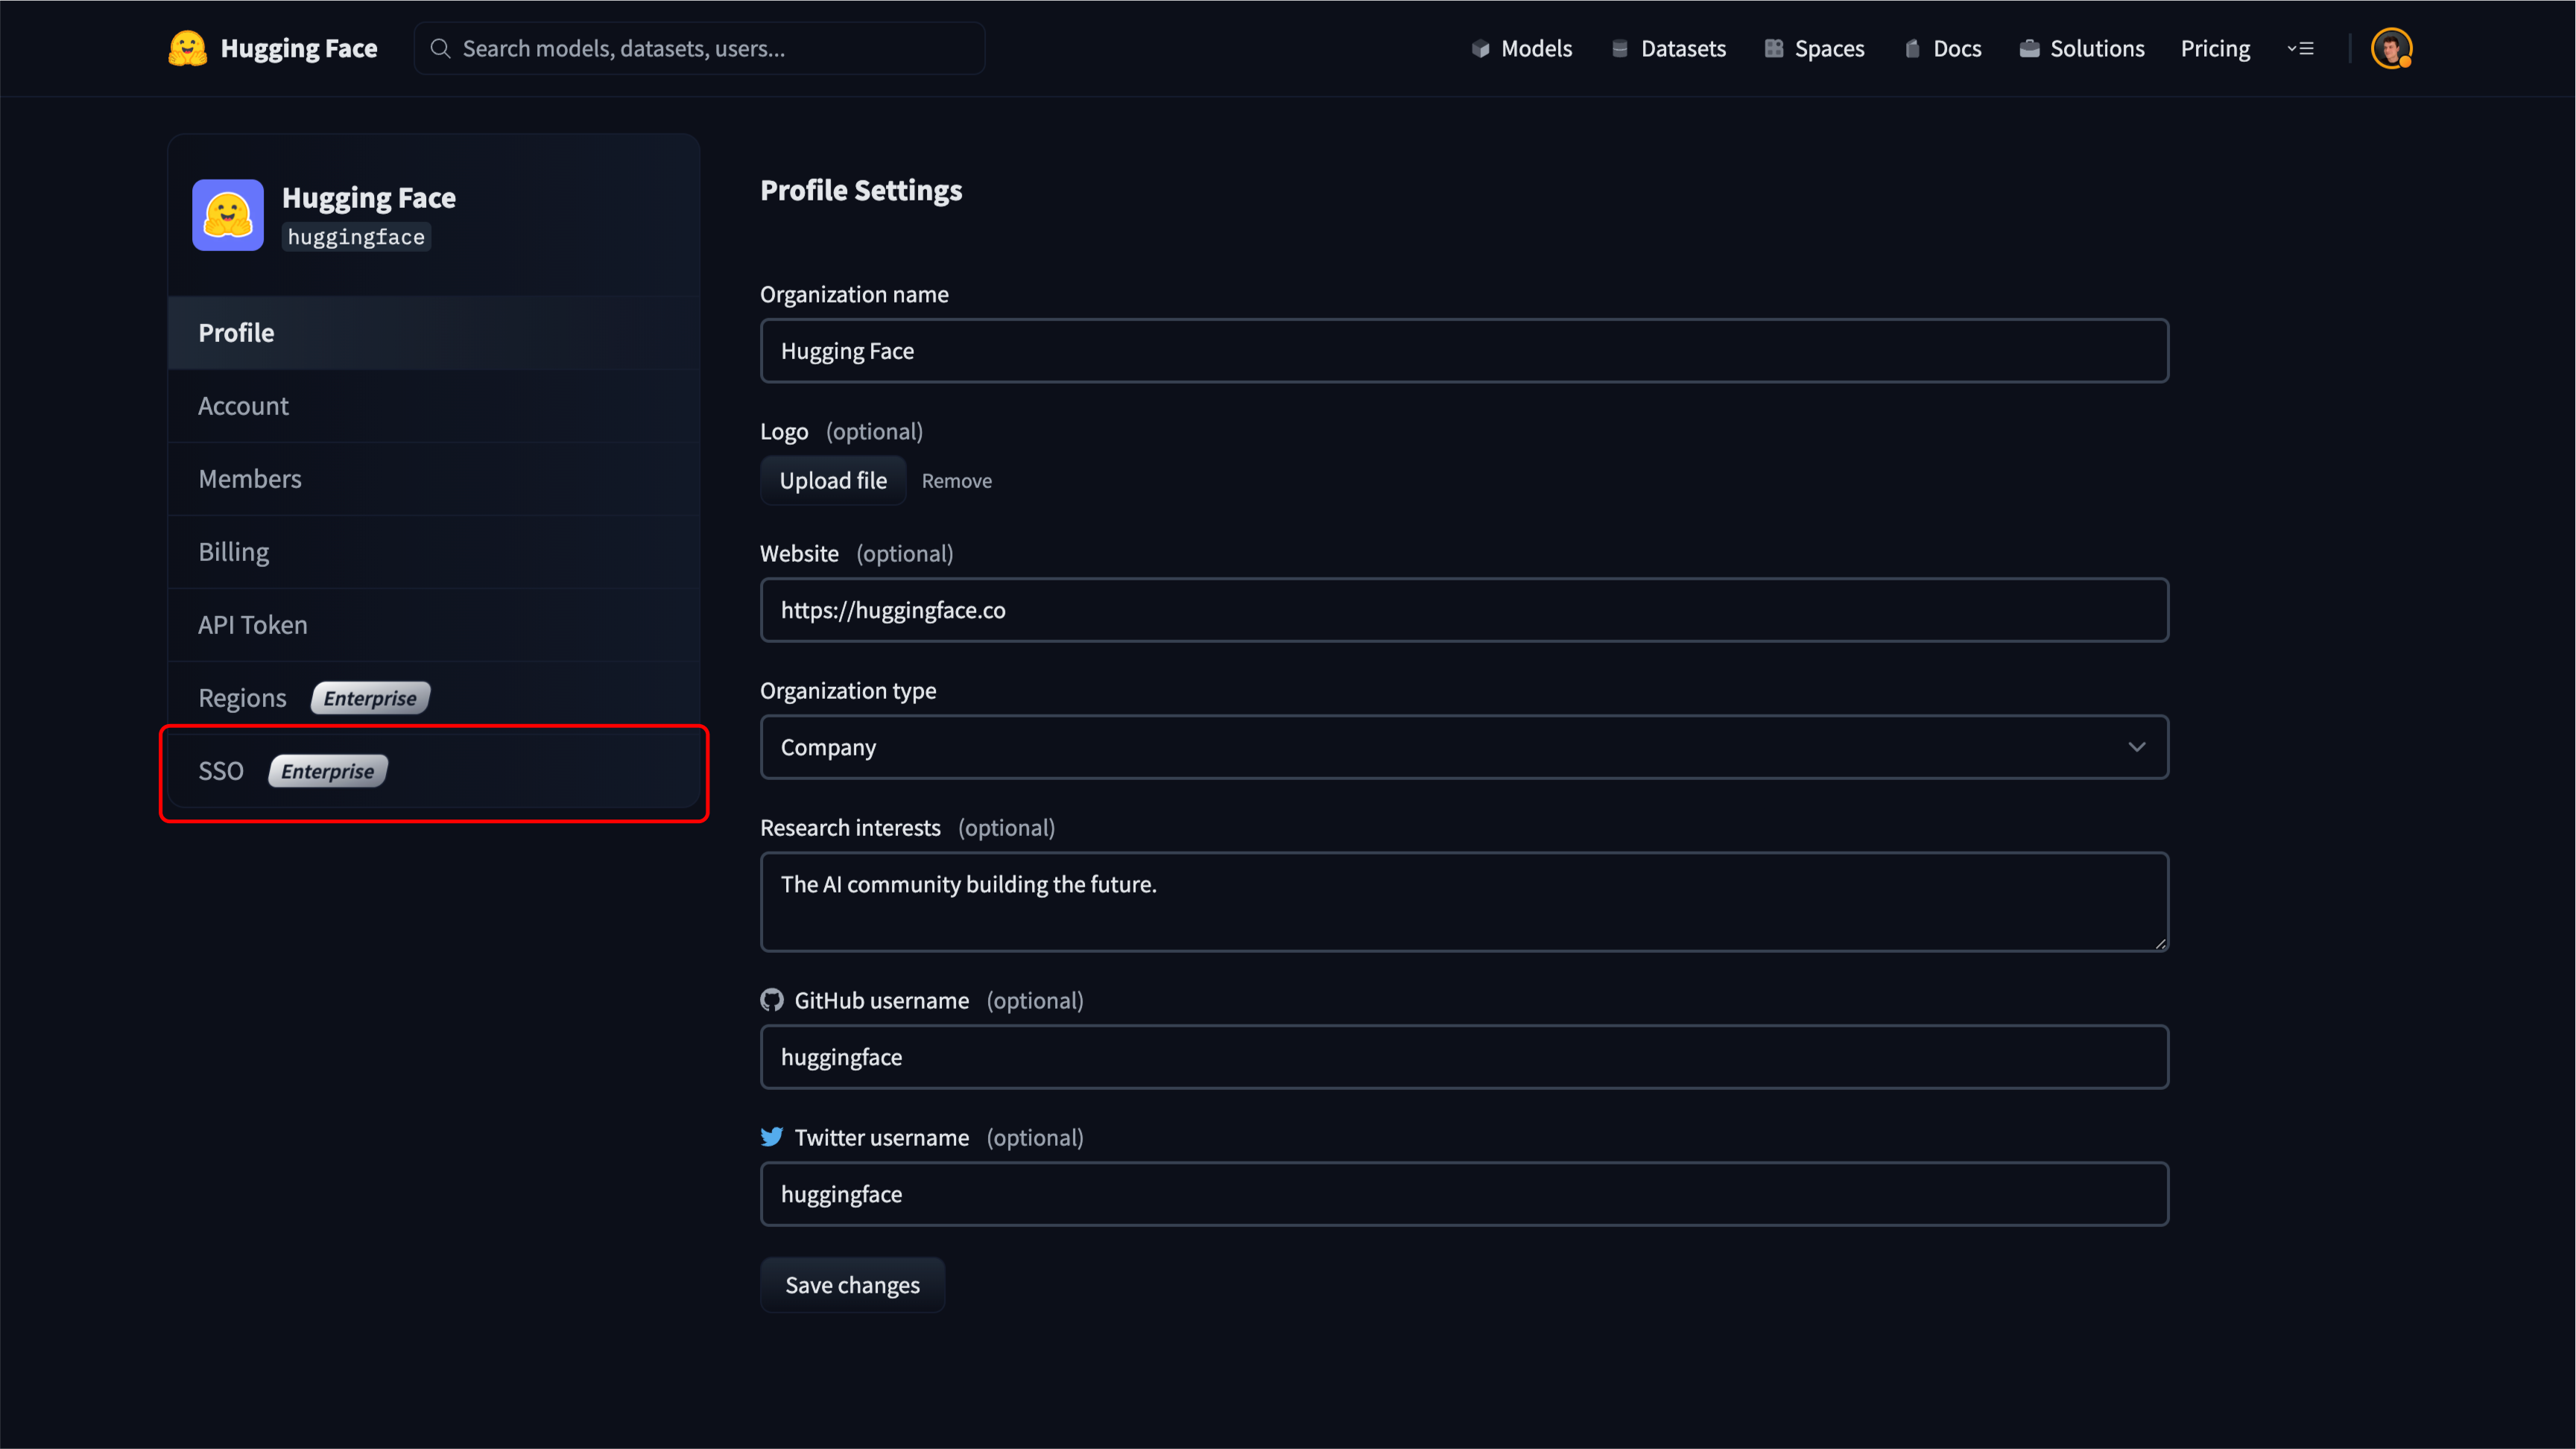
Open a new tab/window in your browser and navigate to the SSO section of your organization’s settings. Select the SAML protocol.


Copy the “Assertion Consumer Service URL” from the organization’s settings on Hugging Face, and paste it in the “Single sign-on URL” field on Okta.
The URL looks like this: https://huggingface.co/organizations/[organizationIdentifier]/saml/consume.
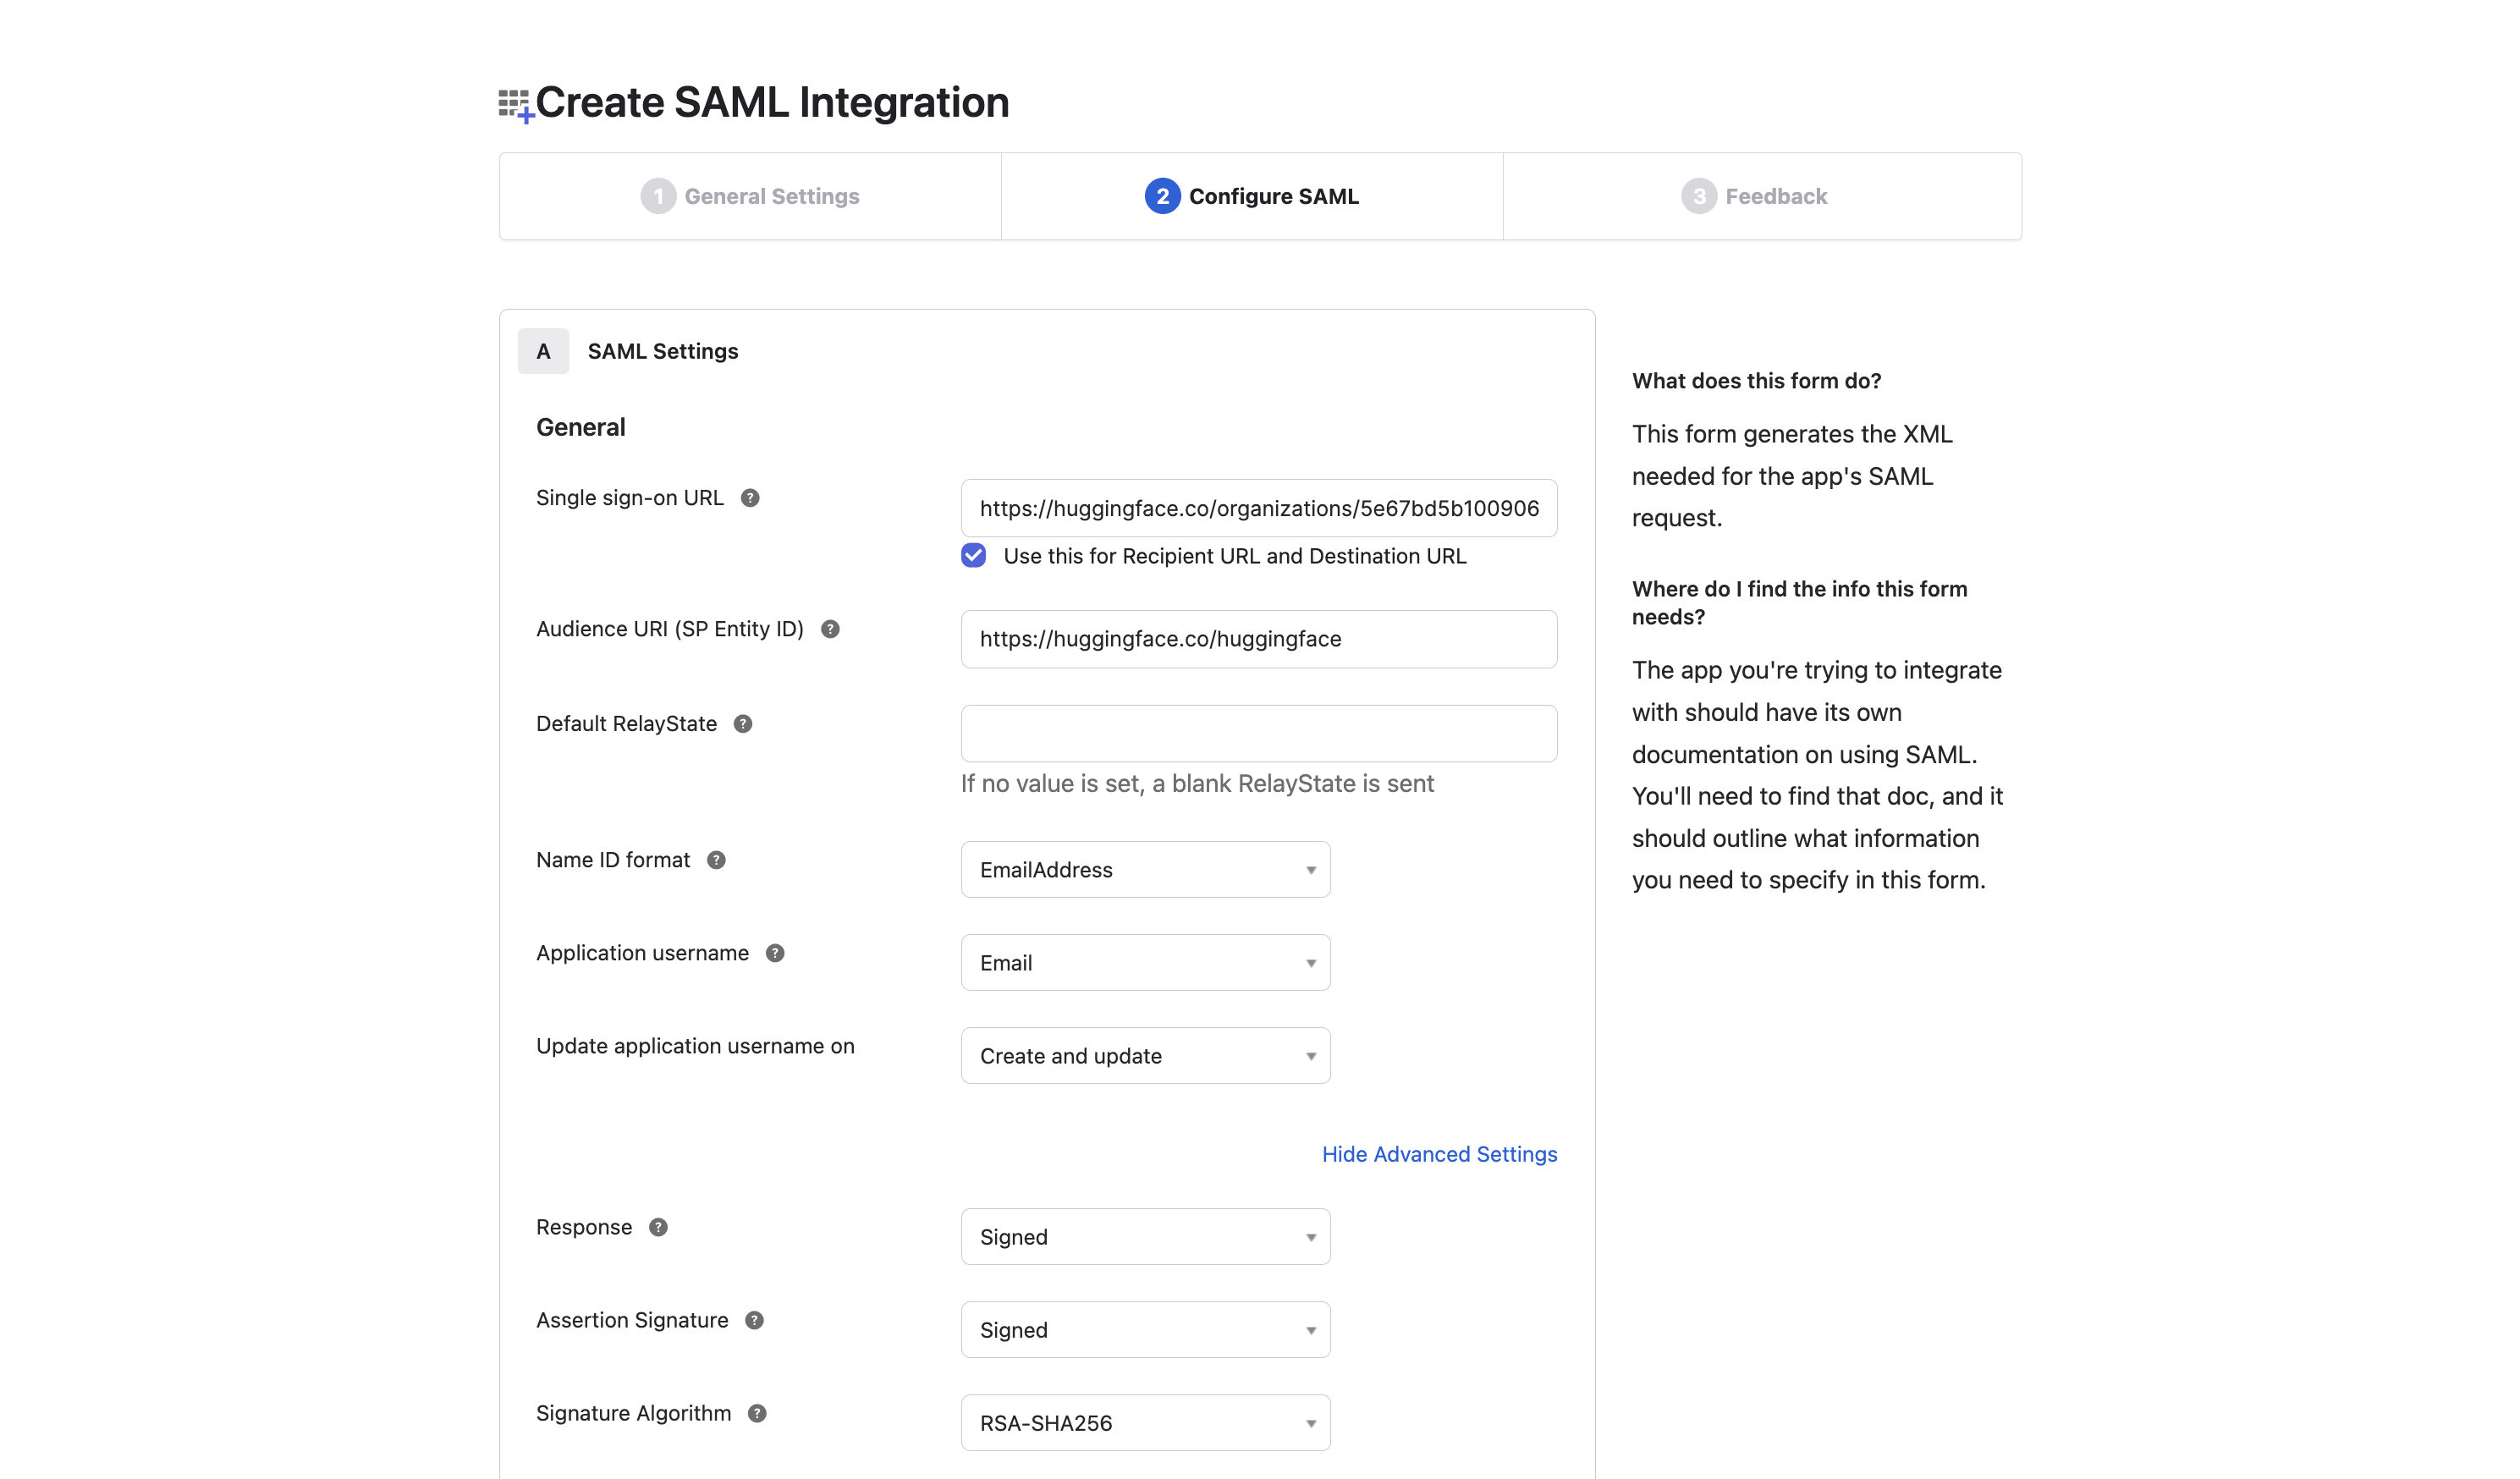
On Okta, set the following settings:
- Set Audience URI (SP Entity Id) to match the “SP Entity ID” value on Hugging Face.
- Set Name ID format to EmailAddress.
- Under “Show Advanced Settings”, verify that Response and Assertion Signature are set to: Signed.
Save your new application.
Step 3: Finalize configuration on Hugging Face
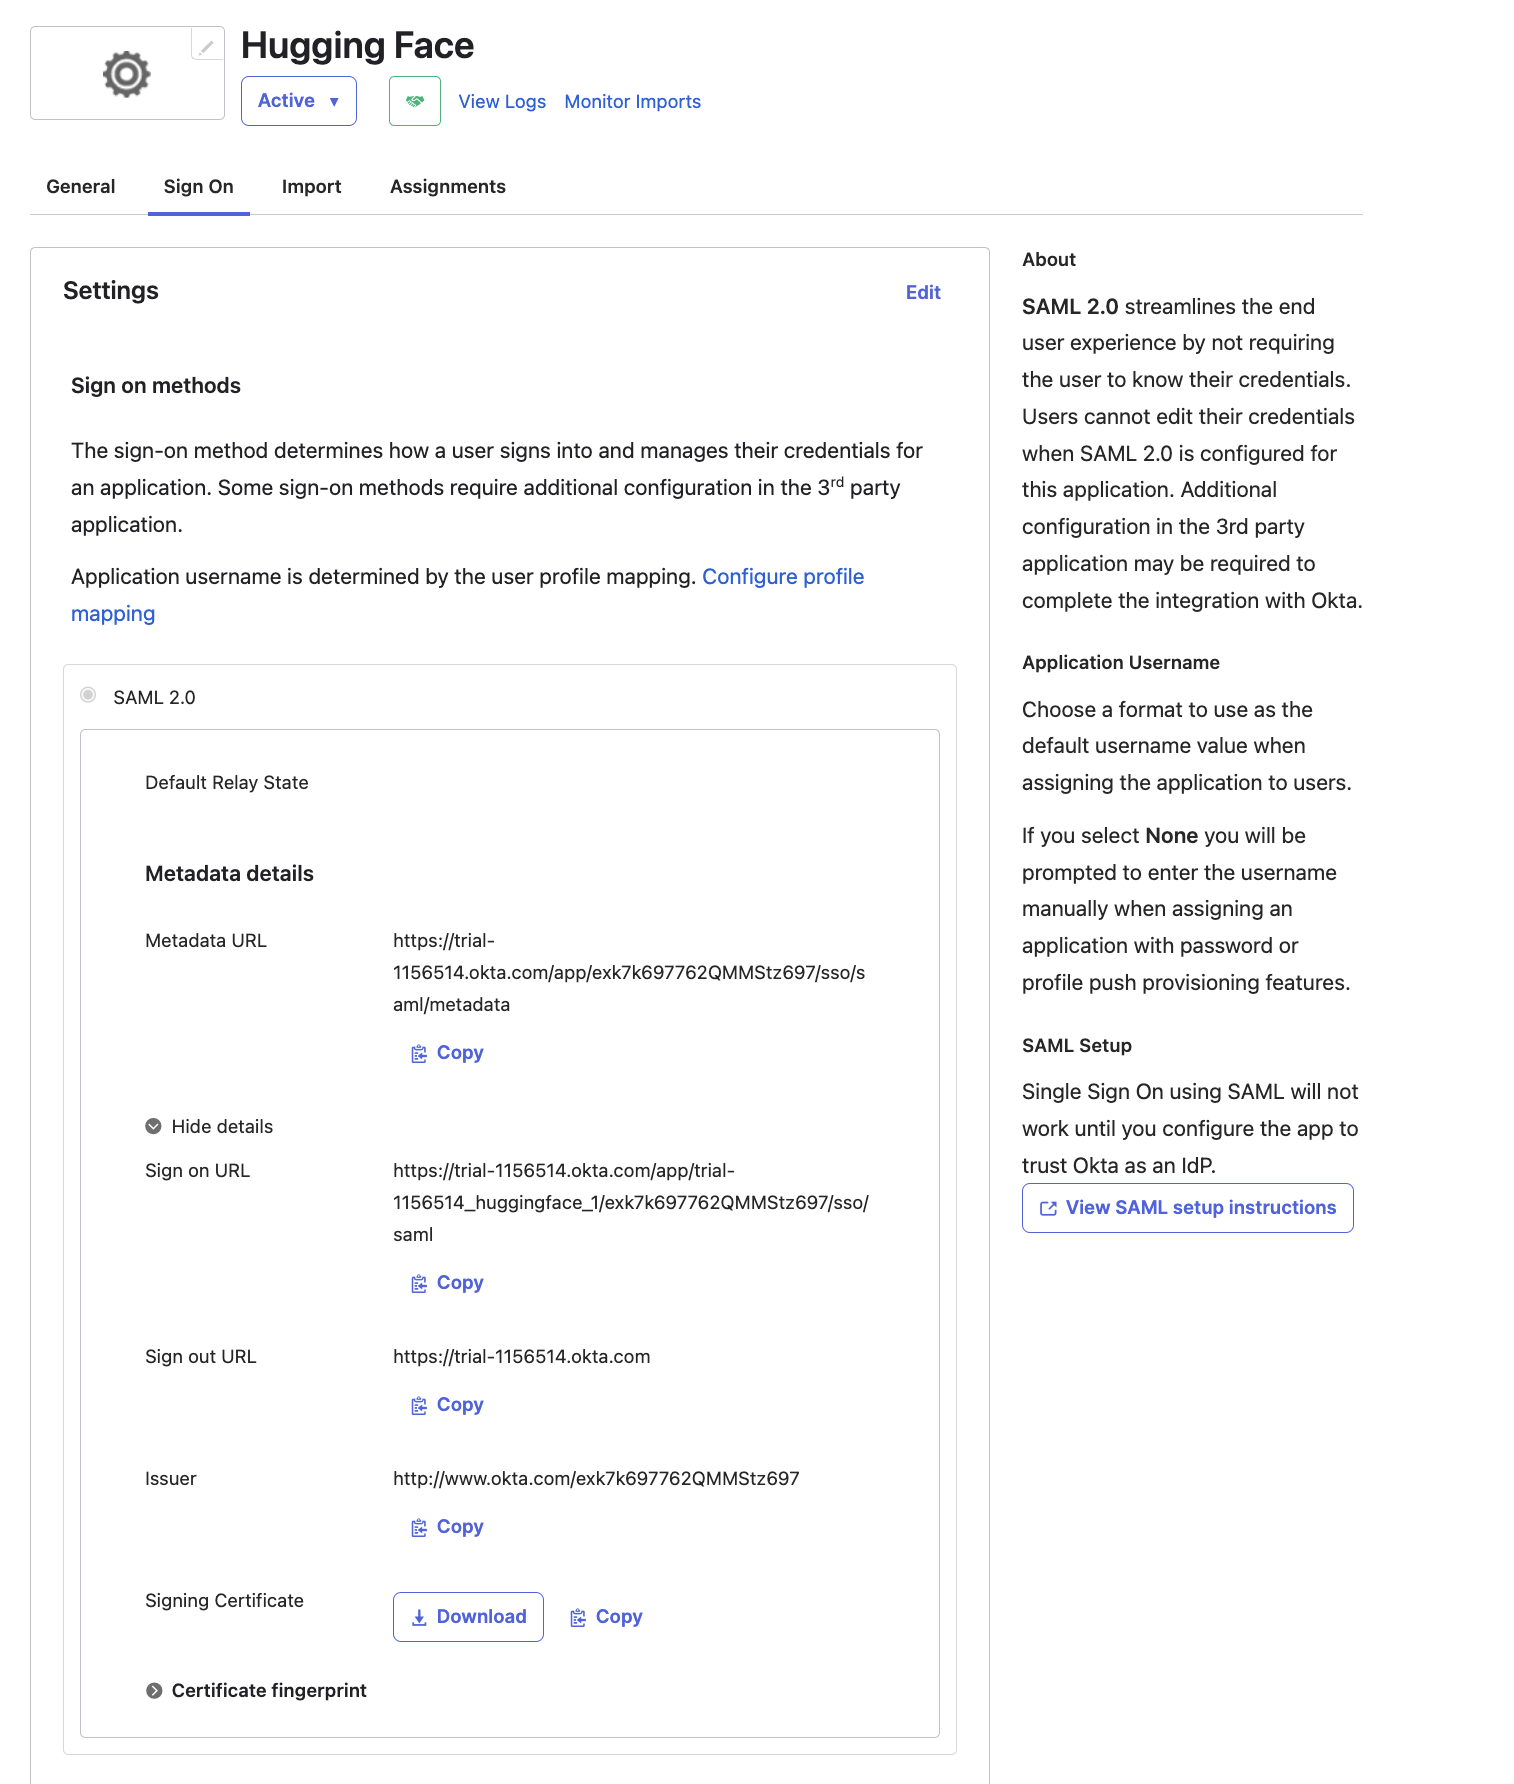
In your Okta application, under “Sign On/Settings/More details”, find the following fields:
- Sign-on URL
- Public certificate
- SP Entity ID You will need them to finalize the SSO setup on Hugging Face.
In the SSO section of your organization’s settings, copy-paste these values from Okta:
- Sign-on URL
- SP Entity ID
- Public certificate
The public certificate must have the following format:
-----BEGIN CERTIFICATE-----
{certificate}
-----END CERTIFICATE-----
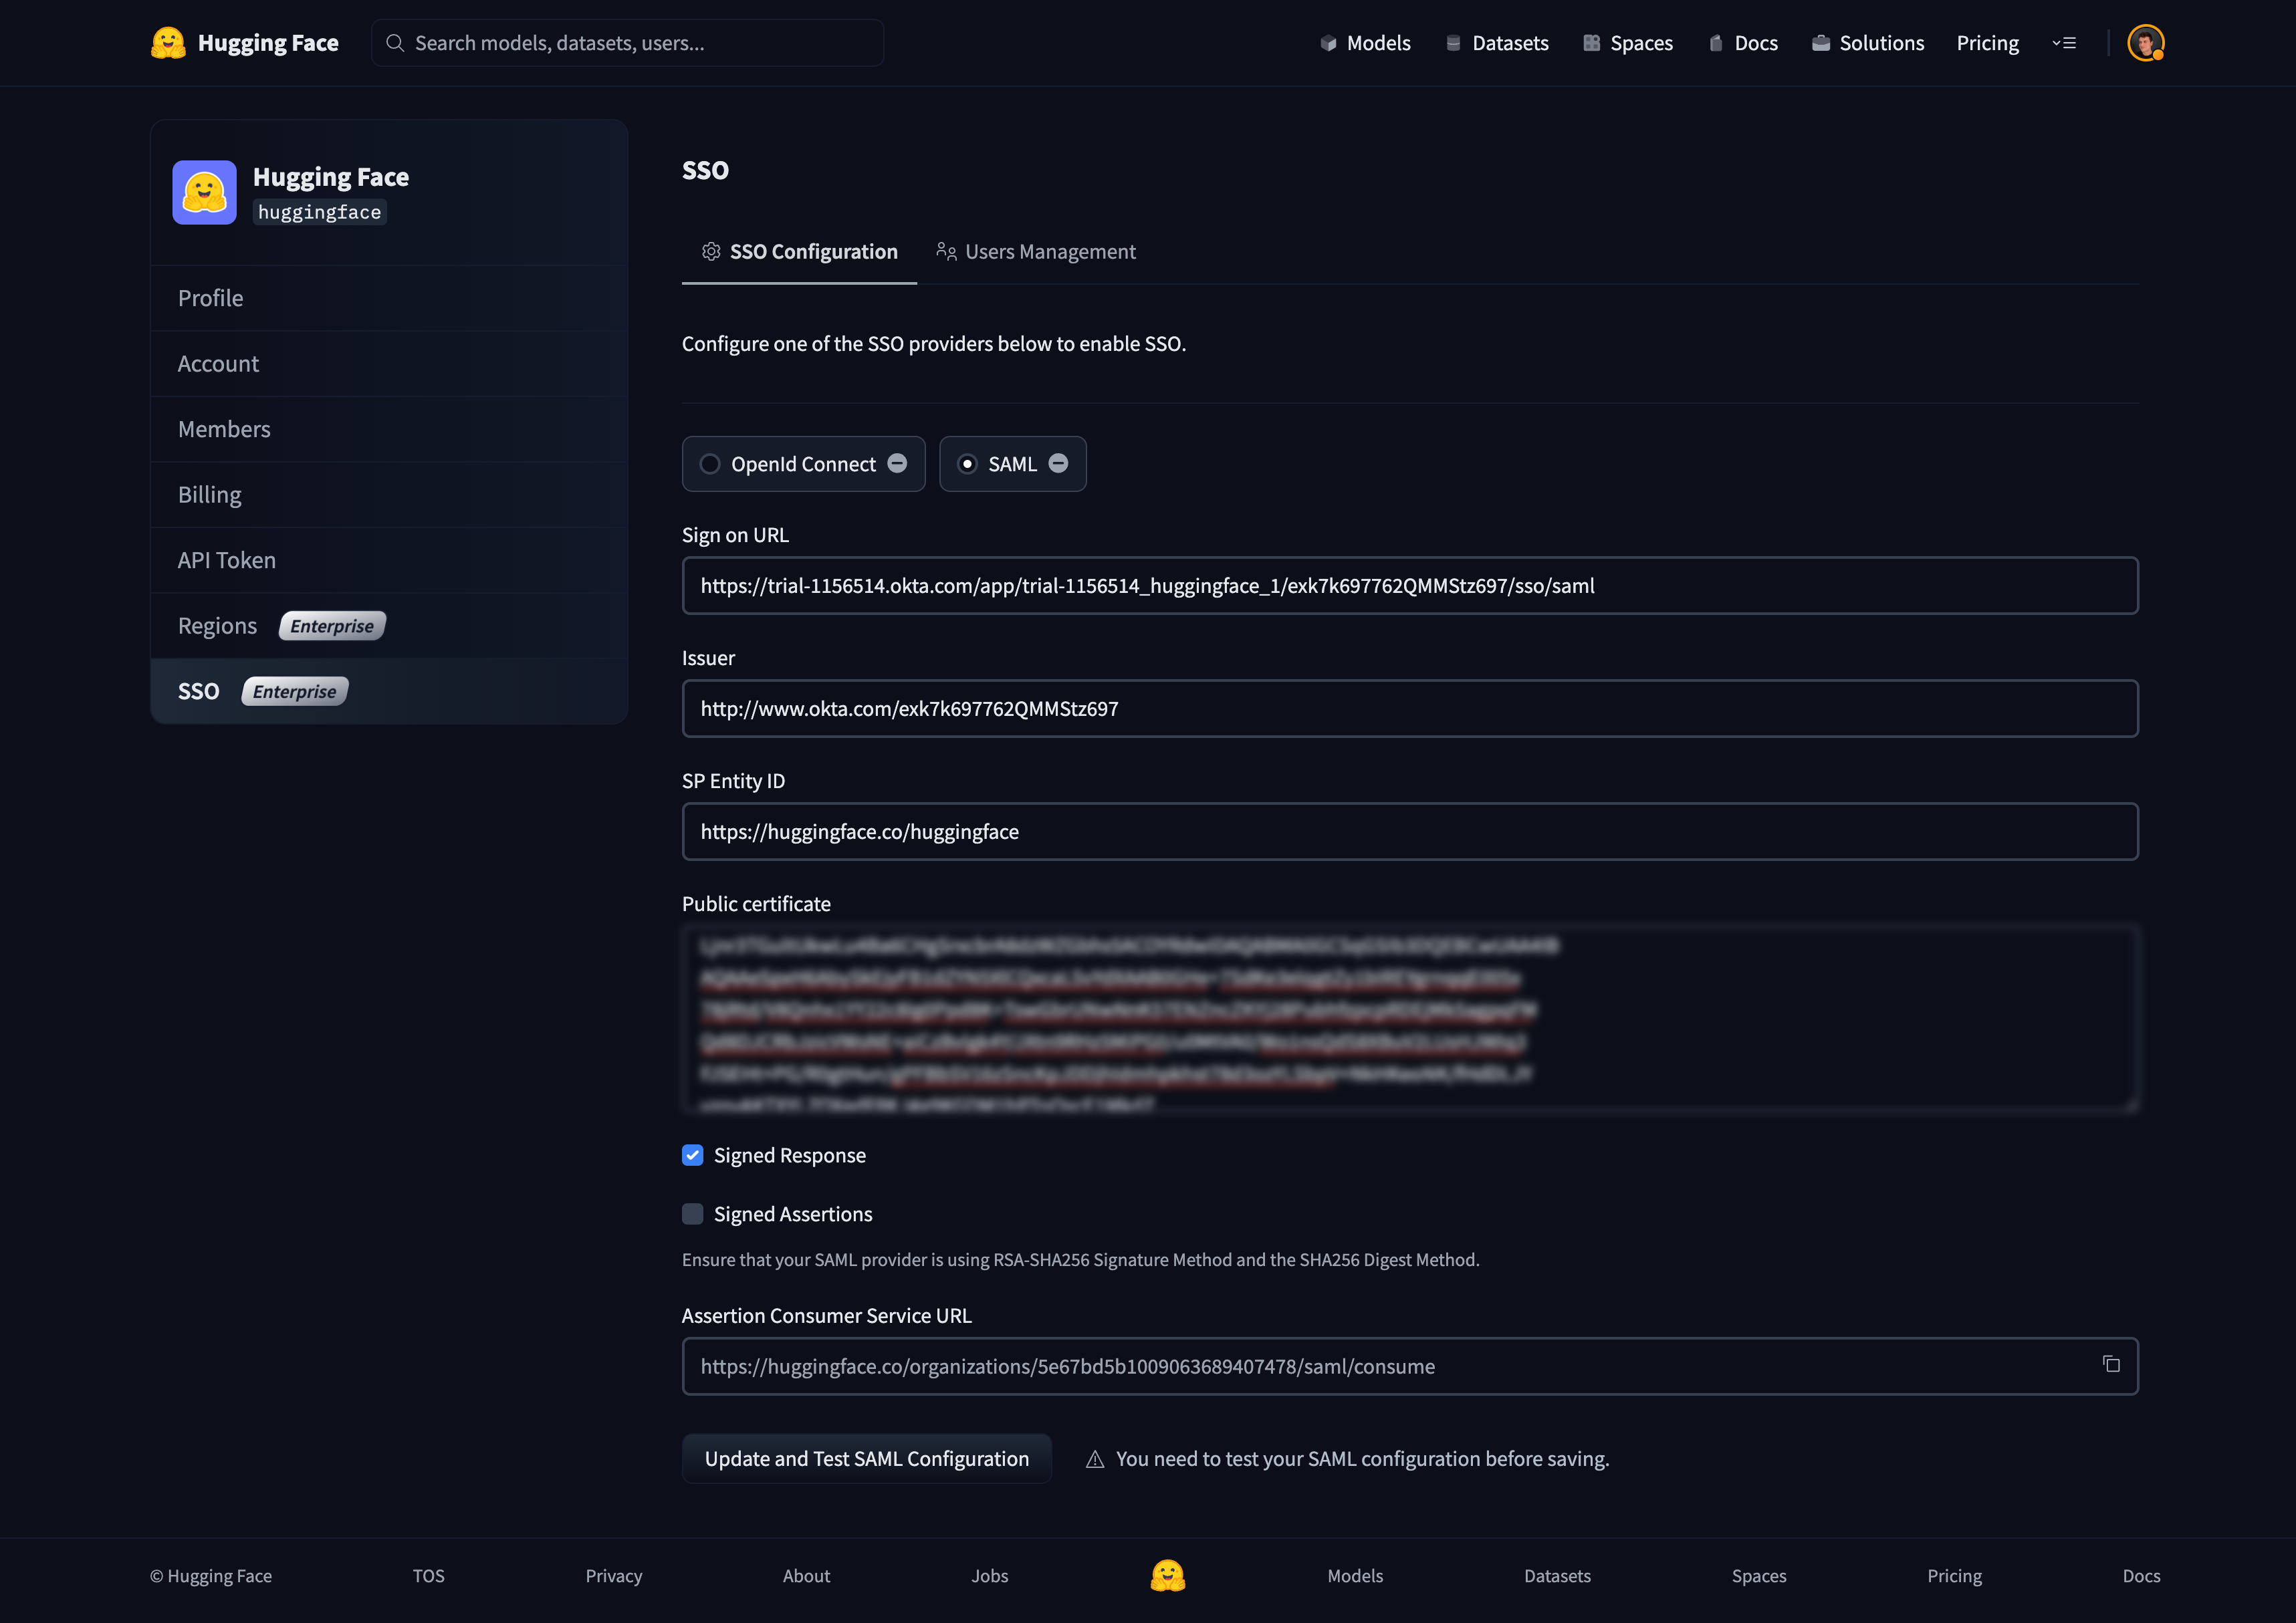
You can now click on “Update and Test SAML configuration” to save the settings.
You should be redirected to your SSO provider (IdP) login prompt. Once logged in, you’ll be redirected to your organization’s settings page.
A green check mark near the SAML selector will attest that the test was successful.
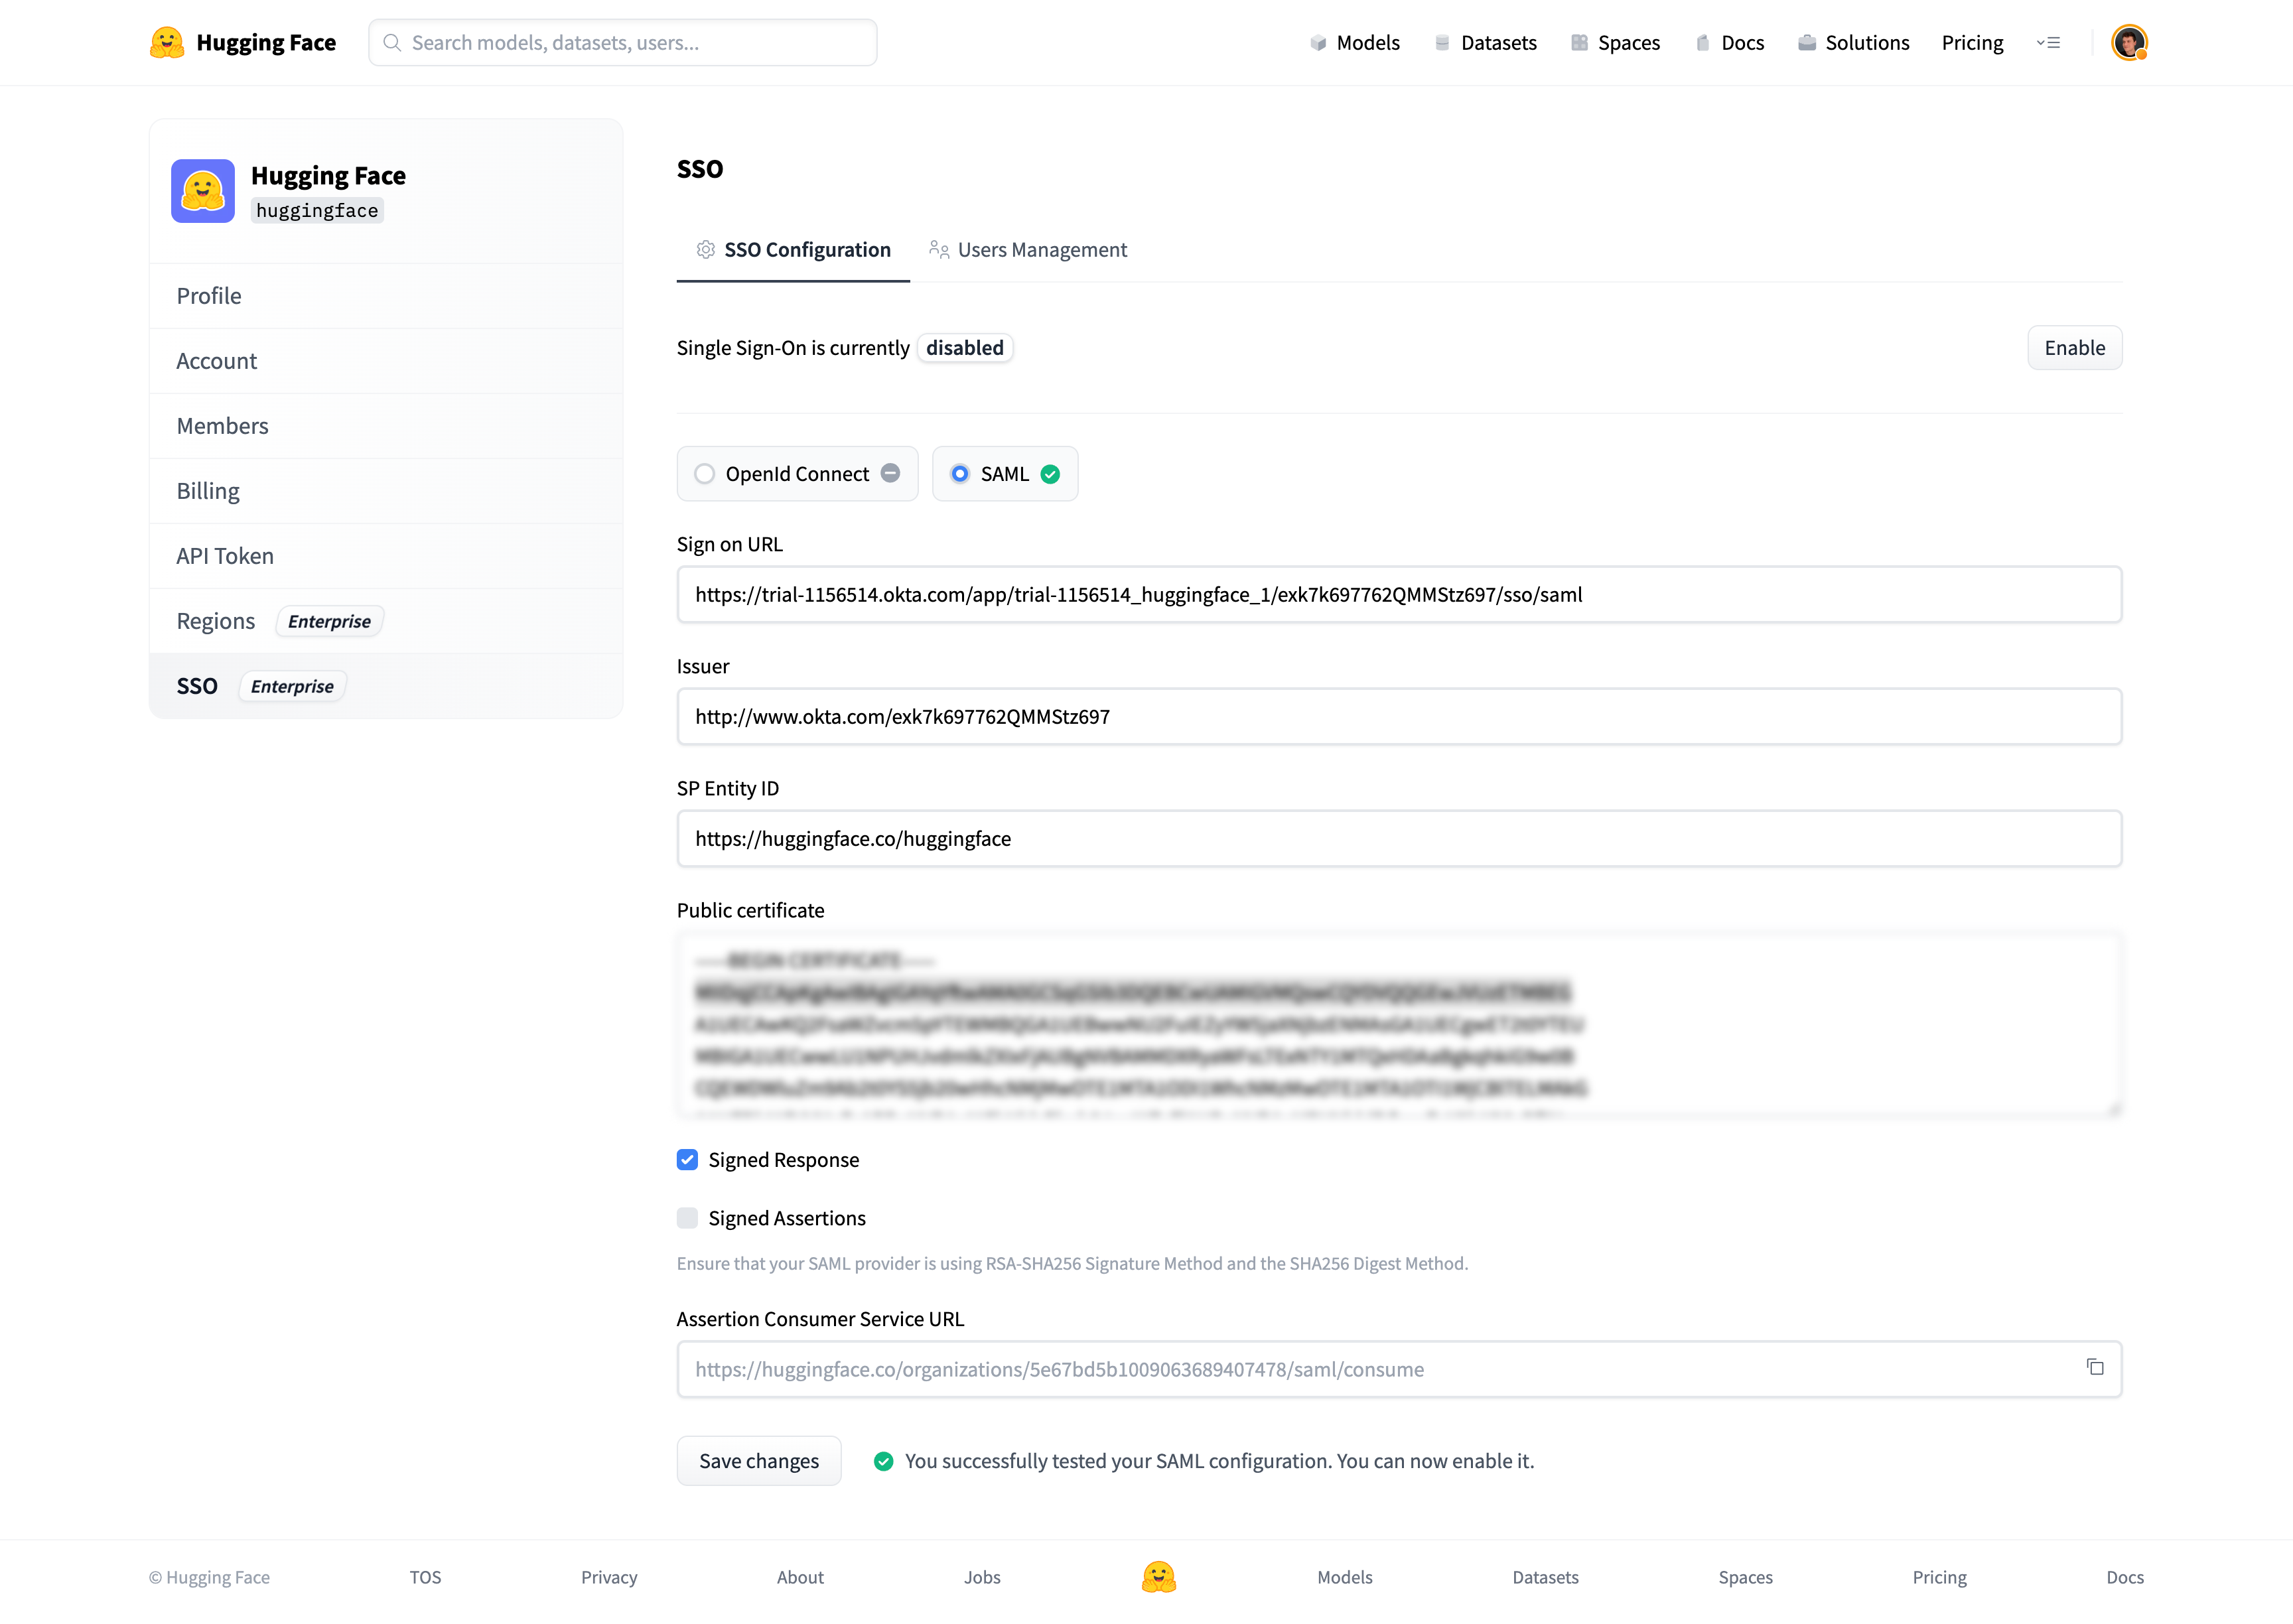

Step 4: Enable SSO in your organization
Now that Single Sign-On is configured and tested, you can enable it for members of your organization by clicking on the “Enable” button.
Once enabled, members of your organization must complete the SSO authentication flow described in the How does it work? section.
< > Update on GitHub