Process image data
This guide shows specific methods for processing image datasets. Learn how to:
- Use map() with image dataset.
- Apply data augmentations to your dataset with set_transform().
For a guide on how to process any type of dataset, take a look at the general process guide.
Map
The map() function can apply transforms over an entire dataset.
For example, create a basic Resize function:
>>> def transforms(examples):
...     examples["pixel_values"] = [image.convert("RGB").resize((100,100)) for image in examples["image"]]
...     return examples
Now use the map() function to resize the entire dataset, and set batched=True to speed up the process by accepting batches of examples. The transform returns pixel_values as a cacheable PIL.Image object:
>>> dataset = dataset.map(transforms, remove_columns=["image"], batched=True)
>>> dataset[0]
{'label': 6,
 'pixel_values': <PIL.PngImagePlugin.PngImageFile image mode=RGB size=100x100 at 0x7F058237BB10>}
The cache file saves time because you don’t have to execute the same transform twice. The map() function is best for operations you only run once per training - like resizing an image - instead of using it for operations executed for each epoch, like data augmentations.
map() takes up some memory, but you can reduce its memory requirements with the following parameters:
batch_sizedetermines the number of examples that are processed in one call to the transform function.writer_batch_sizedetermines the number of processed examples that are kept in memory before they are stored away.
Both parameter values default to 1000, which can be expensive if you are storing images. Lower these values to use less memory when you use map().
Data augmentation
🤗 Datasets can apply data augmentations from any library or package to your dataset.
Image Classification
First let’s see how you can transform image classification datasets. This guide will use the transforms from torchvision.
Feel free to use other data augmentation libraries like Albumentations, Kornia, and imgaug.
As an example, try to apply a ColorJitter transform to change the color properties of the image randomly:
>>> from torchvision.transforms import Compose, ColorJitter, ToTensor

>>> jitter = Compose(
...     [
...          ColorJitter(brightness=0.25, contrast=0.25, saturation=0.25, hue=0.7),
...          ToTensor(),
...     ]
... )
Create a function to apply the ColorJitter transform to an image:
>>> def transforms(examples):
...     examples["pixel_values"] = [jitter(image.convert("RGB")) for image in examples["image"]]
...     return examples
Use the set_transform() function to apply the transform on-the-fly which consumes less disk space. This function is useful if you only need to access the examples once:
>>> dataset.set_transform(transforms)Now you can take a look at the augmented image by indexing into the pixel_values:
>>> import numpy as np
>>> import matplotlib.pyplot as plt

>>> img = dataset[0]["pixel_values"]
>>> plt.imshow(img.permute(1, 2, 0))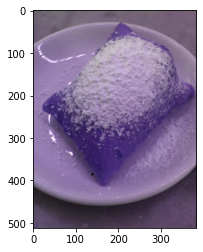
Object Detection
Object detection models identify something in an image, and object detection datasets are used for applications such as autonomous driving and detecting natural hazards like wildfire. This guide will show you how to apply transformations to an object detection dataset following the tutorial from Albumentations.
To run these examples, make sure you have up-to-date versions of albumentations and cv2 installed:
pip install -U albumentations opencv-pythonIn this example, you’ll use the cppe-5 dataset for identifying medical personal protective equipment (PPE) in the context of the COVID-19 pandemic.
Load the dataset and take a look at an example:
from datasets import load_dataset
>>> ds = load_dataset("cppe-5")
>>> example = ds['train'][0]
>>> example
{'height': 663,
'image': <PIL.JpegImagePlugin.JpegImageFile image mode=RGB size=943x663 at 0x7FC3DC756250>,
'image_id': 15,
'objects': {'area': [3796, 1596, 152768, 81002],
'bbox': [[302.0, 109.0, 73.0, 52.0],
[810.0, 100.0, 57.0, 28.0],
[160.0, 31.0, 248.0, 616.0],
[741.0, 68.0, 202.0, 401.0]],
'category': [4, 4, 0, 0],
'id': [114, 115, 116, 117]},
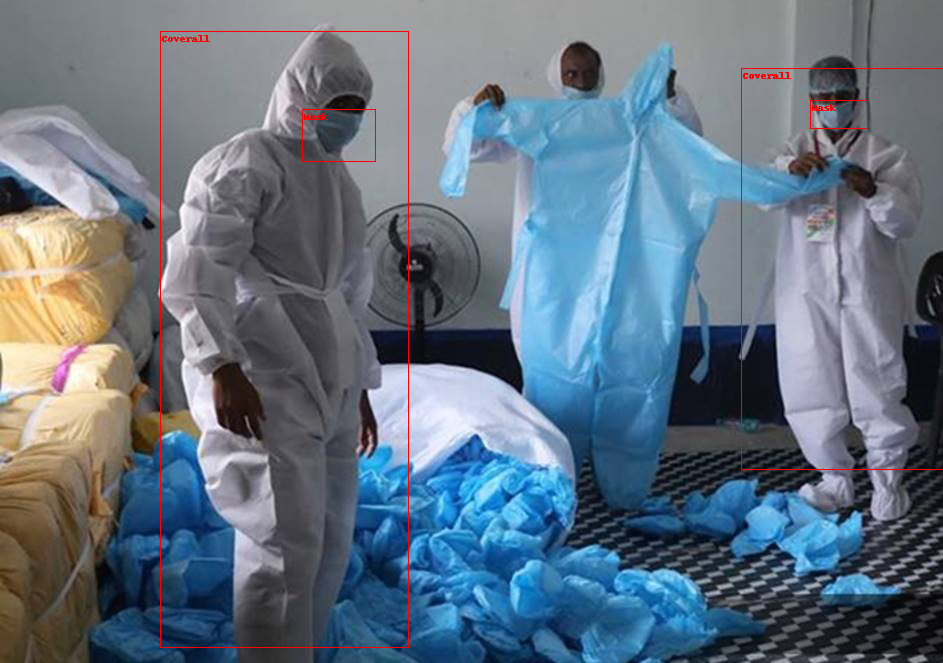
'width': 943}The dataset has the following fields:
image: PIL.Image.Image object containing the image.image_id: The image ID.height: The image height.width: The image width.objects: A dictionary containing bounding box metadata for the objects in the image:id: The annotation id.area: The area of the bounding box.bbox: The object’s bounding box (in the coco format).category: The object’s category, with possible values includingCoverall (0),Face_Shield (1),Gloves (2),Goggles (3)andMask (4).
You can visualize the bboxes on the image using some internal torch utilities. To do that, you will need to reference the ClassLabel feature associated with the category IDs so you can look up the string labels:
>>> import torch
>>> from torchvision.ops import box_convert
>>> from torchvision.utils import draw_bounding_boxes
>>> from torchvision.transforms.functional import pil_to_tensor, to_pil_image

>>> categories = ds['train'].features['objects'].feature['category']

>>> boxes_xywh = torch.tensor(example['objects']['bbox'])
>>> boxes_xyxy = box_convert(boxes_xywh, 'xywh', 'xyxy')
>>> labels = [categories.int2str(x) for x in example['objects']['category']]
>>> to_pil_image(
...     draw_bounding_boxes(
...         pil_to_tensor(example['image']),
...         boxes_xyxy,
...         colors="red",
...         labels=labels,
...     )
... )
With albumentations, you can apply transforms that will affect the image while also updating the bboxes accordingly. In this case, the image is resized to (480, 480), flipped horizontally, and brightened.
albumentations expects the image to be in BGR format, not RGB, so you’ll have to convert the image before applying the transform.
>>> import albumentations as A
>>> import numpy as np

>>> transform = A.Compose([
...     A.Resize(480, 480),
...     A.HorizontalFlip(p=1.0),
...     A.RandomBrightnessContrast(p=1.0),
... ], bbox_params=A.BboxParams(format='coco',  label_fields=['category']))

>>> # RGB PIL Image -> BGR Numpy array
>>> image = np.flip(np.array(example['image']), -1)
>>> out = transform(
...     image=image,
...     bboxes=example['objects']['bbox'],
...     category=example['objects']['category'],
... )
Now when you visualize the result, the image should be flipped, but the bboxes should still be in the right places.
>>> image = torch.tensor(out['image']).flip(-1).permute(2, 0, 1)
>>> boxes_xywh = torch.stack([torch.tensor(x) for x in out['bboxes']])
>>> boxes_xyxy = box_convert(boxes_xywh, 'xywh', 'xyxy')
>>> labels = [categories.int2str(x) for x in out['category']]
>>> to_pil_image(
...     draw_bounding_boxes(
...         image,
...         boxes_xyxy,
...         colors='red',
...         labels=labels
...     )
... )
Create a function to apply the transform to a batch of examples:
>>> def transforms(examples):
...     images, bboxes, categories = [], [], []
...     for image, objects in zip(examples['image'], examples['objects']):
...         image = np.array(image.convert("RGB"))[:, :, ::-1]
...         out = transform(
...             image=image,
...             bboxes=objects['bbox'],
...             category=objects['category']
...         )
...         images.append(torch.tensor(out['image']).flip(-1).permute(2, 0, 1))
...         bboxes.append(torch.tensor(out['bboxes']))
...         categories.append(out['category'])
...     return {'image': images, 'bbox': bboxes, 'category': categories}
Use the set_transform() function to apply the transform on-the-fly which consumes less disk space. The randomness of data augmentation may return a different image if you access the same example twice. It is especially useful when training a model for several epochs.
>>> ds['train'].set_transform(transforms)You can verify the transform works by visualizing the 10th example:
>>> example = ds['train'][10]
>>> to_pil_image(
...     draw_bounding_boxes(
...         example['image'],
...         box_convert(example['bbox'], 'xywh', 'xyxy'),
...         colors='red',
...         labels=[categories.int2str(x) for x in example['category']]
...     )
... )