> **Note**
>
> このReadmeファイルは、このプロジェクトのmarkdown翻訳プラグインによって自動的に生成されたもので、100%正確ではない可能性があります。
>
> When installing dependencies, please strictly choose the versions specified in `requirements.txt`.
>
> `pip install -r requirements.txt`
>
#  GPT 学术优化 (GPT Academic)
**もしこのプロジェクトが好きなら、星をつけてください。もしあなたがより良いアカデミックショートカットまたは機能プラグインを思いついた場合、Issueをオープンするか pull request を送信してください。私たちはこのプロジェクト自体によって翻訳された[英語 |](README_EN.md)[日本語 |](README_JP.md)[한국어 |](https://github.com/mldljyh/ko_gpt_academic)[Русский |](README_RS.md)[Français](README_FR.md)のREADMEも用意しています。
GPTを使った任意の言語にこのプロジェクトを翻訳するには、[`multi_language.py`](multi_language.py)を読んで実行してください。 (experimental)。
> **注意**
>
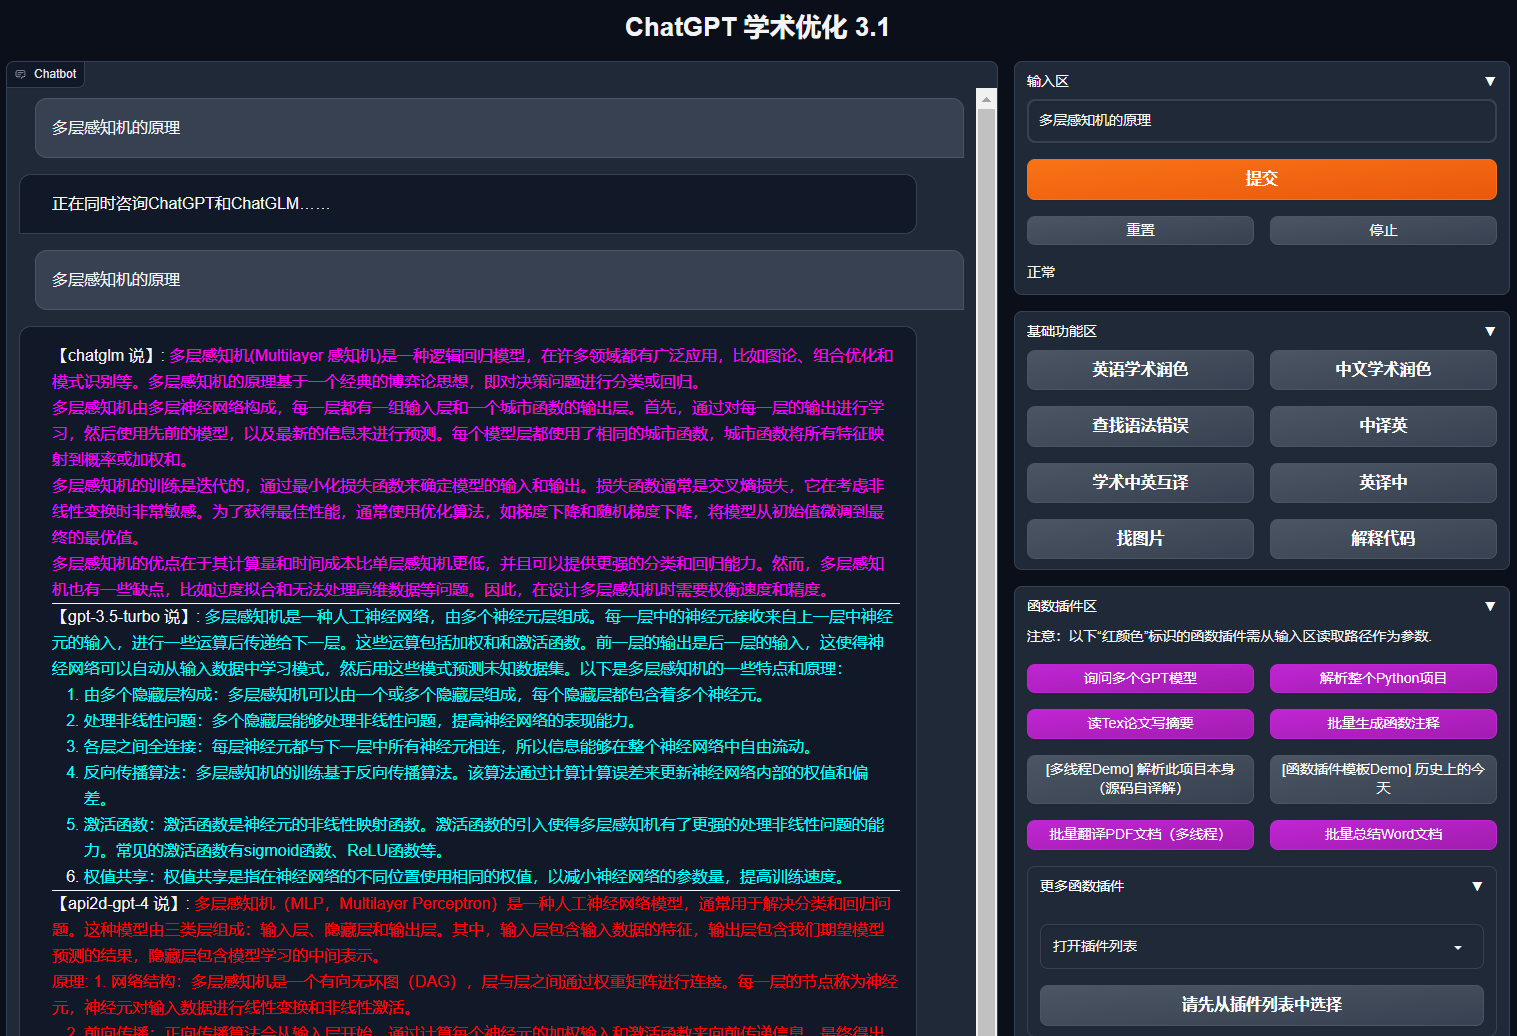
> 1. **赤色**で表示された関数プラグイン(ボタン)のみ、ファイルの読み取りをサポートしています。一部のプラグインは、プラグインエリアの**ドロップダウンメニュー**内にあります。また、私たちはどんな新しいプラグインのPRでも、**最優先**で歓迎し、処理します!
>
> 2. このプロジェクトの各ファイルの機能は、自己解析の詳細説明書である[`self_analysis.md`](https://github.com/binary-husky/gpt_academic/wiki/chatgpt-academic%E9%A1%B9%E7%9B%AE%E8%87%AA%E8%AF%91%E8%A7%A3%E6%8A%A5%E5%91%8A)で説明されています。バージョンが進化するにつれて、関連する関数プラグインをいつでもクリックし、GPTを呼び出してプロジェクトの自己解析レポートを再生成することができます。よくある問題は[`wiki`](https://github.com/binary-husky/gpt_academic/wiki/%E5%B8%B8%E8%A7%81%E9%97%AE%E9%A2%98)にまとめられています。[インストール方法](#installation)。
> 3. このプロジェクトは、chatglmやRWKV、パンクなど、国内の大規模自然言語モデルを利用することをサポートし、試みることを奨励します。複数のAPIキーを共存することができ、設定ファイルに`API_KEY="openai-key1,openai-key2,api2d-key3"`のように記入することができます。`API_KEY`を一時的に変更する場合は、入力エリアに一時的な`API_KEY`を入力してEnterキーを押せば、それが有効になります。
GPT 学术优化 (GPT Academic)
**もしこのプロジェクトが好きなら、星をつけてください。もしあなたがより良いアカデミックショートカットまたは機能プラグインを思いついた場合、Issueをオープンするか pull request を送信してください。私たちはこのプロジェクト自体によって翻訳された[英語 |](README_EN.md)[日本語 |](README_JP.md)[한국어 |](https://github.com/mldljyh/ko_gpt_academic)[Русский |](README_RS.md)[Français](README_FR.md)のREADMEも用意しています。
GPTを使った任意の言語にこのプロジェクトを翻訳するには、[`multi_language.py`](multi_language.py)を読んで実行してください。 (experimental)。
> **注意**
>
> 1. **赤色**で表示された関数プラグイン(ボタン)のみ、ファイルの読み取りをサポートしています。一部のプラグインは、プラグインエリアの**ドロップダウンメニュー**内にあります。また、私たちはどんな新しいプラグインのPRでも、**最優先**で歓迎し、処理します!
>
> 2. このプロジェクトの各ファイルの機能は、自己解析の詳細説明書である[`self_analysis.md`](https://github.com/binary-husky/gpt_academic/wiki/chatgpt-academic%E9%A1%B9%E7%9B%AE%E8%87%AA%E8%AF%91%E8%A7%A3%E6%8A%A5%E5%91%8A)で説明されています。バージョンが進化するにつれて、関連する関数プラグインをいつでもクリックし、GPTを呼び出してプロジェクトの自己解析レポートを再生成することができます。よくある問題は[`wiki`](https://github.com/binary-husky/gpt_academic/wiki/%E5%B8%B8%E8%A7%81%E9%97%AE%E9%A2%98)にまとめられています。[インストール方法](#installation)。
> 3. このプロジェクトは、chatglmやRWKV、パンクなど、国内の大規模自然言語モデルを利用することをサポートし、試みることを奨励します。複数のAPIキーを共存することができ、設定ファイルに`API_KEY="openai-key1,openai-key2,api2d-key3"`のように記入することができます。`API_KEY`を一時的に変更する場合は、入力エリアに一時的な`API_KEY`を入力してEnterキーを押せば、それが有効になります。
機能 | 説明
--- | ---
一键校正 | 一键で校正可能、論文の文法エラーを検索することができる
一键中英翻訳 | 一键で中英翻訳可能
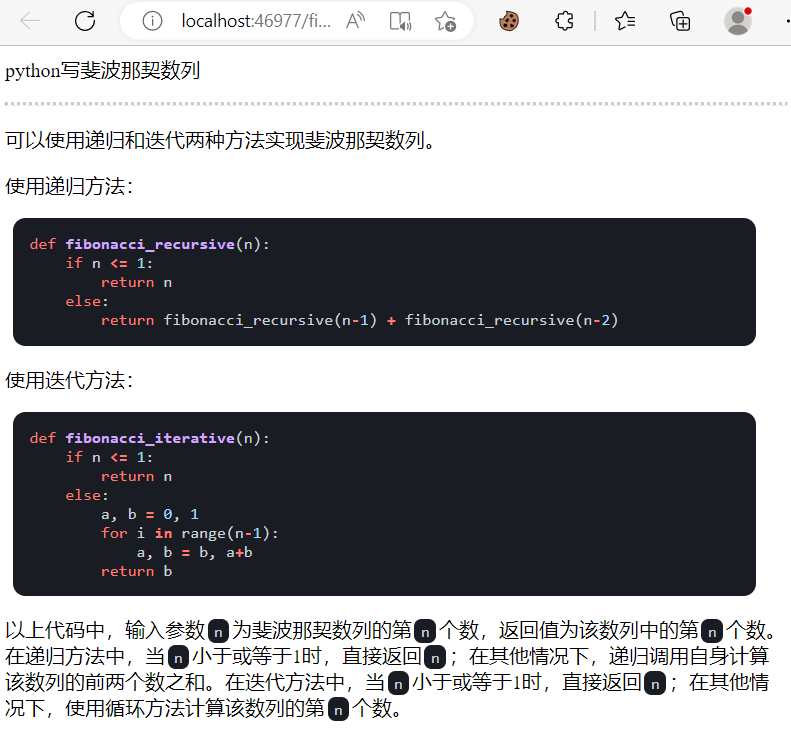
一键コード解説 | コードを表示し、解説し、生成し、コードに注釈をつけることができる
[自分でカスタマイズ可能なショートカットキー](https://www.bilibili.com/video/BV14s4y1E7jN) | 自分でカスタマイズ可能なショートカットキーをサポートする
モジュール化された設計 | カスタマイズ可能な[強力な関数プラグイン](https://github.com/binary-husky/gpt_academic/tree/master/crazy_functions)をサポートし、プラグインは[ホットアップデート](https://github.com/binary-husky/gpt_academic/wiki/%E5%87%BD%E6%95%B0%E6%8F%92%E4%BB%B6%E6%8C%87%E5%8D%97)に対応している
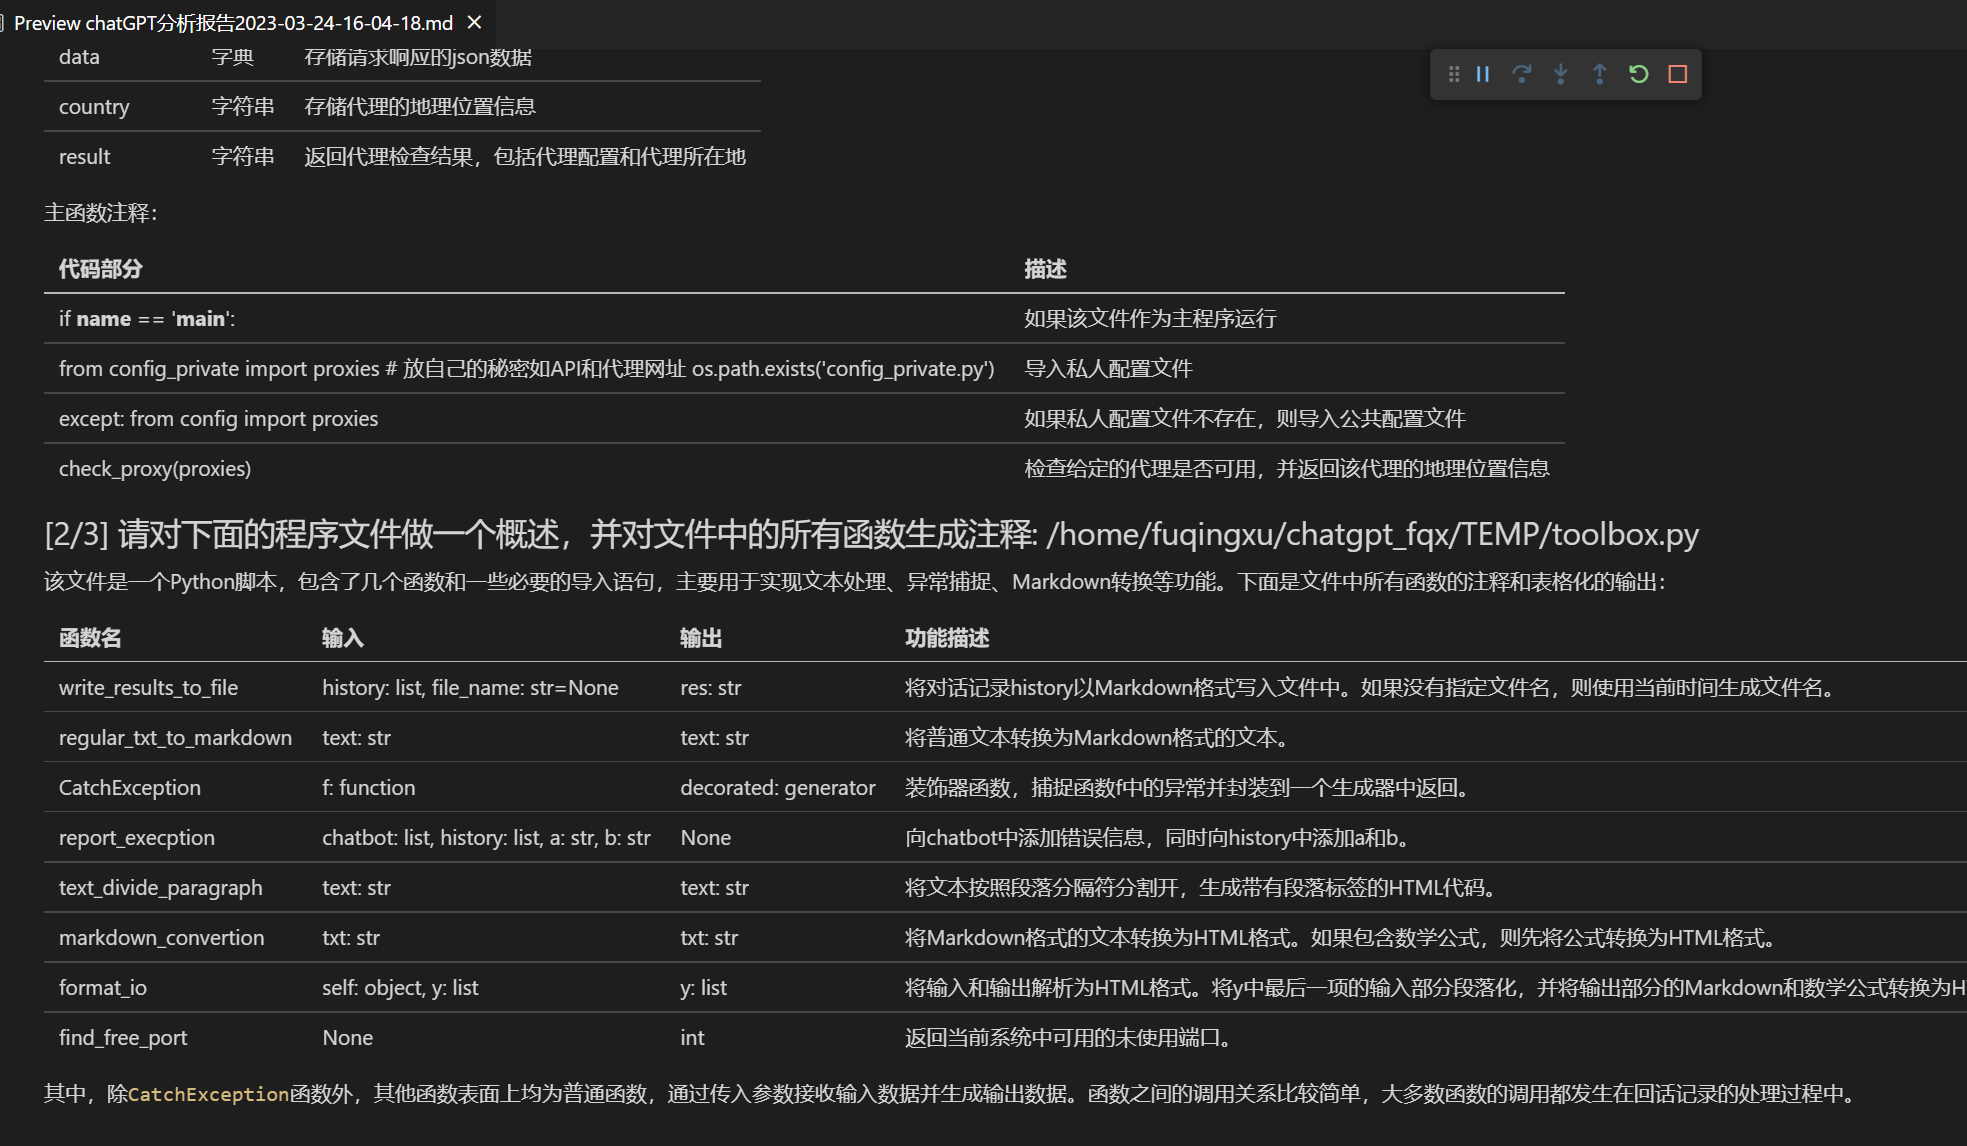
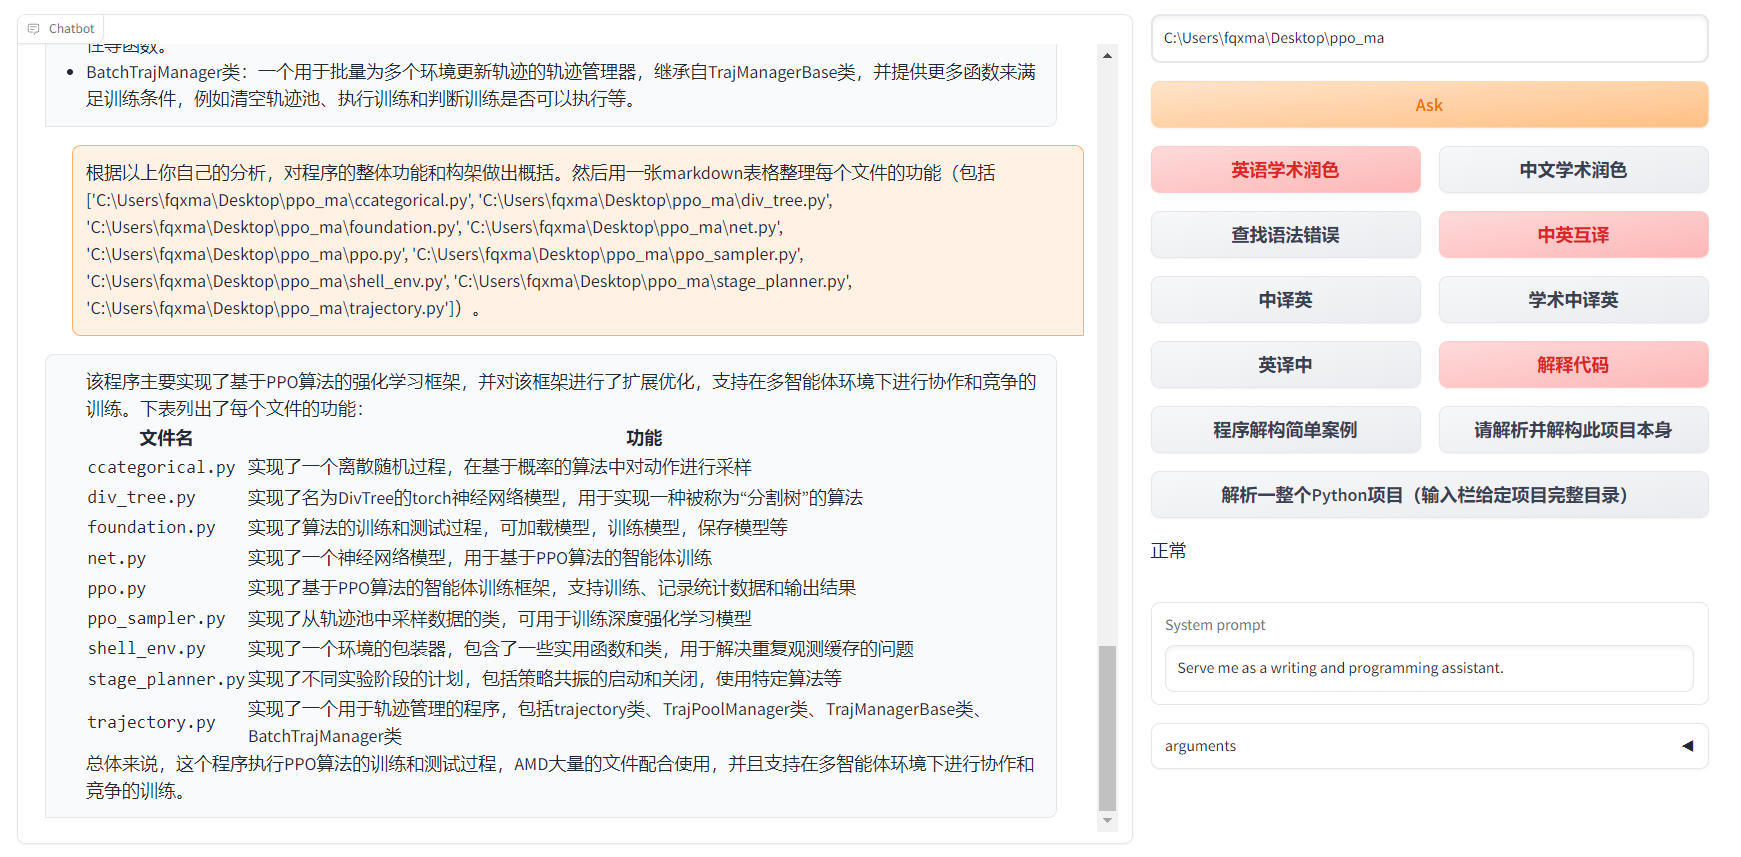
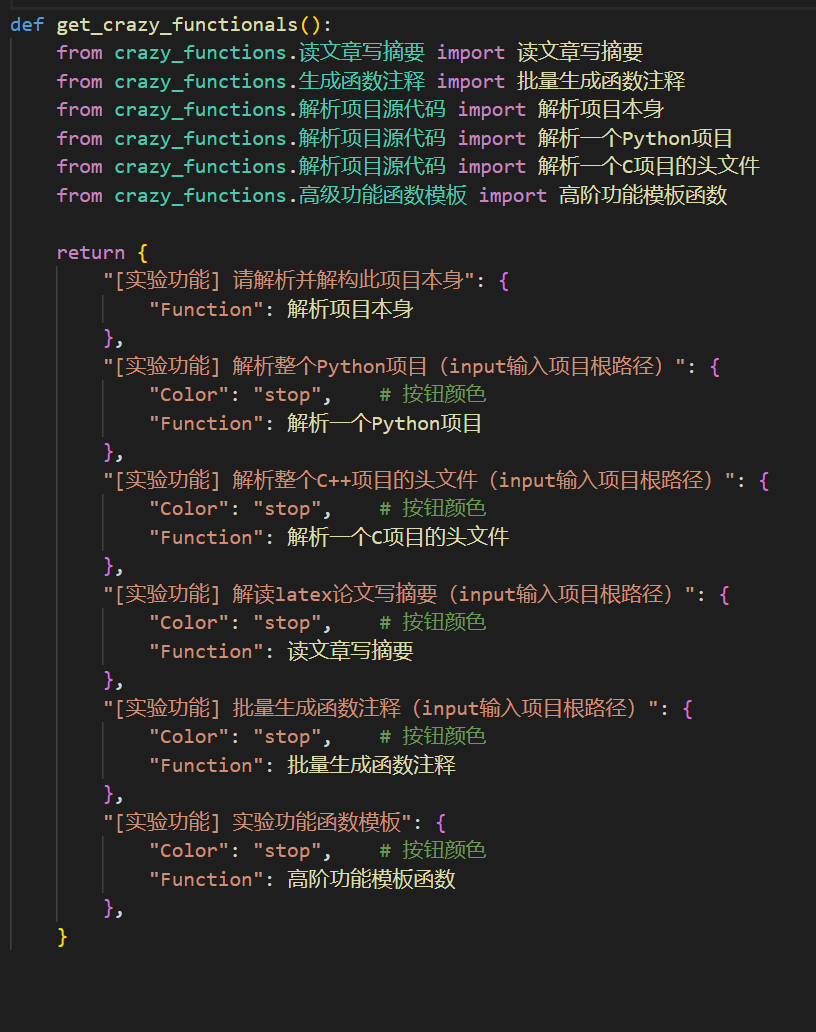
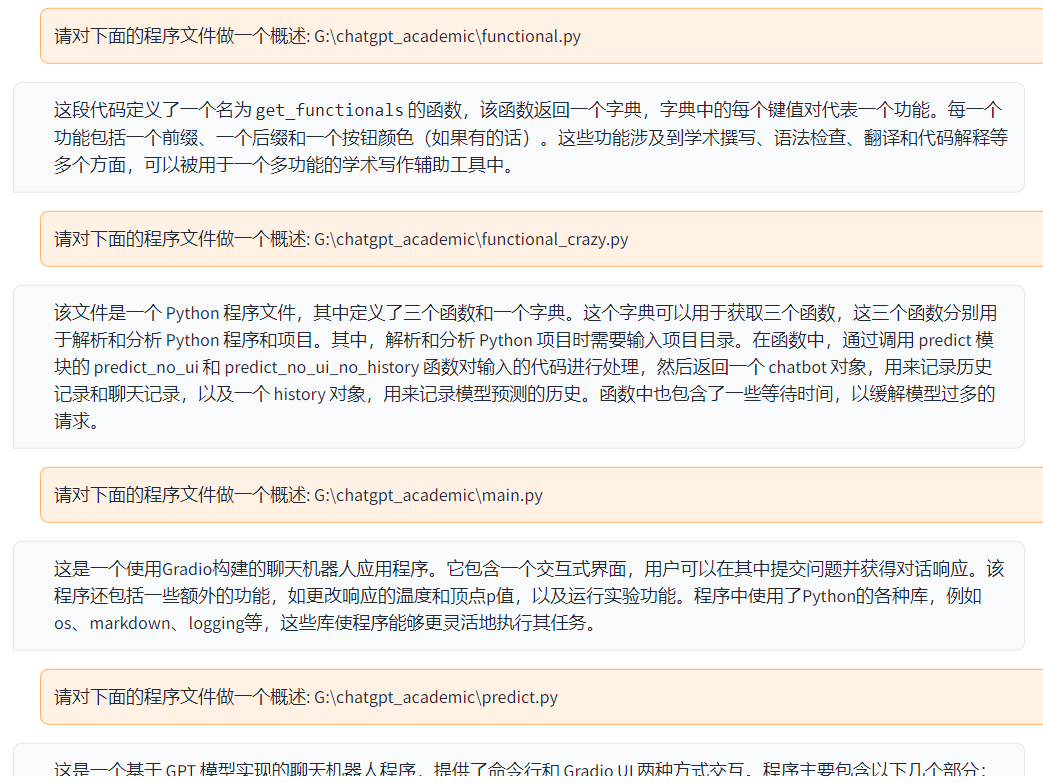
[自己プログラム解析](https://www.bilibili.com/video/BV1cj411A7VW) | [関数プラグイン] [一键読解](https://github.com/binary-husky/gpt_academic/wiki/chatgpt-academic%E9%A1%B9%E7%9B%AE%E8%87%AA%E8%AF%91%E8%A7%A3%E6%8A%A5%E5%91%8A)このプロジェクトのソースコード
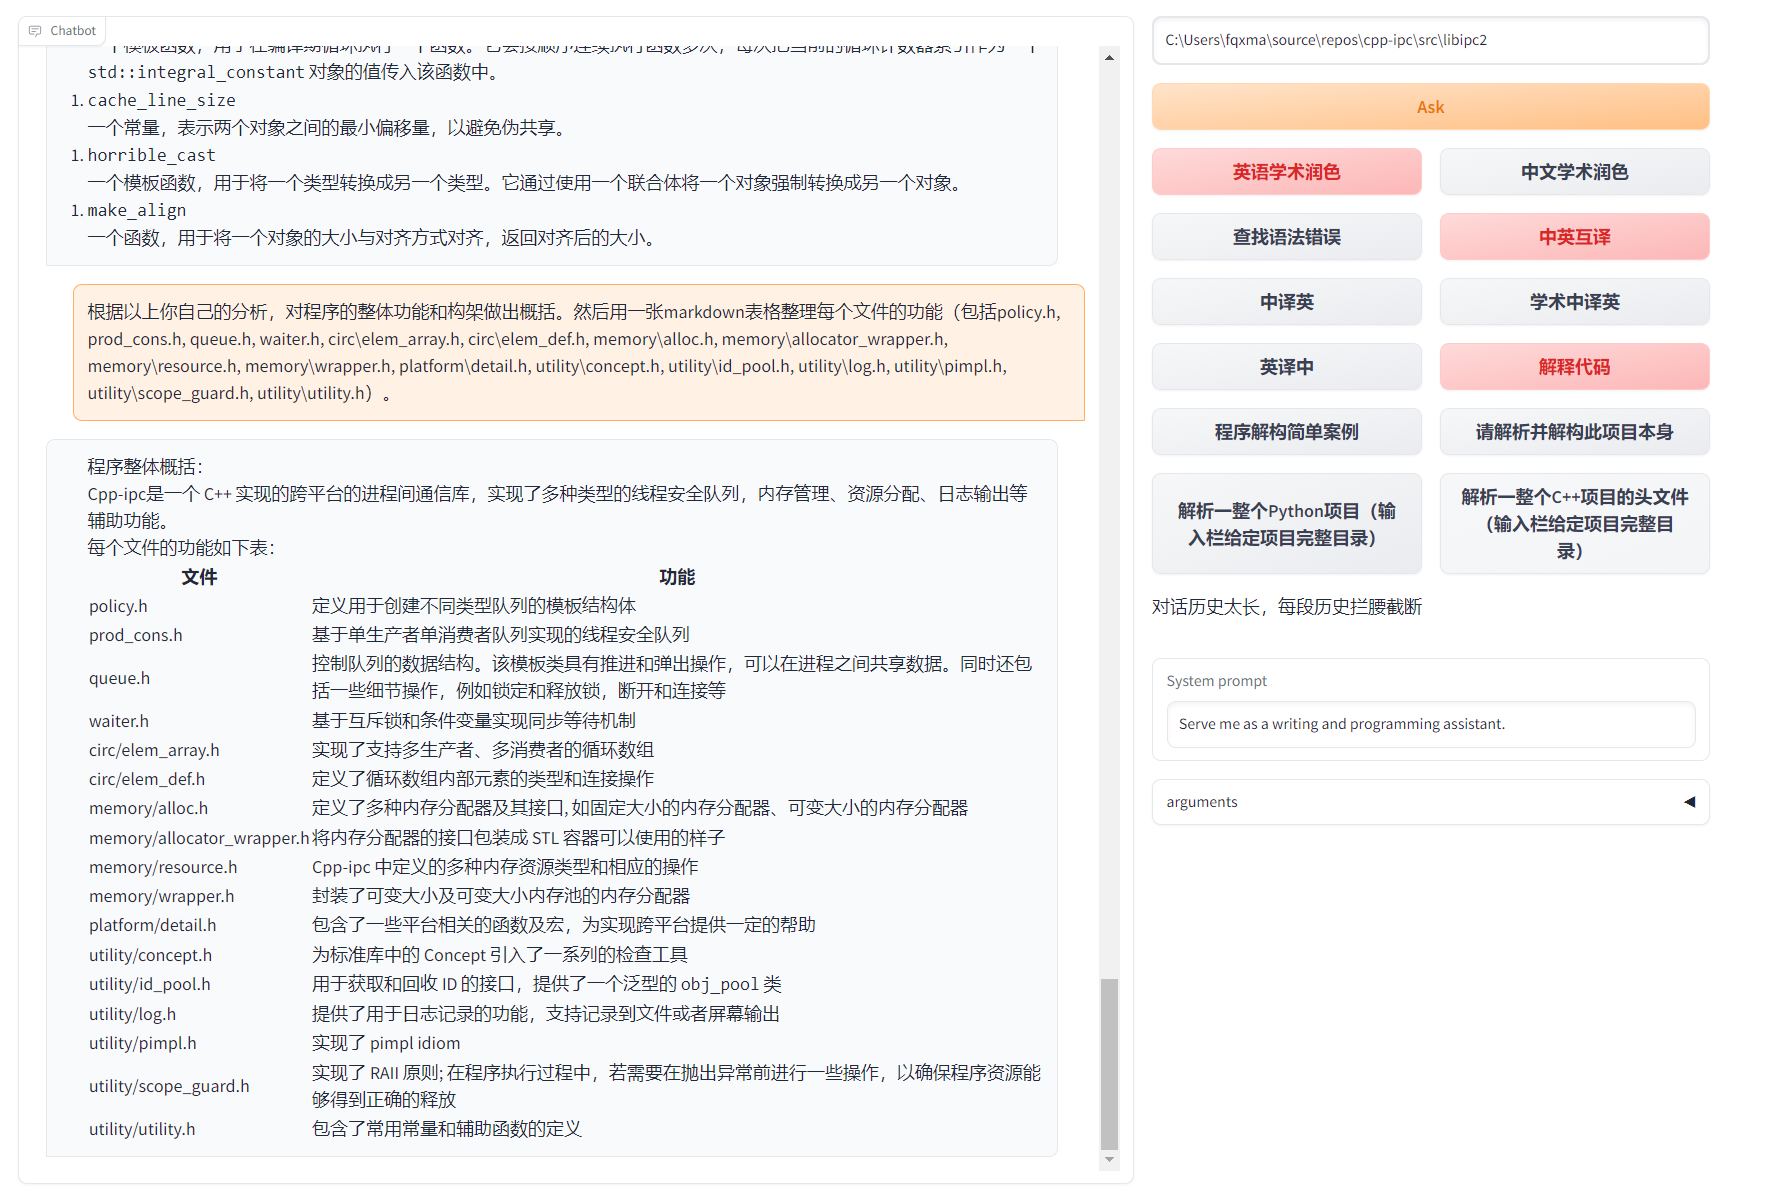
プログラム解析 | [関数プラグイン] 一鍵で他のPython/C/C++/Java/Lua/...プロジェクトを分析できる
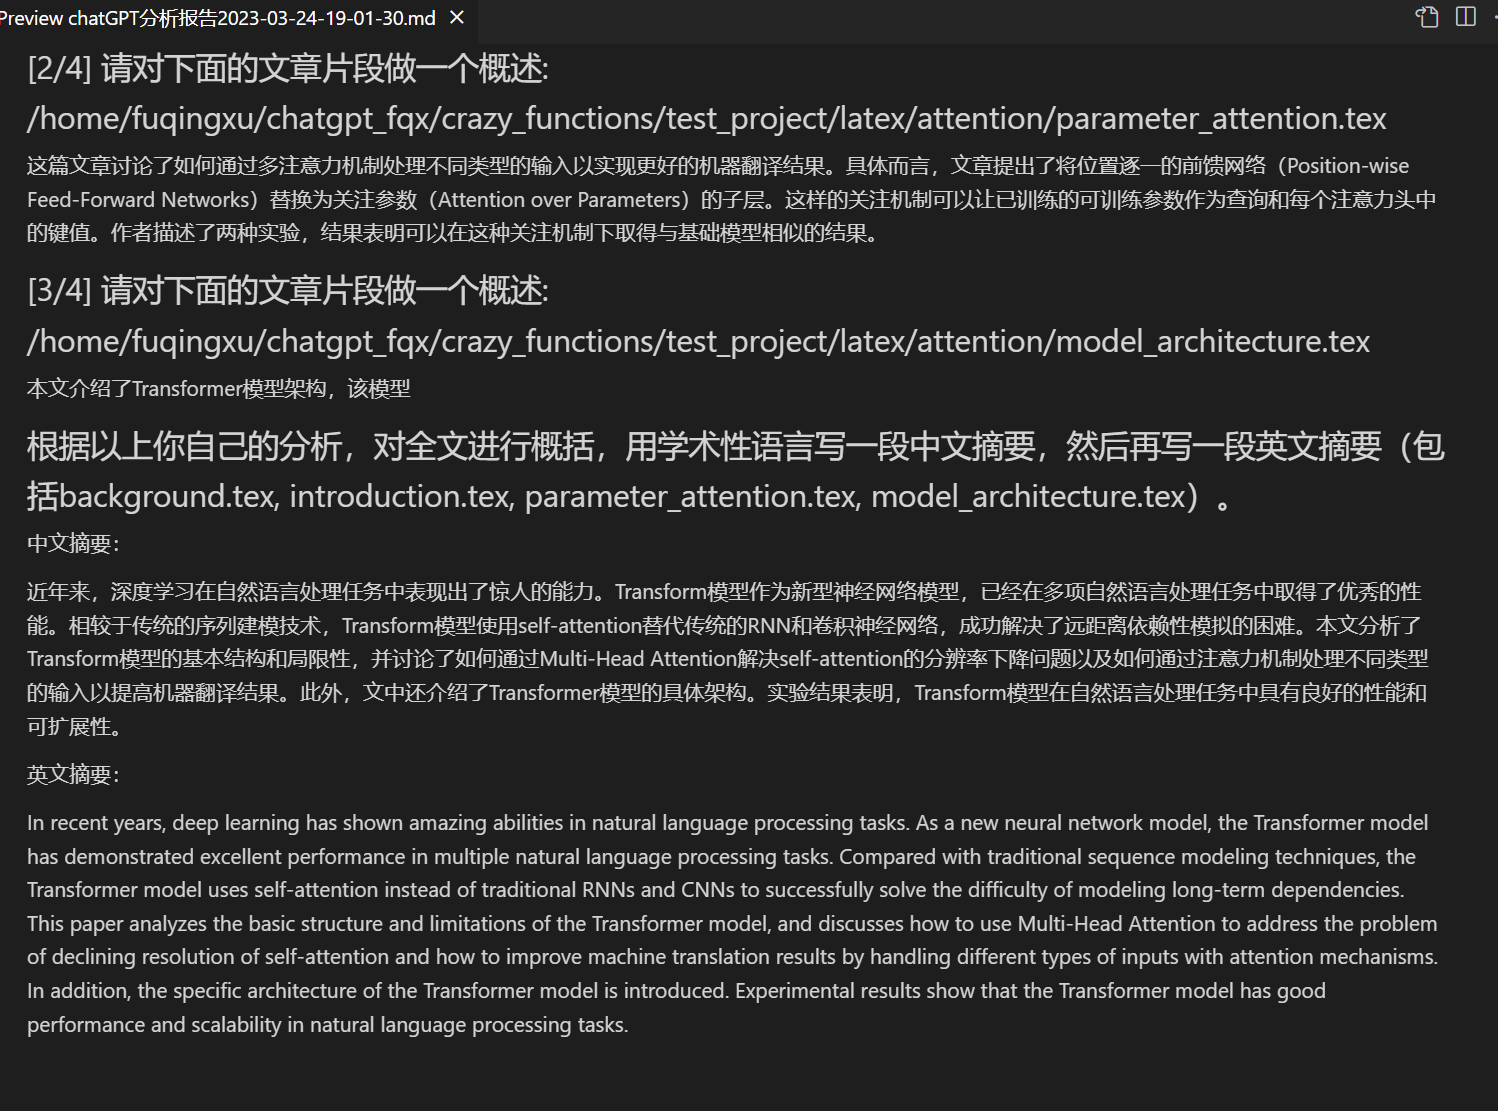
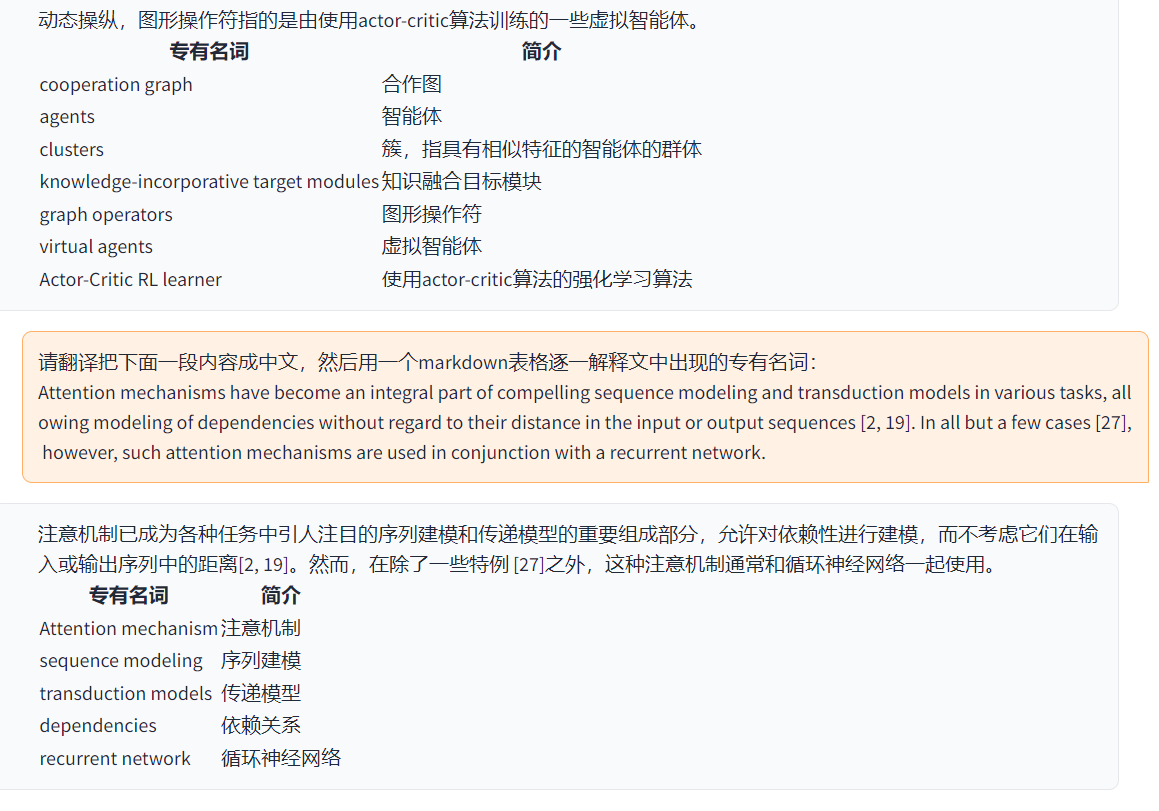
論文の読み、[翻訳](https://www.bilibili.com/video/BV1KT411x7Wn) | [関数プラグイン] LaTex/ PDF論文の全文を一鍵で読み解き、要約を生成することができる
LaTex全文[翻訳](https://www.bilibili.com/video/BV1nk4y1Y7Js/)、[校正](https://www.bilibili.com/video/BV1FT411H7c5/) | [関数プラグイン] LaTex論文の翻訳または校正を一鍵で行うことができる
一括で注釈を生成 | [関数プラグイン] 一鍵で関数に注釈をつけることができる
Markdown[中英翻訳](https://www.bilibili.com/video/BV1yo4y157jV/) | [関数プラグイン] 上記の5種類の言語の[README](https://github.com/binary-husky/gpt_academic/blob/master/docs/README_EN.md)を見たことがありますか?
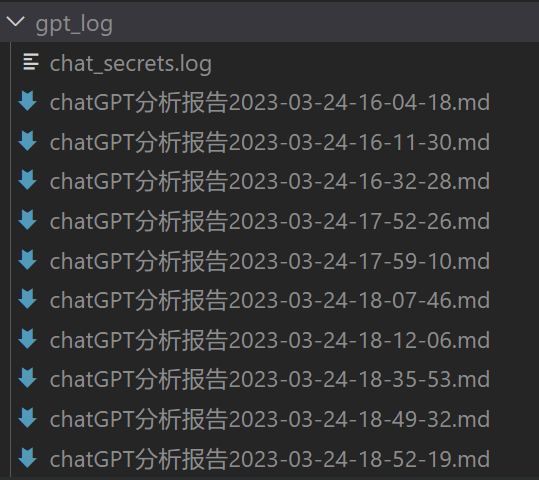
チャット分析レポート生成 | [関数プラグイン] 実行後、自動的に概要報告書を生成する
[PDF論文全文翻訳機能](https://www.bilibili.com/video/BV1KT411x7Wn) | [関数プラグイン] PDF論文からタイトルと要約を抽出し、全文を翻訳する(マルチスレッド)
[Arxivアシスタント](https://www.bilibili.com/video/BV1LM4y1279X) | [関数プラグイン] arxiv記事のURLを入力するだけで、要約を一鍵翻訳し、PDFをダウンロードできる
[Google Scholar 総合アシスタント](https://www.bilibili.com/video/BV19L411U7ia) | [関数プラグイン] 任意のGoogle Scholar検索ページURLを指定すると、gptが[related works](https://www.bilibili.com/video/BV1GP411U7Az/)を作成する
インターネット情報収集+GPT | [関数プラグイン] まずGPTに[インターネットから情報を収集](https://www.bilibili.com/video/BV1om4y127ck)してから質問に回答させ、情報が常に最新であるようにする
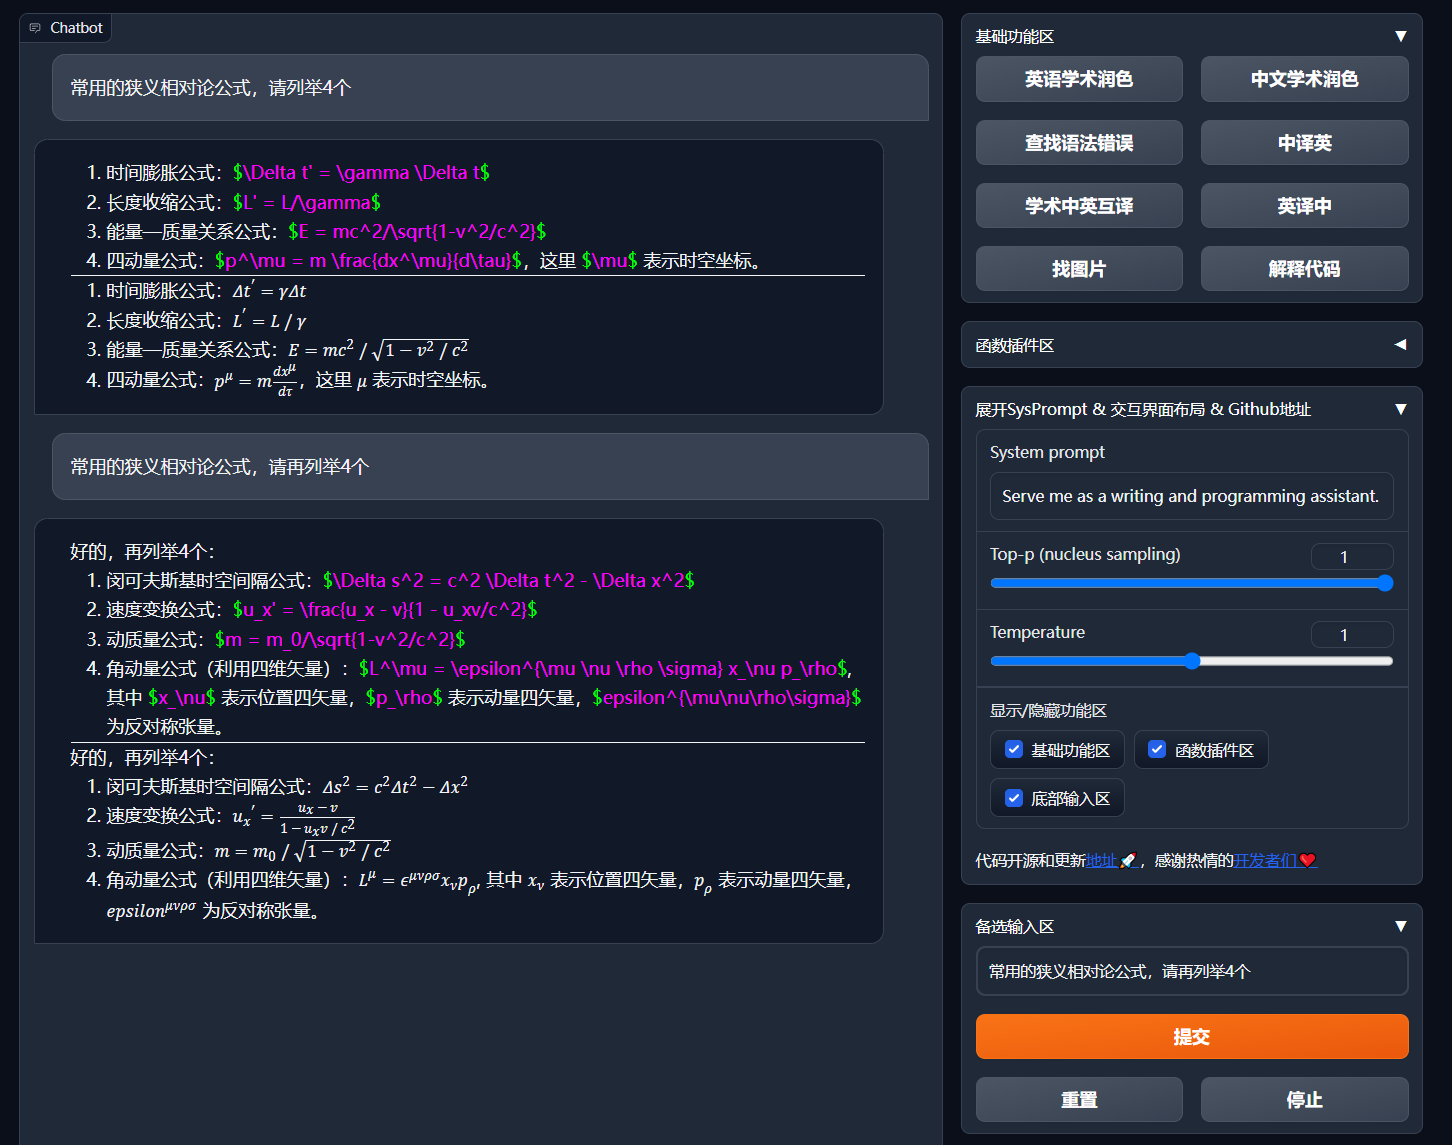
数式/画像/表表示 | 数式の[tex形式とレンダリング形式](https://user-images.githubusercontent.com/96192199/230598842-1d7fcddd-815d-40ee-af60-baf488a199df.png)を同時に表示し、数式、コードハイライトをサポートしている
マルチスレッド関数プラグインがサポートされている | chatgptをマルチスレッドで呼び出し、[大量のテキスト](https://www.bilibili.com/video/BV1FT411H7c5/)またはプログラムを一鍵で処理できる
ダークグラジオ[テーマの起動](https://github.com/binary-husky/gpt_academic/issues/173) | ブラウザのURLの後ろに```/?__theme=dark```を追加すると、ダークテーマを切り替えることができます。
[多数のLLMモデル](https://www.bilibili.com/video/BV1wT411p7yf)がサポートされ、[API2D](https://api2d.com/)がサポートされている | 同時にGPT3.5、GPT4、[清華ChatGLM](https://github.com/THUDM/ChatGLM-6B)、[復旦MOSS](https://github.com/OpenLMLab/MOSS)に対応
より多くのLLMモデルが接続され、[huggingfaceデプロイ](https://huggingface.co/spaces/qingxu98/gpt-academic)がサポートされている | Newbingインターフェイス(Newbing)、清華大学の[Jittorllm](https://github.com/Jittor/JittorLLMs)のサポート[LLaMA](https://github.com/facebookresearch/llama), [RWKV](https://github.com/BlinkDL/ChatRWKV)と[盘古α](https://openi.org.cn/pangu/)
さらに多くの新機能(画像生成など)を紹介する... | この文書の最後に示す...
- 新しいインターフェース(`config.py`のLAYOUTオプションを変更することで、「左右配置」と「上下配置」を切り替えることができます)
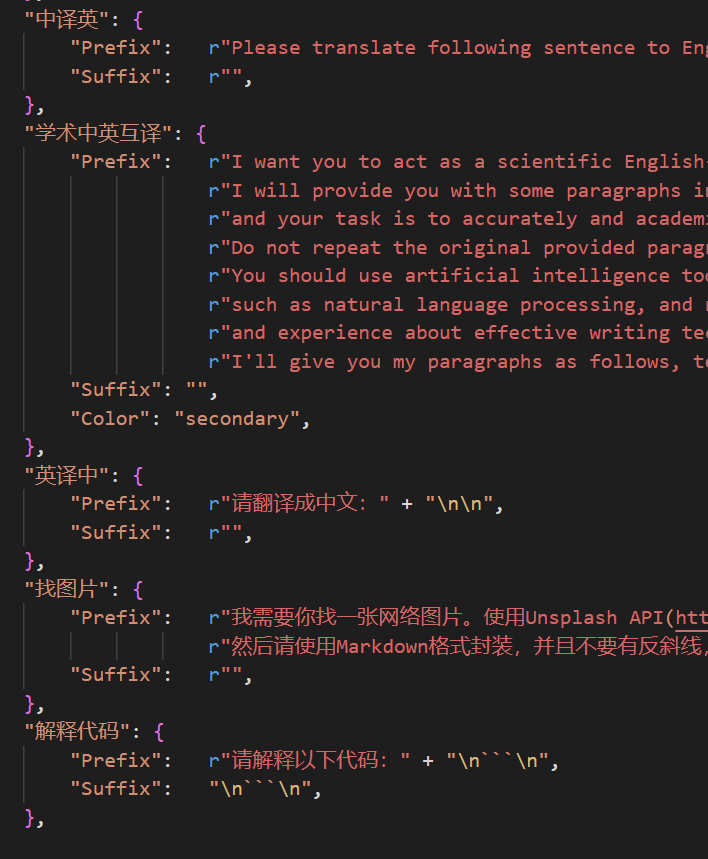
- All buttons are dynamically generated by reading functional.py, and custom functions can be freely added to free the clipboard.
- Polishing/Correction
- If the output contains formulas, they are displayed in both TeX and rendering forms, making it easy to copy and read.
- Don't feel like looking at the project code? Just ask chatgpt directly.
- Mixed calls of multiple large language models (ChatGLM + OpenAI-GPT3.5 + [API2D](https://api2d.com/)-GPT4)
---
# Installation
## Installation-Method 1: Directly run (Windows, Linux or MacOS)
1. Download the project.
```sh
git clone https://github.com/binary-husky/gpt_academic.git
cd gpt_academic
```
2. Configure the API_KEY.
Configure the API KEY and other settings in `config.py` and [special network environment settings](https://github.com/binary-husky/gpt_academic/issues/1).
(P.S. When the program is running, it will first check if there is a private configuration file named `config_private.py`, and use the configuration in it to override the same name configuration in `config.py`. Therefore, if you can understand our configuration reading logic, we strongly recommend that you create a new configuration file named `config_private.py` next to `config.py`, and transfer (copy) the configuration in `config.py` to `config_private.py`. `config_private.py` is not controlled by git and can make your privacy information more secure. P.S. The project also supports configuring most options through `environment variables`, and the writing format of environment variables refers to the `docker-compose` file. Reading priority: `environment variables` > `config_private.py` > `config.py`)
3. Install dependencies.
```sh
# (Choose I: If familiar with Python)(Python version 3.9 or above, the newer the better) Note: Use the official pip source or Ali pip source. Temporary switching source method: python -m pip install -r requirements.txt -i https://mirrors.aliyun.com/pypi/simple/
python -m pip install -r requirements.txt
# (Choose II: If not familiar with Python) Use anaconda, the steps are the same (https://www.bilibili.com/video/BV1rc411W7Dr):
conda create -n gptac_venv python=3.11 # Create anaconda environment.
conda activate gptac_venv # Activate the anaconda environment.
python -m pip install -r requirements.txt # This step is the same as the pip installation step.
```
If you need to support Tsinghua ChatGLM/Fudan MOSS as a backend, click to expand.
[Optional Steps] If you need to support Tsinghua ChatGLM/Fudan MOSS as a backend, you need to install more dependencies (precondition: familiar with Python + used Pytorch + computer configuration). Strong enough):
```sh
# Optional step I: support Tsinghua ChatGLM. Tsinghua ChatGLM remarks: If you encounter the error "Call ChatGLM fail cannot load ChatGLM parameters normally", refer to the following: 1: The version installed above is torch+cpu version, using cuda requires uninstalling torch and reinstalling torch+cuda; 2: If the model cannot be loaded due to insufficient local configuration, you can modify the model accuracy in request_llm/bridge_chatglm.py, and change AutoTokenizer.from_pretrained("THUDM/chatglm-6b", trust_remote_code=True) to AutoTokenizer.from_pretrained("THUDM/chatglm-6b-int4", trust_remote_code=True).
python -m pip install -r request_llm/requirements_chatglm.txt
# Optional Step II: Support Fudan MOSS.
python -m pip install -r request_llm/requirements_moss.txt
git clone https://github.com/OpenLMLab/MOSS.git request_llm/moss # Note that when executing this line of code, it must be in the project root.
# 【Optional Step III】Ensure that the AVAIL_LLM_MODELS in the config.py configuration file contains the expected model. Currently, all supported models are as follows (jittorllms series currently only supports the docker solution):
AVAIL_LLM_MODELS = ["gpt-3.5-turbo", "api2d-gpt-3.5-turbo", "gpt-4", "api2d-gpt-4", "chatglm", "newbing", "moss"] # + ["jittorllms_rwkv", "jittorllms_pangualpha", "jittorllms_llama"]
```
2. Custom function plugins
Write powerful function plugins to perform any task you can and cannot think of.
The difficulty of writing and debugging plugins in this project is low, and as long as you have a certain amount of python basic knowledge, you can follow the template provided by us to achieve your own plugin functions.
For details, please refer to the [Function Plugin Guide](https://github.com/binary-husky/gpt_academic/wiki/%E5%87%BD%E6%95%B0%E6%8F%92%E4%BB%B6%E6%8C%87%E5%8D%97).
---
# Latest Update
## New feature dynamics.
1. ダイアログの保存機能。関数プラグインエリアで '現在の会話を保存' を呼び出すと、現在のダイアログを読み取り可能で復元可能なHTMLファイルとして保存できます。さらに、関数プラグインエリア(ドロップダウンメニュー)で 'ダイアログの履歴保存ファイルを読み込む' を呼び出すことで、以前の会話を復元することができます。Tips:ファイルを指定せずに 'ダイアログの履歴保存ファイルを読み込む' をクリックすることで、過去のHTML保存ファイルのキャッシュを表示することができます。'すべてのローカルダイアログの履歴を削除' をクリックすることで、すべてのHTML保存ファイルのキャッシュを削除できます。
2. 報告書を生成します。ほとんどのプラグインは、実行が終了した後に作業報告書を生成します。
3. モジュール化された機能設計、簡単なインターフェースで強力な機能をサポートする。
4. 自己解決可能なオープンソースプロジェクトです。
5. 他のオープンソースプロジェクトの解読、容易である。
6. [Live2D](https://github.com/fghrsh/live2d_demo)のデコレート小機能です。(デフォルトでは閉じてますが、 `config.py`を変更する必要があります。)

7. 新たにMOSS大言語モデルのサポートを追加しました。

8. OpenAI画像生成

9. OpenAIオーディオの解析とサマリー

10. 全文校正されたLaTeX

## バージョン:
- version 3.5(作業中):すべての関数プラグインを自然言語で呼び出すことができるようにする(高い優先度)。
- version 3.4(作業中):chatglmのローカルモデルのマルチスレッドをサポートすることで、機能を改善する。
- version 3.3:+Web情報の総合機能
- version 3.2:関数プラグインでさらに多くのパラメータインターフェイスをサポートする(ダイアログの保存機能、任意の言語コードの解読+同時に任意のLLM組み合わせに関する問い合わせ)
- version 3.1:複数のGPTモデルを同時に質問できるようになりました! api2dをサポートし、複数のAPIキーを均等に負荷分散することができます。
- version 3.0:chatglmとその他の小型LLMのサポート。
- version 2.6:プラグイン構造を再構築し、対話内容を高め、より多くのプラグインを追加しました。
- version 2.5:自己アップデートし、長文書やトークンのオーバーフローの問題を解決しました。
- version 2.4:(1)全文翻訳のPDF機能を追加しました。(2)入力エリアの位置切り替え機能を追加しました。(3)垂直レイアウトオプションを追加しました。(4)マルチスレッド関数プラグインを最適化しました。
- version 2.3:マルチスレッド性能の向上。
- version 2.2:関数プラグインのホットリロードをサポートする。
- version 2.1:折りたたみ式レイアウト。
- version 2.0:モジュール化された関数プラグインを導入。
- version 1.0:基本機能
gpt_academic開発者QQグループ-2:610599535
- 既知の問題
- 一部のブラウザ翻訳プラグインが、このソフトウェアのフロントエンドの実行を妨害する
- gradioバージョンが高すぎるか低すぎると、多くの異常が引き起こされる
## 参考学習
```
コードの中には、他の優れたプロジェクトの設計から参考にしたものがたくさん含まれています:
# プロジェクト1:清華ChatGLM-6B:
https://github.com/THUDM/ChatGLM-6B
# プロジェクト2:清華JittorLLMs:
https://github.com/Jittor/JittorLLMs
# プロジェクト3:Edge-GPT:
https://github.com/acheong08/EdgeGPT
# プロジェクト4:ChuanhuChatGPT:
https://github.com/GaiZhenbiao/ChuanhuChatGPT
# プロジェクト5:ChatPaper:
https://github.com/kaixindelele/ChatPaper
# その他:
https://github.com/gradio-app/gradio
https://github.com/fghrsh/live2d_demo
```