# InstructPix2Pix training example
[InstructPix2Pix](https://arxiv.org/abs/2211.09800) is a method to fine-tune text-conditioned diffusion models such that they can follow an edit instruction for an input image. Models fine-tuned using this method take the following as inputs:
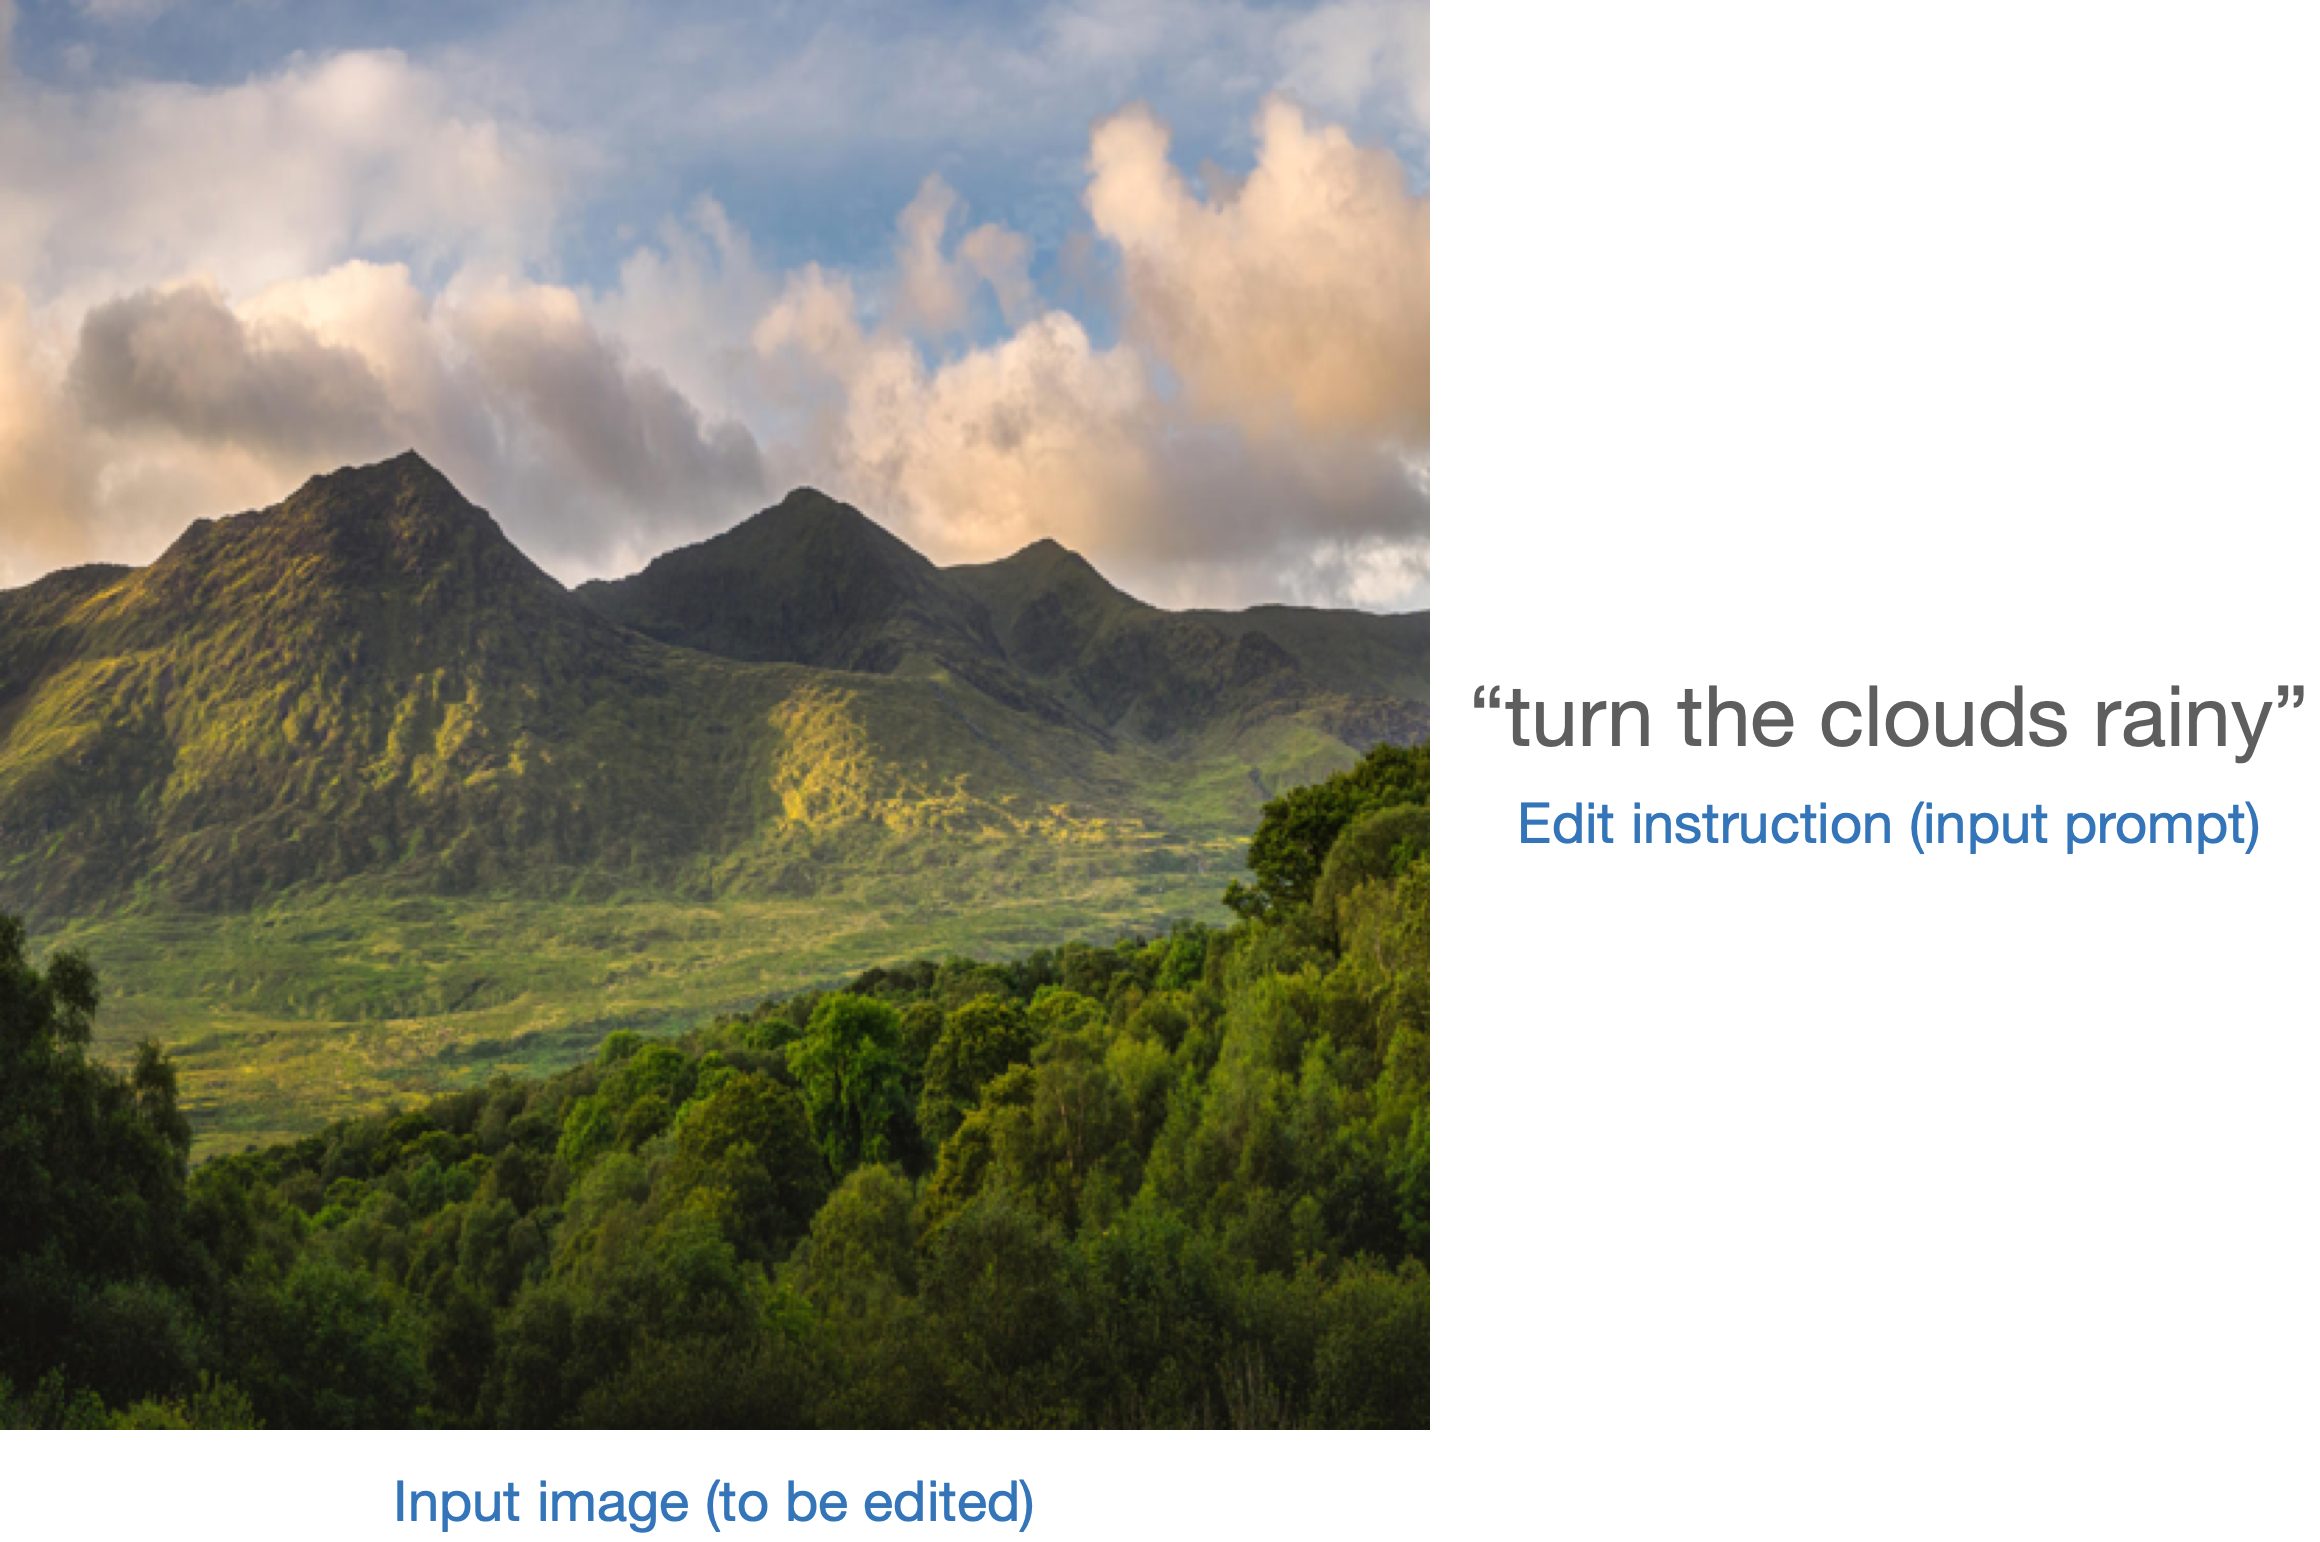
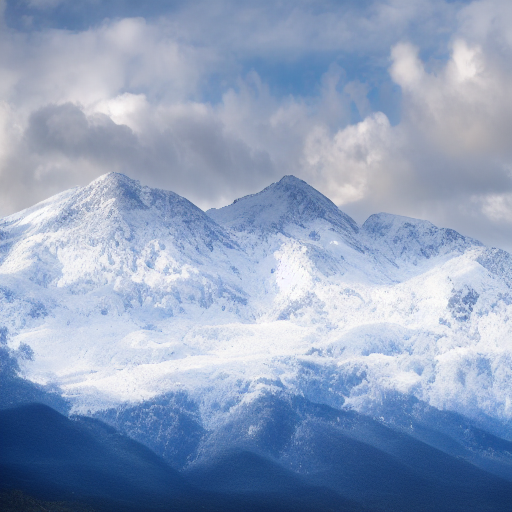
The output is an "edited" image that reflects the edit instruction applied on the input image:
The `train_instruct_pix2pix.py` script shows how to implement the training procedure and adapt it for Stable Diffusion.
***Disclaimer: Even though `train_instruct_pix2pix.py` implements the InstructPix2Pix
training procedure while being faithful to the [original implementation](https://github.com/timothybrooks/instruct-pix2pix) we have only tested it on a [small-scale dataset](https://huggingface.co/datasets/fusing/instructpix2pix-1000-samples). This can impact the end results. For better results, we recommend longer training runs with a larger dataset. [Here](https://huggingface.co/datasets/timbrooks/instructpix2pix-clip-filtered) you can find a large dataset for InstructPix2Pix training.***
## Running locally with PyTorch
### Installing the dependencies
Before running the scripts, make sure to install the library's training dependencies:
**Important**
To make sure you can successfully run the latest versions of the example scripts, we highly recommend **installing from source** and keeping the install up to date as we update the example scripts frequently and install some example-specific requirements. To do this, execute the following steps in a new virtual environment:
```bash
git clone https://github.com/huggingface/diffusers
cd diffusers
pip install -e .
```
Then cd in the example folder and run
```bash
pip install -r requirements.txt
```
And initialize an [🤗Accelerate](https://github.com/huggingface/accelerate/) environment with:
```bash
accelerate config
```
Or for a default accelerate configuration without answering questions about your environment
```bash
accelerate config default
```
Or if your environment doesn't support an interactive shell e.g. a notebook
```python
from accelerate.utils import write_basic_config
write_basic_config()
```
### Toy example
As mentioned before, we'll use a [small toy dataset](https://huggingface.co/datasets/fusing/instructpix2pix-1000-samples) for training. The dataset
is a smaller version of the [original dataset](https://huggingface.co/datasets/timbrooks/instructpix2pix-clip-filtered) used in the InstructPix2Pix paper.
Configure environment variables such as the dataset identifier and the Stable Diffusion
checkpoint:
```bash
export MODEL_NAME="runwayml/stable-diffusion-v1-5"
export DATASET_ID="fusing/instructpix2pix-1000-samples"
```
Now, we can launch training:
```bash
accelerate launch --mixed_precision="fp16" train_instruct_pix2pix.py \
--pretrained_model_name_or_path=$MODEL_NAME \
--dataset_name=$DATASET_ID \
--enable_xformers_memory_efficient_attention \
--resolution=256 --random_flip \
--train_batch_size=4 --gradient_accumulation_steps=4 --gradient_checkpointing \
--max_train_steps=15000 \
--checkpointing_steps=5000 --checkpoints_total_limit=1 \
--learning_rate=5e-05 --max_grad_norm=1 --lr_warmup_steps=0 \
--conditioning_dropout_prob=0.05 \
--mixed_precision=fp16 \
--seed=42
```
Additionally, we support performing validation inference to monitor training progress
with Weights and Biases. You can enable this feature with `report_to="wandb"`:
```bash
accelerate launch --mixed_precision="fp16" train_instruct_pix2pix.py \
--pretrained_model_name_or_path=$MODEL_NAME \
--dataset_name=$DATASET_ID \
--enable_xformers_memory_efficient_attention \
--resolution=256 --random_flip \
--train_batch_size=4 --gradient_accumulation_steps=4 --gradient_checkpointing \
--max_train_steps=15000 \
--checkpointing_steps=5000 --checkpoints_total_limit=1 \
--learning_rate=5e-05 --max_grad_norm=1 --lr_warmup_steps=0 \
--conditioning_dropout_prob=0.05 \
--mixed_precision=fp16 \
--val_image_url="https://hf.co/datasets/diffusers/diffusers-images-docs/resolve/main/mountain.png" \
--validation_prompt="make the mountains snowy" \
--seed=42 \
--report_to=wandb
```
We recommend this type of validation as it can be useful for model debugging. Note that you need `wandb` installed to use this. You can install `wandb` by running `pip install wandb`.
[Here](https://wandb.ai/sayakpaul/instruct-pix2pix/runs/ctr3kovq), you can find an example training run that includes some validation samples and the training hyperparameters.
***Note: In the original paper, the authors observed that even when the model is trained with an image resolution of 256x256, it generalizes well to bigger resolutions such as 512x512. This is likely because of the larger dataset they used during training.***
## Inference
Once training is complete, we can perform inference:
```python
import PIL
import requests
import torch
from diffusers import StableDiffusionInstructPix2PixPipeline
model_id = "your_model_id" # <- replace this
pipe = StableDiffusionInstructPix2PixPipeline.from_pretrained(model_id, torch_dtype=torch.float16).to("cuda")
generator = torch.Generator("cuda").manual_seed(0)
url = "https://huggingface.co/datasets/sayakpaul/sample-datasets/resolve/main/test_pix2pix_4.png"
def download_image(url):
image = PIL.Image.open(requests.get(url, stream=True).raw)
image = PIL.ImageOps.exif_transpose(image)
image = image.convert("RGB")
return image
image = download_image(url)
prompt = "wipe out the lake"
num_inference_steps = 20
image_guidance_scale = 1.5
guidance_scale = 10
edited_image = pipe(prompt,
image=image,
num_inference_steps=num_inference_steps,
image_guidance_scale=image_guidance_scale,
guidance_scale=guidance_scale,
generator=generator,
).images[0]
edited_image.save("edited_image.png")
```
An example model repo obtained using this training script can be found
here - [sayakpaul/instruct-pix2pix](https://huggingface.co/sayakpaul/instruct-pix2pix).
We encourage you to play with the following three parameters to control
speed and quality during performance:
* `num_inference_steps`
* `image_guidance_scale`
* `guidance_scale`
Particularly, `image_guidance_scale` and `guidance_scale` can have a profound impact
on the generated ("edited") image (see [here](https://twitter.com/RisingSayak/status/1628392199196151808?s=20) for an example).