Godot RL Agents
Godot RL Agents is an Open Source package that allows video game creators, AI researchers, and hobbyists the opportunity to learn complex behaviors for their Non Player Characters or agents.
The library provides:
- An interface between games created in the Godot Engine and Machine Learning algorithms running in Python
- Wrappers for four well known rl frameworks: StableBaselines3, CleanRL, Sample Factory and Ray RLLib
- Support for memory-based agents with LSTM or attention based interfaces
- Support for 2D and 3D games
- A suite of AI sensors to augment your agent’s capacity to observe the game world
- Godot and Godot RL Agents are completely free and open source under a very permissive MIT license. No strings attached, no royalties, nothing.
You can find out more about Godot RL agents on their GitHub page or their AAAI-2022 Workshop paper. The library’s creator, Ed Beeching, is a Research Scientist here at Hugging Face.
Installation of the library is simple: pip install godot-rl
Create a custom RL environment with Godot RL Agents
In this section, you will learn how to create a custom environment in the Godot Game Engine and then implement an AI controller that learns to play with Deep Reinforcement Learning.
The example game we create today is simple, but shows off many of the features of the Godot Engine and the Godot RL Agents library. You can then dive into the examples for more complex environments and behaviors.
The environment we will be building today is called Ring Pong, the game of pong but the pitch is a ring and the paddle moves around the ring. The objective is to keep the ball bouncing inside the ring.

Installing the Godot Game Engine
The Godot game engine is an open source tool for the creation of video games, tools and user interfaces.
Godot Engine is a feature-packed, cross-platform game engine designed to create 2D and 3D games from a unified interface. It provides a comprehensive set of common tools, so users can focus on making games without having to reinvent the wheel. Games can be exported in one click to a number of platforms, including the major desktop platforms (Linux, macOS, Windows) as well as mobile (Android, iOS) and web-based (HTML5) platforms.
While we will guide you through the steps to implement your agent, you may wish to learn more about the Godot Game Engine. Their documentation is thorough, and there are many tutorials on YouTube we would also recommend GDQuest, KidsCanCode and Bramwell as sources of information.
In order to create games in Godot, you must first download the editor. Godot RL Agents supports the latest version of Godot, Godot 4.0.
Which can be downloaded at the following links:
Loading the starter project
We provide two versions of the codebase:
- A starter project, to download and follow along for this tutorial
- A final version of the project, for comparison and debugging.
To load the project, in the Godot Project Manager click Import, navigate to where the files are located and load the project.godot file.
If you press F5 or play in the editor, you should be able to play the game in human mode. There are several instances of the game running, this is because we want to speed up training our AI agent with many parallel environments.
Installing the Godot RL Agents plugin
The Godot RL Agents plugin can be installed from the Github repo or with the Godot Asset Lib in the editor.
First click on the AssetLib and search for “rl”
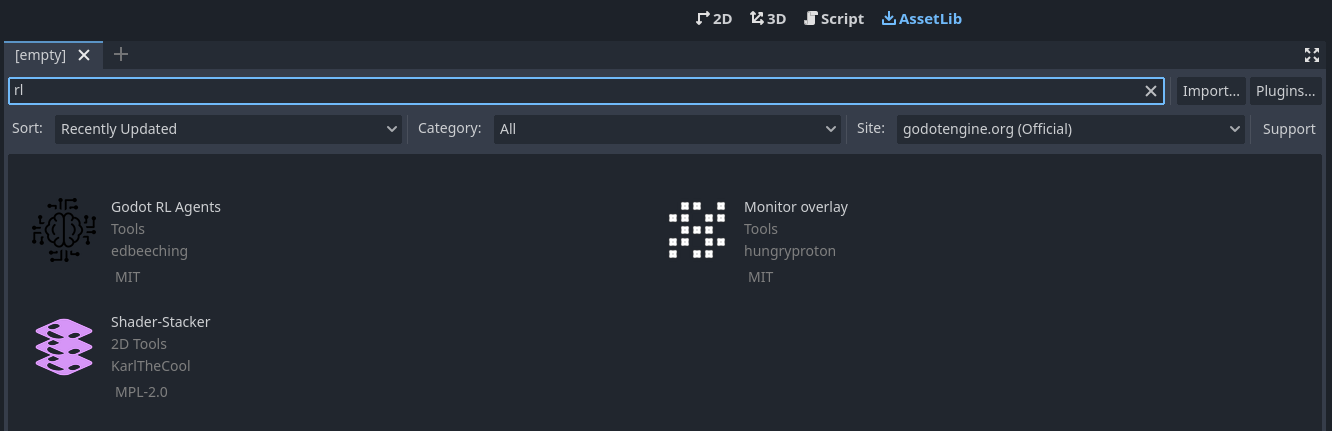
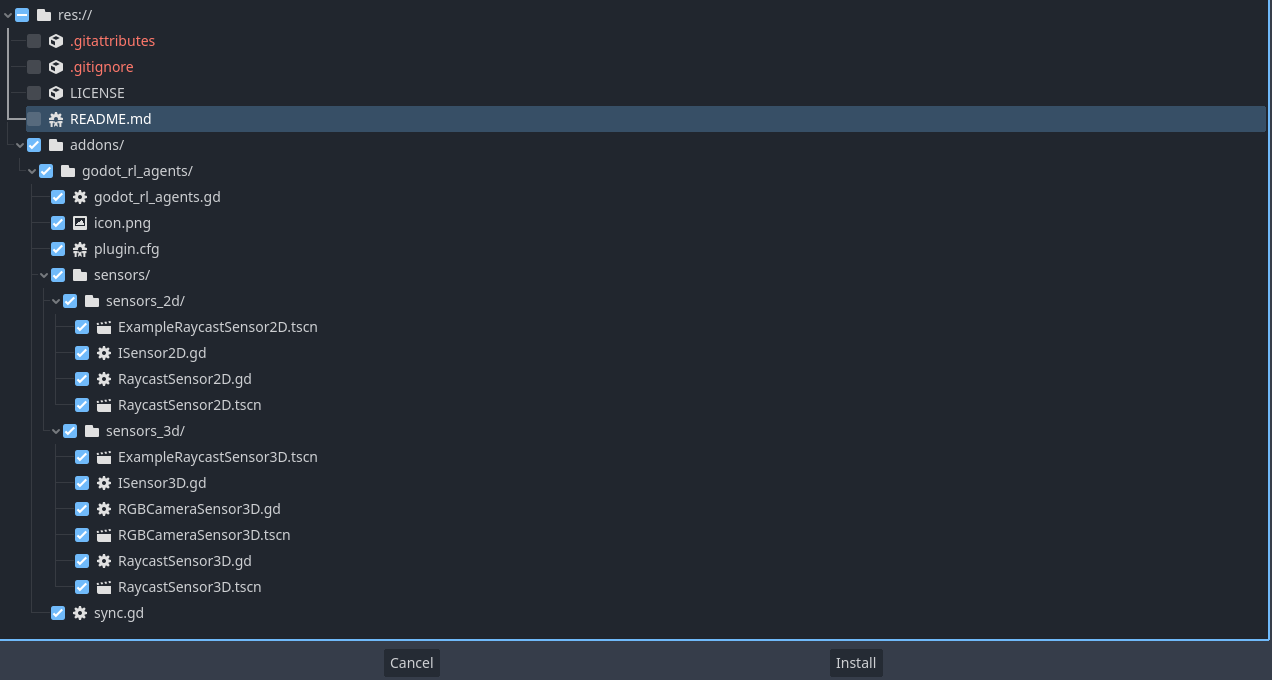
Then click on Godot RL Agents, click Download and unselect the LICENSE and README .md files. Then click install.
The Godot RL Agents plugin is now downloaded to your machine. Now click on Project → Project settings and enable the addon:

Adding the AI controller
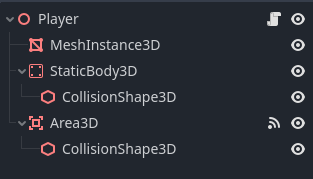
We now want to add an AI controller to our game. Open the player.tscn scene, on the left you should see a hierarchy of nodes that looks like this:
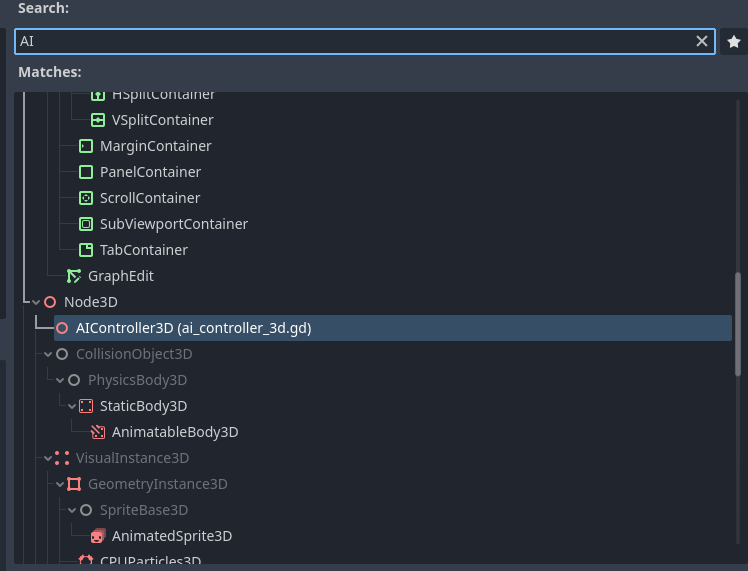
Right click the Player node and click Add Child Node. There are many nodes listed here, search for AIController3D and create it.
The AI Controller Node should have been added to the scene tree, next to it is a scroll. Click on it to open the script that is attached to the AIController. The Godot game engine uses a scripting language called GDScript, which is syntactically similar to python. The script contains methods that need to be implemented in order to get our AI controller working.
#-- Methods that need implementing using the "extend script" option in Godot --#
func get_obs() -> Dictionary:
	assert(false, "the get_obs method is not implemented when extending from ai_controller")
	return {"obs":[]}

func get_reward() -> float:
	assert(false, "the get_reward method is not implemented when extending from ai_controller")
	return 0.0

func get_action_space() -> Dictionary:
	assert(false, "the get get_action_space method is not implemented when extending from ai_controller")
	return {
		"example_actions_continous" : {
			"size": 2,
			"action_type": "continuous"
		},
		"example_actions_discrete" : {
			"size": 2,
			"action_type": "discrete"
		},
		}

func set_action(action) -> void:
	assert(false, "the get set_action method is not implemented when extending from ai_controller")
# -----------------------------------------------------------------------------#
In order to implement these methods, we will need to create a class that inherits from AIController3D. This is easy to do in Godot, and is called “extending” a class.
Right click the AIController3D Node and click “Extend Script” and call the new script controller.gd. You should now have an almost empty script file that looks like this:
extends AIController3D

# Called when the node enters the scene tree for the first time.
func _ready():
	pass # Replace with function body.

# Called every frame. 'delta' is the elapsed time since the previous frame.
func _process(delta):
	pass
We will now implement the 4 missing methods, delete this code, and replace it with the following:
extends AIController3D

# Stores the action sampled for the agent's policy, running in python
var move_action : float = 0.0

func get_obs() -> Dictionary:
	# get the balls position and velocity in the paddle's frame of reference
	var ball_pos = to_local(_player.ball.global_position)
	var ball_vel = to_local(_player.ball.linear_velocity)
	var obs = [ball_pos.x, ball_pos.z, ball_vel.x/10.0, ball_vel.z/10.0]

	return {"obs":obs}

func get_reward() -> float:
	return reward

func get_action_space() -> Dictionary:
	return {
		"move_action" : {
			"size": 1,
			"action_type": "continuous"
		},
		}

func set_action(action) -> void:
	move_action = clamp(action["move_action"][0], -1.0, 1.0)
We have now defined the agent’s observation, which is the position and velocity of the ball in its local coordinate space. We have also defined the action space of the agent, which is a single continuous value ranging from -1 to +1.
The next step is to update the Player’s script to use the actions from the AIController, edit the Player’s script by clicking on the scroll next to the player node, update the code in Player.gd to the following:
extends Node3D

@export var rotation_speed = 3.0
@onready var ball = get_node("../Ball")
@onready var ai_controller = $AIController3D

func _ready():
	ai_controller.init(self)

func game_over():
	ai_controller.done = true
	ai_controller.needs_reset = true

func _physics_process(delta):
	if ai_controller.needs_reset:
		ai_controller.reset()
		ball.reset()
		return

	var movement : float
	if ai_controller.heuristic == "human":
		movement = Input.get_axis("rotate_anticlockwise", "rotate_clockwise")
	else:
		movement = ai_controller.move_action
	rotate_y(movement*delta*rotation_speed)

func _on_area_3d_body_entered(body):
	ai_controller.reward += 1.0
We now need to synchronize between the game running in Godot and the neural network being trained in Python. Godot RL agents provides a node that does just that. Open the train.tscn scene, right click on the root node, and click “Add child node”. Then, search for “sync” and add a Godot RL Agents Sync node. This node handles the communication between Python and Godot over TCP.
You can run training live in the editor, by first launching the python training with gdrl.
In this simple example, a reasonable policy is learned in several minutes. You may wish to speed up training, click on the Sync node in the train scene, and you will see there is a “Speed Up” property exposed in the editor:
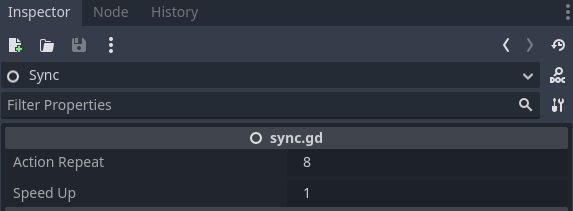
Try setting this property up to 8 to speed up training. This can be a great benefit on more complex environments, like the multi-player FPS we will learn about in the next chapter.
There’s more!
We have only scratched the surface of what can be achieved with Godot RL Agents, the library includes custom sensors and cameras to enrich the information available to the agent. Take a look at the examples to find out more!
For the ability to export the trained model to .onnx so that you can run inference directly from Godot without the Python server, and other useful training options, take a look at the advanced SB3 tutorial.
Author
This section was written by Edward Beeching