基于 HuggingFace Datasets 和 Transformers 的图像相似性搜索
通过本文,你将学习使用 🤗 Transformers 构建图像相似性搜索系统。找出查询图像和潜在候选图像之间的相似性是信息检索系统的一个重要用例,例如反向图像搜索(即找出查询图像的原图)。此类系统试图解答的问题是,给定一个 **查询** 图像和一组 **候选** 图像,找出候选图像中哪些图像与查询图像最相似。
我们将使用 [🤗 `datasets` 库](https://huggingface.co/docs/datasets/),因为它无缝支持并行处理,这在构建系统时会派上用场。
尽管这篇文章使用了基于 ViT 的模型 ([`nateraw/vit-base-beans`](https://huggingface.co/nateraw/vit-base-beans)) 和特定的 ([Beans](https://huggingface.co/datasets/beans)) 数据集,但它可以扩展到其他支持视觉模态的模型,也可以扩展到其他图像数据集。你可以尝试的一些著名模型有:
* [Swin Transformer](https://huggingface.co/docs/transformers/model_doc/swin)
* [ConvNeXT](https://huggingface.co/docs/transformers/model_doc/convnext)
* [RegNet](https://huggingface.co/docs/transformers/model_doc/regnet)
此外,文章中介绍的方法也有可能扩展到其他模态。
要研究完整的图像相似度系统,你可以参考 [这个](https://colab.research.google.com/github/huggingface/notebooks/blob/main/examples/image_similarity.ipynb) Colab Notebook。
## 我们如何定义相似性?
要构建这个系统,我们首先需要定义我们想要如何计算两个图像之间的相似度。一种广泛流行的做法是先计算给定图像的稠密表征(即嵌入(embedding)),然后使用 [余弦相似性度量(cosine similarity metric)](https://en.wikipedia.org/wiki/Cosine_similarity) 来确定两幅图像的相似程度。
在本文中,我们将使用 “嵌入” 来表示向量空间中的图像。它为我们提供了一种将图像从高维像素空间(例如 224 x 224 x 3)有意义地压缩到一个低得多的维度(例如 768)的好方法。这样做的主要优点是减少了后续步骤中的计算时间。
## 计算嵌入
为了计算图像的嵌入,我们需要使用一个视觉模型,该模型知道如何在向量空间中表示输入图像。这种类型的模型通常也称为图像编码器(image encoder)。
我们利用 [`AutoModel` 类](https://huggingface.co/docs/transformers/model_doc/auto#transformers.AutoModel) 来加载模型。它为我们提供了一个接口,可以从 HuggingFace Hub 加载任何兼容的模型 checkpoint。除了模型,我们还会加载与模型关联的处理器 (processor) 以进行数据预处理。
```py
from transformers import AutoFeatureExtractor, AutoModel
model_ckpt = "nateraw/vit-base-beans"
extractor = AutoFeatureExtractor.from_pretrained (model_ckpt)
model = AutoModel.from_pretrained (model_ckpt)
```
本例种使用的checkpoint 是一个在 [`beans` 数据集](https://huggingface.co/datasets/beans) 上微调过的 [ViT 模型](https://huggingface.co/google/vit-base-patch16-224-in21k)。
这里可能你会问一些问题:
**Q1**:为什么我们不使用 `AutoModelForImageClassification`?
这是因为我们想要获得图像的稠密表征,而 AutoModelForImageClassification 只能输出离散类别。
**Q2**:为什么使用这个特定的 checkpoint?
如前所述,我们使用特定的数据集来构建系统。因此,与其使用通用模型(例如 [在 ImageNet-1k 数据集上训练的模型](https://huggingface.co/models?dataset=dataset:imagenet-1k&sort=downloads)),不如使用使用已针对所用数据集微调过的模型。这样,模型能更好地理解输入图像。
**注意** 你还可以使用通过自监督预训练获得的 checkpoint, 不必得由有监督学习训练而得。事实上,如果预训练得当,自监督模型可以 [获得](https://ai.facebook.com/blog/dino-paws-computer-vision-with-self-supervised-transformers-and-10x-more-efficient-training/) 令人印象深刻的检索性能。
现在我们有了一个用于计算嵌入的模型,我们需要一些候选图像来被查询。
## 加载候选图像数据集
后面,我们会构建将候选图像映射到哈希值的哈希表。在查询时,我们会使用到这些哈希表,详细讨论的讨论稍后进行。现在,我们先使用 [`beans` 数据集](https://huggingface.co/datasets) 中的训练集来获取一组候选图像。
```py
from datasets import load_dataset
dataset = load_dataset ("beans")
```
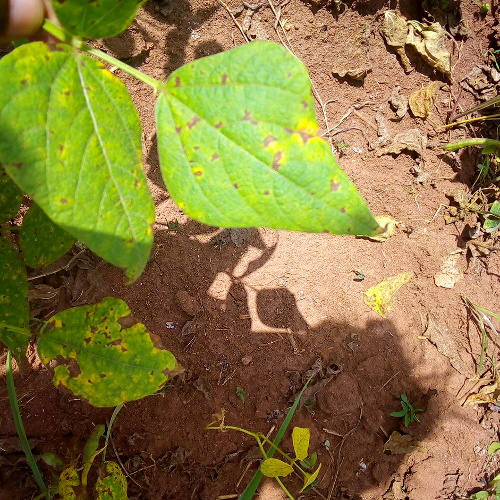
以下展示了训练集中的一个样本:
该数据集的三个 `features` 如下:
```py
dataset ["train"].features
>>> {'image_file_path': Value (dtype='string', id=None),
'image': Image (decode=True, id=None),
'labels': ClassLabel (names=['angular_leaf_spot', 'bean_rust', 'healthy'], id=None)}
```
为了使图像相似性系统可演示,系统的总体运行时间需要比较短,因此我们这里只使用候选图像数据集中的 100 张图像。
```py
num_samples = 100
seed = 42
candidate_subset = dataset ["train"].shuffle (seed=seed).select (range (num_samples))
```
## 寻找相似图片的过程
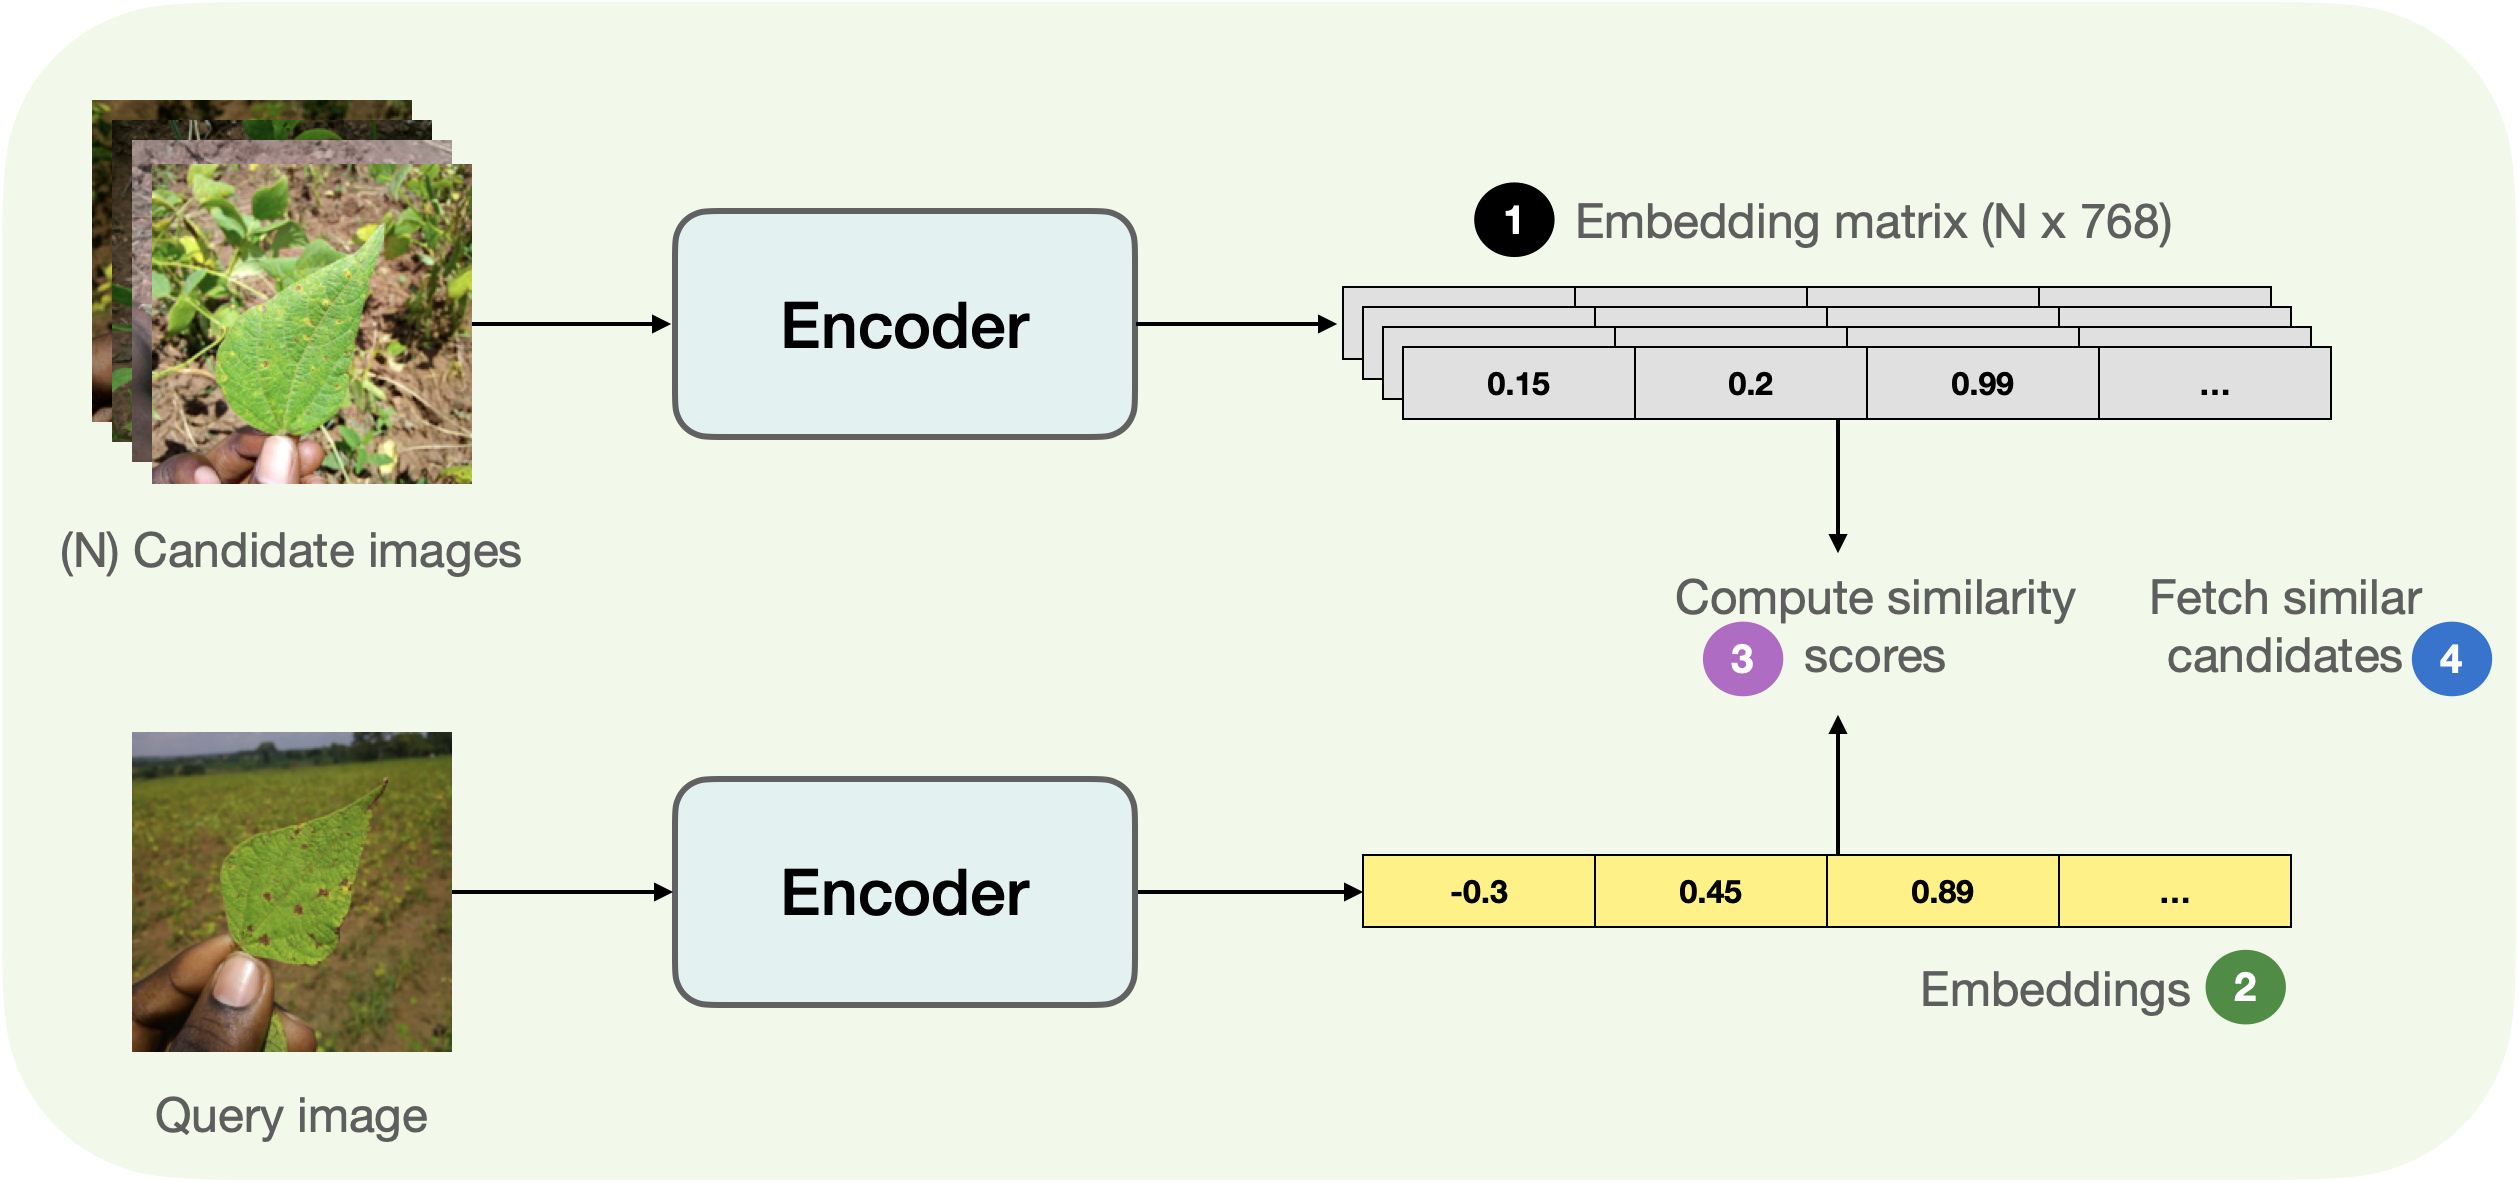
下图展示了获取相似图像的基本过程。
稍微拆解一下上图,我们分为 4 步走:
1. 从候选图像 (`candidate_subset`) 中提取嵌入,将它们存储在一个矩阵中。
2. 获取查询图像并提取其嵌入。
3. 遍历嵌入矩阵(步骤 1 中得到的)并计算查询嵌入和当前候选嵌入之间的相似度得分。我们通常维护一个类似字典的映射,来维护候选图像的 ID 与相似性分数之间的对应关系。
4. 根据相似度得分进行排序并返回相应的图像 ID。最后,使用这些 ID 来获取候选图像。
我们可以编写一个简单的工具函数用于计算嵌入并使用 `map ()` 方法将其作用于候选图像数据集的每张图像,以有效地计算嵌入。
```py
import torch
def extract_embeddings (model: torch.nn.Module):
"""Utility to compute embeddings."""
device = model.device
def pp (batch):
images = batch ["image"]
# `transformation_chain` is a compostion of preprocessing
# transformations we apply to the input images to prepare them
# for the model. For more details, check out the accompanying Colab Notebook.
image_batch_transformed = torch.stack (
[transformation_chain (image) for image in images]
)
new_batch = {"pixel_values": image_batch_transformed.to (device)}
with torch.no_grad ():
embeddings = model (**new_batch).last_hidden_state [:, 0].cpu ()
return {"embeddings": embeddings}
return pp
```
我们可以像这样映射 extract_embeddings() :
```py
device = "cuda" if torch.cuda.is_available () else "cpu"
extract_fn = extract_embeddings (model.to (device))
candidate_subset_emb = candidate_subset.map (extract_fn, batched=True, batch_size=batch_size)
```
接下来,为方便起见,我们创建一个候选图像 ID 的列表。
```py
candidate_ids = []
for id in tqdm (range (len (candidate_subset_emb))):
label = candidate_subset_emb [id]["labels"]
# Create a unique indentifier.
entry = str (id) + "_" + str (label)
candidate_ids.append (entry)
```
我们用包含所有候选图像的嵌入矩阵来计算与查询图像的相似度分数。我们之前已经计算了候选图像嵌入,在这里我们只是将它们集中到一个矩阵中。
```py
all_candidate_embeddings = np.array (candidate_subset_emb ["embeddings"])
all_candidate_embeddings = torch.from_numpy (all_candidate_embeddings)
```
我们将使用 [余弦相似度](https://en.wikipedia.org/wiki/Cosine_similarity) 来计算两个嵌入向量之间的相似度分数。然后,我们用它来获取给定查询图像的相似候选图像。
```py
def compute_scores (emb_one, emb_two):
"""Computes cosine similarity between two vectors."""
scores = torch.nn.functional.cosine_similarity (emb_one, emb_two)
return scores.numpy ().tolist ()
def fetch_similar (image, top_k=5):
"""Fetches the`top_k`similar images with`image`as the query."""
# Prepare the input query image for embedding computation.
image_transformed = transformation_chain (image).unsqueeze (0)
new_batch = {"pixel_values": image_transformed.to (device)}
# Comute the embedding.
with torch.no_grad ():
query_embeddings = model (**new_batch).last_hidden_state [:, 0].cpu ()
# Compute similarity scores with all the candidate images at one go.
# We also create a mapping between the candidate image identifiers
# and their similarity scores with the query image.
sim_scores = compute_scores (all_candidate_embeddings, query_embeddings)
similarity_mapping = dict (zip (candidate_ids, sim_scores))
# Sort the mapping dictionary and return `top_k` candidates.
similarity_mapping_sorted = dict (
sorted (similarity_mapping.items (), key=lambda x: x [1], reverse=True)
)
id_entries = list (similarity_mapping_sorted.keys ())[:top_k]
ids = list (map (lambda x: int (x.split ("_")[0]), id_entries))
labels = list (map (lambda x: int (x.split ("_")[-1]), id_entries))
return ids, labels
```
## 执行查询
经过以上准备,我们可以进行相似性搜索了。我们从 `beans` 数据集的测试集中选取一张查询图像来搜索:
```py
test_idx = np.random.choice (len (dataset ["test"]))
test_sample = dataset ["test"][test_idx]["image"]
test_label = dataset ["test"][test_idx]["labels"]
sim_ids, sim_labels = fetch_similar (test_sample)
print (f"Query label: {test_label}")
print (f"Top 5 candidate labels: {sim_labels}")
```
结果为:
```
Query label: 0
Top 5 candidate labels: [0, 0, 0, 0, 0]
```
看起来我们的系统得到了一组正确的相似图像。将结果可视化,如下:
## 进一步扩展与结论
现在,我们有了一个可用的图像相似度系统。但实际系统需要处理比这多得多的候选图像。考虑到这一点,我们目前的程序有不少缺点:
* 如果我们按原样存储嵌入,内存需求会迅速增加,尤其是在处理数百万张候选图像时。在我们的例子中嵌入是 768 维,这即使对大规模系统而言可能也是相对比较高的维度。
* 高维的嵌入对检索部分涉及的后续计算有直接影响。
如果我们能以某种方式降低嵌入的维度而不影响它们的意义,我们仍然可以在速度和检索质量之间保持良好的折衷。本文 [附带的 Colab Notebook](https://colab.research.google.com/github/huggingface/notebooks/blob/main/examples/image_similarity.ipynb) 实现并演示了如何通过随机投影 (random projection) 和位置敏感哈希(locality-sensitive hashing,LSH)这两种方法来取得折衷。
🤗 Datasets 提供与 [FAISS](https://github.com/facebookresearch/faiss) 的直接集成,进一步简化了构建相似性系统的过程。假设你已经提取了候选图像的嵌入(`beans` 数据集)并把他们存储在称为 `embedding` 的 `feature` 中。你现在可以轻松地使用 `dataset` 的 [`add_faiss_index ()`](https://huggingface.co/docs/datasets/v2.7.1/en/package_reference/main_classes#datasets.Dataset.add_faiss_index) 方法来构建稠密索引:
```py
dataset_with_embeddings.add_faiss_index (column="embeddings")
```
建立索引后,可以使用 `dataset_with_embeddings` 模块的 [`get_nearest_examples ()`](https://huggingface.co/docs/datasets/v2.7.1/en/package_reference/main_classes#datasets.Dataset.get_nearest_examples) 方法为给定查询嵌入检索最近邻:
```py
scores, retrieved_examples = dataset_with_embeddings.get_nearest_examples (
"embeddings", qi_embedding, k=top_k
)
```
该方法返回检索分数及其对应的图像。要了解更多信息,你可以查看 [官方文档](https://huggingface.co/docs/datasets/faiss_es) 和 [这个 notebook](https://colab.research.google.com/gist/sayakpaul/5b5b5a9deabd3c5d8cb5ef8c7b4bb536/image_similarity_faiss.ipynb)。
最后,你可以试试下面这个 Space,这是个迷你的图像相似度应用:
在本文中,我们快速入门并构建了一个图像相似度系统。如果你觉得这篇文章很有趣,我们强烈建议你基于我们讨论的概念继续构建你的系统,这样你就可以更加熟悉内部工作原理。
还想了解更多吗?以下是一些可能对你有用的其他资源:
* [Faiss:高效相似性搜索库](https://engineering.fb.com/2017/03/29/data-infrastructure/faiss-a-library-for-efficient-similarity-search/)
* [ScaNN:高效向量相似性搜索](http://ai.googleblog.com/2020/07/announcing-scann-efficient-vector.html)
* [在移动应用程序中集成图像搜索引擎](https://www.tensorflow.org/lite/inference_with_metadata/task_library/image_searcher)
> 英文原文: https://huggingface.co/blog/dialog-agents
>
> 译者: Matrix Yao (姚伟峰),英特尔深度学习工程师,工作方向为 transformer-family 模型在各模态数据上的应用及大规模模型的训练推理。